Basic Details
Provide the basic details for your configuration profile to manage Cloud Agents behavior as per your requirements.
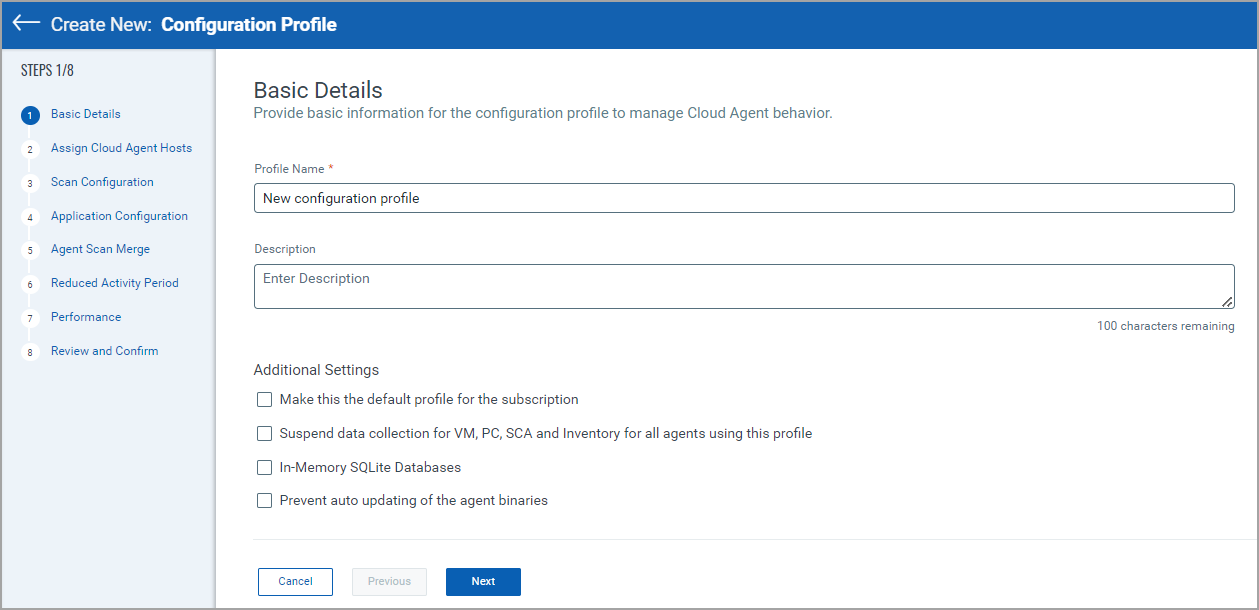
Profile Name
Provide the name for your configuration profile to identify it when you assign the profile to Cloud Agents. You can use letters, numbers, and symbols to make configuration profile names unique.
Description
Enter a brief description for your configuration profile to explain its purpose or functions. This is saved with the profile settings and it is visible to all users with access to the profile.
Additional Settings
Make this the Default Profile for the Subscription
The default configuration profile is automatically applied to the newly installed Cloud Agents. Select the checkbox against this option to make your profile the default profile.
Suspend Data Collection for VM, PC, SCA and Inventory for all agents using this profile
This option suspends data collection for VM, PC, SCA, and Inventory for all Cloud Agents using this profile. Select this option if you want your Cloud Agent to stop scanning and monitoring their hosts.
When you select this option, the Cloud Agent does not schedule future scans for their host. All the scans started before downloading the configuration profile are completed. Cloud Agent for which data collection is suspended, continues to auto-update, get manifest updates, and get configuration updates.
For more information, see Suspend Scanning on All Agents.
Cloud Agents activated for FIM: If you suspend data collection on Cloud Agent activated for FIM, and then assign a FIM monitoring profile to it, the FIM manifest is not downloaded on that Cloud Agent. The FIM manifest is downloaded once you enable scanning on Cloud Agent.
In-Memory SQLite Databases
Select this option to get the SQLite Database in memory. When you download the In-Memory SQLite database, it improves the system performance but needs more memory space. By default, this option is disabled.
Prevent Auto-updating of the Agent Binaries
Select this option to prevent the Cloud Agents from auto-updating. This configuration profile setting is available for Windows Agent 1.5.5+ and Linux/BSD/Unix/MacOS Agent 1.6.0+. For more information, see Prevent Auto Update.
Next Step: Assign Cloud Agent Hosts