Manage Cloud Agent Activation Keys
A Cloud Agent activation key provides you with the means to group your assets, install Cloud Agents, and provision Cloud Agents for different modules. The following subsections illustrate activation key management workflows.
Generate Activation Key
To start with the Cloud Agent installation, you must have a valid activation key. Perform the following key steps to generate an activation key.
- In the Cloud Agent user interface, navigate to the Agent Management > Activation Key tab.
- Click Generate Key. The activation key settings page opens.
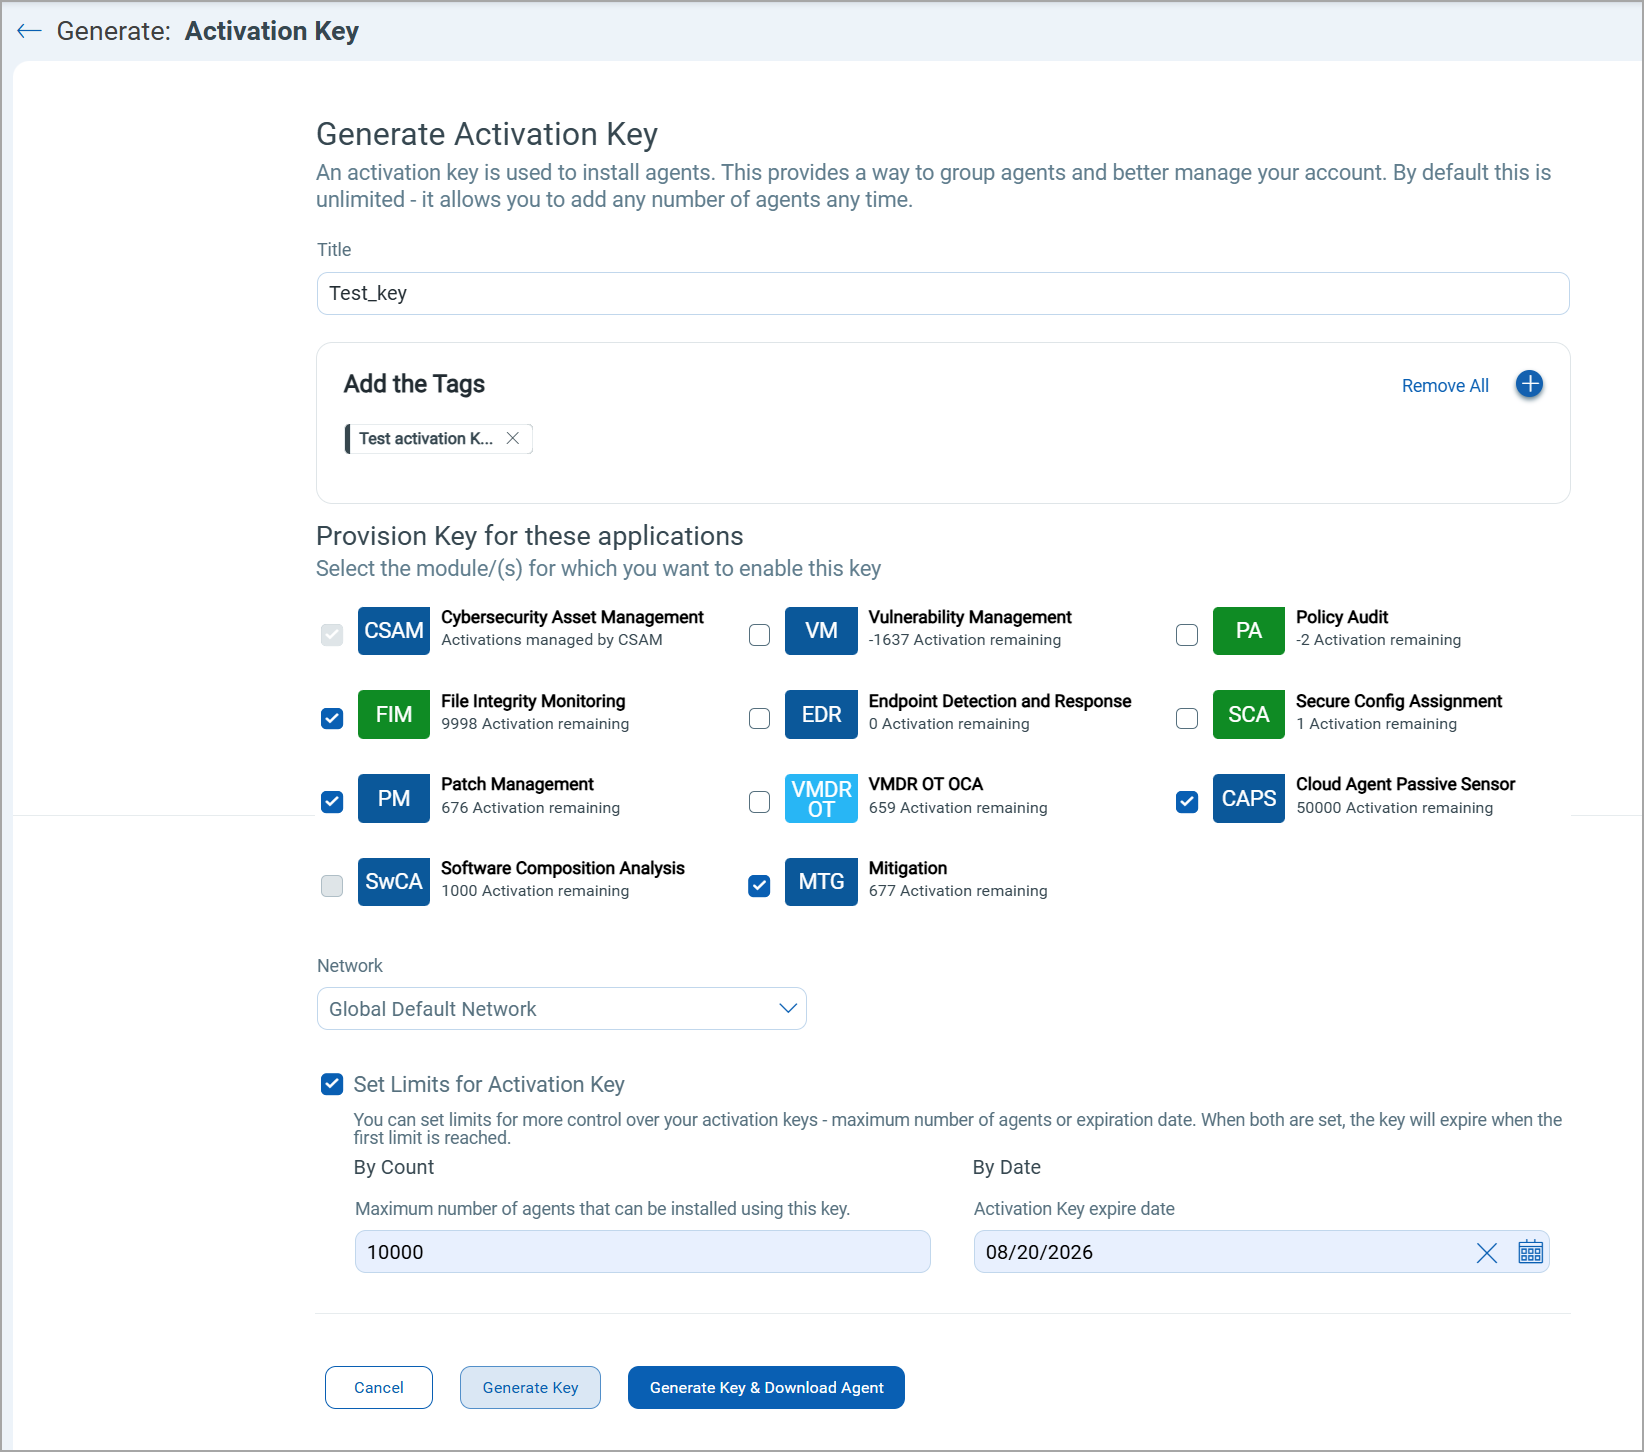
- Enter the following details to generate the activation key.
Title: Enter a unique and informative title for the activation key. An activation key title can be alphanumeric.
The activation keys cannot have duplicate titles. Use unique titles to successfully generate an activation key.
Add Tags: Add the tags to group the Cloud Agent installed using the associated activation keys. You can select the tags from the available options or create a new tag.
Provision Modules: Select the Qualys Modules for which you want to provision your Cloud Agents when installed using this activation key. All the agents installed using this key will be activated for the selected modules, if sufficient licenses are available.
If you select a module for provisioning that does not have valid licenses remaining, the activation key is generated successfully, but the Cloud Agents installed using this activation key are not activated for that module.
Network: Select the network for your activation key. You can create more networks in the Vulnerability Management module.
Set Limits: Select this checkbox to implement the usage limit for the activation key. If the Set Limits checkbox is not selected, an unlimited key is generated without any usage limits.
You can set the limits by Agent Count or the Expiry Date for the key.
Agent Count: Specify the maximum number of Cloud Agents that can be installed with the activation key. A single activation key can install a maximum of 1000000 Cloud Agents.
Expiry Date: Select the expiry date for the activation key. A past date cannot be set as an expiry date.
- Click Generate Key or Generate Key & Download Agent. The Generate Key & Download Agent proceeds to the Cloud Agent Download page. The generated activation key is displayed on the Activation Key listing page.
Download and Install Cloud Agents using an Activation Key
Perform the following steps to download and install Cloud Agents using an activation key.
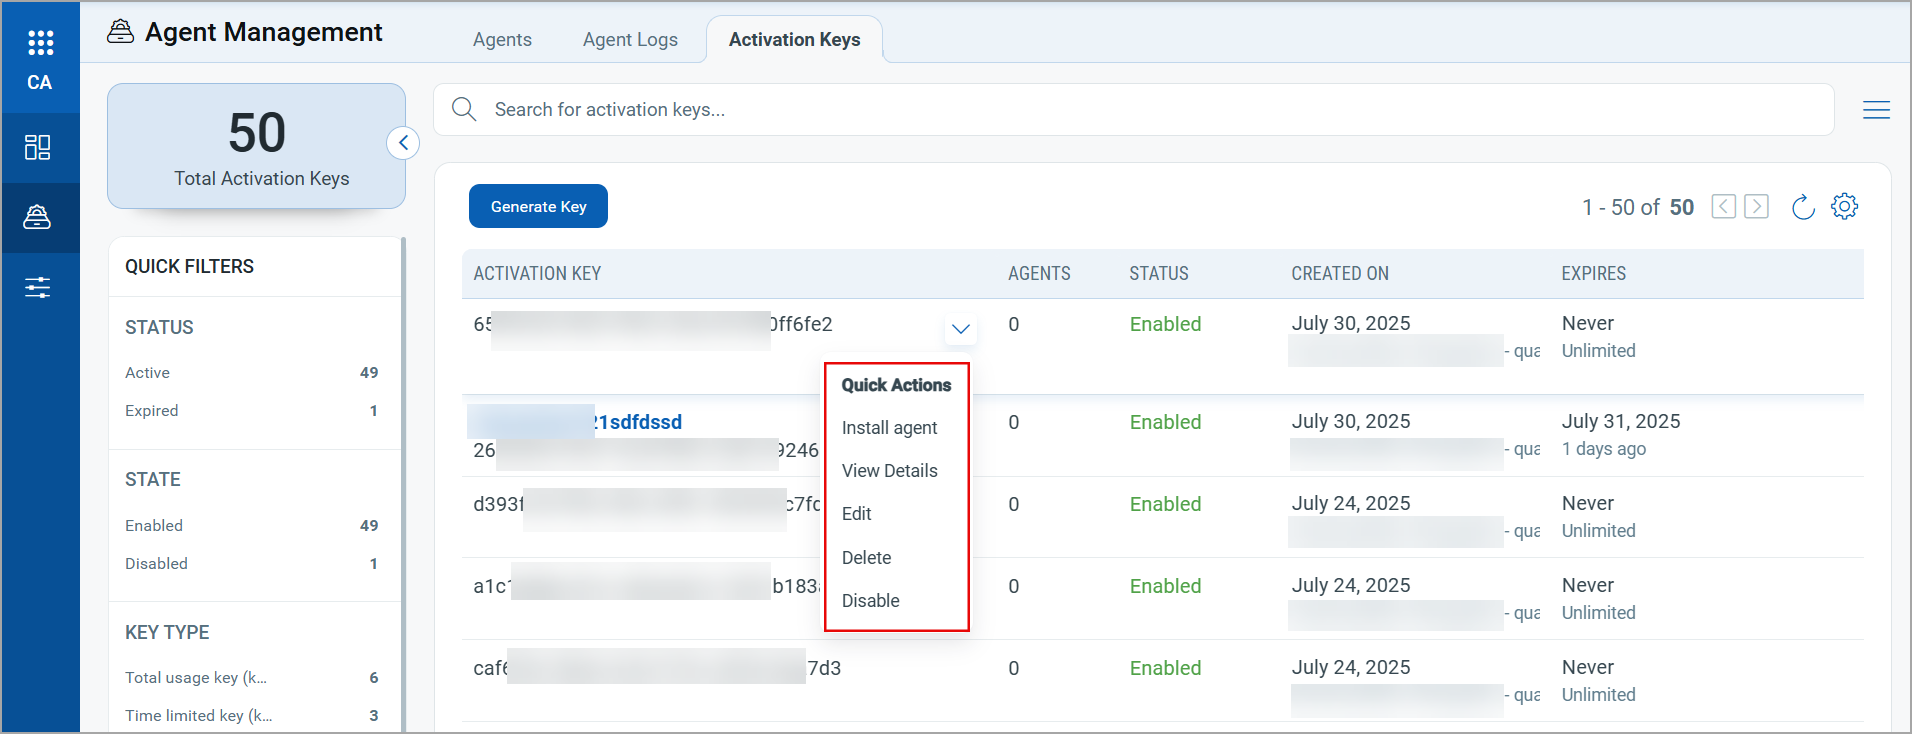
- In the Activation Key tab, select the activation key that you want to use for downloading a Cloud Agent. Alternatively, you can follow step 4 in the Generate Activation Key section to download Cloud Agent while generating an activation key.
- In the Quick Actions menu for the selected activation key, click Install Agent.
- On the Install Cloud Agent window, select the platform type as per the agent host requirements.
- Follow the instructions displayed on the Installation Instructions window to install the Cloud Agent. To learn more about installing a Cloud Agent, refer to Cloud Agent Installation.
Edit Activation Key
You can edit an activation key with the Edit option in the Quick Actions menu. You can update the key title, add asset tags, provision modules, add networks, and set limits for the key.
The following actions are not allowed while editing an activation key.
- The specified Cloud Agent Count limit must be greater than the number of agents already installed using that key.
- Provisioning the activation key for the SwCA application may significantly increase the vulnerability count for the affected assets.
Disable Activation Key
When an activation key is disabled, it is no longer available for activating more Cloud Agents. The agents that are already installed using the disabled key continue to work as expected. The disabled keys are displayed on the Activation Key listing page.
- Select a key on the Activation Key listing page.
- In the Quick Actions menu, click Disable. A confirmation message is displayed.
- Click Disable to disable the selected key.
Delete Activation Key
To delete an activation key, click Delete in the Quick Actions menu for the key.
The activation key that has been used for installing Cloud Agents cannot be deleted.
Related topic: Activation Key Search