Qualys Cloud Agent Installation using Intune
To add the Qualys Cloud Agent package for line-of-business apps:
- Sign in to the Microsoft Intune admin center.
- In Microsoft Intune admin center, click Apps > All apps > Add. The Select app type pane opens.
- In the Select app type pane, click Other > Line-of-business app.
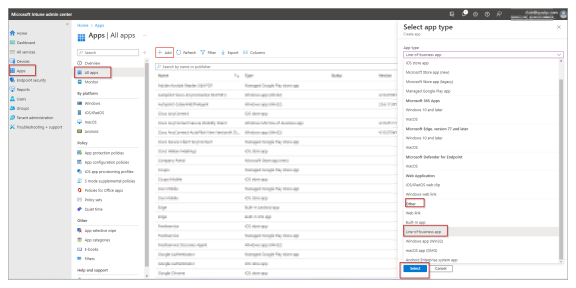
- Click Select. The Add App page appears.
Complete the following steps on the Add App page.
App Information
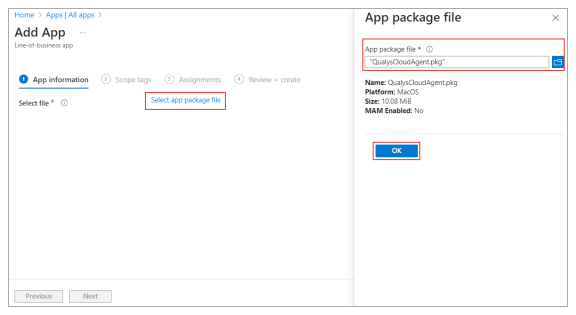
- On the Add App > App information page, click Select app package file to choose the Qualys Cloud Agent package file. The App package file pane opens.
- In the App package file pane, upload Qualys Cloud Agent package file (.pkg) and click OK. Other app information fields gets available to edit.
- On the App information page, enter the app details.
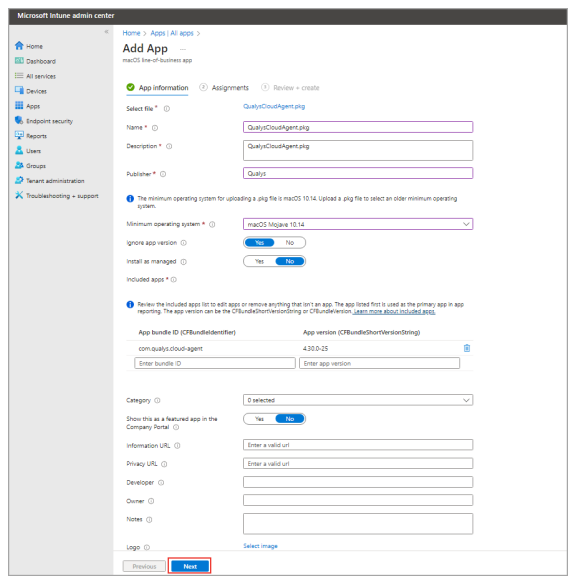
- Click Next to navigate to the Assignments page.
Assignments
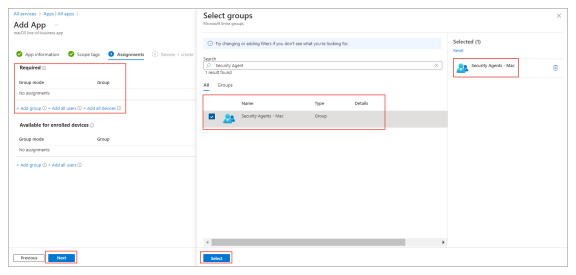
- To assign the groups, go to Assignments > Required > Add group. The Select groups pane opens.
- On the Select groups pane, search group name to assign for cloud agent deployment. A list of groups appears.
- Click the required group from the available list and click Select. You can select multiple groups if required.
- You can view the selected groups in the right pane. If you want to remove a group from selection, click delete symbol next the group name.
- On the Assignments page, click Next. The Review + Create page opens.
- Alternatively, you can add groups in Available for enrolled devices option by following same steps.
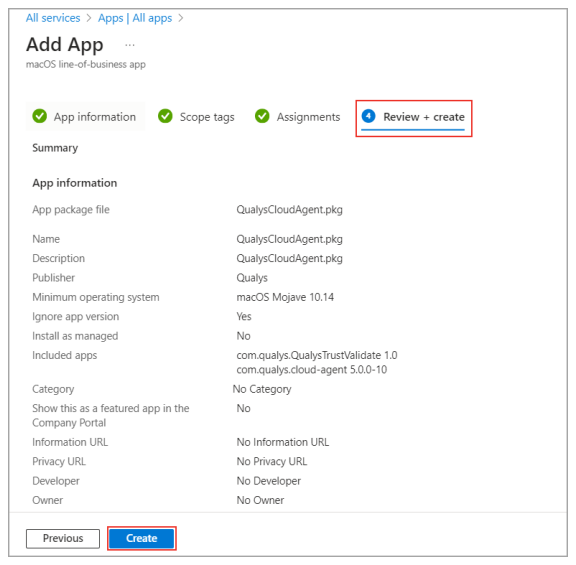
Review + create
- Review the app information and click Create.
- You can navigate back using the Previous button to edit the app information.
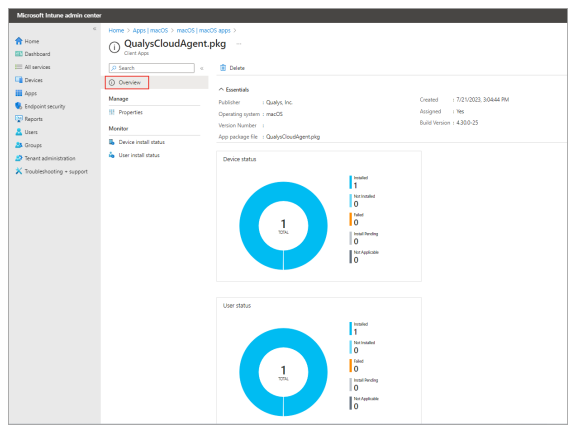
- The Overview page displays that Qualys Cloud Agent is installed.
The next step is to create the shell script to configure the Qualys Cloud Agent.