Deployment using Microsoft Intune
You can use Microsoft Intune to deploy Qualys Cloud Agent for Windows on remote assets. There are two different methods to deploy Qualys Cloud Agent remotely:
Cloud Agent Deployment using .exe Package
The following are the steps to deploy the Cloud Agent using .exe file.
Step 1: Create .intunewin Package
Step 2: Add App Information
Step 3: Set Program Information
Step 4: Set Requirements
Step 5: Set Detection Rule
Step 6: Scope tags
Step 7: Assignments
Step 8: Review + create
Create .intunewin Package
To deploy the .exebased Cloud Agent package, first you have to download the Cloud Agent installer and then convert it into .intunewinpackage file. following are the steps to download Cloud Agent installer and create .intunewinpackage file.
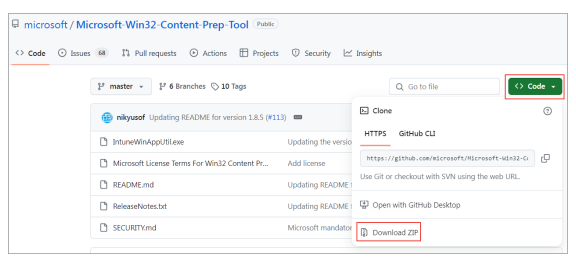
- Download the prep tool from GitHub. To download the prep tool refer to GitHub Prep Tool. Ensure that you download prep tool in .zipfile
- Extract the prep tool
.zipfile on the local folder.
- Download the Cloud Agent installer from Cloud Agent user interface. For details, refer to Download Cloud Agent Installer.
To create the.intunewinpackage file:
- Create a local folder and save the downloaded Cloud Agent file in that folder.
- Run the
IntuneWinAppUtil.exefile from the extracted prep tool files. - In the Command Prompt window, enter the following details:
Source folder containing the Cloud Installer package.
Cloud Agent setup file
Output folder for the.intunewinpackage file.
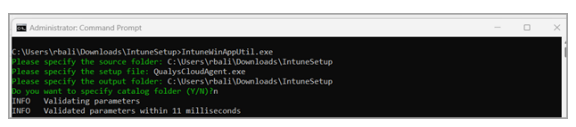
The.intunewinfile for Cloud Agent is generated and saved in the output folder.
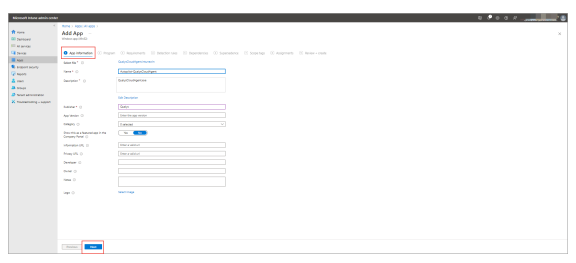
Add App Information
- On the Microsoft Intune Admin Center home page, click Apps> Add App> Windows.
- On the App informationpage, click Select app package file. The Select app type pane opens.
- In the Select app type pane, select Windows app (Win32) and click Select.
- On the App package file pane, upload the
.intunewinpackage file, and click OK. - On the App Information page, enter the app details and click Next. The Program page opens.
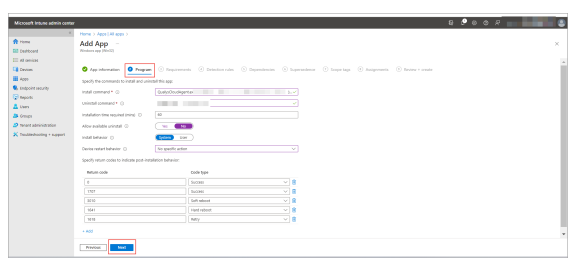
Set Program Information
- On the Program page, enter the Install command and Uninstall command. The Install command and Uninstall command are associated with the Cloud Agent installer.
- Sample installation command:
QualysCloudAgent.exe CustomerId={xxxxxxxx-xxxx-xxxx-xxxxxxxxxxxxxxxx} ActivationId={xxxxxxxx-xxxx-xxxx-xxxx-xxxxxxxxxxxx} WebServiceUri=/CloudAgent/ - Sample installation command:
"%programfiles%\qualys\qualysagent\uninstall.exe" Uninstall=True Force=True - Set the Allow available uninstall field to No.
- Click Next. The Requirements page opens.
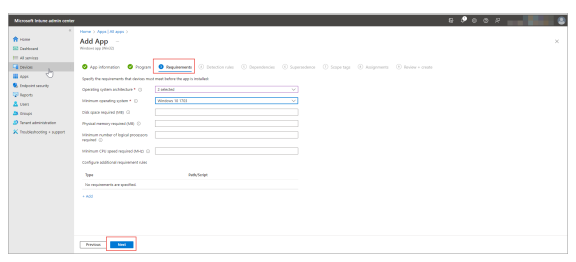
Set Requirements
- On the Requirements page, select the values for Operating system architecture and Minimum operating system fields from the available options.
- Click Next. The Detection Rule page opens.
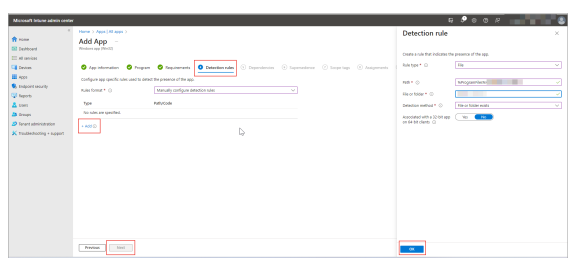
Set Detection Rule
- On the Detection rules page, in the Rules format, select Manually configure detection rules.
- In the Detection rule pane, in the Rule type select File.
- In the Detection rule pane, set the following fields:
Path: The folder path where Cloud Agent installer is downloaded.
File or folder: Cloud Agent installer file(.exe).
Detection method: Set field value as File or folder exists.
- Click Next.
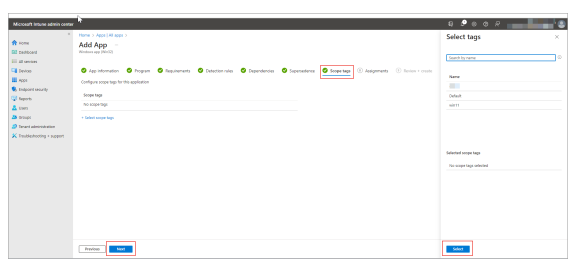
Scope Tags
Complete the following steps to proceed to the Assignments page.
- Dependencies: Software dependencies for the Cloud Agent are the applications that need to be installed before installing the Cloud Agent. In this step, you can enable or disable the auto installation of dependencies. Click Next.
- Supersedence: In this step, you can specify whether to update or replace a previous version of the Cloud Agent. Click Next.
- Scope tags: On this page, you can specify the scope tags for your Cloud Agent.
- Click Next. The Assignments page opens.
The values for above steps are user defined. You can set the field values for above steps as per your requirements.
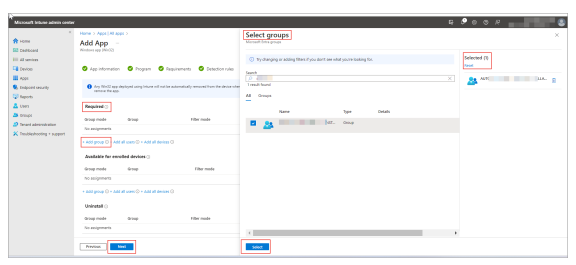
Assignments
On this page, add the groups to which you want to deploy the Cloud Agent.
- On the Assignments page > Required section, click Add groups. The Select groups pane opens.
- In the Select groups pane, select the check box associated to the asset groups.
- Click Select. You can view the selected asset groups in the Selected pane.
- Click Next to proceed to the Review + create page.
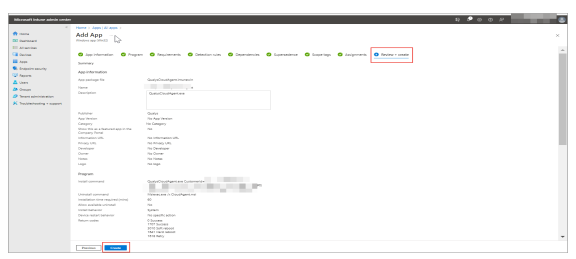
Review + create
Review the information you entered for the Cloud Agent deployment package.
- To navigate to earlier pages, click Previous.
- Click Create to deploy the Cloud Agent.