Tag-based Agent Version Control Profile
Along with the subscription-level Agent Version Control (AVC) profile, you can also create a tag-based AVC profile. With the tag-based AVC profile, you can select the assets in your network to which you want to apply the agent version control rules. You can use the static tags, dynamic tags, and tag sets while creating a tag based AVC profile.
The following are the steps to create a tag-based AVC profile:
- In the Cloud Agent application, navigate to Configuration > Agent Version Control Profile.
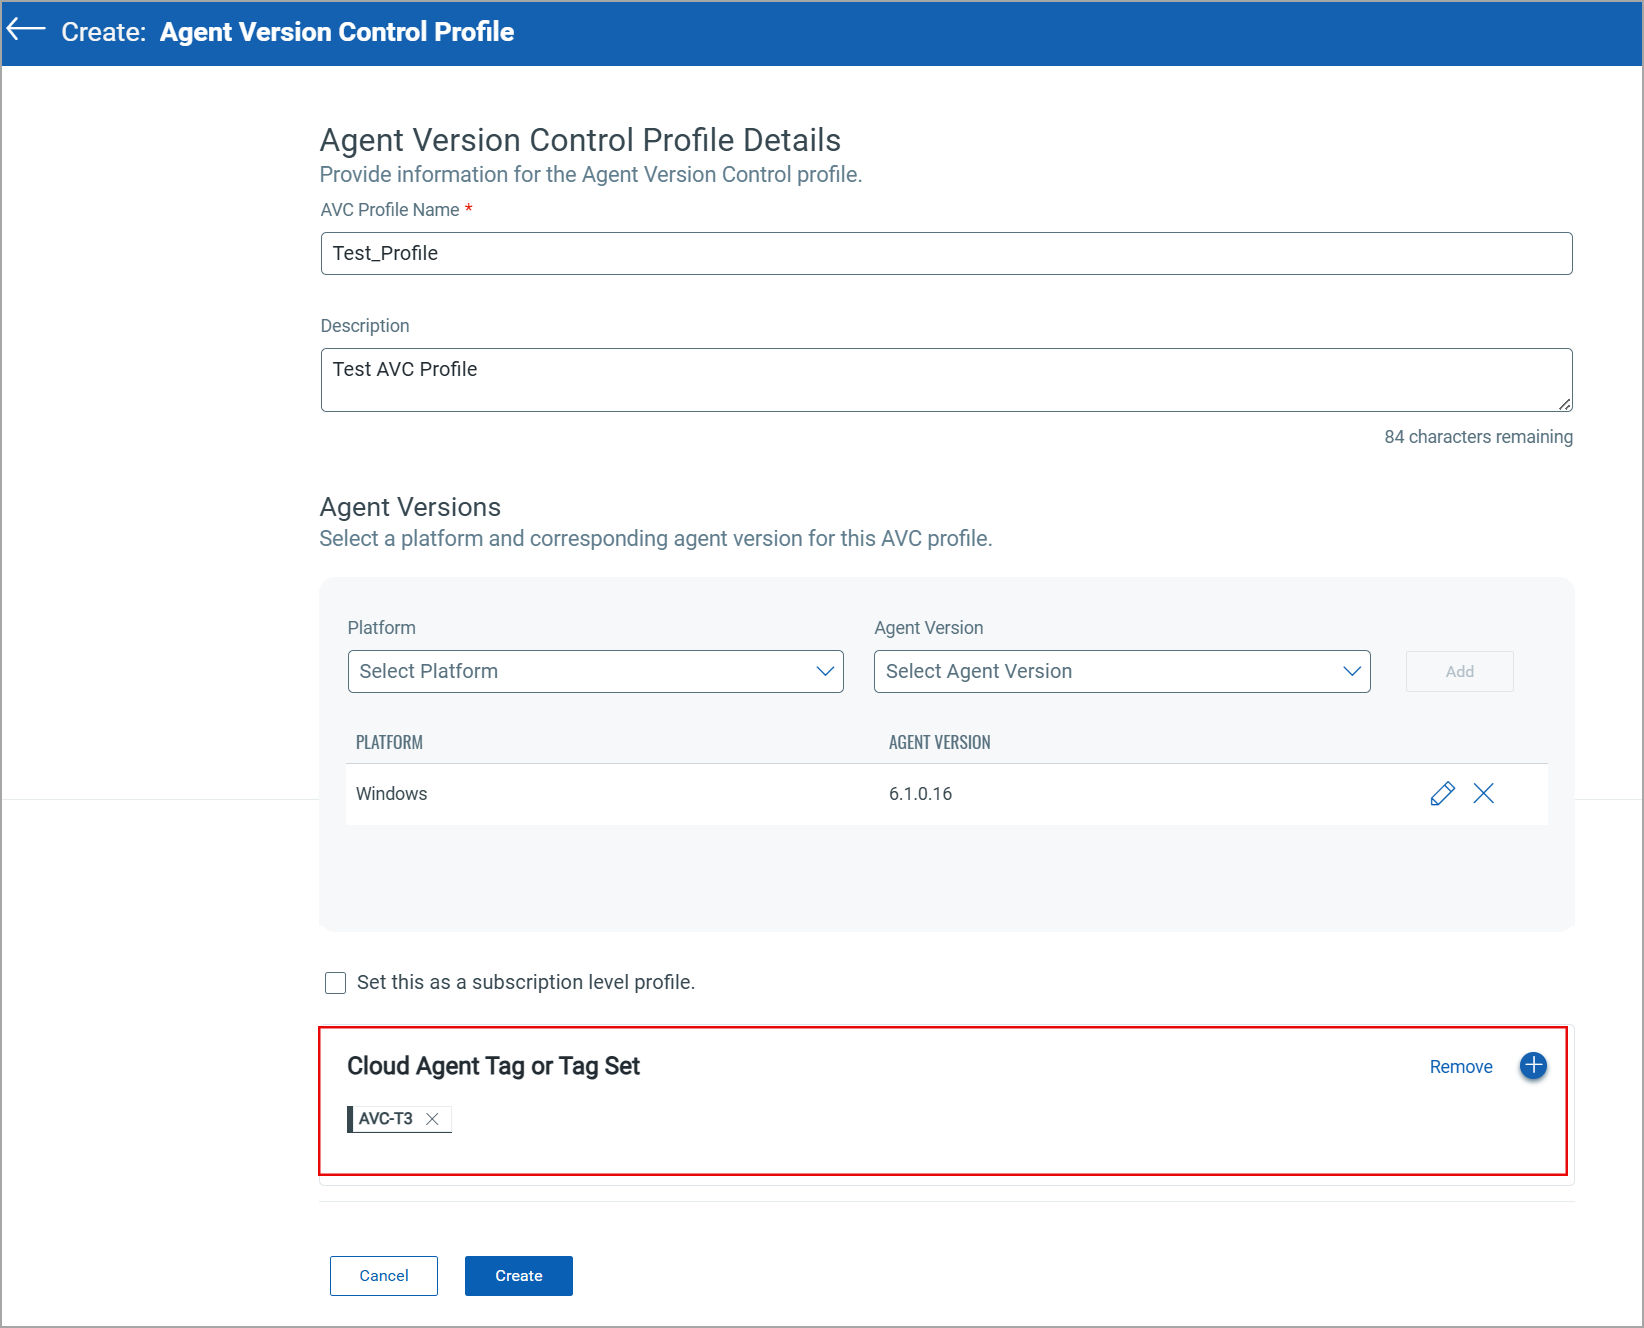
In the AVC Profile Name field, enter the name for your new AVC profile.
In the Description field, enter a brief description of the new profile. - Under the Agent Versions section, select the Platform and respective Agent Version. You can select one or multiple platform as per your requirements.
- Ensure that the Set this as a subscription level profile. checkbox is not selected to be able to apply tags to the AVC profile.
- In the Cloud Agent Tag or Tag Set section, click add (
 ) to select a tag for your AVC profile.
 - In the Select Tags window, select a tag or tag-set associated to the assets to which you want apply this AVC profile.
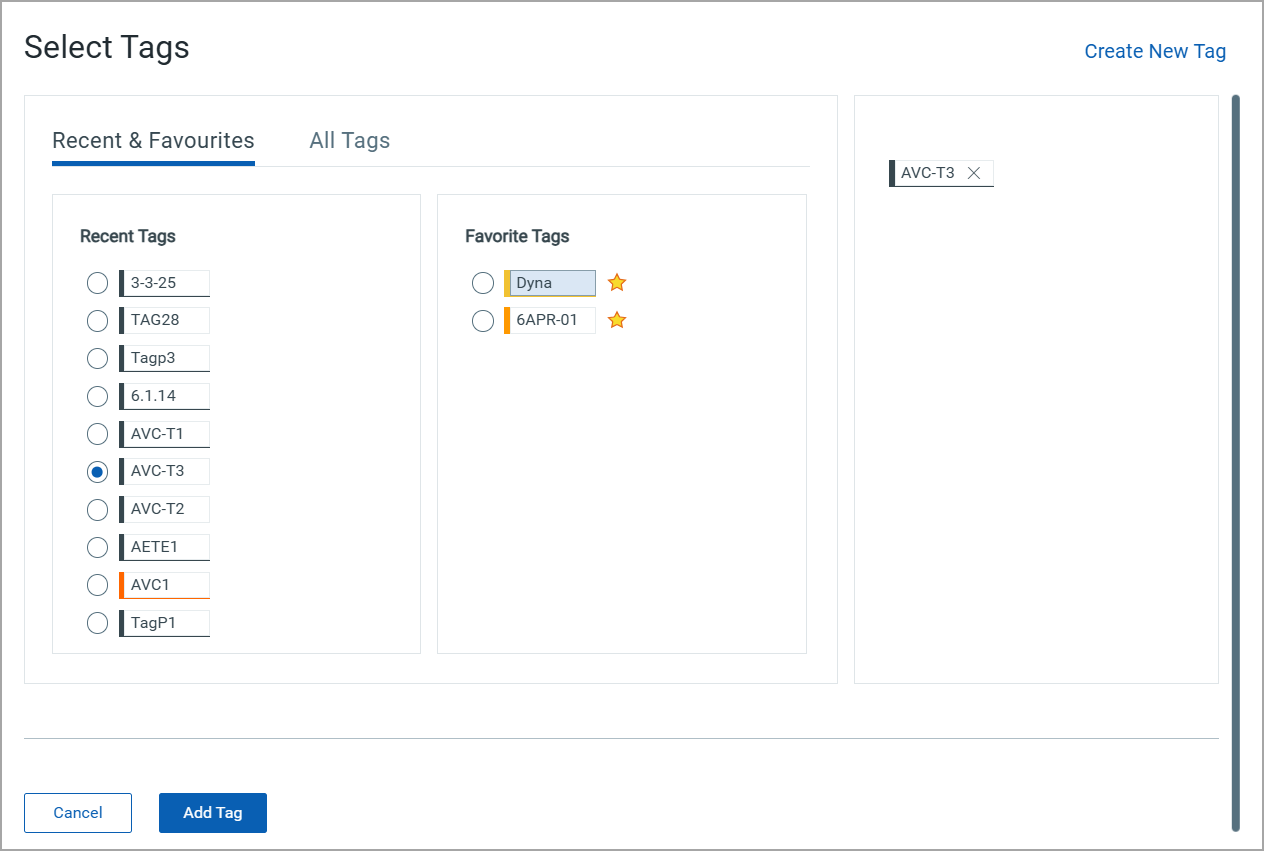
- Click Add Tag to add the selected tag to your profile.
We recommend using static tags while creating tag-based AVC profiles. Using dynamic tags and system tags, such as Cloud Agent, may assign AVC profiles to a broader range of Cloud Agents that were not initially in the assignment scope.
- On the profile creation page, click Create. A new tag-based AVC profile is created.