Cloud Agent Application Release 2.3.0
Limited Customer Release
July 10, 2025 (Updated August 21, 2025)
Deep Scan Overview
Deep Scan is an advanced scanning capability that detects vulnerabilities in non-standard binaries and software that fall outside typical system formats, locations, and behaviors.
Deep Scan matters because traditional vulnerability scanning methods (IP-based and agent-based) target well-known file locations, executable formats, and standardized software packages. This approach leaves gaps: custom-built tools, standalone executables, and software installed in non-default directories remain unscanned, creating blind spots in your security posture.
Deep Scan addresses these visibility gaps by:
- Scanning non-standard binaries and custom software installations.
- Supporting custom file directory specifications.
- Scanning across multiple system drives.
Deep Scan enhances overall scanning coverage, supporting more effective vulnerability and compliance management across varied IT environments.
Platform Requirements
Deep Scan is available on the following application versions and platforms:
| Required Application Version | Enterprise TruRisk™ Platform 3.20.1.0 Vulnerability Management, Detection and Response 2.3.0 |
| Platform Support | Windows OS Deep Scan is currently supported only for Windows assets. Support for Linux assets will be added in a future release. |
Deep Scan is supported on Cloud Agent for Windows 6.2 and later versions.
Key Considerations
This section outlines the key benefits of Deep Scan and the current scope of the functionality for this release.
Key Benefits
Deep Scan offers the following key benefits over traditional vulnerability scans:
- Expanded Scan Coverage: Detect vulnerabilities for binaries and applications located outside the standard system paths.
- Customizable Scope: We have added options to define the scope for Deep Scan. You can include and exclude certain system locations from the scan scope to control the extent of the scan. This also helps you control the resource utilization for Cloud Agent during a deep scan.
- Performance Controls: You can configure the scan intervals, scan delay, CPU usage, and scan timeouts to manage the performance impact.
Current Scope
The following are not in scope for this release:
- Software and application packages discovered during a deep scan are not displayed in the Asset Inventory.
- Deep Scan does not support vulnerability detection for APIs and reporting.
Getting Started
Deep Scan follows a two-step implementation process:
- Step 1: Activate and Configure
Activate Deep Scan from the Cloud Agent > Configuration Profile.
- Step 2: View and Analyze Deep Scan Results
View deep scan results in the Vulnerability Management Detection and Response module.
Step 1: Activate and Configure
The following are the steps to activate Deep Scan and configure scan parameters:
- In the Configuration Profile creation window, navigate to the Scan Configuration window.
- In the Vulnerability Management (VM) section, turn on the Deep Scan toggle.

You can configure the following parameters for the Deep Scan.
- Deep Scan Settings — Configure the following parameters for scan configuration.
- Data Collection Interval — The data collection interval sets the time lapse between the completion of the previous scan and the start of the next scan.
Range: 1440-43200 Minutes. The default value is 10080. - Scan Delay — The time added to the start of scanning, both for new installs and for interval scanning. Enter the time in minutes to delay the start of a scan.
Range: 0-1440 Minutes. The default value is 0. - Scan Randomize — The range of randomization added to the scan delay to offset scanning. For example, if the randomization range is 60 minutes, then a random number between 1 and 60 is calculated and used to delay the start of the next scanning interval. A value of 0 (zero) means no randomization added.
Range: 0-1440 Minutes. The default value is 0. - Scan Timeout — Configure the maximum duration for deep scan before timeout. If the scan exceeds the defined time, it is terminated.
Range: 120-1440 Minutes. The default value is 1440 minutes. - Maximum CPU Usage — Configure the maximum CPU consumption allowed for deep scan. You may observe the momentary spikes in CPU usage.
Range: 10-99%. Default value: 30%.
- Data Collection Interval — The data collection interval sets the time lapse between the completion of the previous scan and the start of the next scan.
- Windows Profile Settings — Provide the following details to define the scan scope for Windows assets.
- Directories to be included: Enter a comma-separated list of directories/files for the Windows assets to be included in deep scan.
By default, C:\ directory is included for deep scan.
You can only add the absolute path for the directories. Wildcard characters and regular expressions are not supported for specifying the directories/files.To reduce the memory consumption and CPU usage, we recommend adding only the specific directories to be included in deep scan.
- Include all Local Drives: Select this checkbox to include all the local drives in deep scan scope.
- Directories to be excluded: Enter a comma-separated list of directories/files for Windows assets to be excluded from deep scan.
By default, the following directories are excluded from deep scan scope:C:\Windows,C:\System Volume Information,C:\$RECYCLE.BIN,C:\hiberfil.sys,C:\pagefile.sys,C:\swapfile.sys
- Directories to be included: Enter a comma-separated list of directories/files for the Windows assets to be included in deep scan.
Defining directories for deep scan scope is required. You cannot save a configuration profile without specifying directories to scan. You can also define the scope by selecting the Include all Local Drives checkbox.
Step 2: View and Analyze Deep Scan Results
The Deep Scan results are displayed in the Vulnerability Management Detection and Response module. You can either use the Search Token: vulnerabilities.detectionScore.name: Deep Scan{}, or use the Vulnerabilities Detection Sources Group by filter to filter the vulnerabilities detected by Deep Scan.
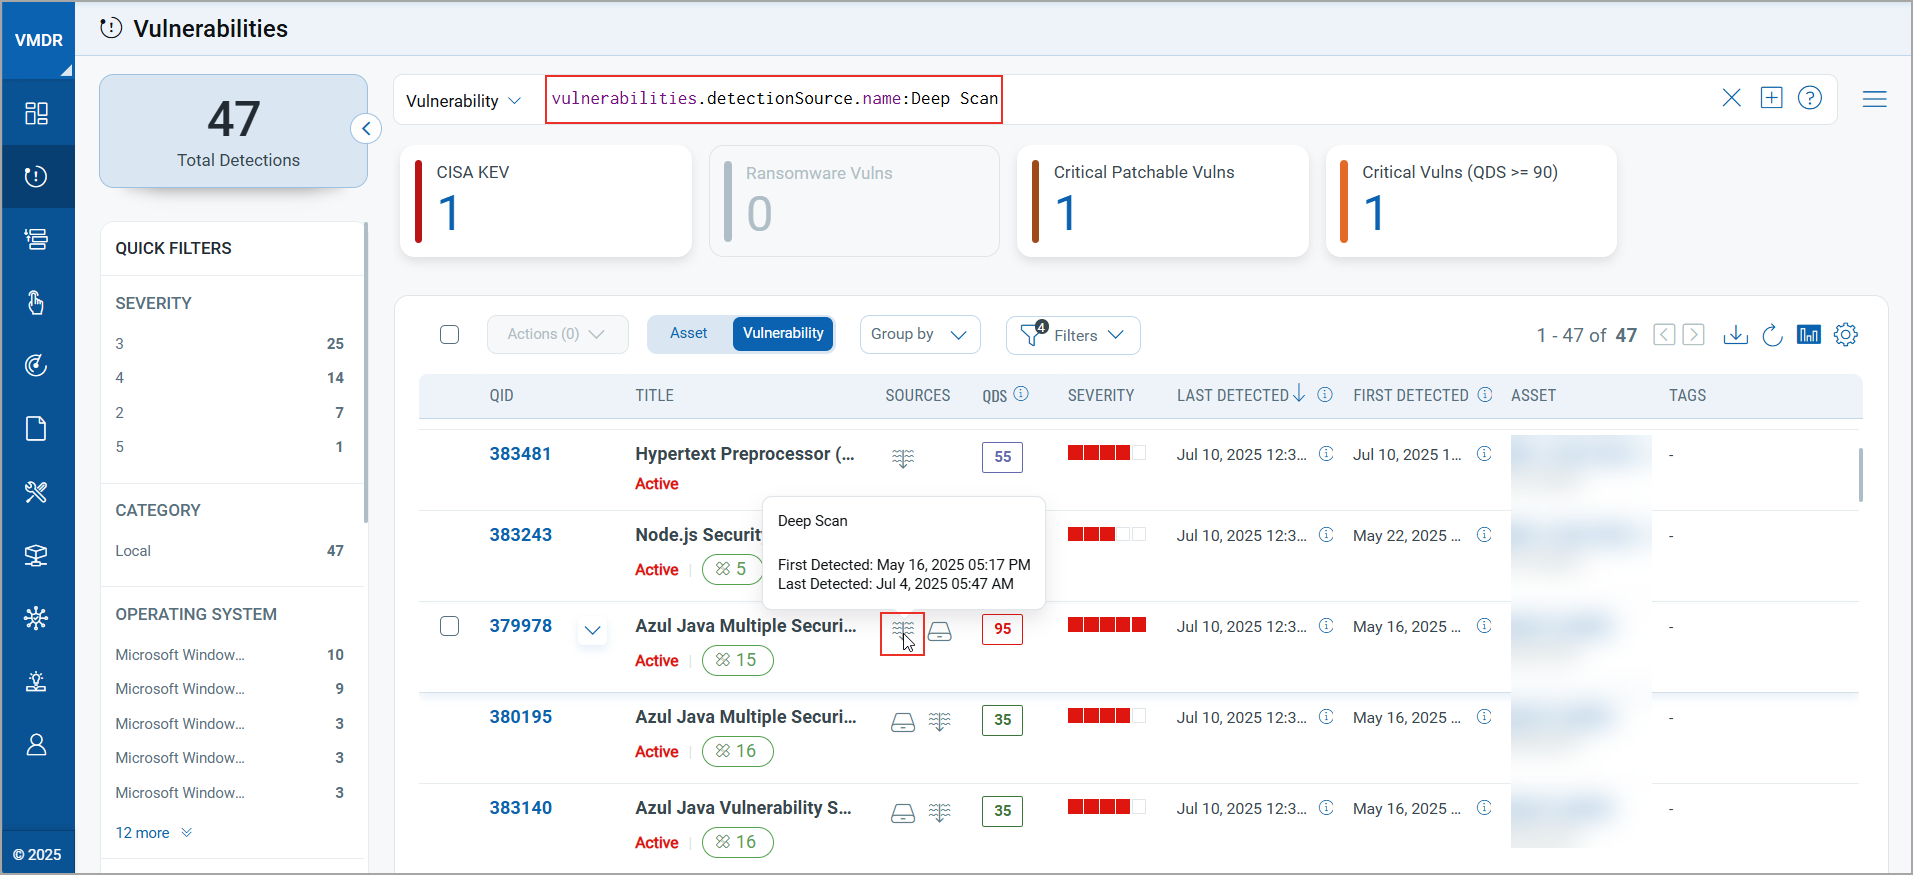
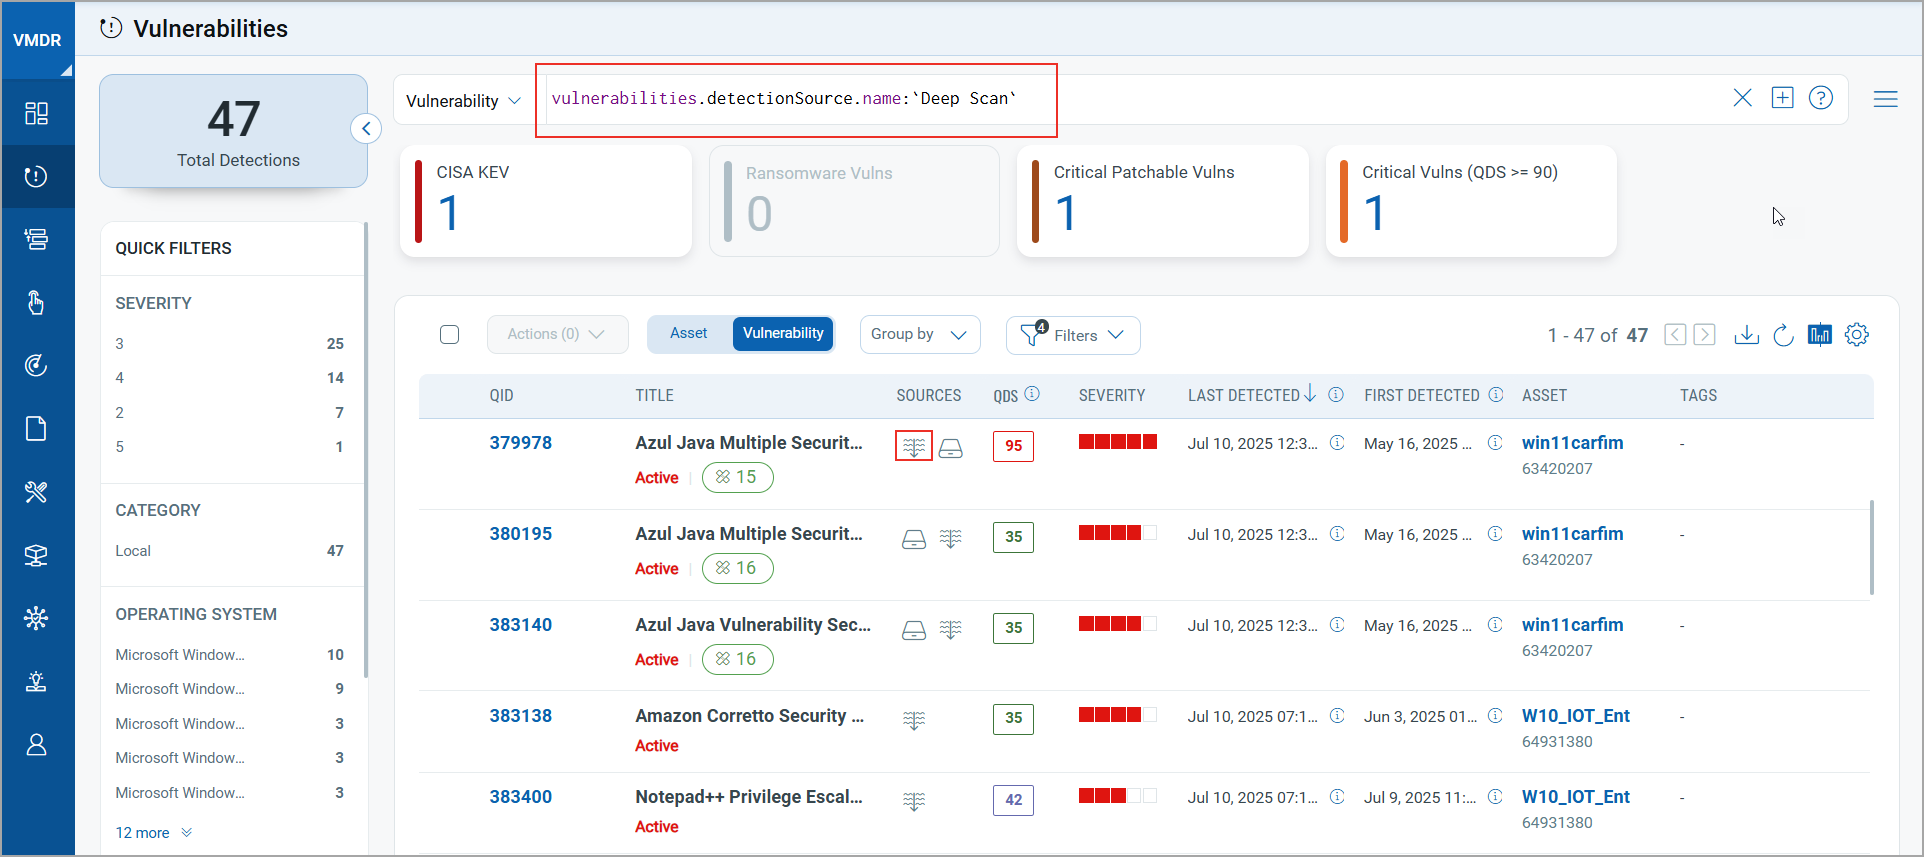
Filtering using the Search Token
The following are the steps to view the Deep Scan results via the Search Token:
- In the Vulnerability Management Detection and Response module, navigate to the Vulnerabilities tab.
- Ensure Vulnerability is selected in the dropdown next to the Search field.
- In the Search field, enter the QQL token:
vulnerabilities.detectionSource.name: Deep Scan, and then press Enter.
The results display vulnerabilities detected by deep scan. You can also hover on the Source icon to see the first and last detected information in a tool-tip.
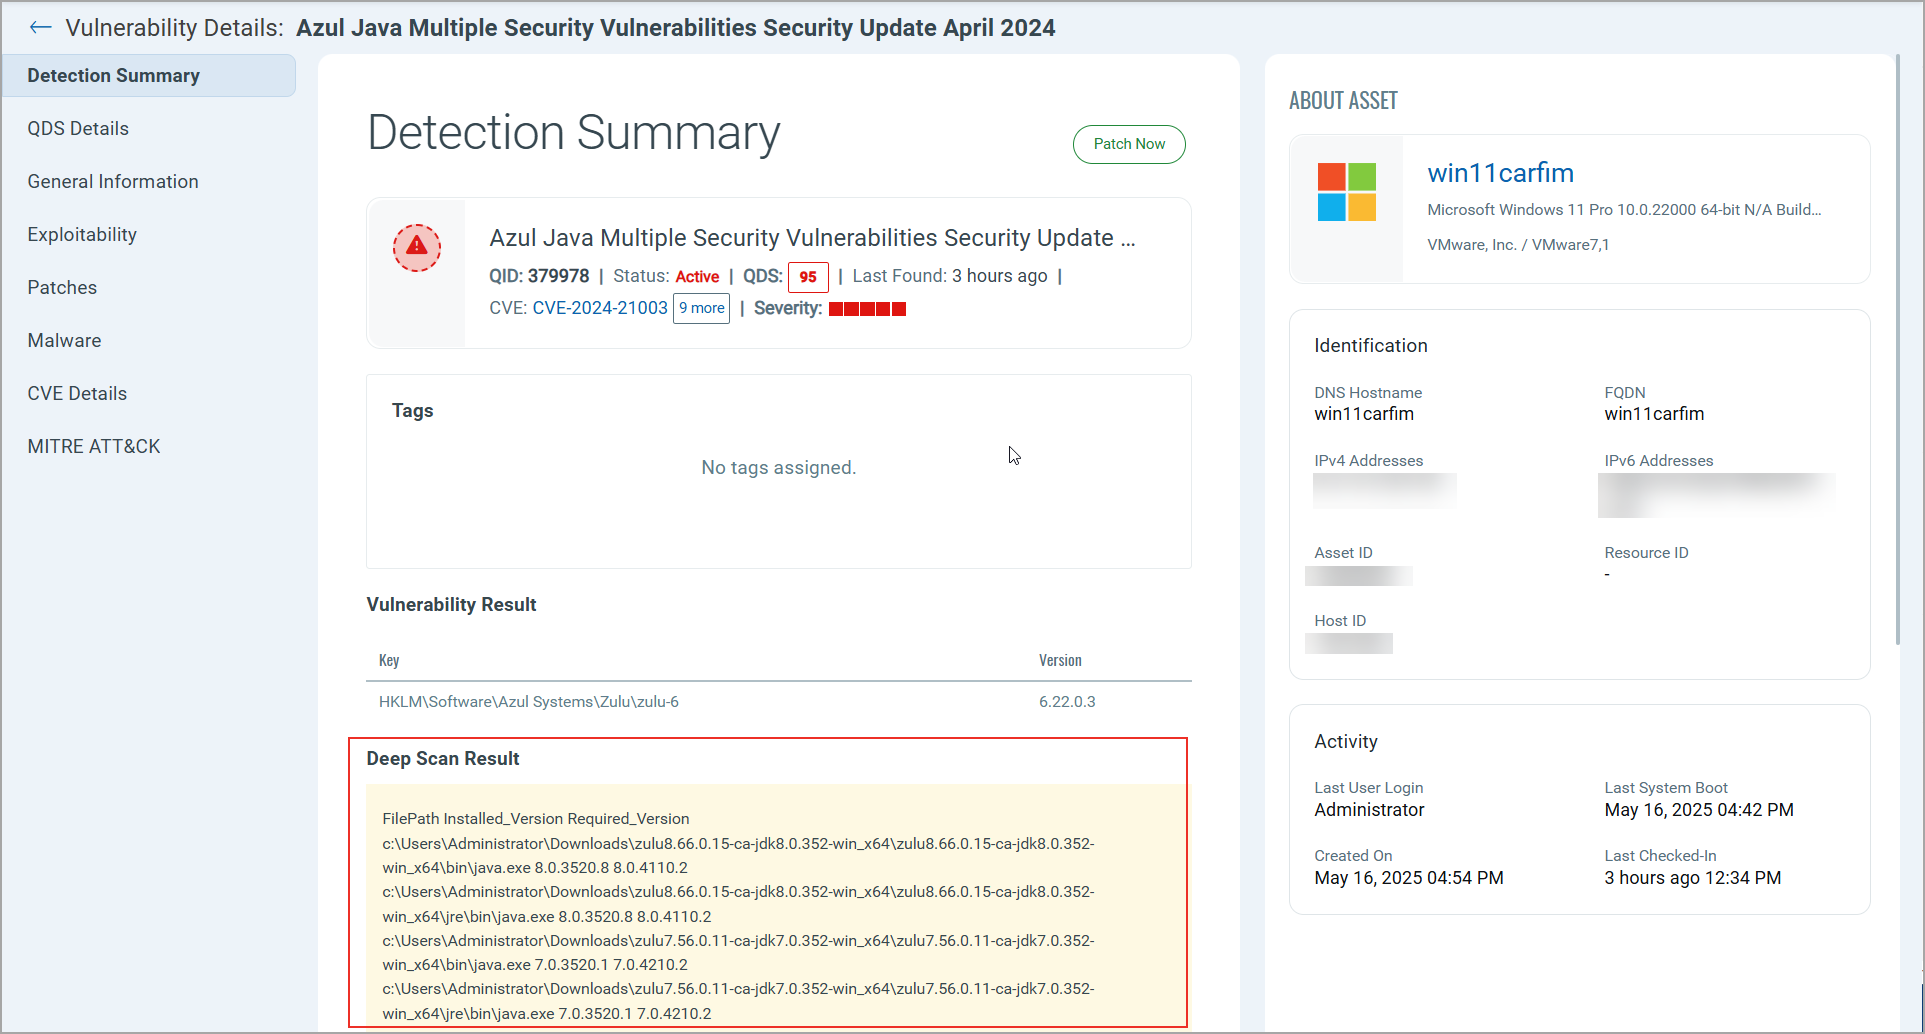
- Click a QID.
- In the Vulnerabilities Details > Detection Summary > scroll to the Vulnerability Result section > Deep Scan Result.
Filtering Using the Group By Filter
The following are the steps to view the Deep Scan results:
- In the Vulnerability Management Detection and Response module, navigate to the Vulnerabilities tab.
- In the Group By filter, select the Vulnerabilities Detection Sources filter.
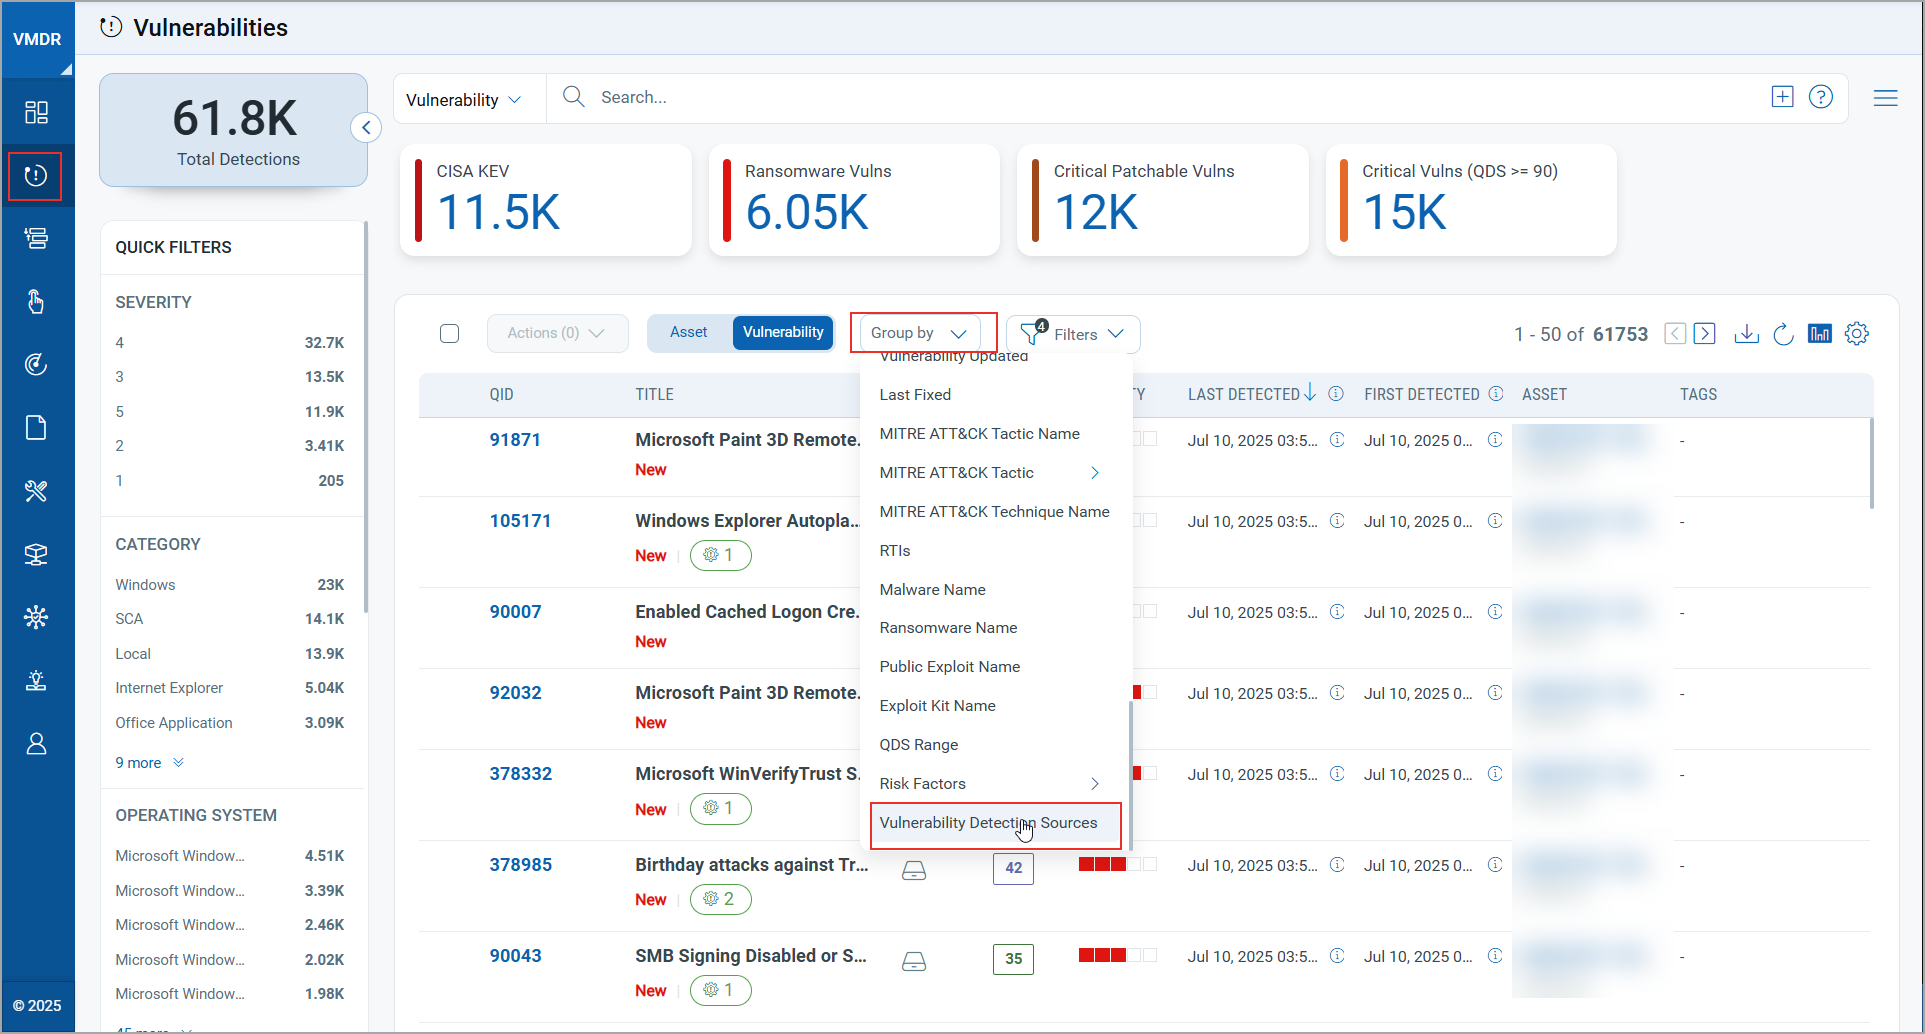
- In the detection sources list, click Deep Scan.
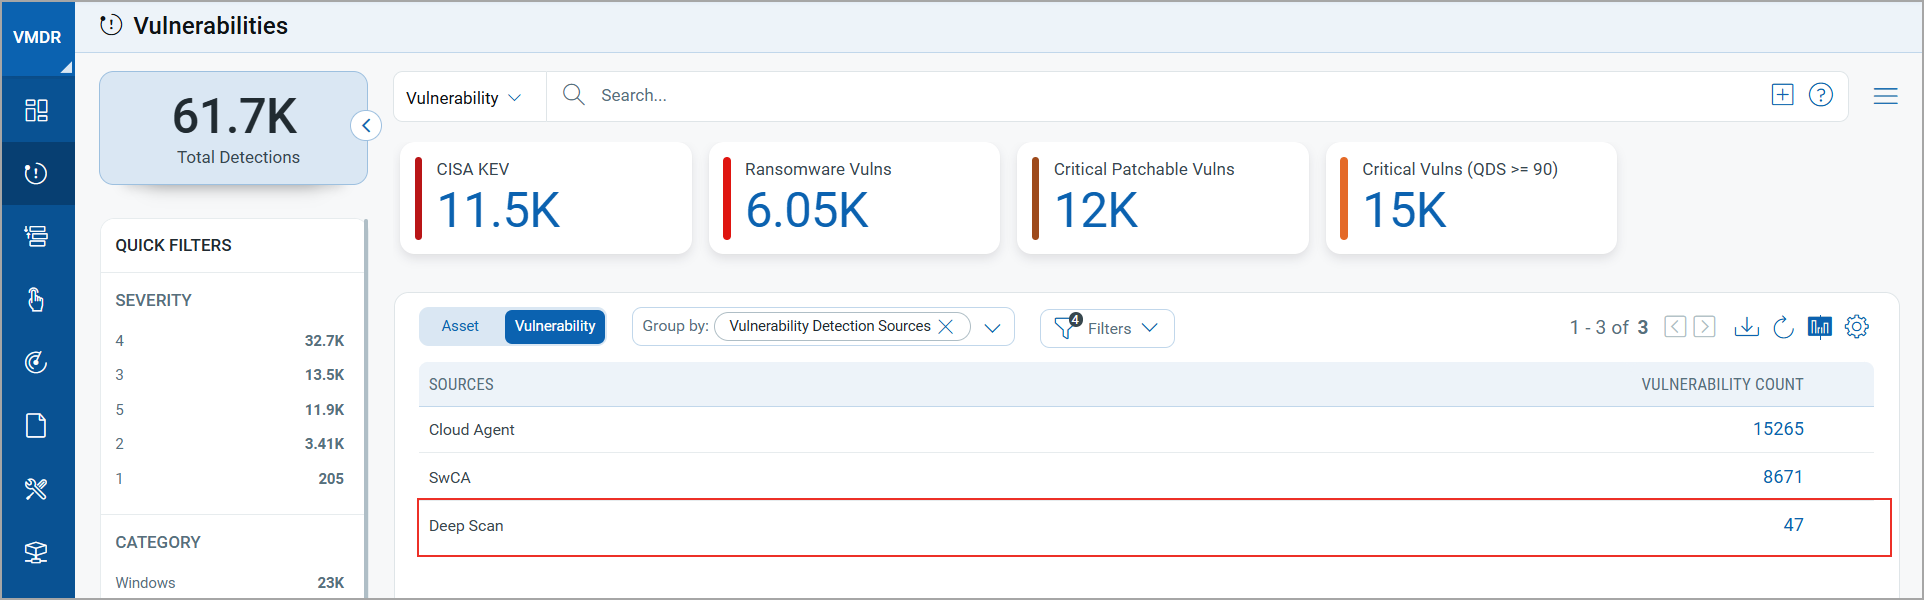
The results display vulnerabilities detected by deep scan.
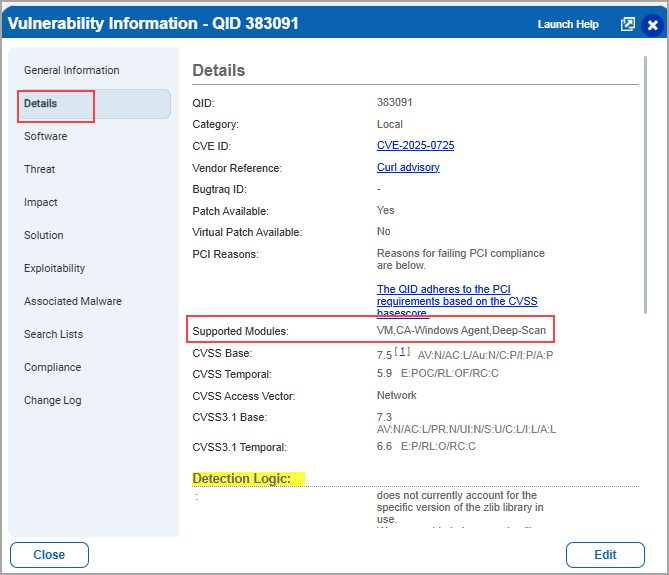
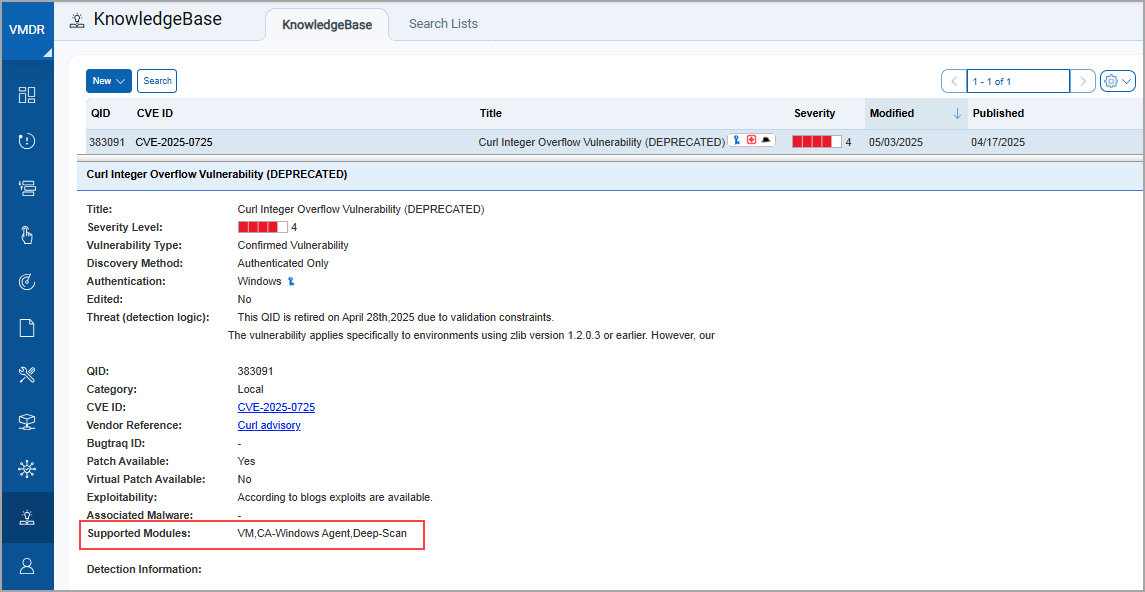
Identifying Deep Scan Vulnerabilities Using VMDR KnowledgeBase
To identify vulnerabilities associated with Deep Scan, refer to the QIDs listed in the VMDR KnowledgeBase. These QIDs can be found under the Supported Modules field, accessible from both the Details tab and the QID preview page.
| Details Tab | QID Preview page |
 |
 |
This information supports effective remediation by providing detailed insights into Deep Scan-related vulnerabilities.
Deep Scan Behavioral Notes
The following points highlight the standard behavior of Deep Scan:
- Once enabled, Deep Scan is executed as per the schedule defined in the scan configuration.
- You can pre-configure the scan scope for the Linux platform as well, but the scan for Linux assets will not be performed until the support is enabled.
- Results from deep scans are not retroactive and are populated only if the first scan is executed after the Cloud Agent deployment.