Risk Acceptance Rules
The Risk Acceptance Rules tab lets you create, manage, and view user-defined exception findings. Based on the network address, network events, or other conditions, you can create a new exception rule for findings that are false-positives or irrelevant to your specific group/organization to filter-out and export the specific exception findings data from Investigate to the Risk Acceptance Rules tab. This allows for more precise threat detection and management, ensuring that exceptions are handled efficiently.
Create a new Exception
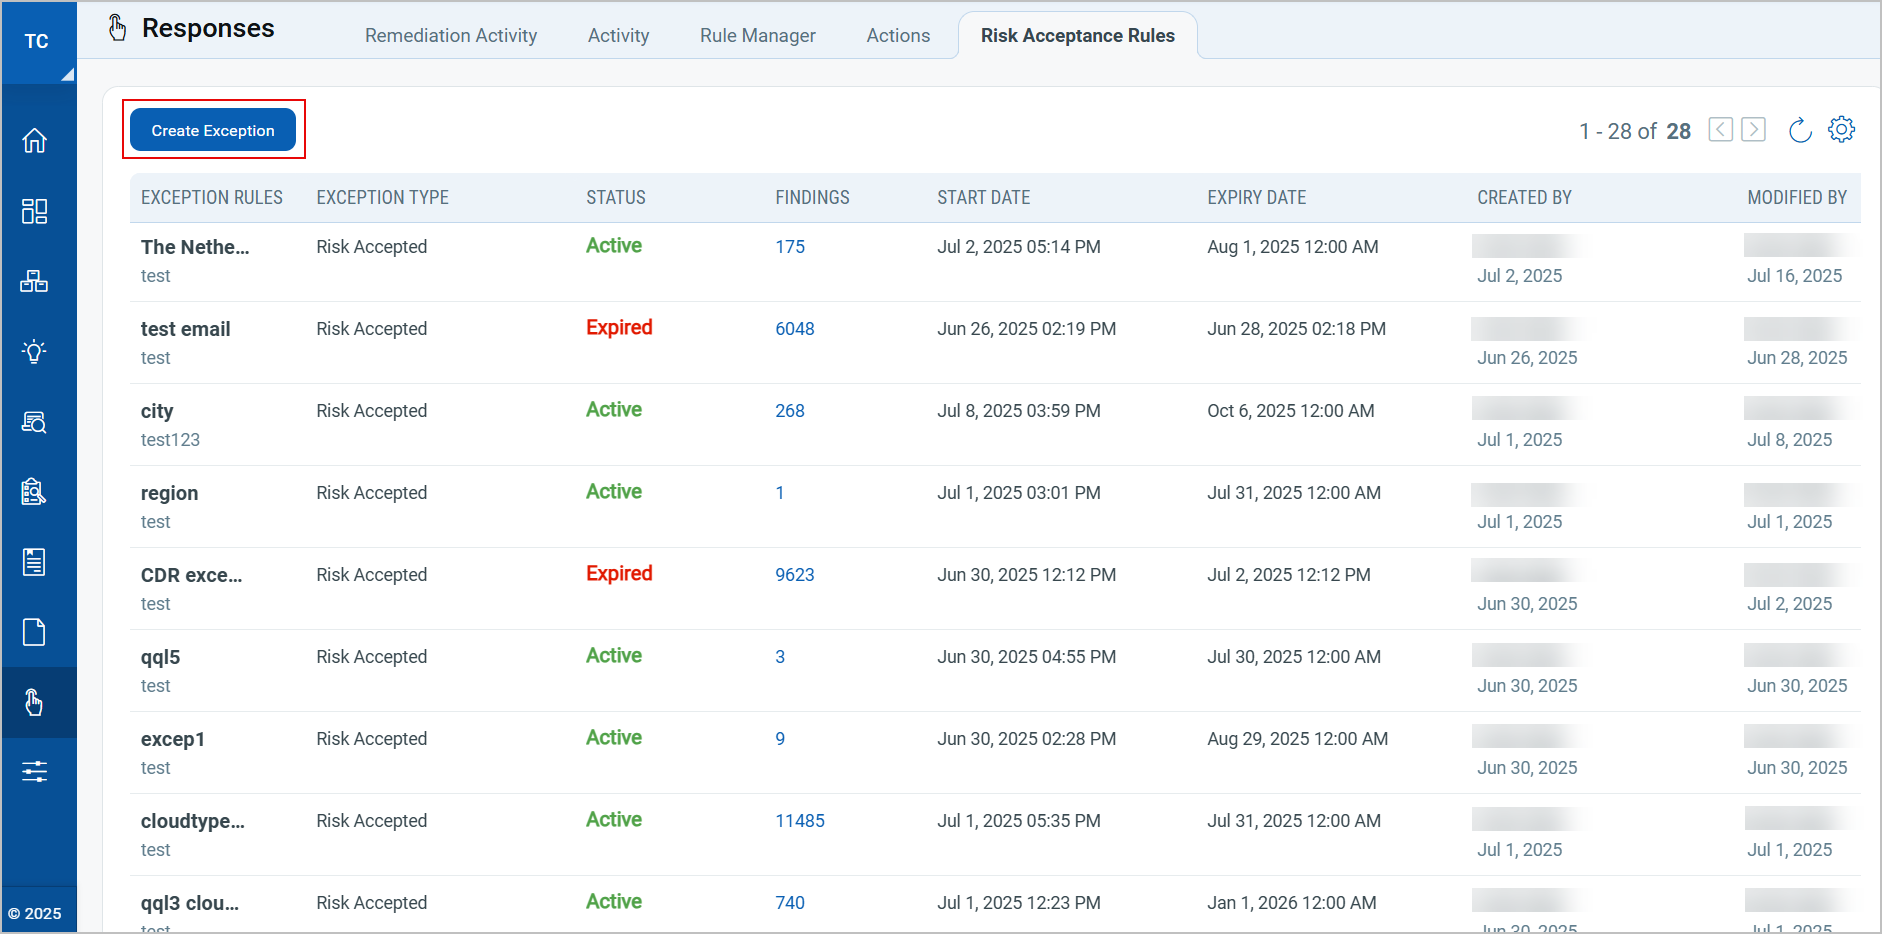
- Navigate to Responses on the left menu and select Risk Acceptance Rules tab.

- Select Create Exception.
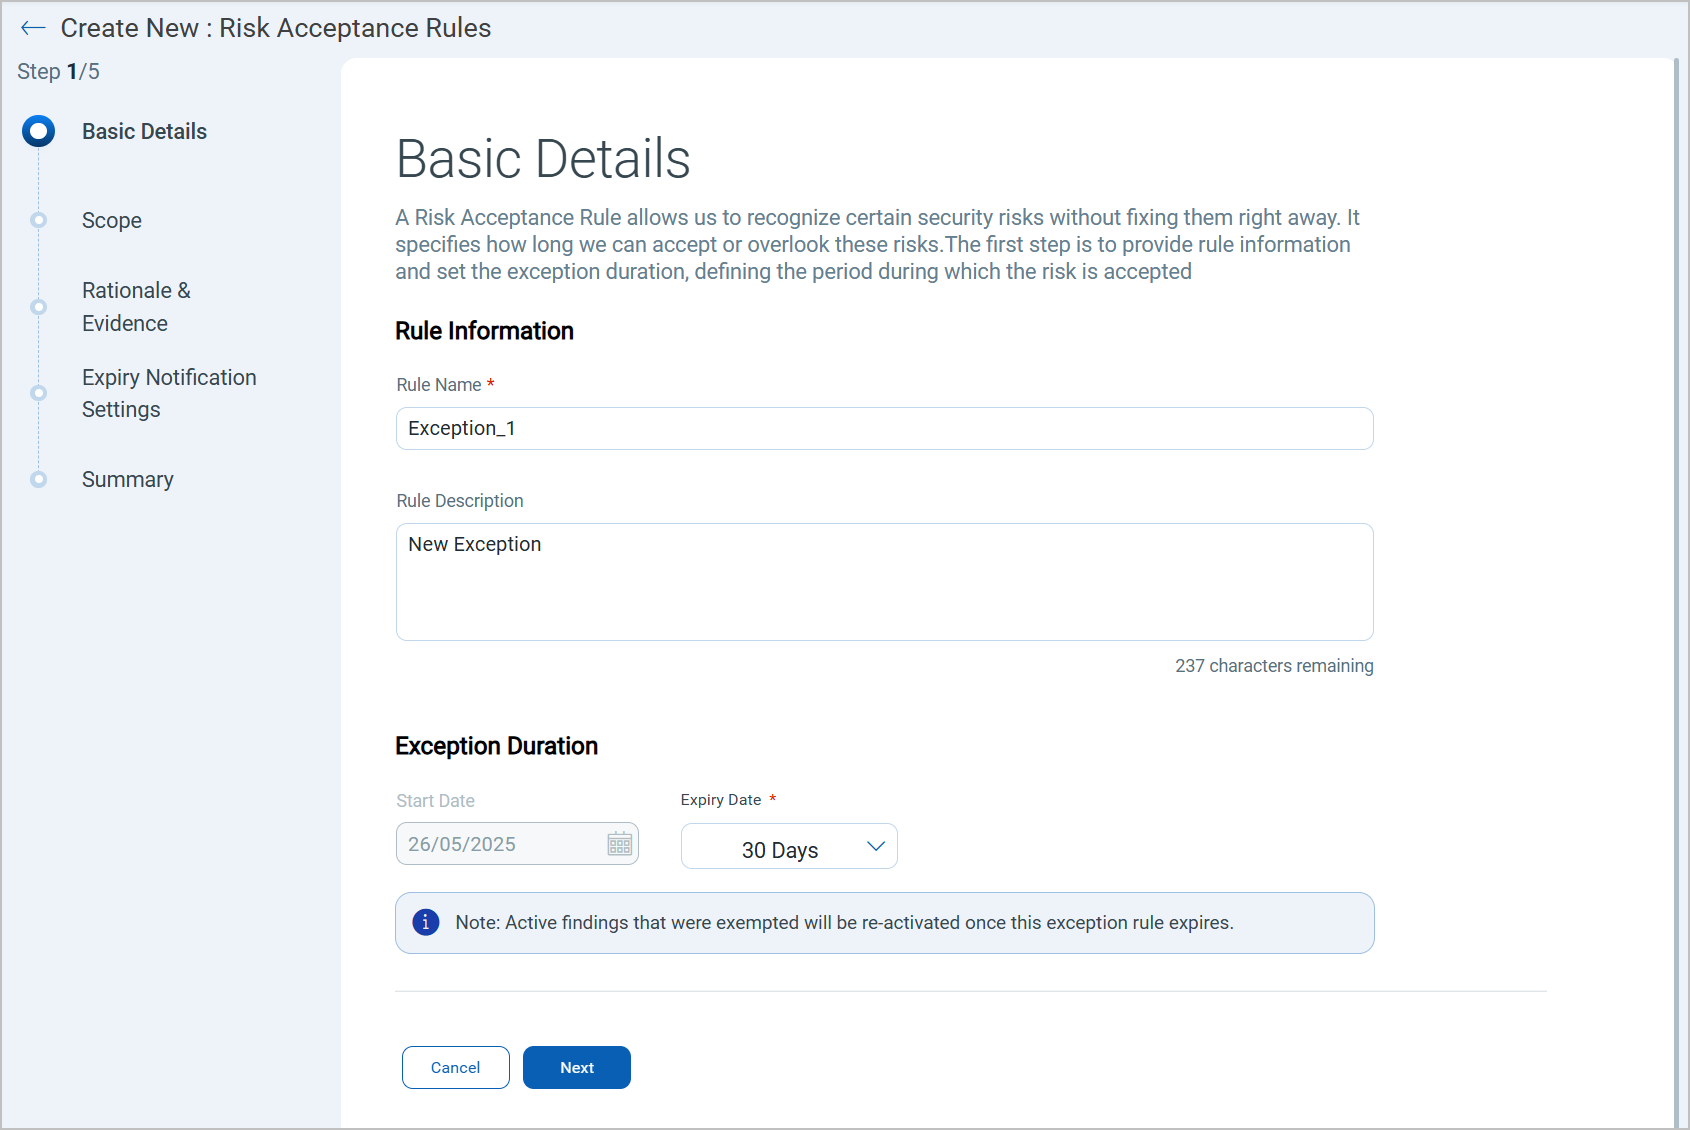
- Basic Details: Provide a name and description of the new exception in the Rule Name and Description. Set an expiration duration for the new rule. You can either set the expiration duration to 30, 60, or 90 days or set a specific date as per your requirement.
You can only schedule scans for future dates and retrieve findings related to exceptions at that time.
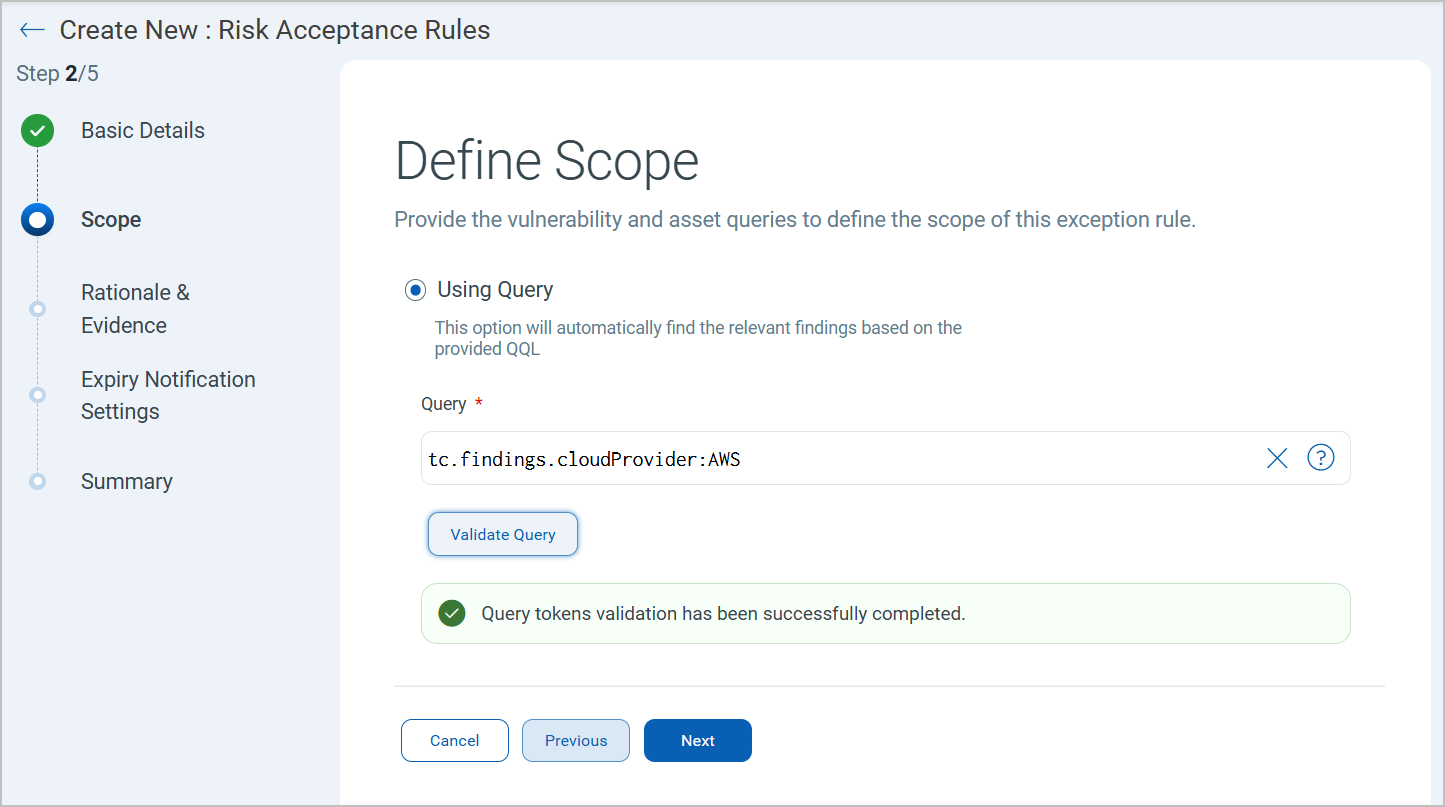
- Define Scope: Provide a QQL query to define the scope of the new exception, then select Validate Query. Ensure the token is validated successfully. If not, then provide a different query.
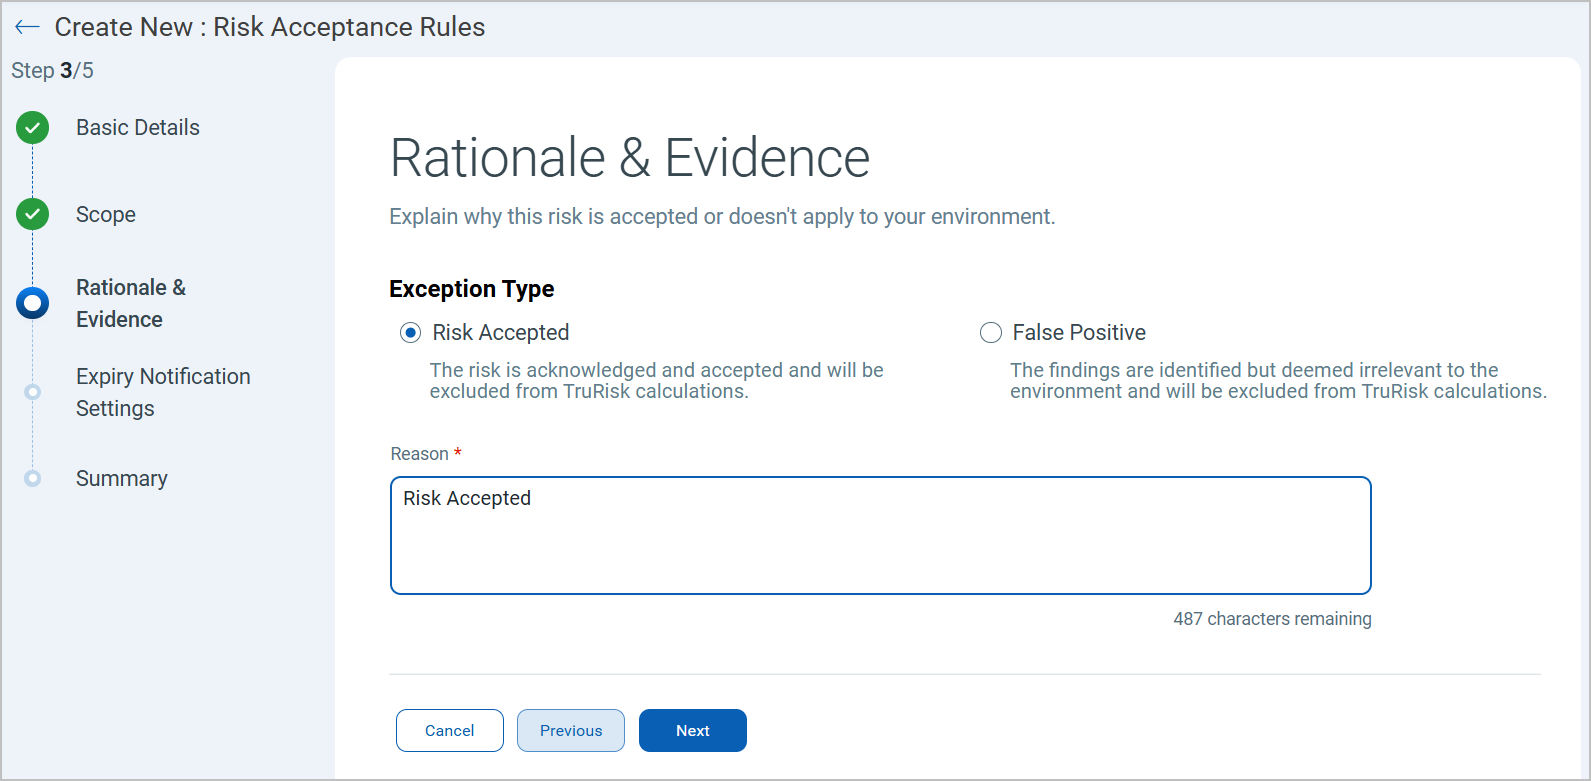
- Rationale and Evidence: Select the type of exception, either Risk Accepted or False Positive, and provide a reason for the exception.
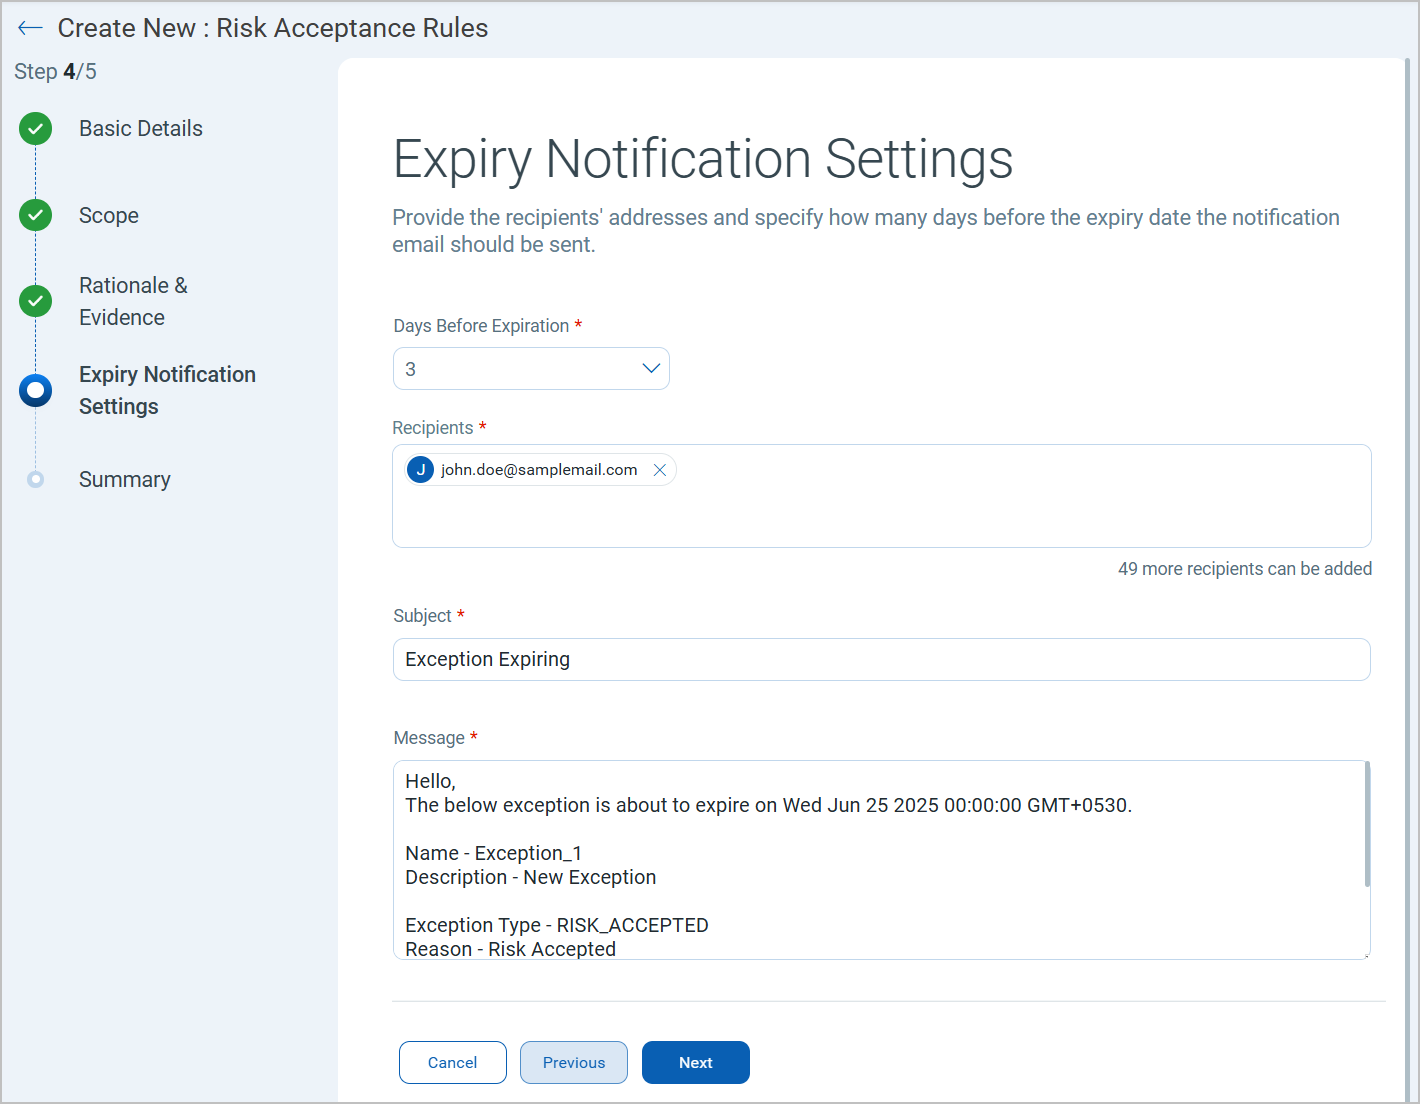
- Expiry Notification Settings: Specify how many days in advance you would like to receive the notification before the exception expiry date. Enter the email address where the notification should be sent. You also have the option to customize the email subject and message format for easier identification.
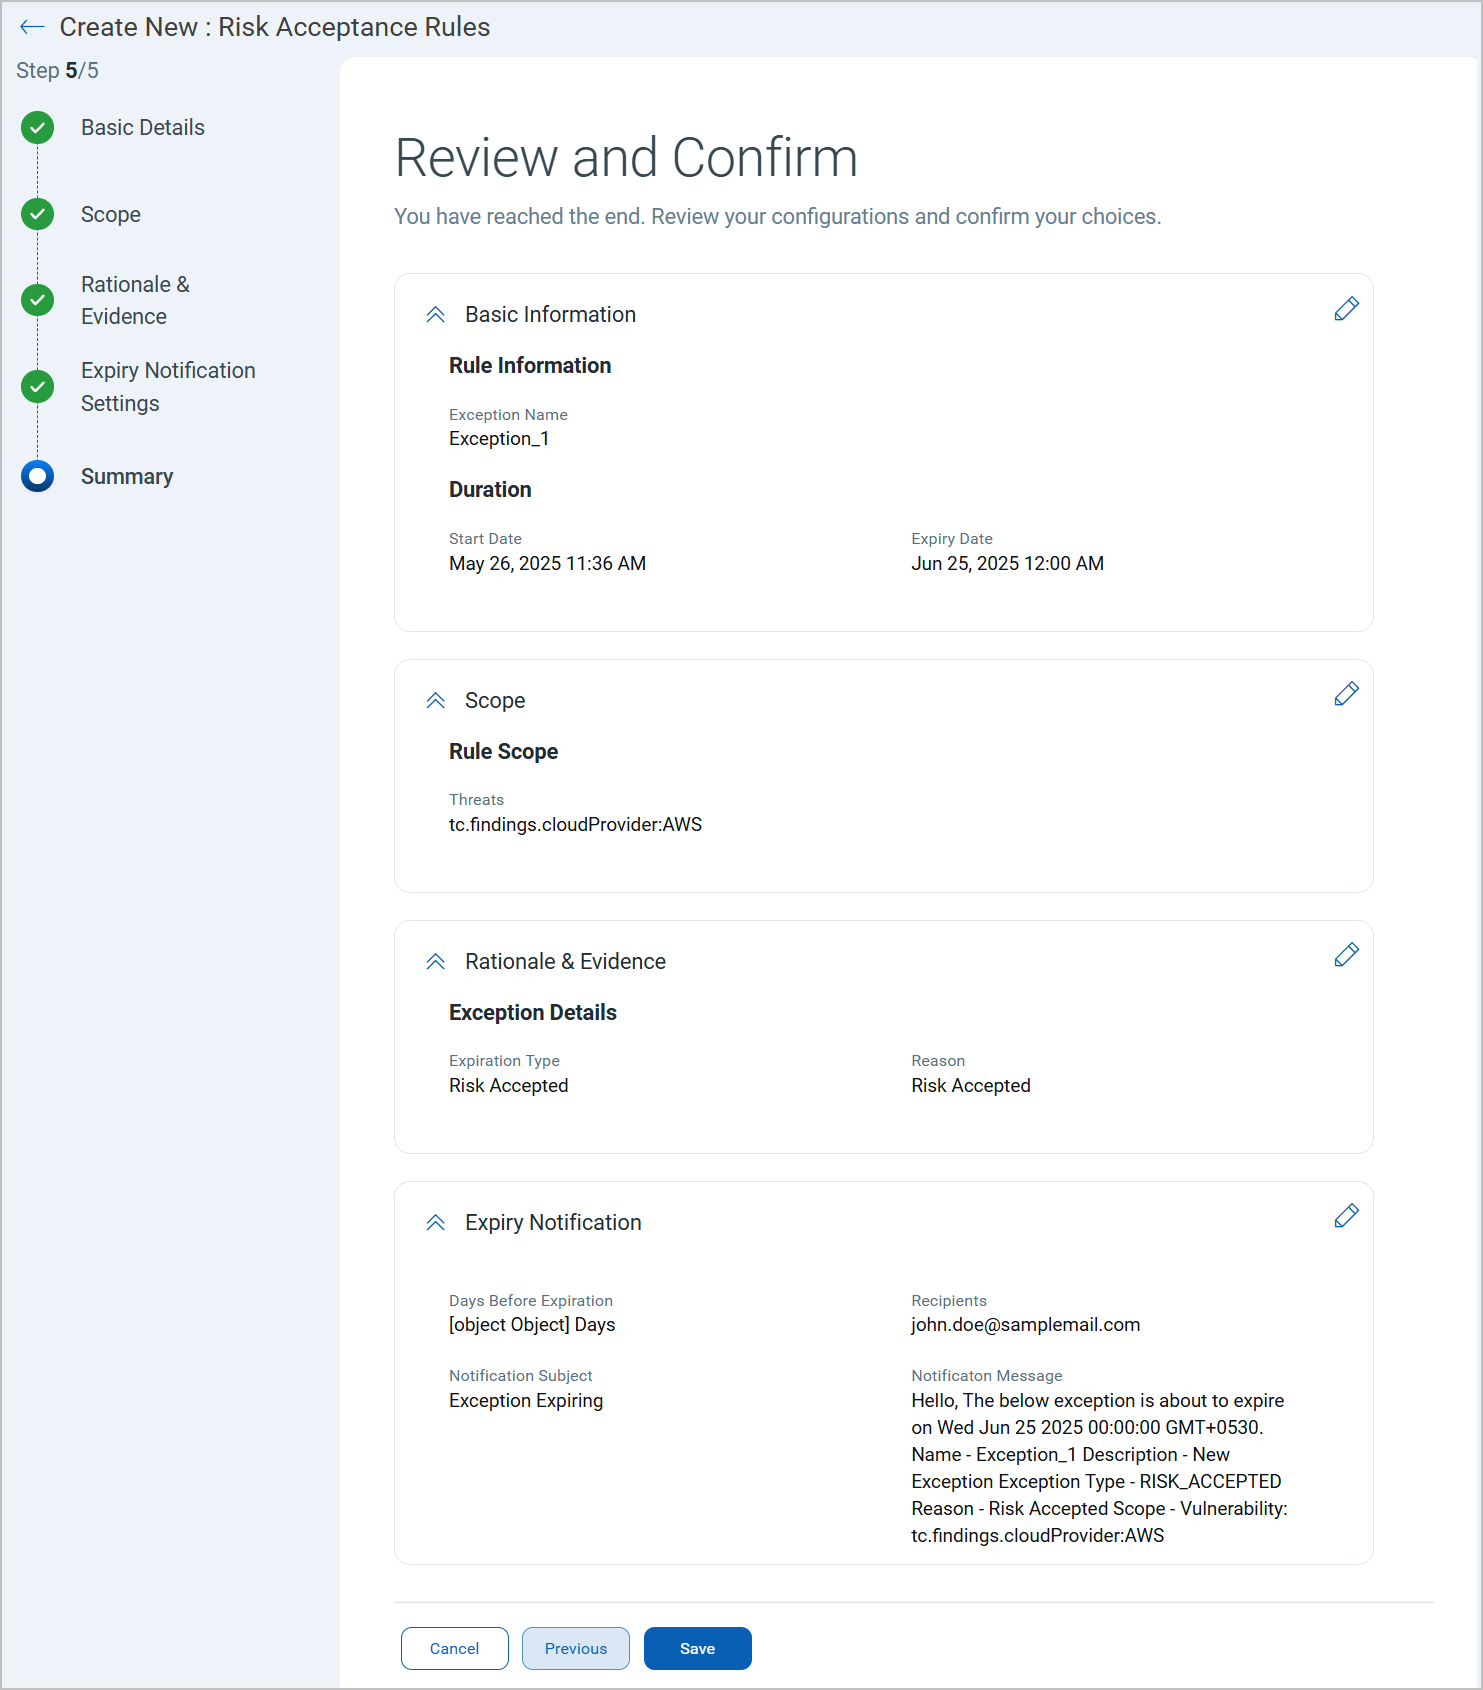
- Summary: Review and confirm the details specified for the new exception and select Save to create the new exception rule.
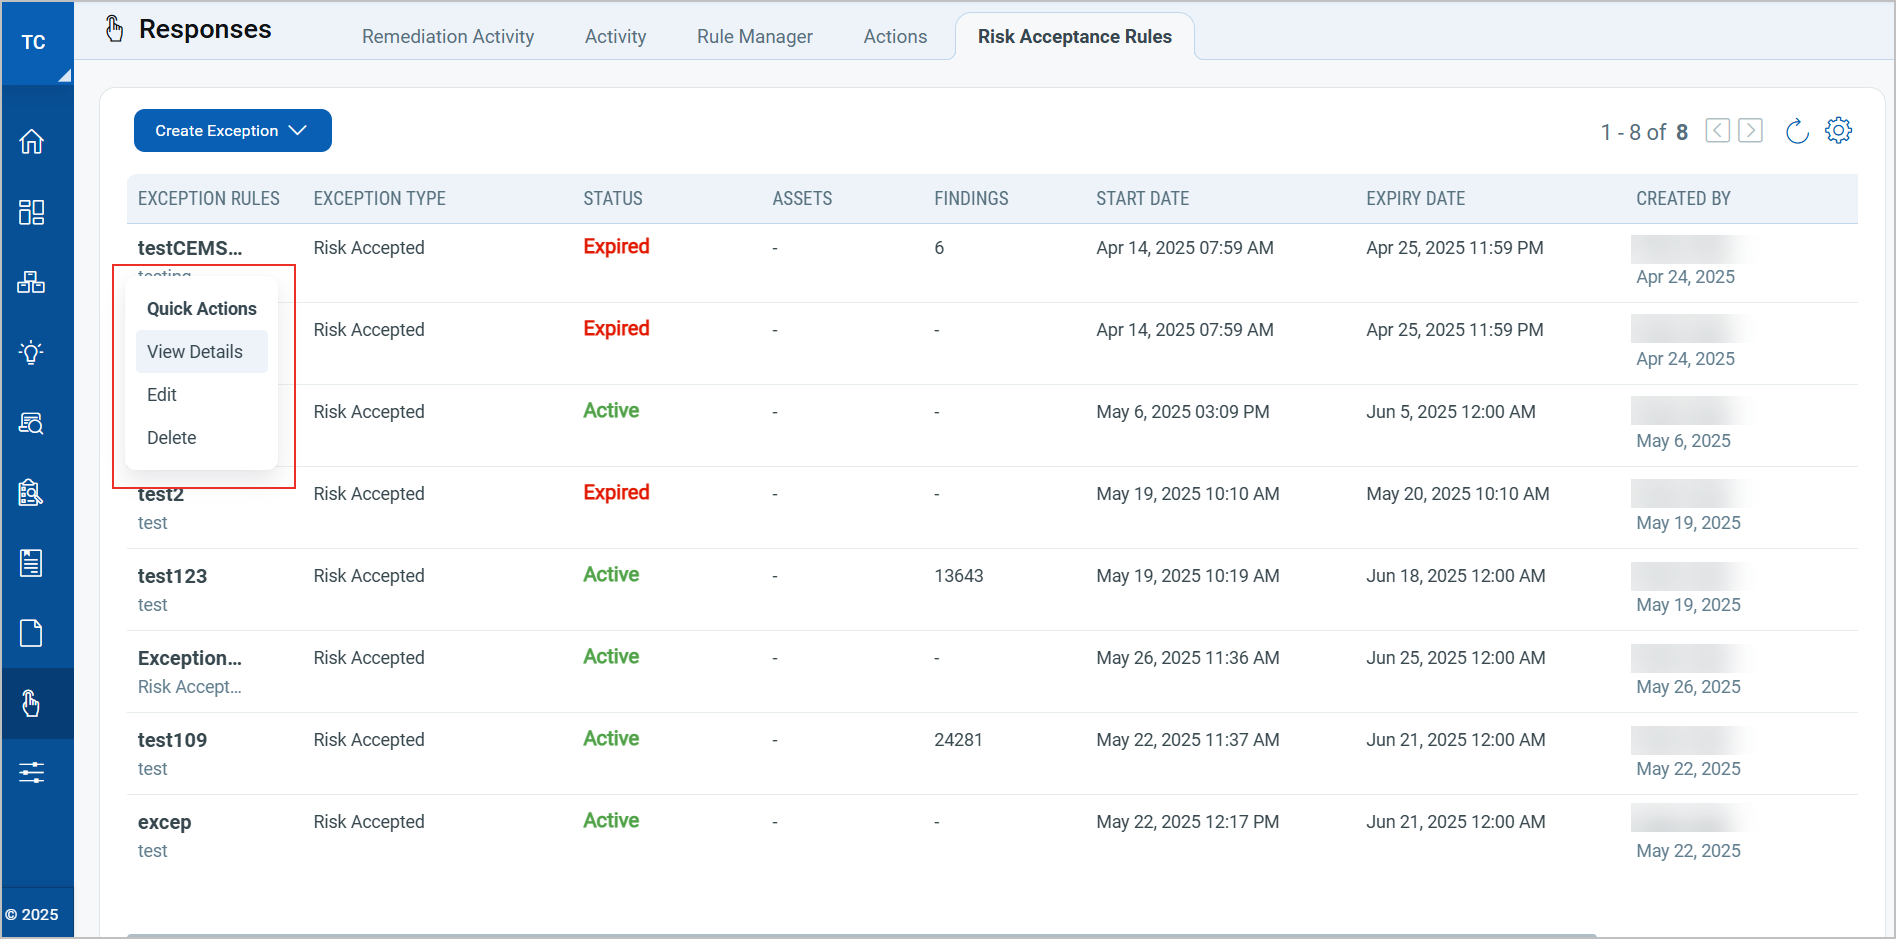
Manage Exceptions
You can use the Quick Actions menu to view details, edit, and delete exception rules.