Follow these steps to create an IAM role in AWS that gives Qualys cross-account access to your AWS resources. Then copy the Role ARN into your connector details.
1 - Log in to your Amazon Web Services (AWS) Console.
2 - Go to the IAM service.
3 - Go to Roles and click Create role.
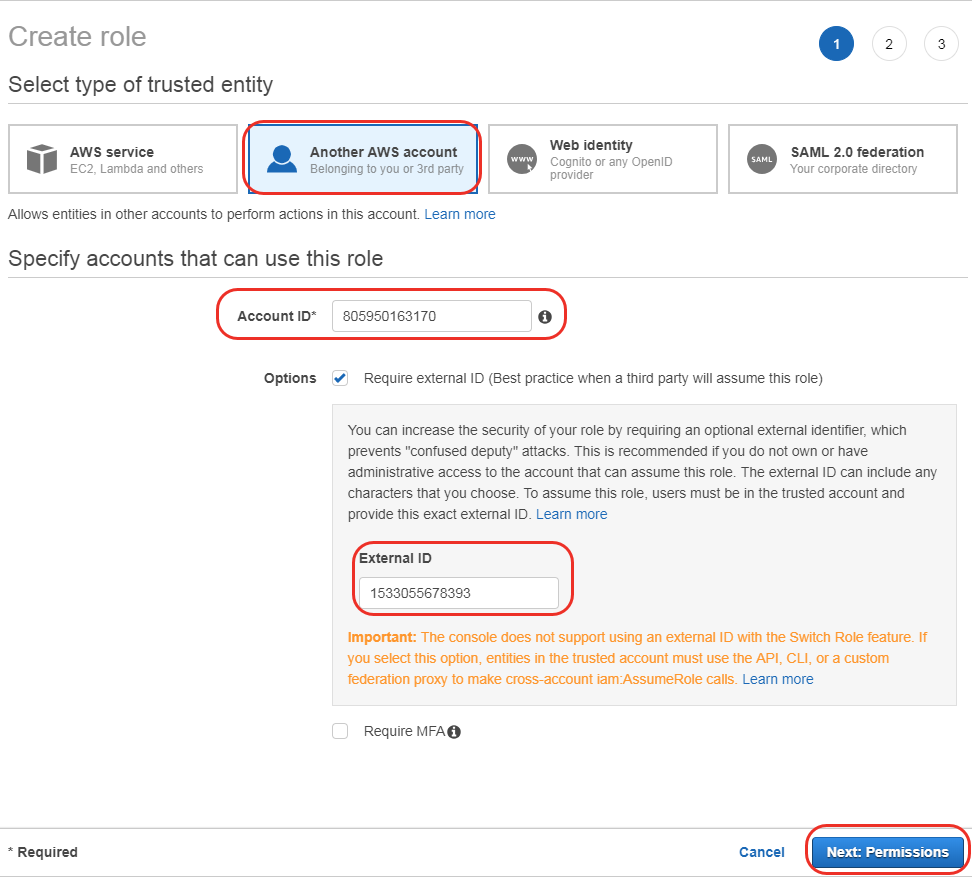
4 - Under "Select type of trusted entity" choose "Another AWS account". Then: a) Paste in the Qualys AWS Account ID (from connector details), b) Select Require external ID and paste in the External ID (from connector details), and c) Click Next: Permissions. Show meShow me
A unique external ID gets generated during connector creation in CloudView. You can copy the external ID that Qualys provides and paste it in AWS console.
5 - Depending on the type of connector you are creating, select the following policies:
Create a policy that includes the permissions: ""ec2:DescribeInstances", "ec2:DescribeAddresses", "ec2:DescribeImages", "ec2:DescribeRegions". Once you create the policy, find the policy and select the check box next to the policy.
Create a policy that includes the permissions: ""ec2:DescribeInstances", "ec2:DescribeAddresses", "ec2:DescribeImages", "ec2:DescribeRegions", "organizations:list*" . Once you create the policy, find the policy and select the check box next to the policy.
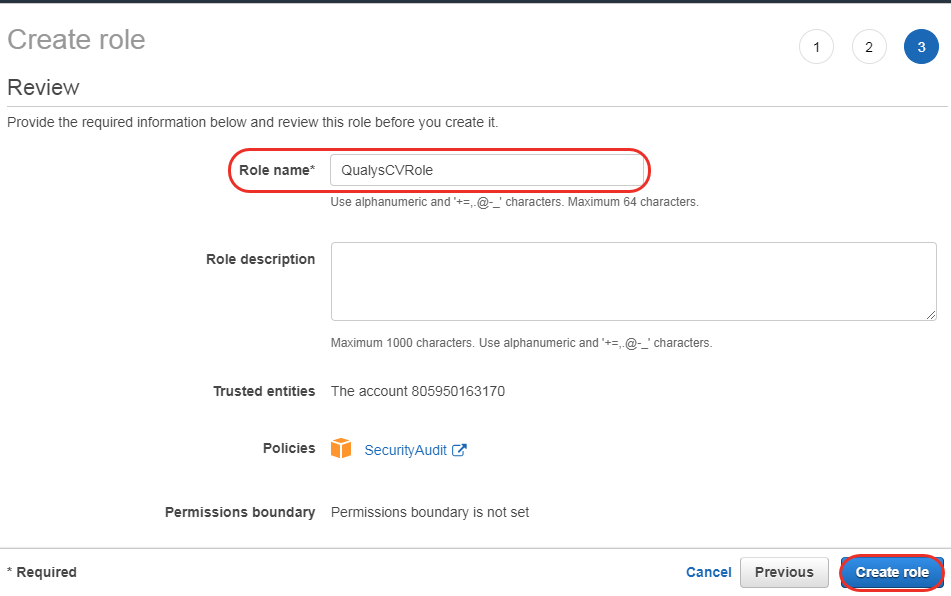
- Find the policy titled “SecurityAudit” and select the check box next to it.
- Create a policy that includes the permissions: "eks:ListFargateProfiles", "eks:DescribeFargateProfile". Once you create the policy, find the policy and select the check box next to the policy. For detailed steps on the policy creation, see Permissions for Fargate Profile.
Note: You need the additional permissions only if you have FargateProfile resources in your cloud environment.
- Create a custom policy that includes additional permissions (applicable only for Elastic File System (EFS), Step Functions, Amazon Quantum Ledger Database (QLDB), Managed Streaming for Apache Kafka (MSK), API Gateway, AWS Backup, WAF, CodeBuild, Lambda, Elastic Block Storage (EBS), Elastic Map Reduce (EMR), Glue, GuardDuty, CodeBuild and Directory Service). Find the custom policy you create and select the check box next to the policy. For detailed steps on the creation of custom policy and the required permissions, see Create Custom Policy.
6 - Click Next: Tags.
7 - Click Next: Review.
8 - Enter a role name (e.g. QualysCVRole) and click Create role.
9 - Click on the role you just created to view details. Copy the Role ARN value and paste it into the connector details
1 - Download the CloudFormation template from the Organization Details step on the Create Organization Connector screen.
2 - Log in to Amazon Web Services (for organization) and go to CloudFormation.
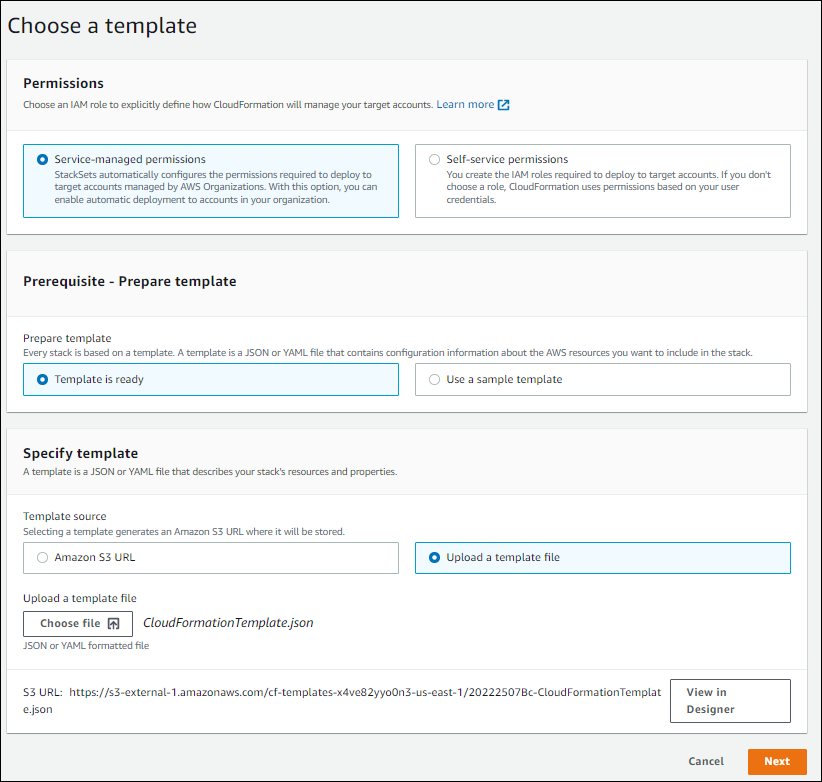
3 - Click Create stack and select 'With new resources(standard)'
4 - Select upload a template file under the Specify Template section
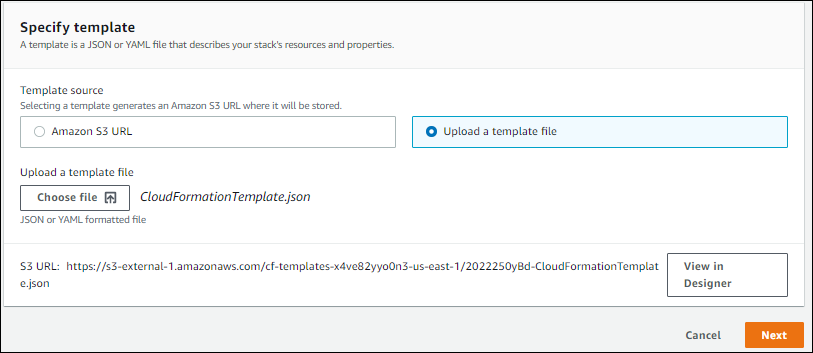
5 - Upload the template and click Next
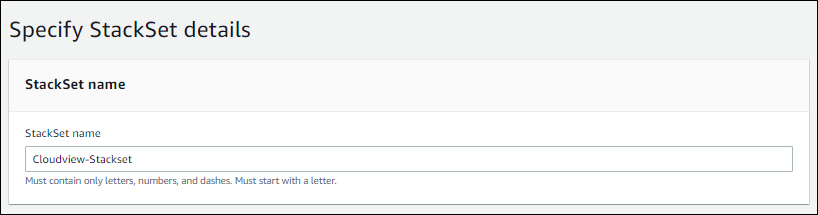
6 - On the Specify stack details step, enter the Stack name and click Next

7 - Configure stack options such as key-value pairs, permissions or other fields. This step is optional.
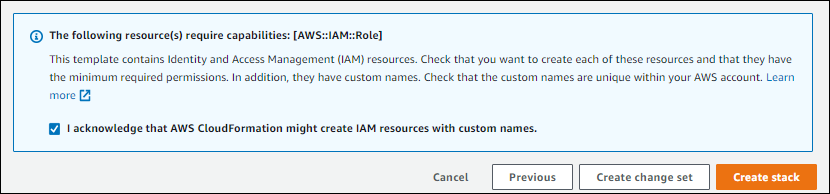
8 - Accept the IAM acknowledgment for resource creation and select Create Stack. The stack creation is initiated. Wait for the CREATE_COMPLETE status.
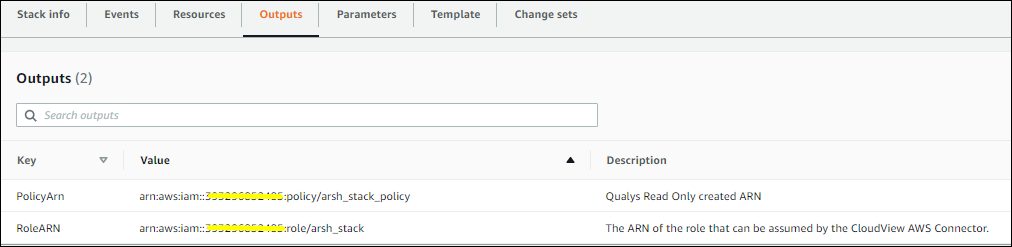
9 - When the stack is complete, copy the Role ARN value from the output and paste it into the connector details.
AWS StackSets enables you to automate the process of applying the Organization's role across multiple accounts in a single operation.
1 - Download the CloudFormation template from the Member Connector Details step on the Create Organization Connector screen.
2 - Log in to Amazon Web Services and go to CloudFormation.
3 - On the AWS management console, select Services > CloudFormation > StackSets > Create StackSet.
4 - Upload the template file and click Next, then enter a StackSet Name.
5 - Configure stackset options. This step is optional.
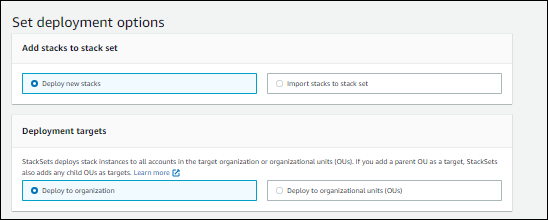
6 - Next, select whether the stackset deploys stack instances to Organization or Organizational Units.
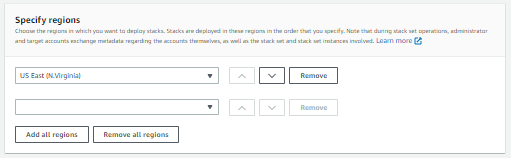
7 - Specify the region where the stacks will be deployed.
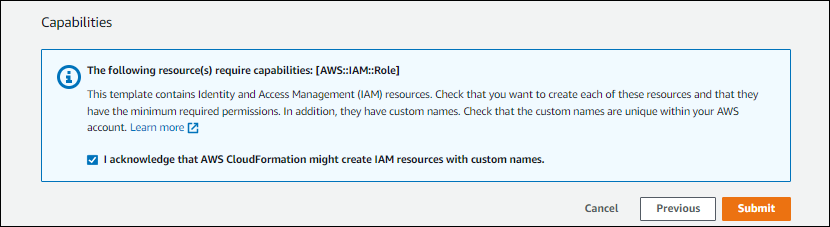
8 - Accept the IAM acknowledgment for resource creation and select Submit.
9 - When the stackset is complete, copy the Role Name value from the output and paste it into the connector details.
Note: The downloaded templates will use the pre-defined RoleName. If you wish to have a custom RoleName, you must edit the template.