Create Azure Connectors
Go to the Connectors tab, click Microsoft Azure Connectors, and then click Create Connector and our wizard can walk you through the steps.
Step 1: Basic DetailsBasic Details
Enter a name and description (optional) for your connector.
Select applications that are applicable for the connector.
Select Enable Remediation to enable remediation on the connector. You need to configure additional permissions before you enable remediation for Azure connectors.
Ensure that you have write access to the Microsoft Azure subscription for which you enable remediation.
Step 2: Authentication Details
- Account TypeAccount Type
Select an account type for your connector: Global or US GovCloud. You can choose only one account type per connector.
- Polling FrequencyPolling Frequency
Select a frequency at which the connector should poll the cloud provider and fetch data.
By default, the connector polling frequency is configured for every 4 hours. As a result, the connector connects with the cloud provider every 4 hours to fetch the data.
- Authentication DetailsAuthentication Details
Enter the authentication information.
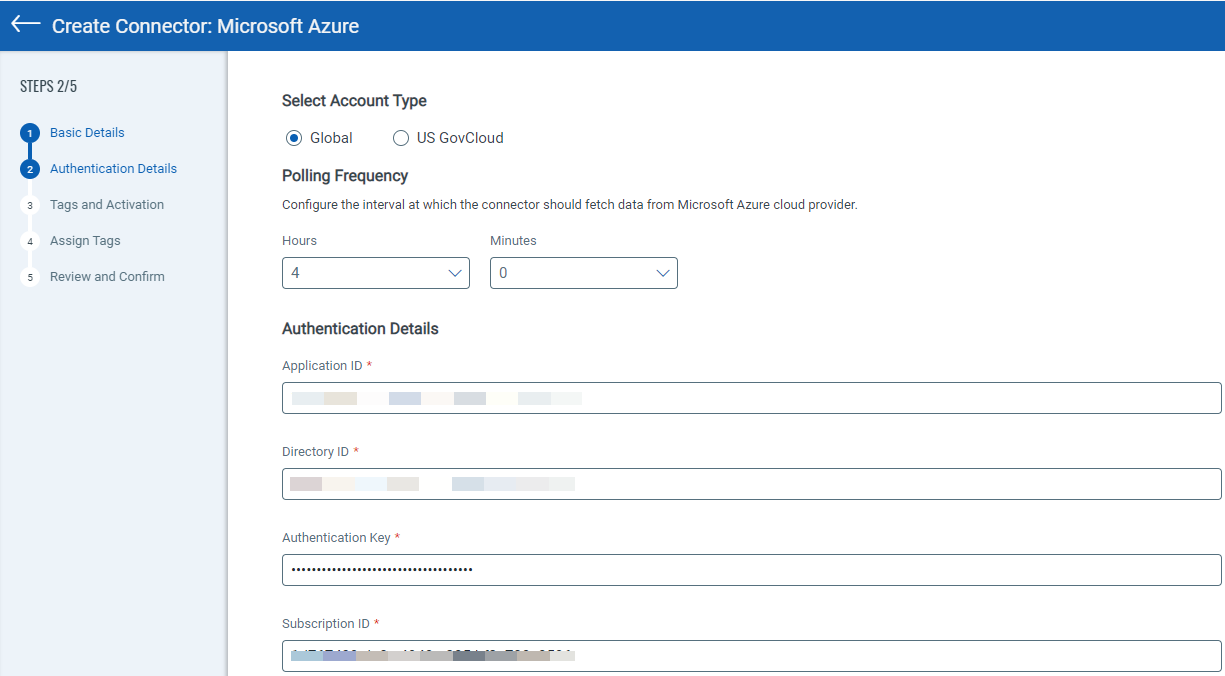
- Application ID and Directory ID
For details on creating an application and retrieving application ID and directory ID, see Create Application and get Application ID, Directory ID.
- Authentication Key
For details on generating an authentication key, see Generate Authentication Key.
- Subscription ID
For details on subscription ID, see Acquire Subscription ID.
- Test ConnectionTest Connection
Click Test Connection to verify if the connector can successfully authenticate using the provided authentication details in the Microsoft Azure cloud environment. If the test connection is successful, proceed with the connector creation process. If the test connection fails, you may need to check and update the authentication details.
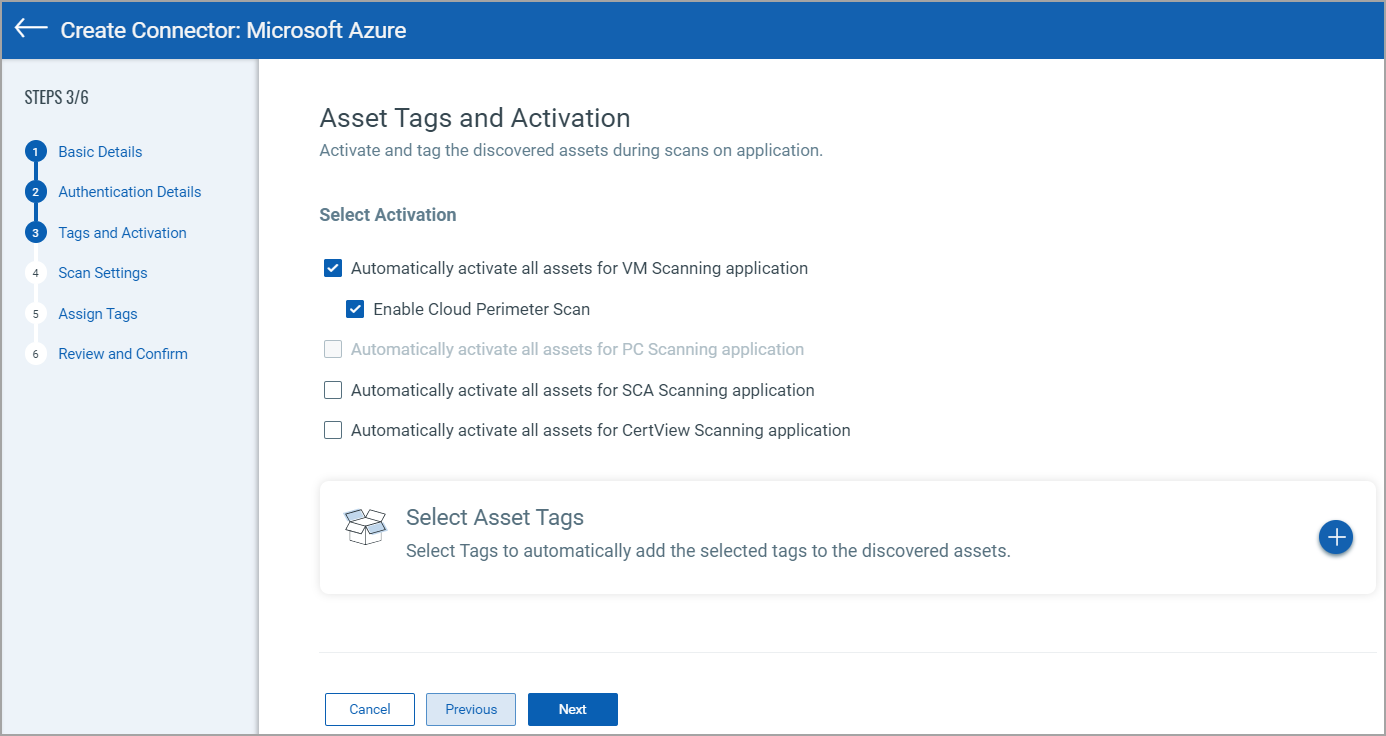
Step 3: Tags and ActivationTags and Activation
We can activate assets for scanning automatically so you don't have to take this extra step. Select the required check box to enable activation for the required app. We automatically activate the resources as they are discovered and even assign them tags if you want.
Enabling Cloud Perimeter Scan
When you select the Automatically activate all assets for VM Scanning application check box, you can see a check box to enable cloud perimeter scan. Show meShow me
Select the Enable Cloud Perimeter Scan iif you want to enable launching perimeter scans on Microsoft Azure resources.
Perimeter scan jobs are run automatically based on the settings defined in the Scan Settings step or in the Cloud Perimeter Scan - Global Scan Configuration.
Select Asset Tags
We recommend you create at least one generic asset tag (for example, azure) and have the connector automatically apply that tag to all imported assets. You can add more tags to your assets based upon discovered azure metadata.
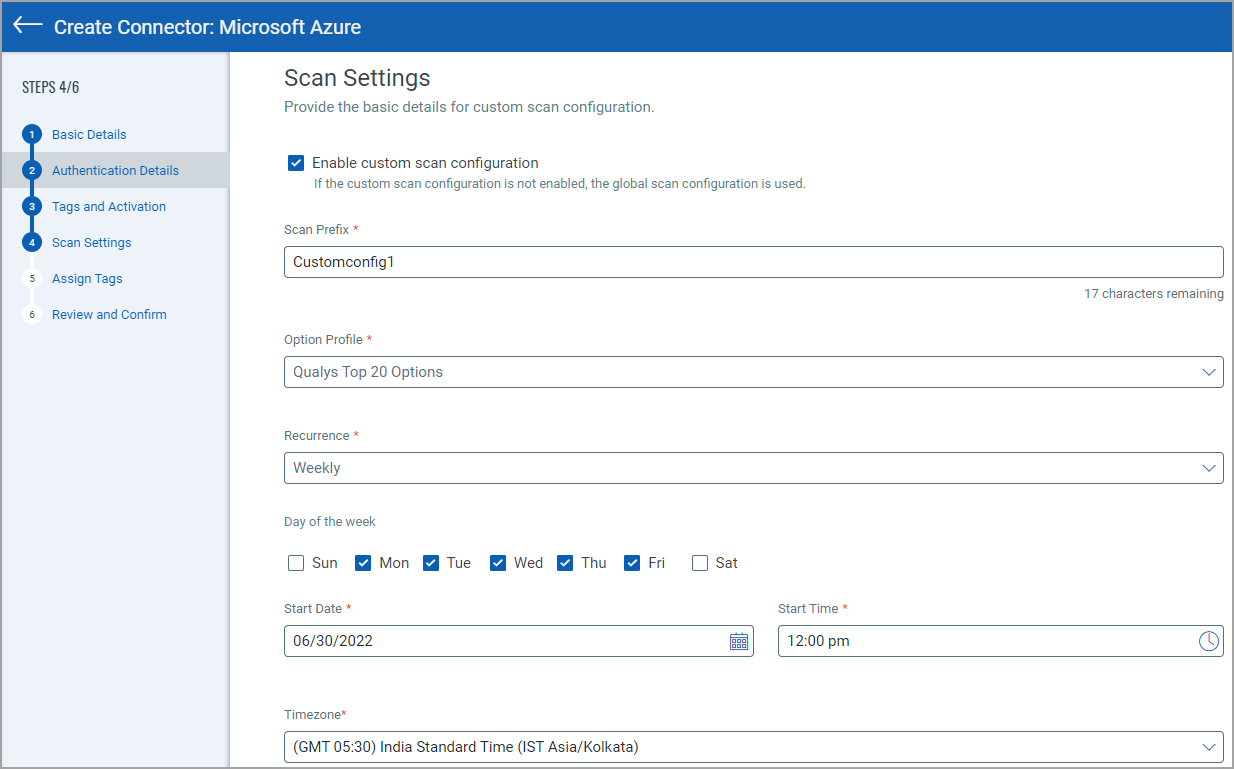
Step 4: Scan SettingsScan Settings
The step for defining scan settings is available only if you select the Enable Cloud Perimeter Scan check box in the Tags and Activation step.
In this step, you can define customized settings for cloud perimeter scans for the specific connector that you are creating.
If you do not define the custom scan configuration for the connector, the global scan configuration is used for launching the cloud perimeter scan. For details on global scan configuration, see Cloud Perimeter Scan - Global Scan Configuration.
Select the Enable custom scan configuration check box. You can define scan settings, such as scan prefix, option profile, recurrence, and timezone. Show meShow me
For details of the scan settings fields, see Cloud Perimeter Scan - Global Scan Configuration.
Step 5: Assign TagsAssign Tags
Assign tags to the connector that you are creating. You can also create a new tag. For details on creating new tags, see Configure Tags in Qualys CyberSecurity Asset Management documentation.
Step 6: ConfirmationConfirmation
Review the connector settings you configured and then click Create Connector.
That’s it! The connector establishes a connection with Microsoft Azure to start discovering resources from configured region.
The Microsoft Azure page displays the list of Azure connectors. The Status column indicates the status of the connector created, that is, Completed successfully, Completed with errors, Queued, Synchronizing, and Disabled.
Frequently Asked Questions
Delete Unsynchronized InstancesDelete Unsynchronized Instances
Azure connectors no longer import and sync assets with a Deleted state. In other words, we will not add a new asset to your asset inventory for an Azure connector that is 'Deleted'.
Note:
- We did sync 'Deleted' instances in previous releases. These remain in your assets list until you purge them.
- If the status of an existing asset changes to 'Deleted' then this is updated in the asset details.
Use this query to easily find Azure assets with a 'Deleted' instance state: azure.vm.state:"DELETED"