Create GCP Connector
Go to the Connectors tab, click Google Cloud Platform Connectors, and then click Create Connector and our wizard can walk you through the steps.
Step 1: Basic DetailsBasic Details
Enter a name and description (optional) for your connector.
Select applications that are applicable for the connector. GCP connector can only be created in CloudView application.
Select Enable Remediation to enable remediation on the connector. You need to configure additional permissions before you enable remediation for GCP connectors.
Ensure that you have write access to the Google Cloud Platform project for which you enable remediation.
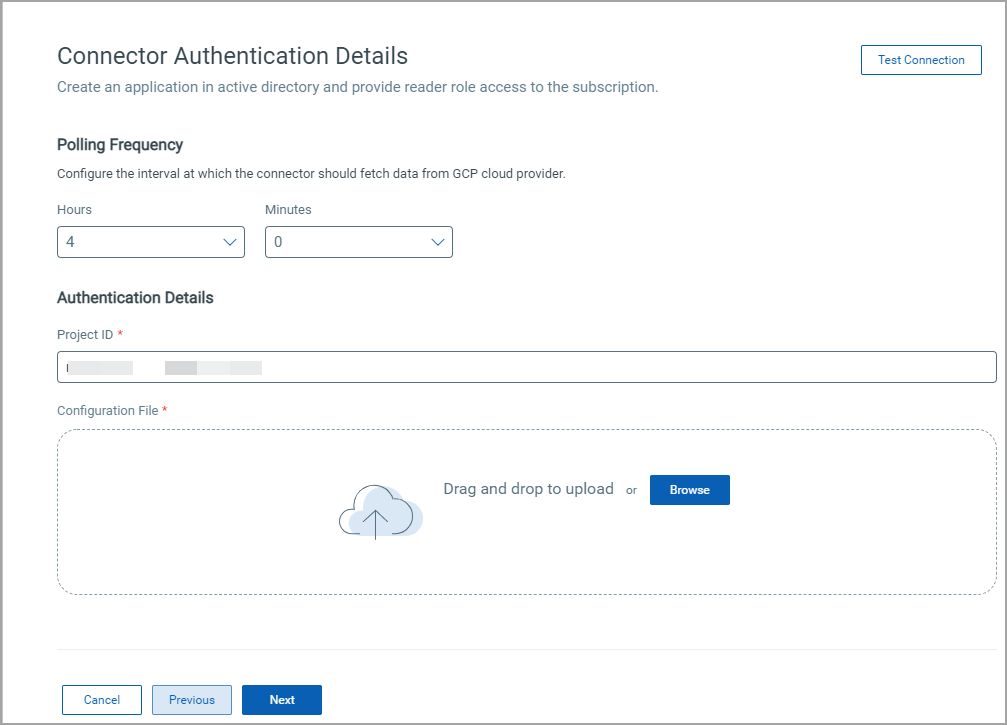
Step 2: Authentication Details
- Polling FrequencyPolling Frequency
Select a frequency at which the connector should poll the cloud provider and fetch data.
By default, the connector polling frequency is configured for every 4 hours. As a result, the connector connects with the cloud provider every 4 hours to fetch the data.
You can configure frequency from minimum one hour to maximum 24 hours. We recommend that you configure frequency of 4 hours or more for optimal use of your connector. Configuring a low polling frequency (lesser than 4 hours) can affect the performance of the connector and may result in GCP API throttling error.
- Authentication DetailsAuthentication Details
- Project ID: Enter your project ID.
You can provide a distinct project ID for a GCP connector. You can use same service account for multiple projects. As a result, you can create multiple GCP connectors with same service account but distinct project IDs.
For detailed steps on using the same service account for multiple projects, see Assigning Service Account for Multiple Projects.
- Configuration File: Create a service account and download the configuration file from the GCP console and then upload it to Qualys Cloud Platform.
Note: Ensure that you have uploaded the configuration file with correct project details for the connector to successfully fetch resource details.
- Test ConnectionTest Connection
Click Test Connection to verify if the connector can successfully authenticate using the provided service account credentials in GCP cloud environment. If the test connection is successful, proceed with the connector creation process. If the test connection fails, you may need to check and update the authentication details (configuration file) you uploaded for the connection to work.
Step 3: Assign TagsAssign Tags
Assign tags to the connector that you are creating. You can also create a new tag. For details on creating new tags, see Configure Tags in Qualys CyberSecurity Asset Management documentation.
Step 4: ConfirmationConfirmation
Review the connector settings you configured and then click Create Connector.
That’s it! The connector establishes a connection with GCP to start discovering resources from each region.
The Google Cloud Platform page displays the list of GCP connectors. The Status column indicates the status of the connector created, that is, Completed successfully, Completed with errors, Queued, Synchronizing, and Disabled.