Create a Role for Cross-account Access
Use this procedure to create an IAM (Identity and Access Management) role in Amazon Web Services (AWS) that enables Qualys to access your AWS resources across accounts. After creating the role, copy the Role ARN and External ID and paste it into your connector details.
Steps to Create IAM Role
- Log in to your AWS Console.
- Navigate to the IAM service.
- Go to Roles and click Create role.
- Under Select type of trusted entity, choose Another AWS account:
- Provide the Qualys AWS Account ID.
- Select Require external ID and create an External ID.
- Click Next: Permissions.

Depending on the type of connector you are creating, select the following policies:
AssetView ConnectorAssetView Connector
Create a policy that includes the following permissions:
"ec2:DescribeInstances"

"ec2:DescribeAddresses"

"ec2:DescribeImages"

"ec2:DescribeRegions"

"
ec2:DescribeVpcs"
Once you create the policy, find the policy and select the check box next to the policy.
Create a policy that includes the permissions:
"ssm:ListInventoryEntries"

"ssm:DescribeInstanceInformation"

"ec2:DescribeInstances"

"ec2:DescribeAddresses"

"ec2:DescribeImages"

"ec2:DescribeRegions"
Once you create the policy, find the policy and select the check box next to the policy
AssetView Organization Connector AssetView Organization Connector
Create a policy that includes the permissions:
"ec2:DescribeInstances"

"ec2:DescribeAddresses"

"ec2:DescribeImages"

"ec2:DescribeRegions"

"ec2:DescribeVpcs"

"organizations:list"
Once you create the policy, find the policy and select the check box next to the policy.
AssetView and CSPM connectorAssetView and CSPM connector
- Find the policy titled “SecurityAudit” and select the check boxes next to it.
- Find the policy that includes the permissions: "eks:ListFargateProfiles", "eks:DescribeFargateProfile" and select the check box next to the policy. (applicable only for Fargate Profiles associated with EKS cluster). Learn more.
- Create a custom policy that includes additional permissions (applicable only for EKS Fargate Profiles associated with EKS cluster, EFS resource, Step Function, Amazon QLDB, Lambda, MSK, API Gateway, AWS Backup, WAF, EBS, EMR, Glue, GuardDuty, CodeBuild and Directory Service). Find the custom policy you create and select the check box next to the policy. Learn more.
Find the custom policy you create and select the check box next to the policy. For detailed steps on creating custom policy and the required permissions, see Create Custom Policy.
CSPM connector with Remediation EnabledCSPM connector with Remediation Enabled
Create a policy that includes the permissions:
"ec2:RevokeSecurityGroupIngress",

"ec2:AuthorizeSecurityGroupIngress",

"ec2:DisassociateIamInstanceProfile",

"ec2:StopInstances",

"s3:PutBucketPublicAccessBlock",

"rds:ModifyDBInstance"
Once you create the policy, find the policy and select the check box next to the policy
- Click Next: Tags.
- Click Next: Review.
- Enter a role name (e.g. QualysCVRole) and click Create role.
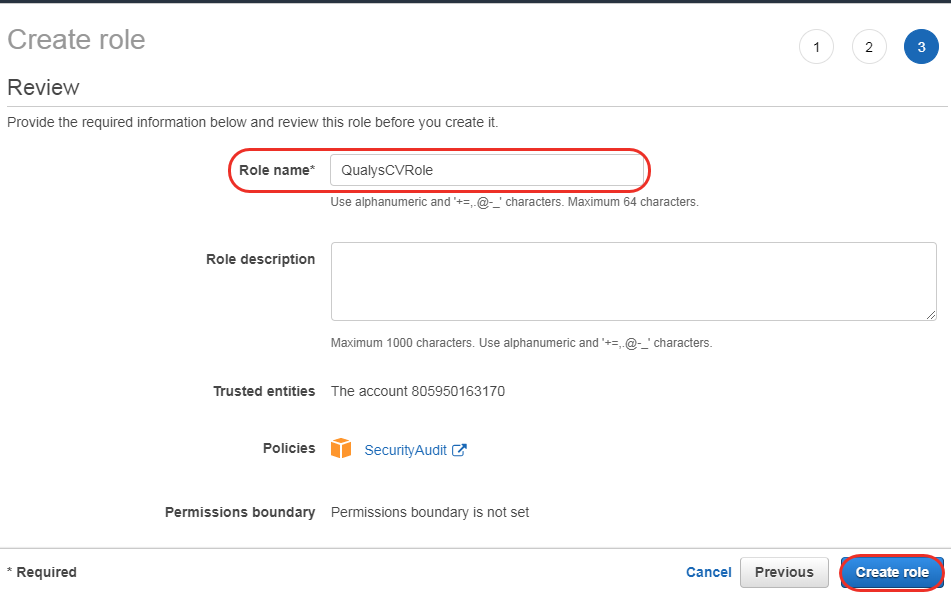
- Click the role you just created to view details. Copy the Role ARN value and paste it into the connector details
Want to create a role using CloudFormation?
Create Role for Organization Connectors Via Stacks
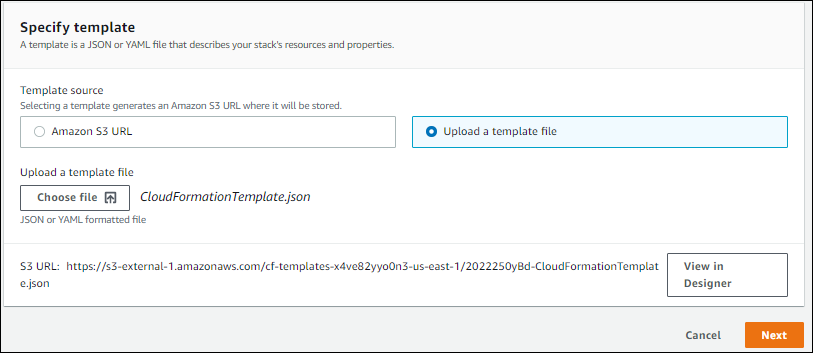
- Download the CloudFormation template from the Organization Details step of the Organization Connector creation.
You must provide an external ID in the Organization Details step to download a valid CloudFormation template.
- Log in to AWS and go to CloudFormation.
- Click Create stack > With new resources (standard).
- Upload the template file and click Next.
- Enter a Stack name and click Next.
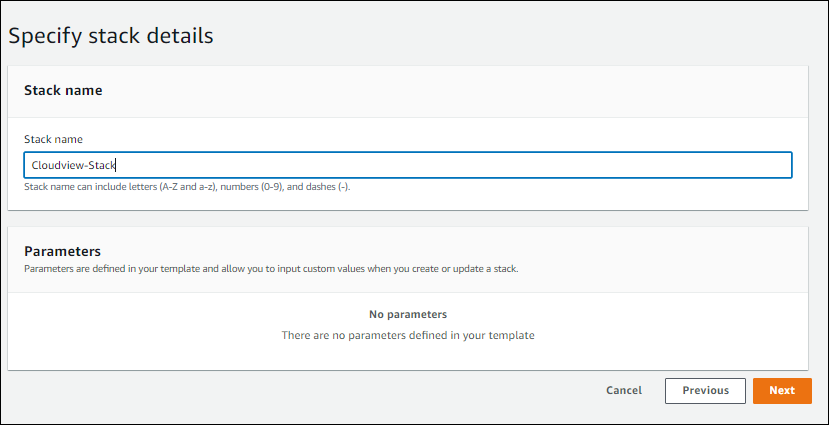
- Configure optional stack options.
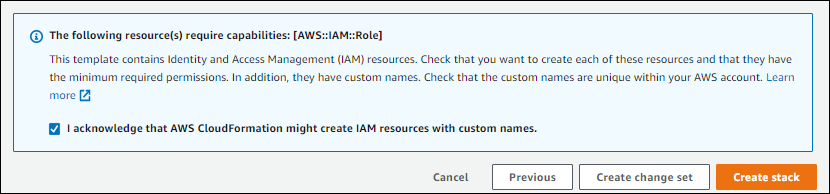
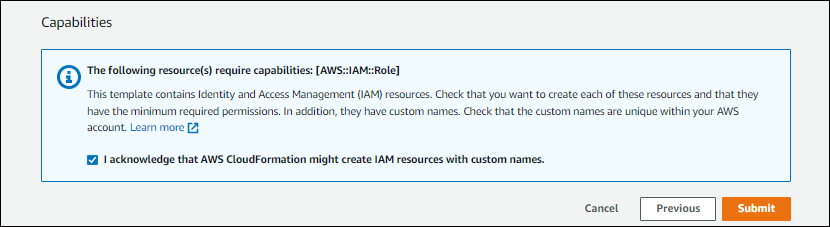
- Accept the IAM acknowledgment and click Create Stack.
- Wait for CREATE_COMPLETE status.
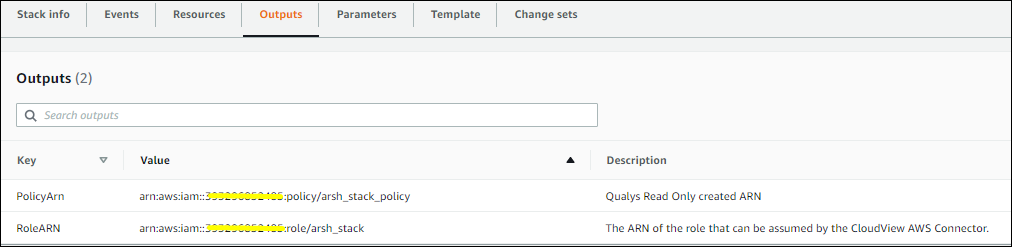
- Copy the Role ARN from the output and paste it into the connector details.
Create Role for Member Connectors via StackSet
Use AWS StackSets to deploy the role across multiple accounts.
- Download the CloudFormation template from the Member Connector Details step of the Account Connector creation.
You must provide an external ID in the Member Connector Details step to download a valid CloudFormation template.
- Log in to AWS and go to CloudFormation.
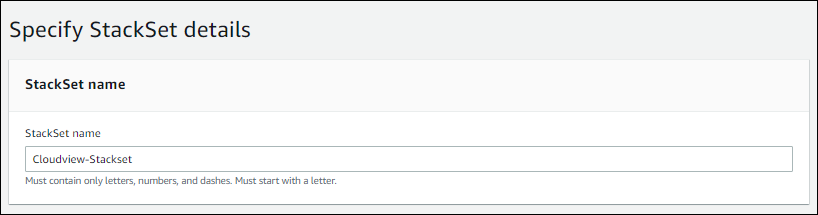
- Navigate to Services > CloudFormation > StackSets > Create StackSet.

- Upload the template and enter a StackSet Name.
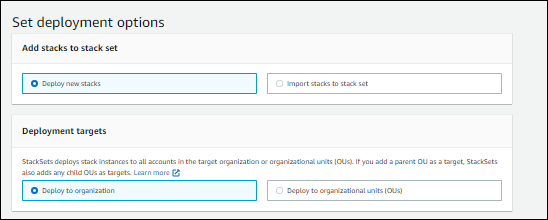
- Configure optional StackSet options.
- Select deployment targets (Organization or Organizational Units).
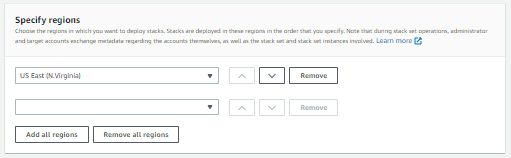
- Specify deployment regions.
- Accept the IAM acknowledgment and click Submit.
- After completion, copy the Role Name from the output and paste it into the connector details.
Templates use predefined RoleNames. To use a custom RoleName, edit the template before deployment.