Microsoft Active Directory (Devices)
The AD Connector bridges Active Directory and Qualys CSAM by automatically synchronizing computer asset data from your directory infrastructure into a centralized inventory system. Security teams gain visibility into their AD-managed assets without manual data entry, enabling faster asset discovery and reducing blind spots in infrastructure visibility. The connector supports flexible scheduling and filtering capabilities, allowing teams to control which assets are tracked based on organizational needs. By integrating AD data with CSAM's asset identification rules, security practitioners can deduplicate records and maintain accurate inventory for vulnerability management and compliance workflows.
Configure AD Collector Connector
To create an Active Directory Collector Connector, navigate to the Connector Applications.
1. Navigate to Integrations.
2. Click the three dots and click Manage on the Active Directory integration.
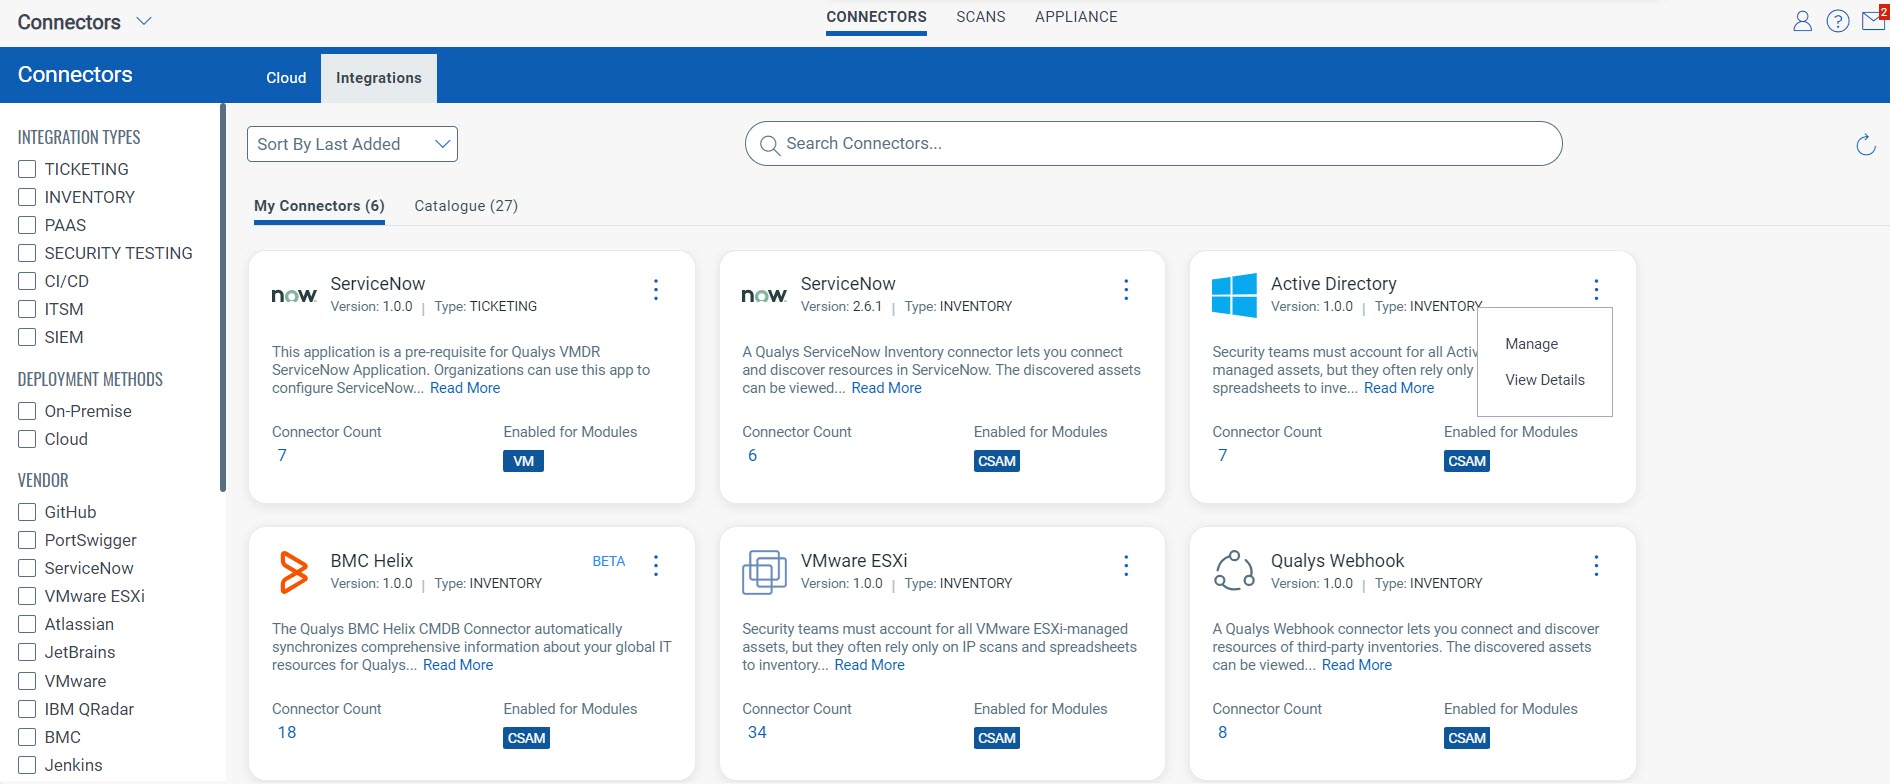
The manage connectors screen lists all the available connectors you created in the Connectors Application. You can view their status and perform actions on them.
3. Let’s begin creating our first connector, click Create Connector.

4. In the Basic Details screen, provide the required details:
Connector Name - Name of the connector.
Description – Description of the connector.
CAMS appliance – Select the appliance you have created on the Appliance tab, which queries the AD data. To learn more about creating an appliance, refer to the Appliance guide.
Note: The appliance must be in Active state to be visible in the CAMS appliance dropdown.
Modules to Enable - Select the Qualys service the connector will have access to. Select CSAM to pass the Connector information to the CSAM application.
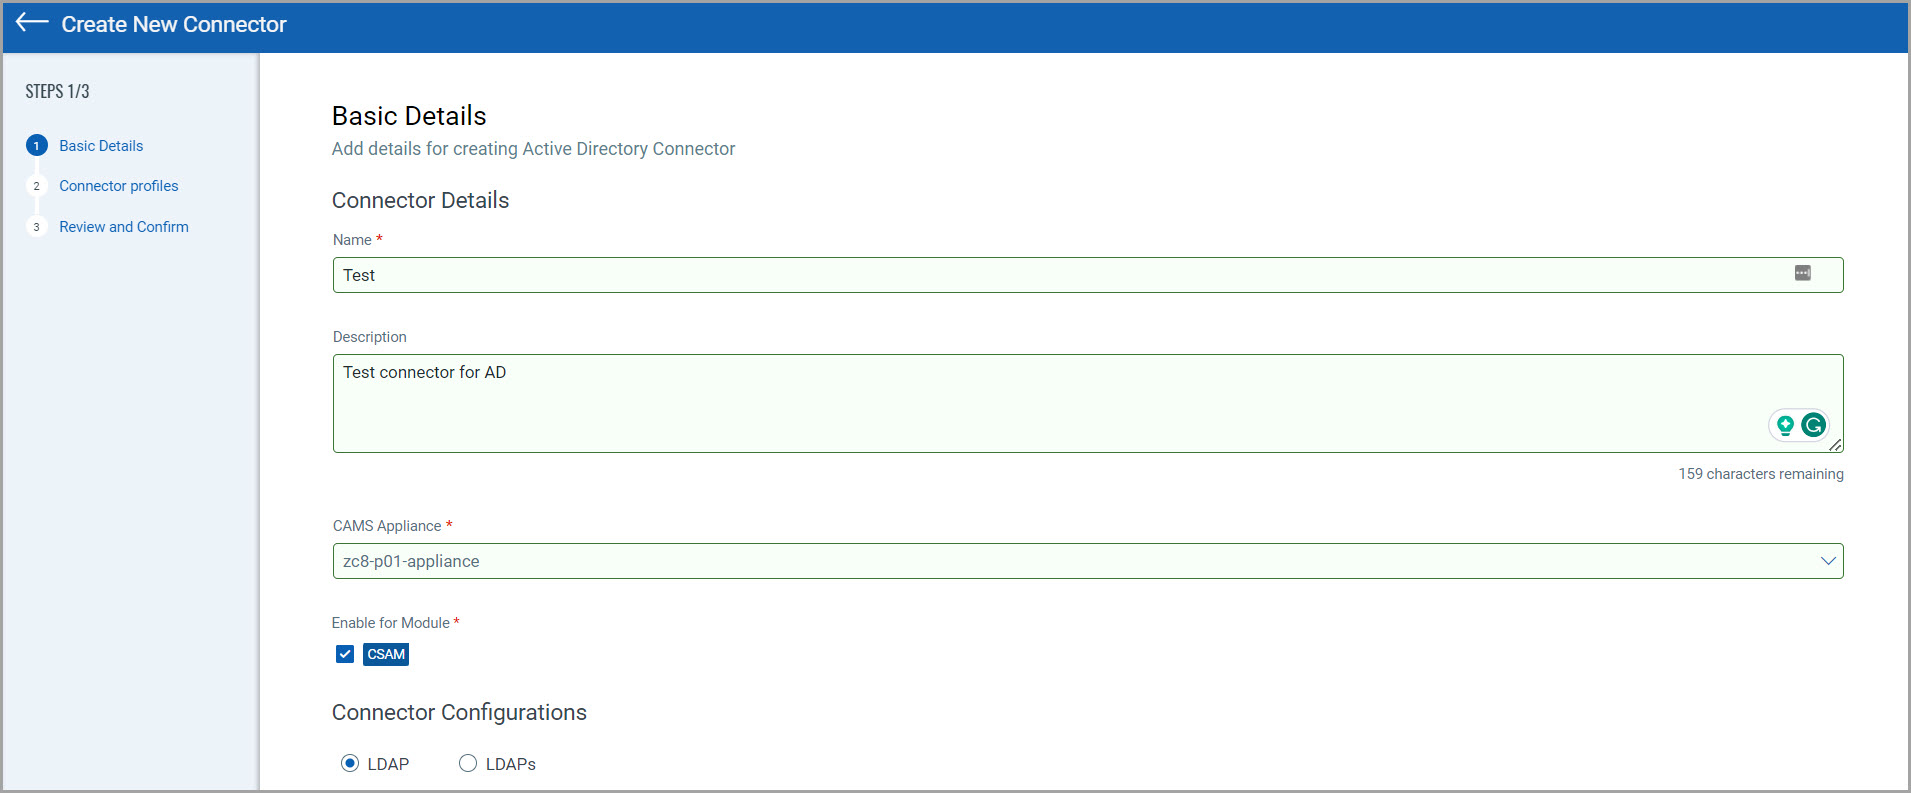
Connector Configurations – Provide the AD server configurations for the connector to establish a connection.
- Choose between LDAP, or LDAPs to query Active Directory data. When choosing LDAPs, you must upload a root certificate of the Active Directory to establish a secure connection. Learn more.
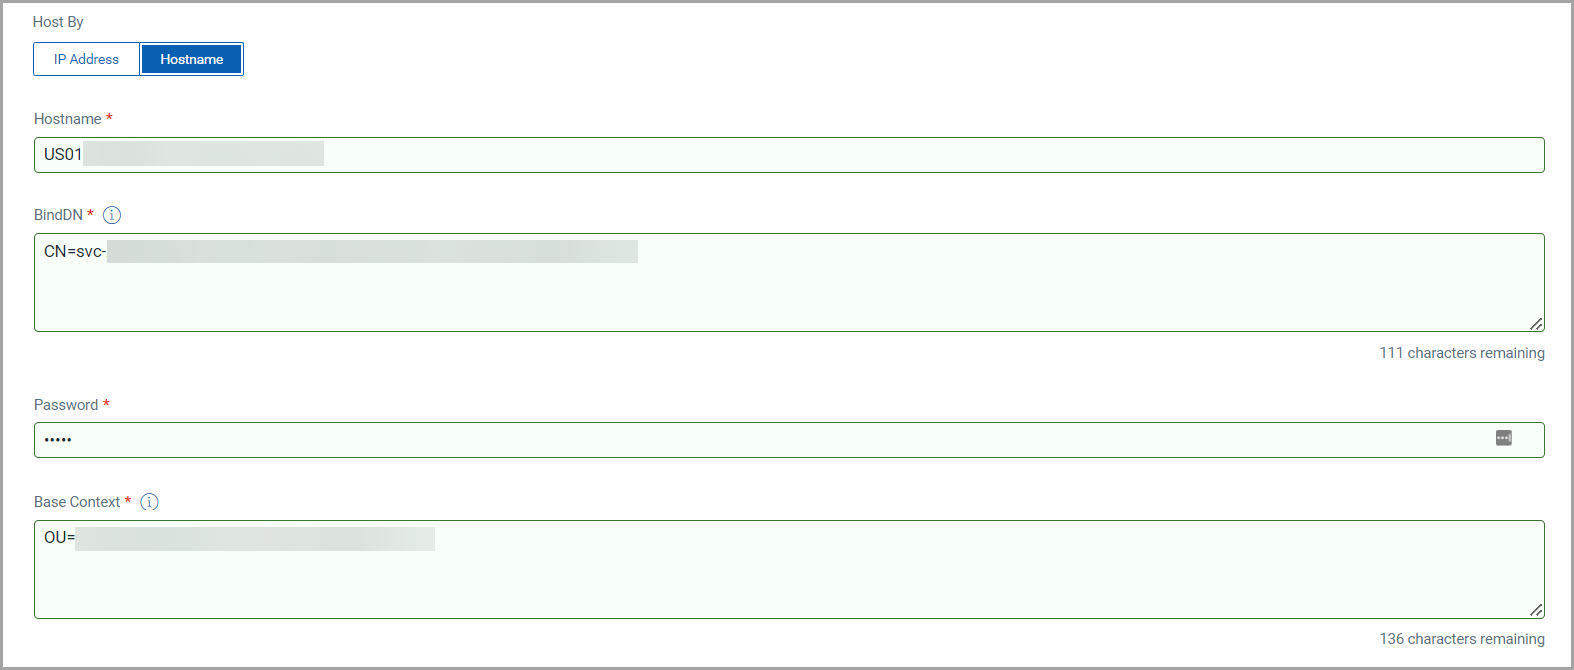
- Provide the IP or Hostname details of the AD server.
- Provide the BindDN for the LDAP connection from Active Directory.
The BindDN is comprised of the user and the location of the user in the LDAP directory tree. The BindDN is the credential to authenticate against an LDAP/LDAPs. When using a BindDN it usually comes with a password associated with it. For example, the user user1 is contained in the Users container, under the example.com domain. The corresponding BindDN will look like the following.
CN=user1,CN=Users,DC=example,DC=com - Provide the password.
The AD connector cannot properly decrypt passwords that contain region-specific or non-ASCII characters (e.g., currency symbols or smart punctuation). Use only standard ASCII characters (A–Z, a–z, 0–9, ! @ # $ % ^ & *) in Active Directory passwords to avoid authentication failures. - Lastly, provide the Base Context. A base context is a path within the Active Directory you select to query data from. AD Connector only fetches the asset information of the specified path and pass it to CSAM. For example, CN=Computers,DC=abc,DC=com" "ou=Users,dc=ISL,dc=local
5. Click Next.
Create Profiles
You are navigated to the Connector Profile screen, where you can create profiles to filter out fetched data. Specify a filter on what assets from the Active Directory should be retrieved. Profiles can be switched to active or inactive depending on the type of data you need.
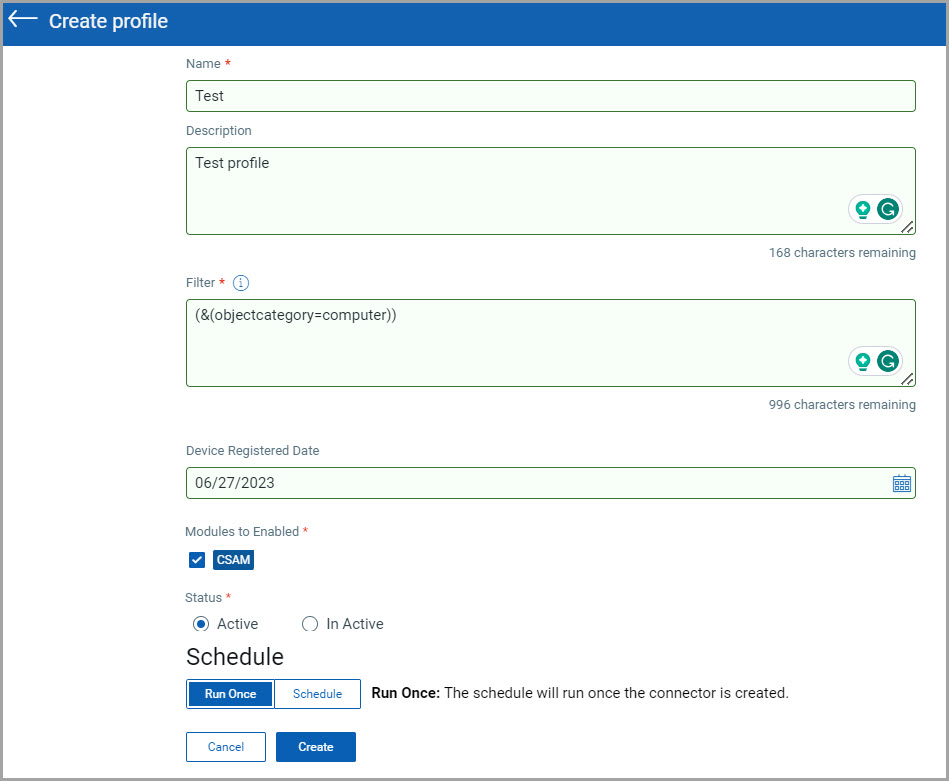
1. In the Connector Profile screen, click on the + icon to provide the required details:

Connector Name - Name of the profile.
Description – Description of the profile.
Filter– The LDAP Filter limits what part of the directory structure the Qualys Connector syncs computers from. For example, (&(objectcategory=computer)).
Device Registered Date – The starting point for fetching asset data. The connector only pulls AD computer assets registered on or after the specified date.
Modules to Enable - Select the Qualys service the connector will have access to. Select CSAM to pass the profile information to the CSAM application.
Status – Select the status (Active/Inactive) of the profile upon creation. You can toggle this later to start or stop fetching the data.
Schedule – Select if the profile should be updated Run Once or on a schedule.
- Run Once - After configuring the profile, the connector fetches asset data from Active Directory and published it to CSAM (within 10 mins).
- Scheduled – Provide a date and time for the connector to run automatically, fetch the assets data from Active Directory and publish to CSAM. The connector runs once as per the configured schedule.
- Scheduled with Recurring – Select the ‘Recurring’ checkbox to run the connectors as per the configured frequency. The connector will run multiple times (daily, weekly, or monthly) and stops only on the provided End date/time.
2. Click Next.
3. Review your configurations and click Submit.
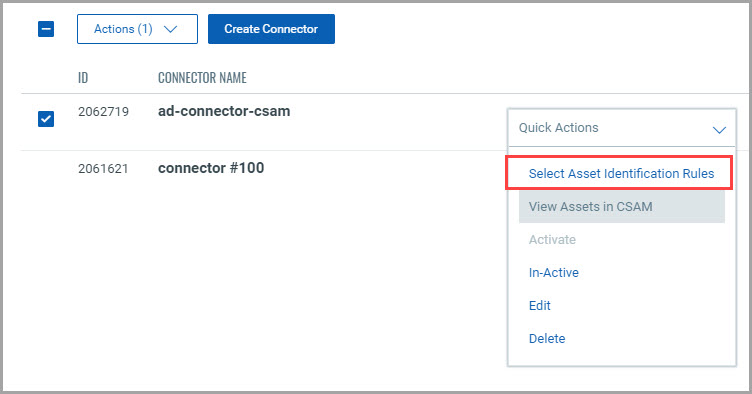
Asset Identification Rules
Once you have created a connector, you can specify the Asset Identification rules to determine which attributes must be fetched and in which order.
This step is only necessary to control the information fetched by the connector in your Asset Inventory. You can read more about Identification Rules here.
You can merge duplicate hostnames or assets, or select rules for webhook or ServiceNow inventory, etc. Select the rules by toggling the ‘Required’ button.
You can create rules in the CSAM application by following the steps documented in the CSAM online help. The rules shown below are created and enabled by default when the Third-party asset identification feature is enabled for your subscription.
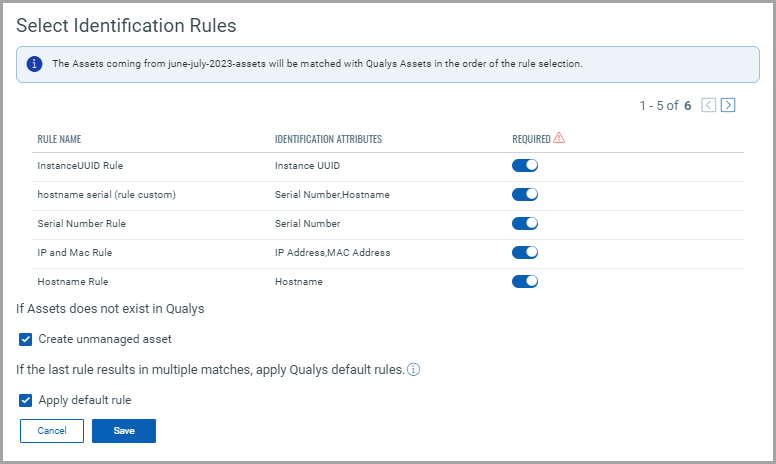
If you do not have any assets, you can create an unmanaged asset by selecting the ‘Create unmanaged asset’ checkbox
You can select the ‘Apply default rule’ when faced with multiple matches under the final rule selected. The asset selected will be based on its most recent update and the trustworthiness of its source.
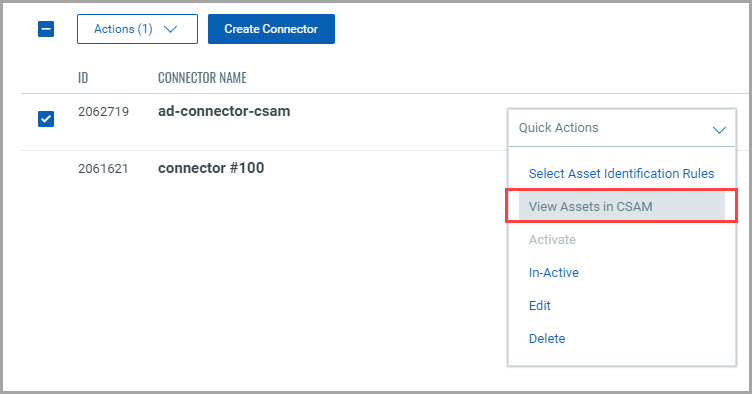
View Assets in CSAM
You connector is created successfully and has Asset Identification rules provided. Now, it should start fetching from Active Directory. To view the Asset information, you must navigate to the CSAM application
You can select any of your connectors, click Actions and click View Assets in CSAM.
This will take you to the CSAM application, where you can view your assets fetched as per the profile and rules.
View Connector Logs
View your past connector runs and their status by navigating to the logs.
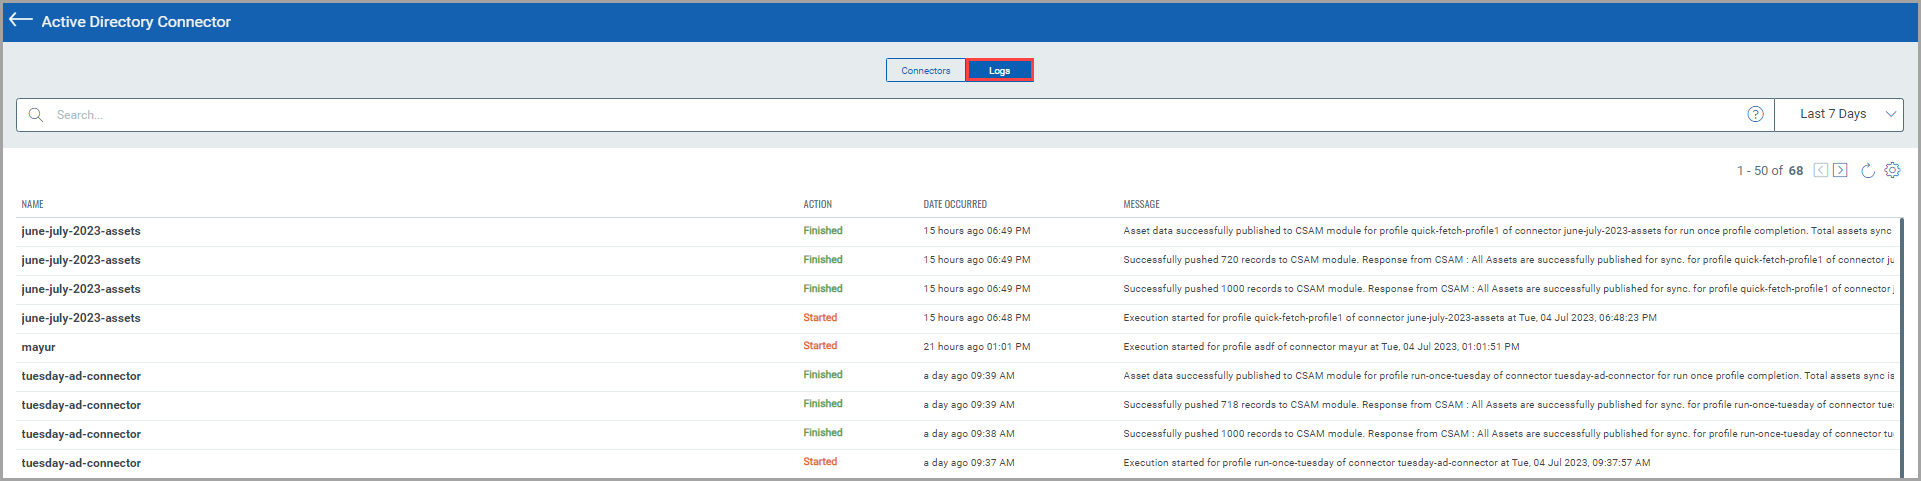
You can use search tokens to filter out logs of specific connectors or logs of connectors of desired status.
To learn more about the search tokens, refer to the connector online help.