AWS S3 (CSV Files)
The AWS S3 Connector enables security teams to automatically ingest vulnerability findings from various third-party assessment tools by retrieving CSV files stored in Amazon S3 buckets. Rather than manually collecting and consolidating vulnerability data from multiple vendors like Tenable, CrowdStrike, and others, teams can leverage event-driven automation through CloudFormation to trigger connector runs whenever new files are uploaded.
This integration streamlines the process of feeding external vulnerability intelligence into Qualys ETM while maintaining consistent data transformation and mapping across different vendor formats. The connector reduces manual overhead and ensures that finding discovery follows the order set by the selected Identification Rules, allowing security teams to focus on remediation rather than data pipeline management.s.
Prerequisites
Before creating the connector, you must create a Role in your AWS environment with the necessary authentication policies. The ARN and External ID used for this policy must be stored for later use.
1. Configure Permissions
Let's create a policy with the ARN of the required S3 Bucket resource.
- Navigate to the Add permissions page:
- Click Create policy
- In the JSON editor, paste the following policy:
{
"Version": "2012-10-17",
"Statement": [
{
"Sid": "VisualEditor0",
"Effect": "Allow",
"Action": [
"s3:GetObject"
],
"Resource": "arn:aws:s3:::minimal-policy-bucket/*"
}
]
}
- Replace
minimal-policy-bucketwith your actual S3 bucket name. - Click Review policy
- Provide a name and description for the policy.
-
Click Create policy
2. Create an IAM Role
Let's proceed by creating a new IAM Role.
- Log in to the AWS Management Console
- Navigate to IAM (Identity and Access Management)
- In the left navigation pane, select Roles
- Click Create role
- Under Select trusted entity:
- Choose AWS account
- Select Another AWS account
- Enter the Qualys AWS account ID
- Check the Require external ID checkbox
- Provide the External ID provided by Qualys.
3. Attach the Policy
- Select the policy you just created and click Next.
- Enter a role name (e.g., "QualysETMConnectorRole")
- Click Create role
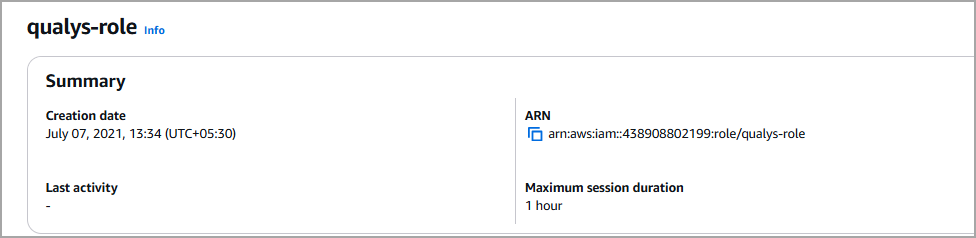
4. Store the Role ARN
- Navigate to the newly created role
- On the role summary page, locate the Role ARN
- Copy the Role ARN value (it should look like:
arn:aws:iam::123456789012:role/RoleName)
Create a New CSV Connector
- Provide the Connector's Name and Description.
- Select the type of Qualys Data Model you want to import or export — currently, we support Vulnerability.
- Select the Asset Type - currently we support Host Asset.
CSV connectors now support Vulnerability/Application (WAS Findings) and Assets-only data. You can now select their target data model while configuring connections and upload Generic CSV format to the connector.
-
Select the Supported Format. The field shows the list of supported vendors from where the connector can fetch the data
Currently, CSV connector supports the following vendor formats.-
Tenable
-
CrowdStrike SpotLight
-
Wiz
-
Onapsis
-
Generic CSV
-
- (Optional) The Retain the status of missing findings checkbox retains the status of a finding discovered in prior connector runs. When selected, findings absent in new runs keep their previous status. When deselected, absent findings are automatically marked as "Fixed".
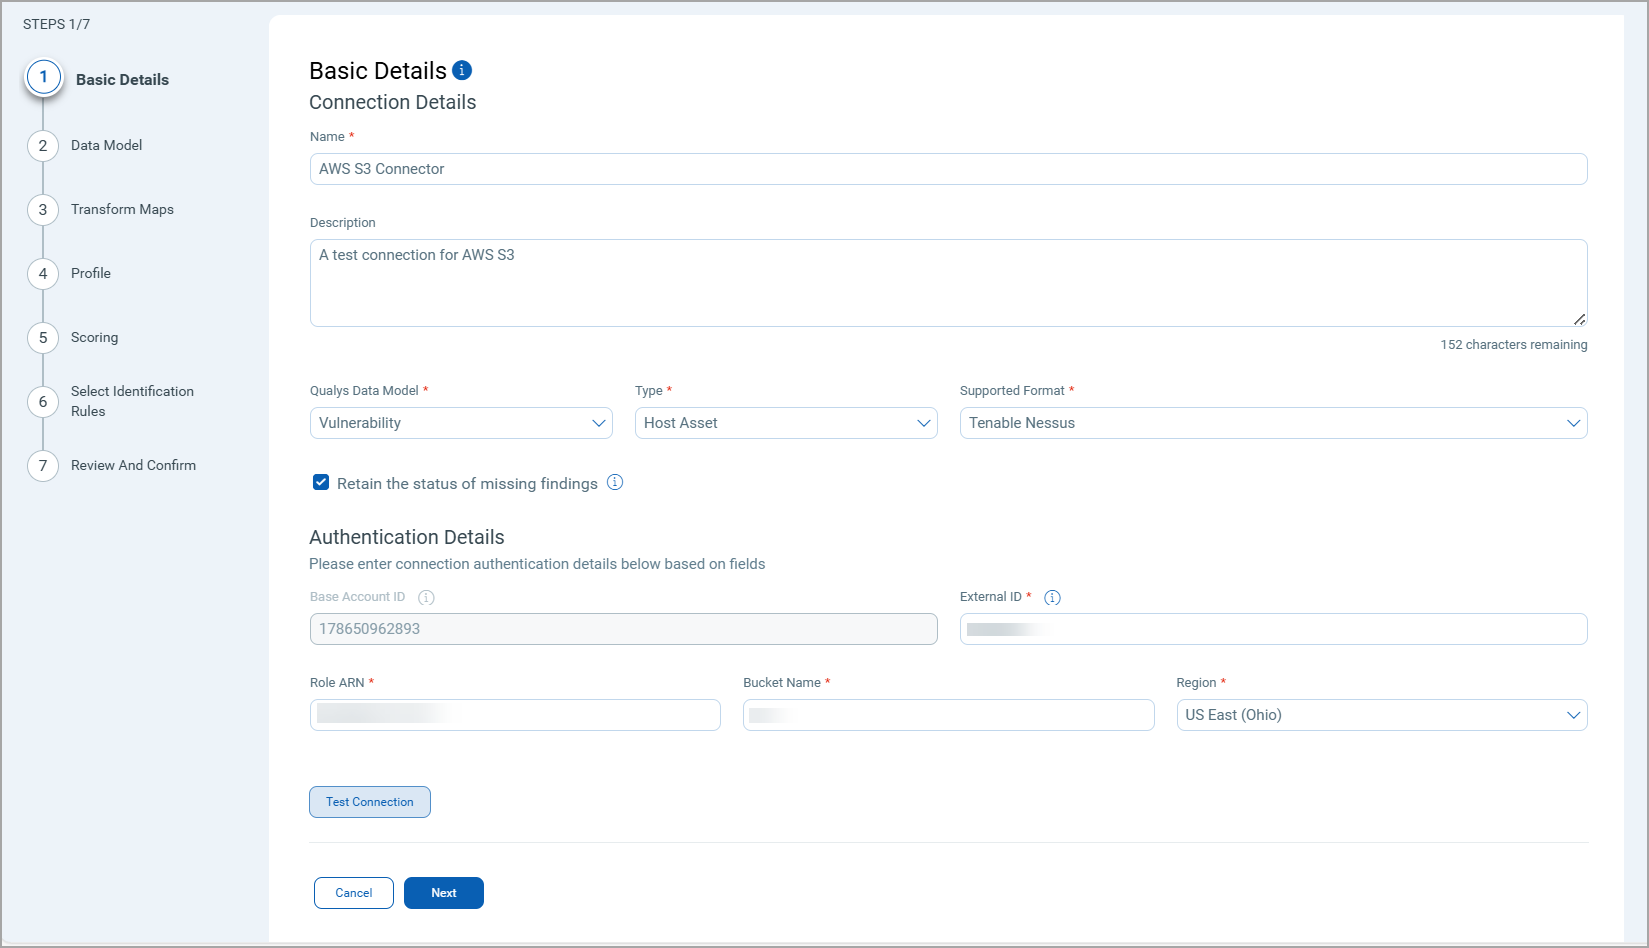
- Authentication Details
Provide the following values from your AWS account
-
External ID - Fetch this from your AWS Trust Relationships.
-
Role ARN - Provide the AWS Role ARN from the Trust Relationships.
-
Bucket Name - Provide S3 Bucket name.
-
Region - Select the region from where the AWS S3 connection runs.
-
To learn about how to create the Role ARN, read Create Role ARN for AWS S3 Connector.
The following screenshot displays the Basic Details fields.
Define the structure of the data you want to import. Specify the fields and their data types to ensure the AWS S3 CSV data aligns correctly with your system's schema.
If you have selected any format other than Generic CSV, the Data Model screen has an out-of-the-box data model mapping available for your use.
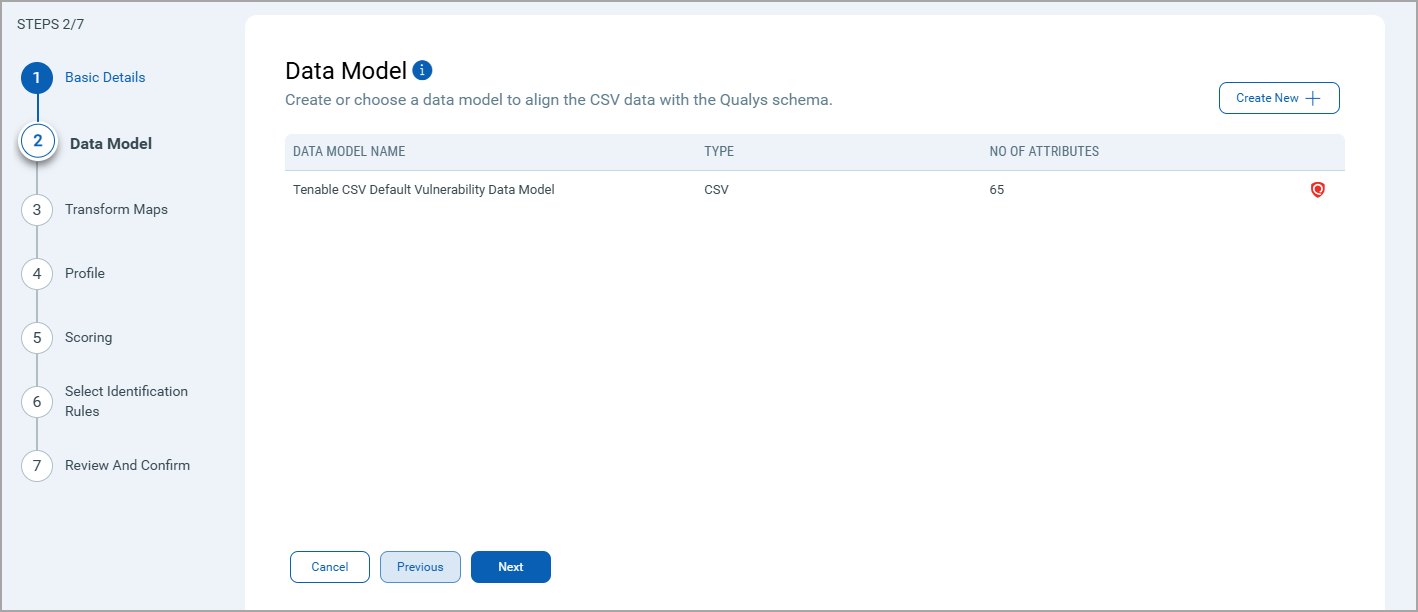
Perform the following steps to create a new data model:
- Enter a unique name for your data model. This helps identify and manage different data models.
- Upload a CSV file containing your data. This is a quick way to import data without manual entry.
However, if you prefer to input data manually, use the following fields:-
Header: Specify if the CSV file contains a header row. This row typically includes column names.
- Column Delimiter: Define the character that separates columns in your CSV file, such as comma (,) semicolon (;) or tab.
- Qualifier: Indicate the character used to enclose each field in the CSV file, commonly a double quote (").
- Row Delimiter: Specify the character that separates rows in your CSV file, usually a newline (\n).
- Escape Character: Identify the character used to escape special characters in the CSV file, typically a backslash (\).
- Header Row: Enter the row number where your data begins. This is especially useful if your file contains metadata or comments in the top row.
Each input field allows precise control over how your data is structured and imported, ensuring accuracy and consistency in your data model.
The following screenshot displays the Data Model fields for the Upload option:

-
Map the fields from the CSV file to the corresponding fields in your target system. Transform Maps ensure the data is transformed correctly during the import or export process.![]()
If you have selected any format other than Generic CSV, the Transform Map screen has an out-of-the-box data transform mapping available for your use.
Perform the following steps to configure a Transform Model:
- Transform Map Name: Enter a unique name for the Transform Map. This name helps identify the specific transformation configuration within this connector.
- Source Data Model: Select the data model that serves as the input for the transformation. This is the model from which data will be extracted.
- Target Data Model: Choose the data model that receives the transformed data. This model defines how the data will be structured after the transformation.
Refer the following Transform Map screenshot:
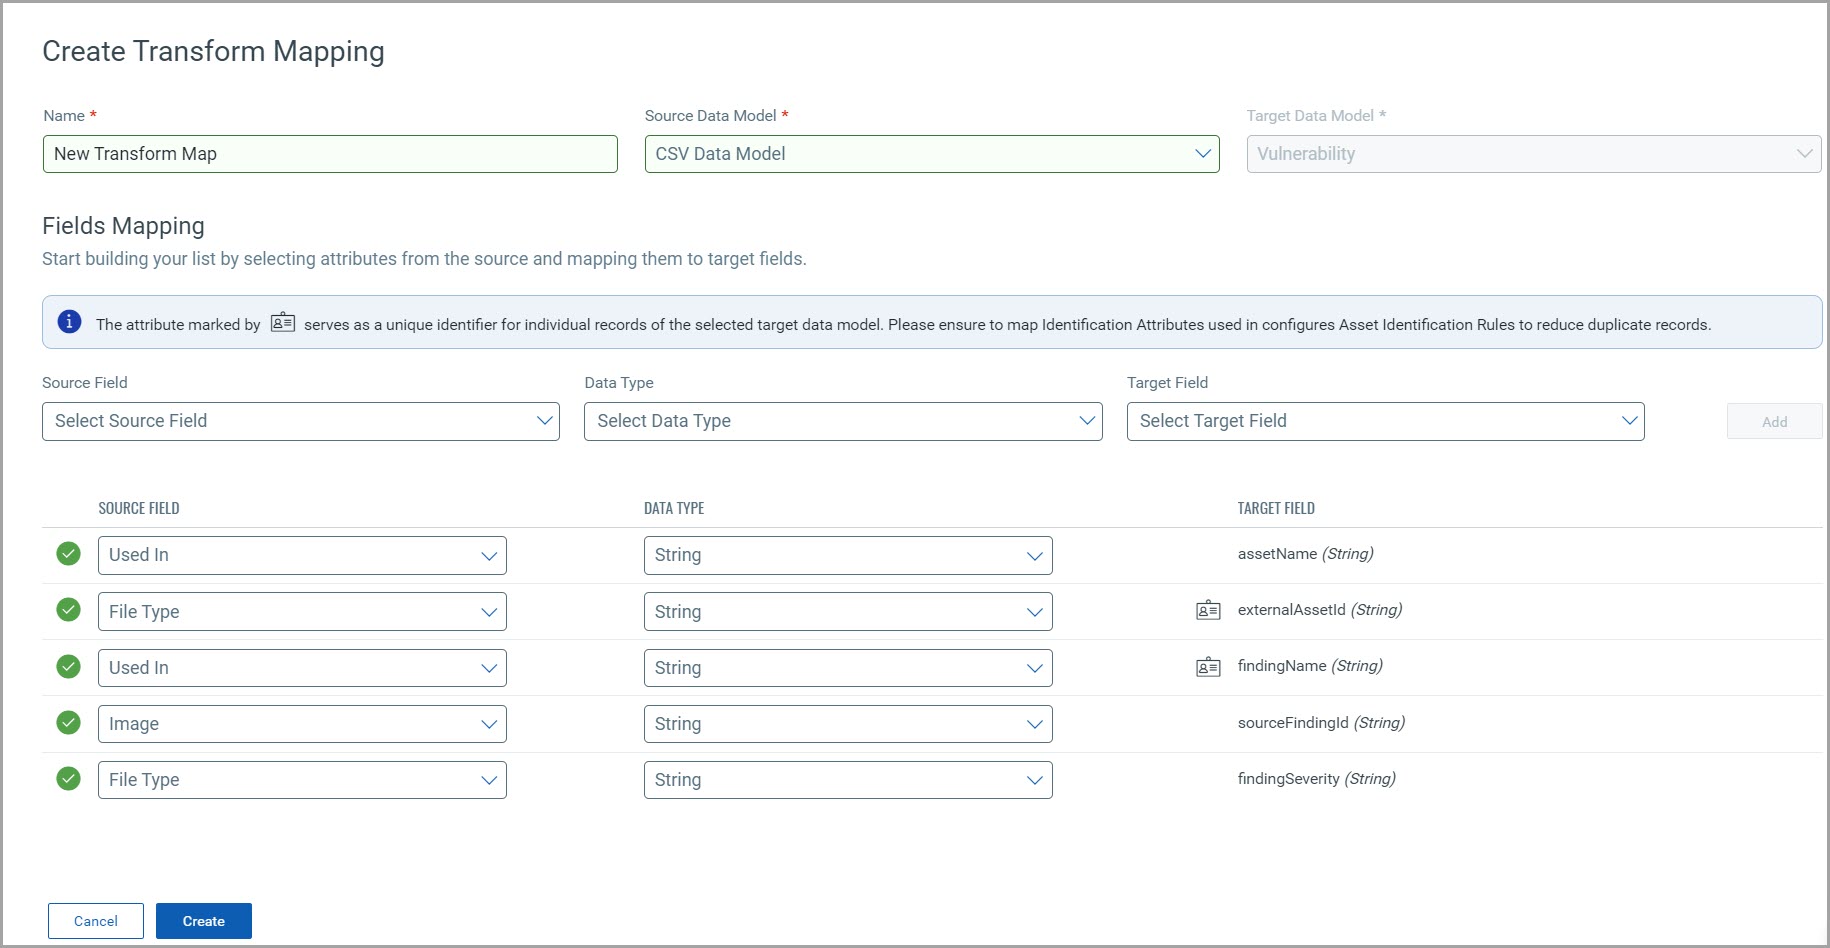
Fields Mapping
The Fields Mapping section maps fields from the Source Data Model to the Target Data Model.
- Source Field: Specify the field in the Source Data Model containing the transformed data.
- Data Type: Indicate the data type of the Source Field (e.g., string, integer, date).
- Target Field: Designate the corresponding field where the transformed data will be placed in the Target Data Model.
Click Add to create and display the mapping for the Source Field, Data Type, and Target Field below the section. This visual helps ensure that all necessary fields are mapped correctly and allows easy verification and adjustments.
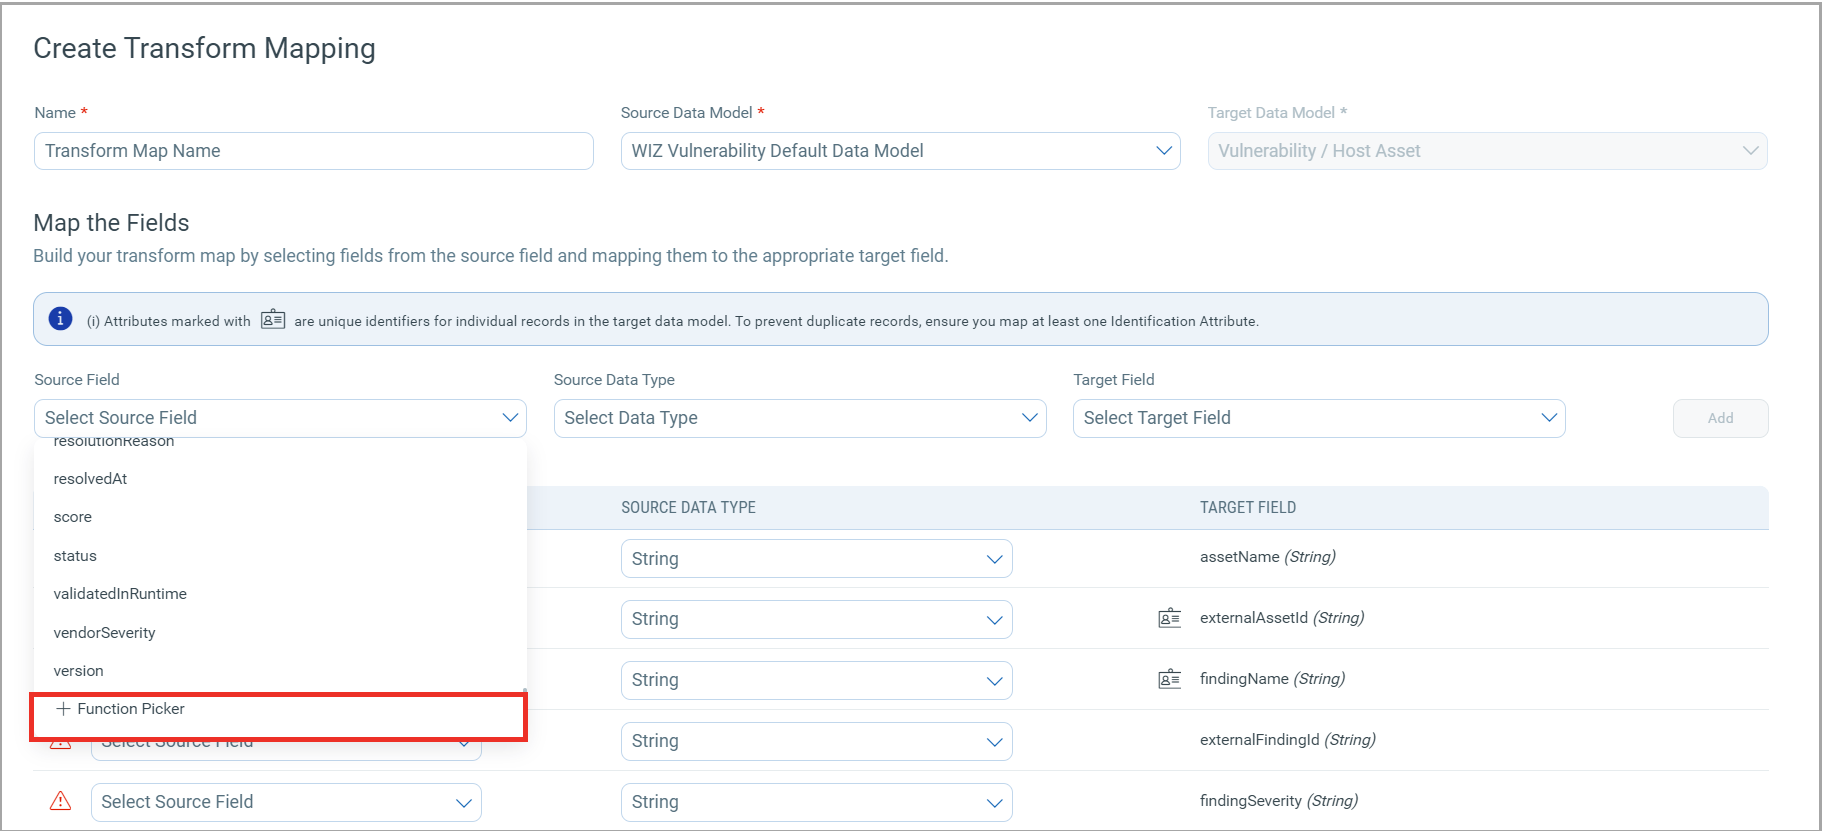
Function Picker
When creating a transform map, you can either directly map attributes or use functions to modify and format the data as needed. From the list of supported source fields in the transform map, you can see an option called the Function Picker. This tool lets you modify the data during the transformation step.
The Function Picker is a collection of powerful operations for your data model transformation. Select and apply these data transformation operations while mapping data from your vulnerability assessment vendors to the Qualys ETM. For example, you can combine multiple text strings using Concat, convert date formats using formatDateTime, or manipulate text case using toUpperCase/toLowerCase functions.
Click the source field dropdown to view the list of source fields, scroll down to see the Function Picker option.
To learn more about all the various Function Picker operations, refer to Transform Map Functions.
Create a profile for your connector. A profile decides the connector status, execution schedule and transform map to choose. The connector follows the configurations of this profile for all future executions.
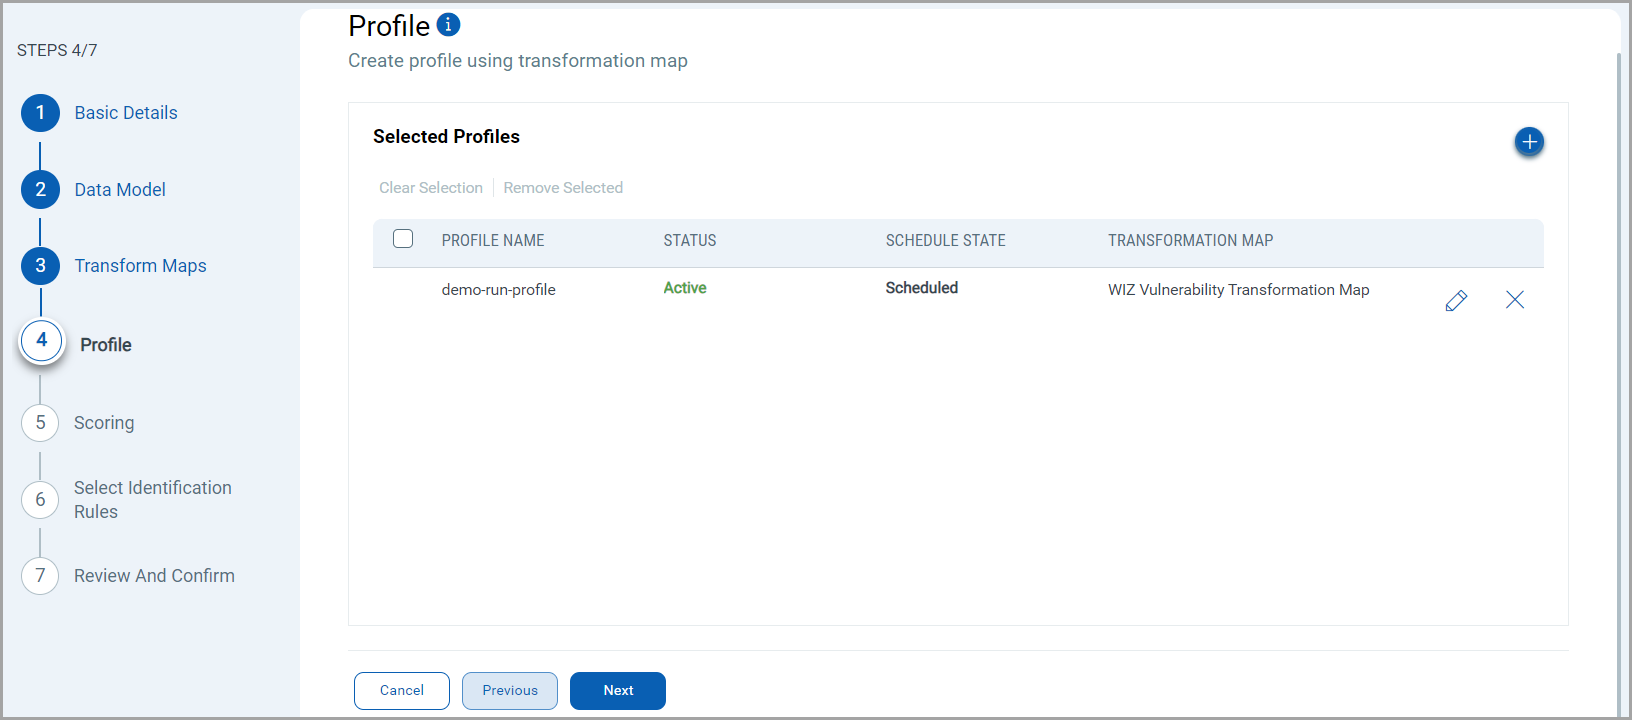
Click the "+" to create a new profile.
In the Add Profile screen, provide the necessary inputs for your new profile.
Provide a Name and Description.
Select the required Transform Map for the data mapping.
The Status field determines whether the connector should be in Active or Inactive state after creation.
The Scoring screen lets you map non-CVE vulnerability scores from your vendors to Qualys Detection Score (QDS) system.
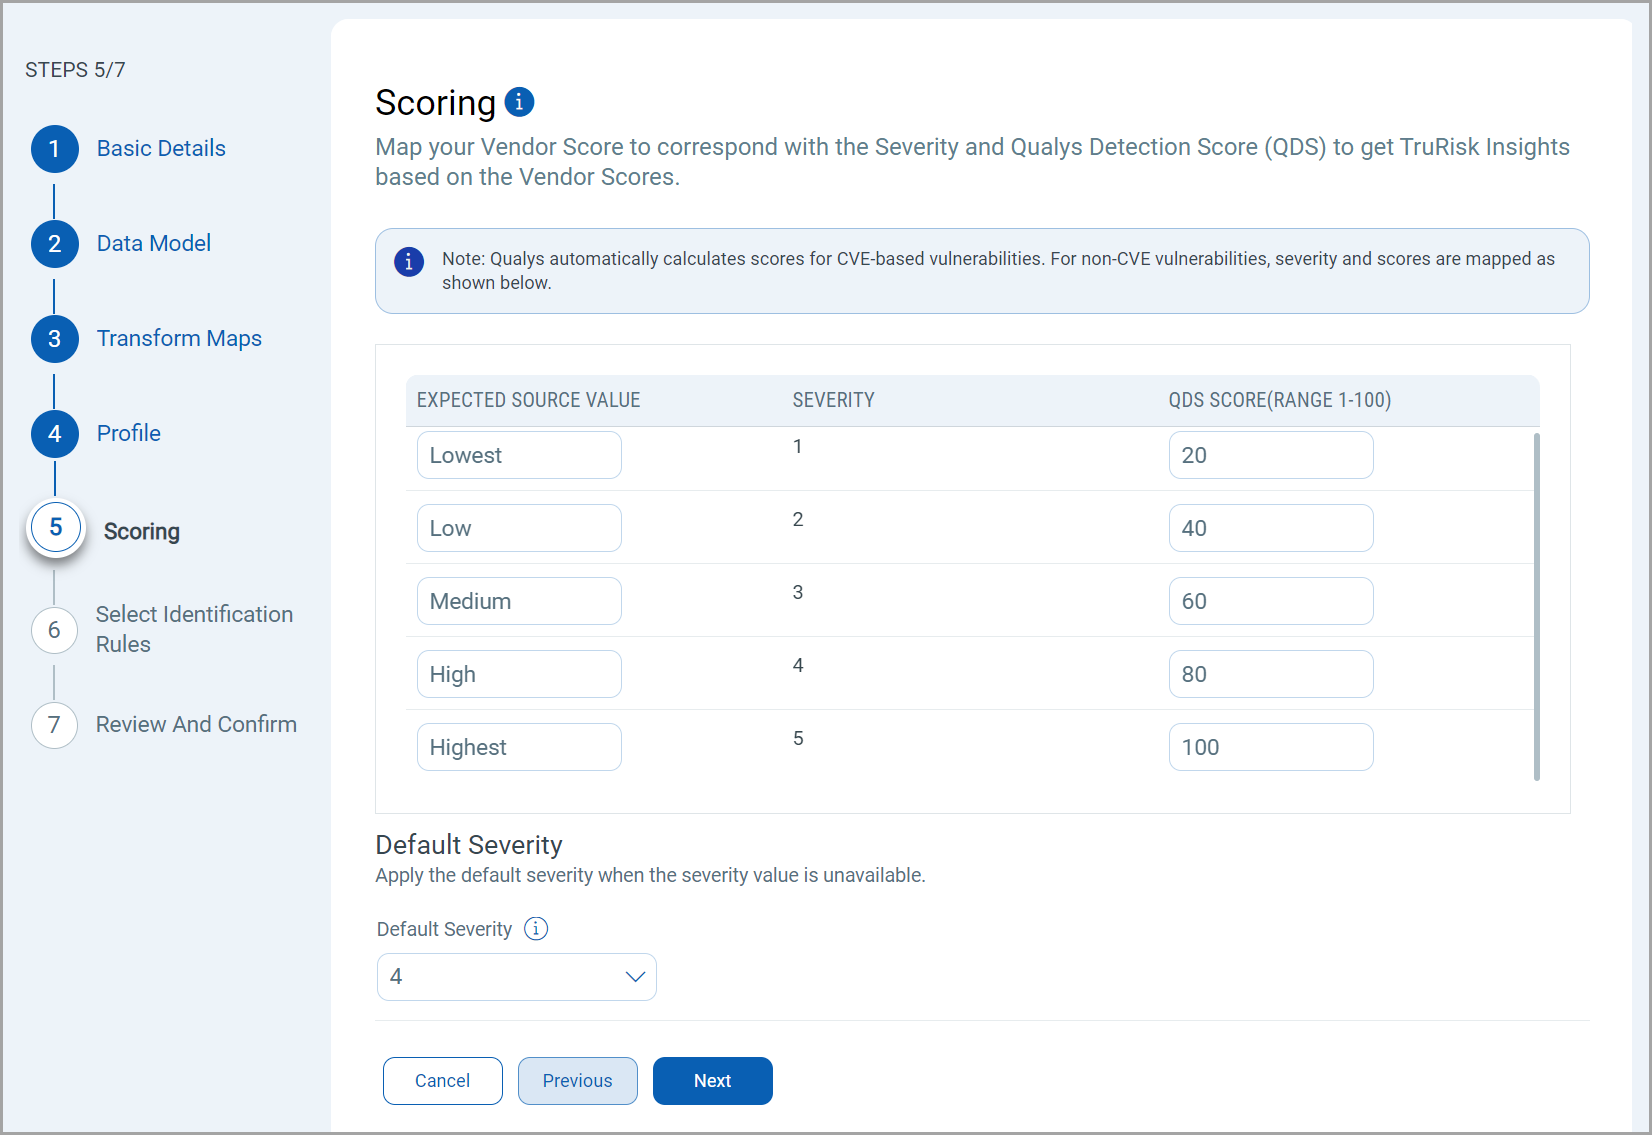
You have two columns with 5 input fields in each of them. These fields correspond to a specific severity starting from the least severe (1), to the most severe (5).
Fill out all 5 rows to create a comprehensive score mapping. This allows for translation between various vendor scoring systems and Qualys' Detection Score.
The specifics of the mapping is explained below.
Expected Source Values - Enter the vendor's original score or rating for non-CVE vulnerabilities.
This can be alphanumeric values. (e.g., "High", "Critical", "A", "3", etc.).
Severity - This column is pre-populated with severity levels from 1-5. These represent the severity levels in Qualys. The Source Value must be mapped such that it utilizes these 5 severity levels.
QDS - Enter the corresponding Qualys Detection Score. Use values from 0-100, where higher numbers indicate higher severity.
Default Severity
Below the scoring map, find the 'Default Severity' dropdown menu.
Select a default severity level from 1-5, this is applied when a vendor's score for a non-CVE vulnerability doesn't match any 'Expected Source Value' in your mapping table.
Select Identification RulesSelect Identification Rules
The Identification Rules are a set of out-of-the-box precedence rules set by Qualys CSAM. The connector discovers findings based on the order set by the selected Identification Rules.
You can proceed to the next step without making any changes to this screen.
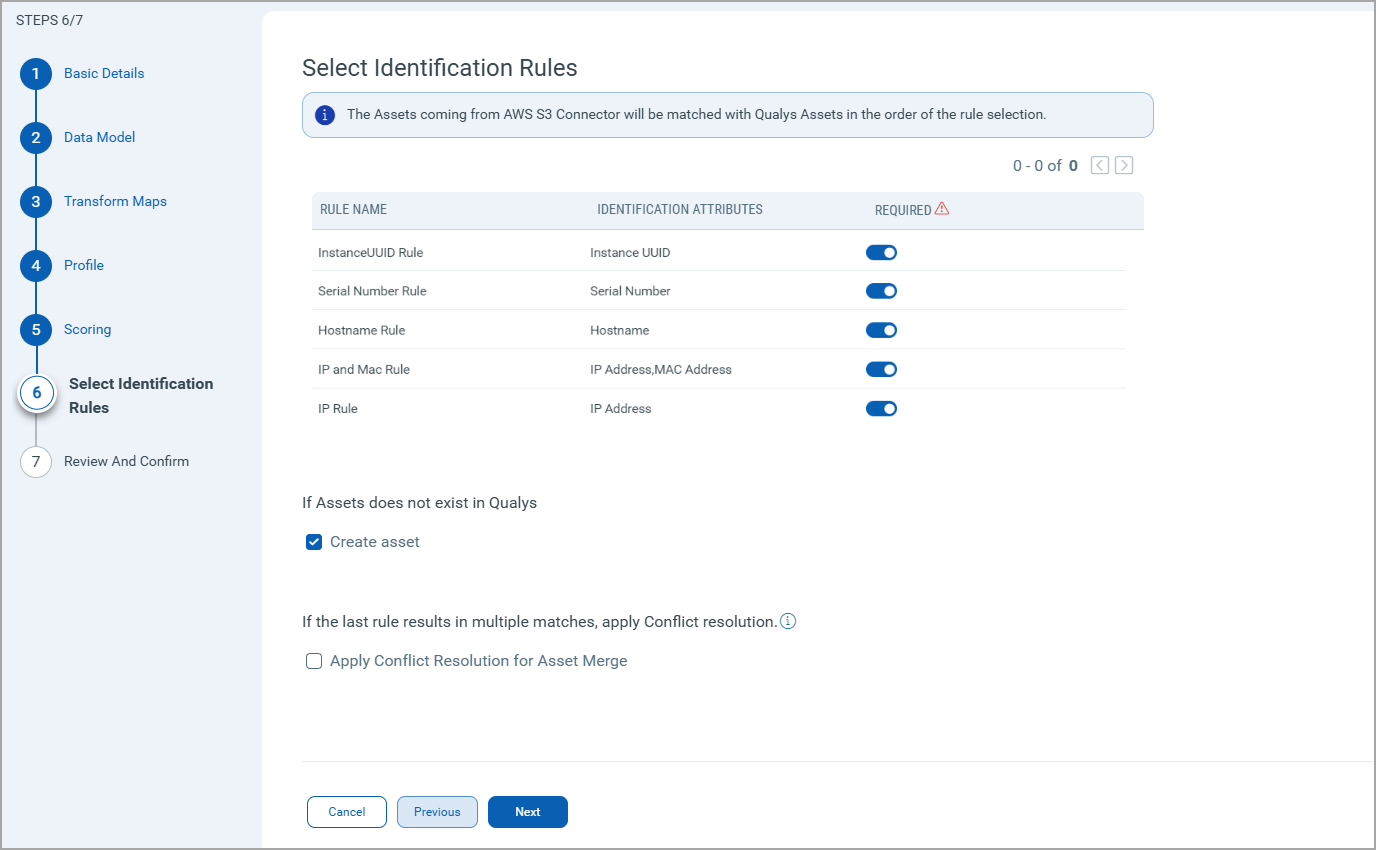
If you don't want to choose a specific rule, turn off the toggle next to it. But, ensure that at least one rule is selected.
To learn more about the different rules and options present in this screen, refer to the CSAM Online Help.
Review and Confirm
Review the configurations provided in the previous steps. Ensure all details are correct and complete. Confirm the setup to finalize the configuration of the AWS S3 connector.
This streamlined process allows for efficient data integration, ensuring accuracy and consistency across systems.
Saving and Running the Connector
When saving and running the connector, a popup appears with the following input fields:
Upload CSV File: Upload the CSV file containing the data to be processed. This file should match the structure defined in the selected data model and will undergo the transformations specified in the chosen Transform Map.
After selecting the Transform Map and uploading the CSV file, the connector will process the data accordingly, transforming and importing it as per the configurations set.
Schedule Event-based Connector Run
The S3 connector provides a CloudFormation Tempate (CFT) that you can configure and execute in your AWS account. The CFT triggers a lambda function that listens for events in your S3 Buckets and runs the connector to discover new findings.
To configure the Event-based Connector Run, you must first download the CFT from your Connector.
- Navigate to the Connector app.
- Select your connector.
- From the Quick Actions menu, click Download Cloud Template.

Now, let's go to your AWS account.
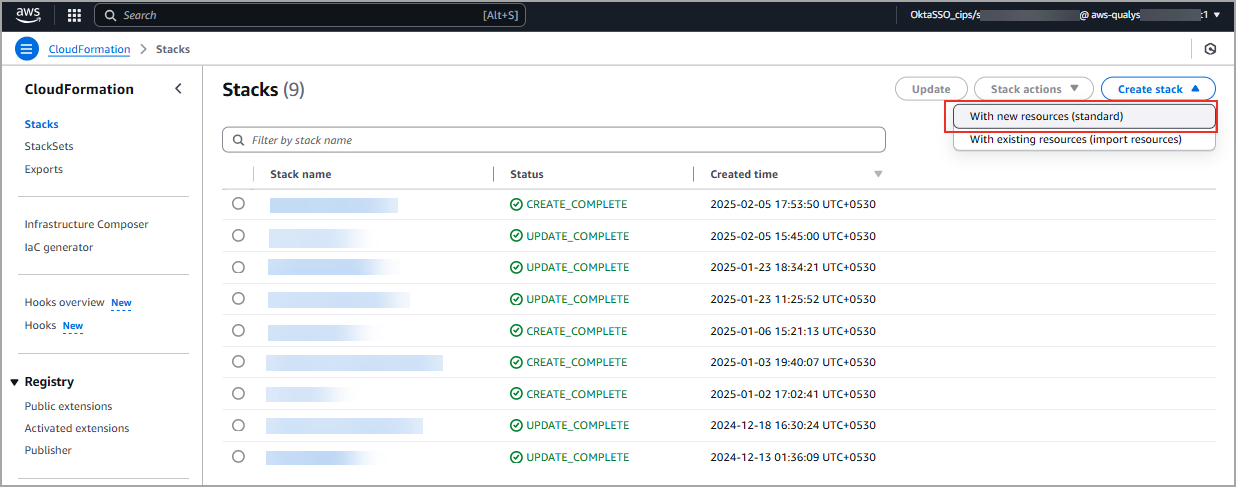
- Navigate to CloudFormation > Stacks > Create stack > With new resources (standard)
- Upload the YAML template.

- Provide the username and password of your Qualys account. The other stack parameters are predefined.
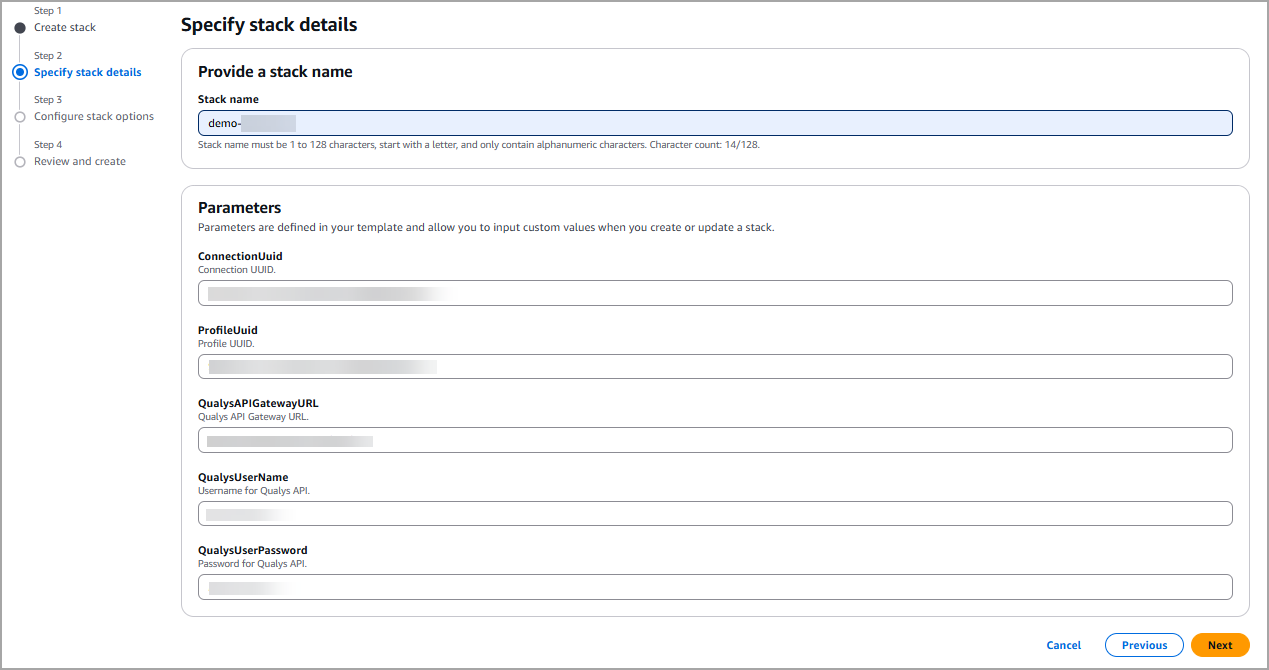
- Click Next and save the changes.
- Now, navigate to Events.
-
Click Create Event notification and assign a name to the notification

- Select the following configurations.
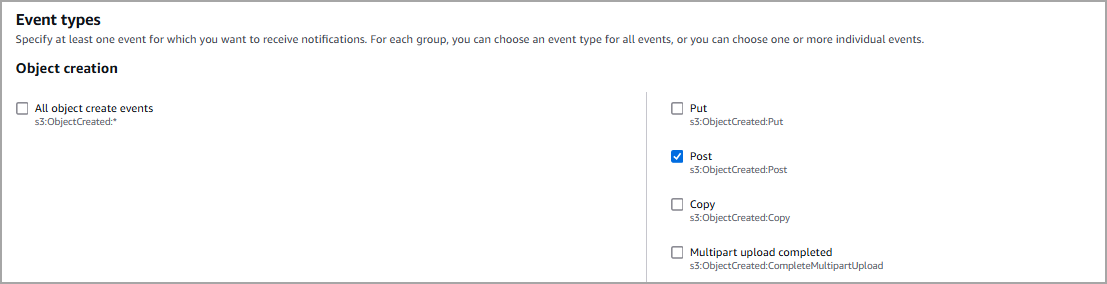
-
Select Choose from your Lambda functions for the trigger notification and select the Lambda function created with the CloudFormation stack.
The function only processes newly uploaded files and will not retrieve or process files that existed in the bucket before the function was configured.
- Click Save changes. Once, the event notification is created we can see it as below.

Now we are done with all the configurations required to run the S3 connection created on the Qualys platform. From now on, for any upload made to the configured S3 bucket, the connection is notified to fetch the file data and send it further to ETM.
The S3 connection is only made for CSV files its is not going to parse the data for any non-csv file uploads.
AWS Lambda Concurrency Limitations with S3 File Uploads
When large numbers of files are uploaded to S3 buckets, there's an important limitation to consider with Lambda triggers:
Challenge: Lambda can handle up to 1000 concurrent executions, but runs into issues when thousands of files are uploaded simultaneously.
The Problem
When you upload thousands of files to an S3 bucket together:
- Each upload triggers a Lambda function (via event notification)
- Lambda immediately attempts to fetch the file using
GetObject - If uploads happen very rapidly (within seconds), this leads to:
- Lambda throttling (beyond 1000/second limit)
- Dropped events (S3 won't retry failed notifications)
- Potential S3 400/500 errors as files may still be finalizing during fetch
Recommended Solution
For users uploading files via AWS CLI or scripts:
- Add delays between uploads
- Process files in batches (~100 files per batch)
This approach allows 100 files to upload at once, then waits for the specified delay before uploading the next batch. This method:
- Uses Lambda functions efficiently
- Ensures the connector receives notifications for all uploads
- Has been tested and proven effective in production environments