BMC Helix Connector
The BMC Helix CMDB Connector solves the critical problem of maintaining an accurate, up-to-date inventory of configuration items across hybrid IT environments by automatically synchronizing CI data between BMC Helix and Qualys Asset Inventory. Security teams benefit from continuous visibility into their infrastructure's relationships and dependencies, enabling better risk assessment and compliance management.
The connector's bidirectional sync capabilities allow organizations to push vulnerability and asset information from Qualys back into their CMDB, creating a unified source of truth that improves incident response and security decision-making. By automating this integration, teams eliminate manual data reconciliation efforts and reduce the window of exposure from asset discovery gaps or stale configuration records.
Create a BMC Helix Connector
To create a BMC Helix connector, you must begin by navigating to the Connectors application.
1. Navigate to Integrations.
2. Click the three dots and click Manage on the BMC Helix integration.
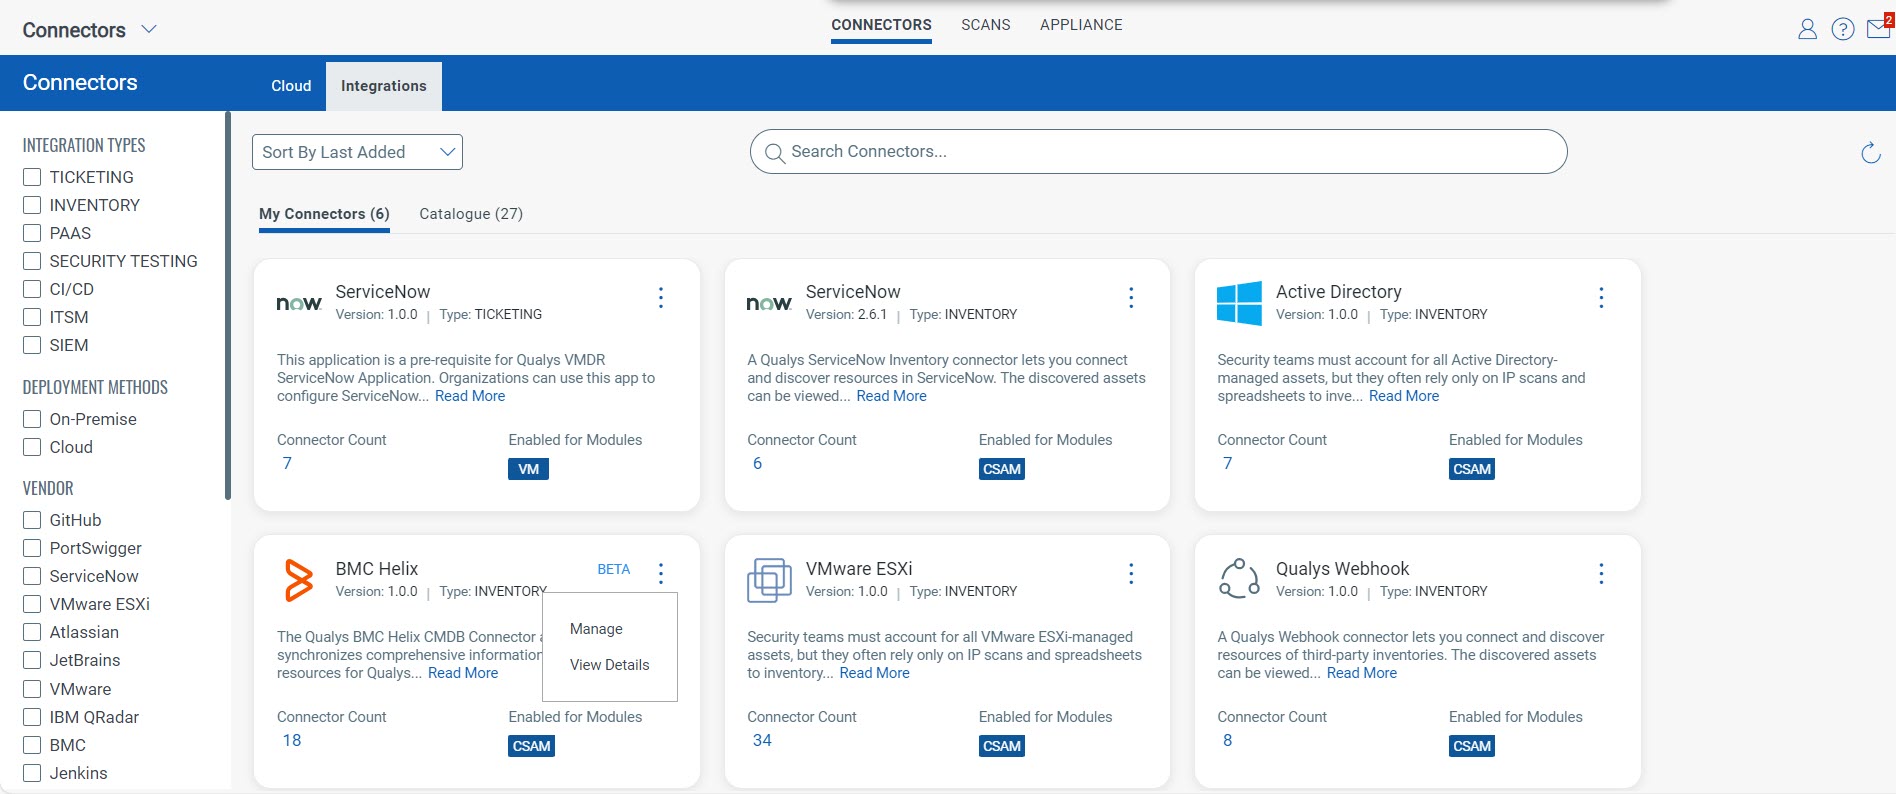
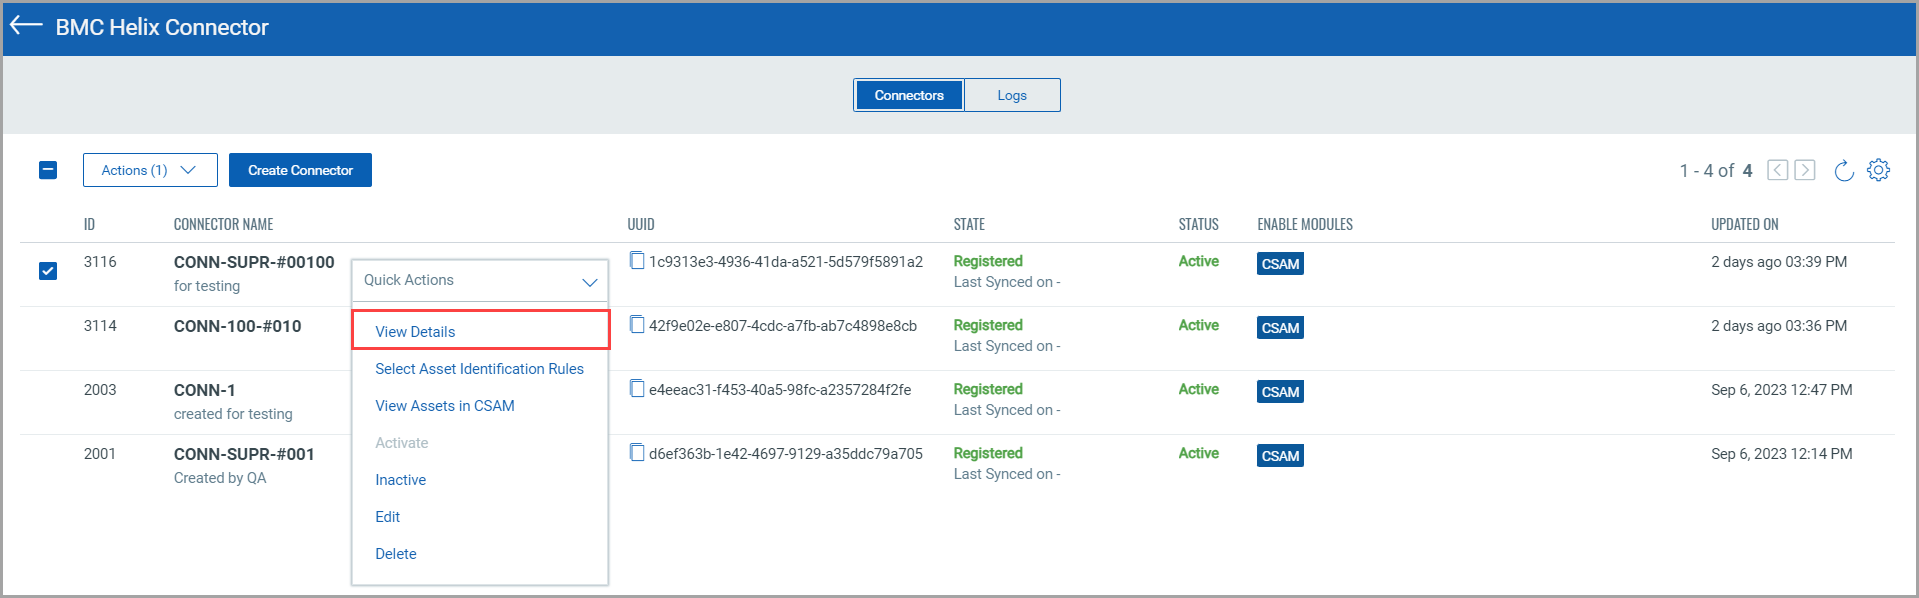
The Manage Connectors screen lists all the available connectors you created in the Connectors Application. You can view their status and perform actions on them.
3. Let’s begin creating our first connector. Click Create Connector.

A connector creation wizard appears. Provide the necessary information to authenticate your BMC Helix account.
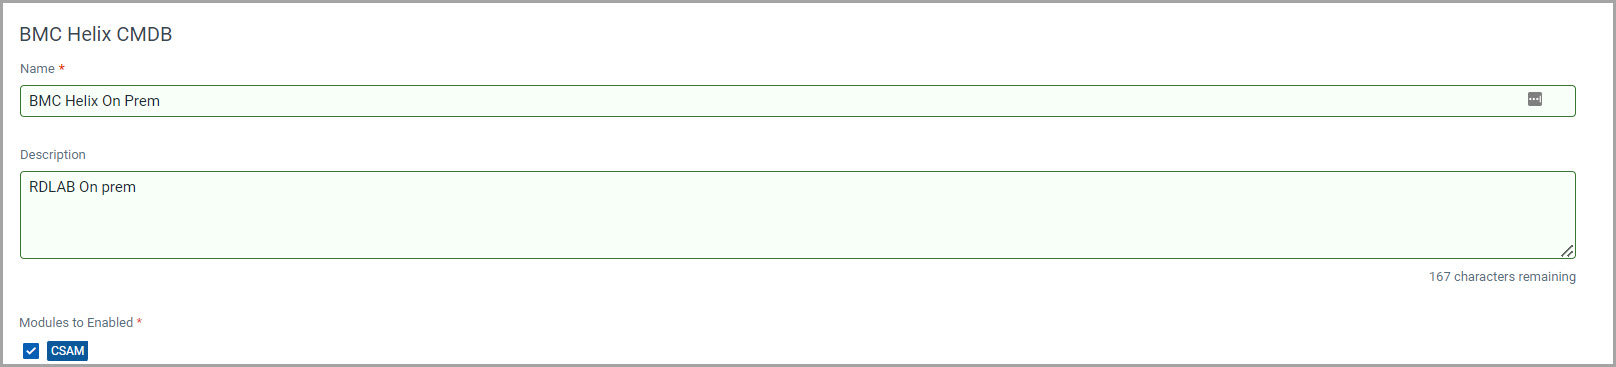
4. In the Basic Details screen, provide the required details:
Connector Name - Name of the connector.
Description – Description of the connector.
Modules to Enable - Select the Qualys service the connector will have access to. Select CSAM to pass the Connector information to the CSAM application.
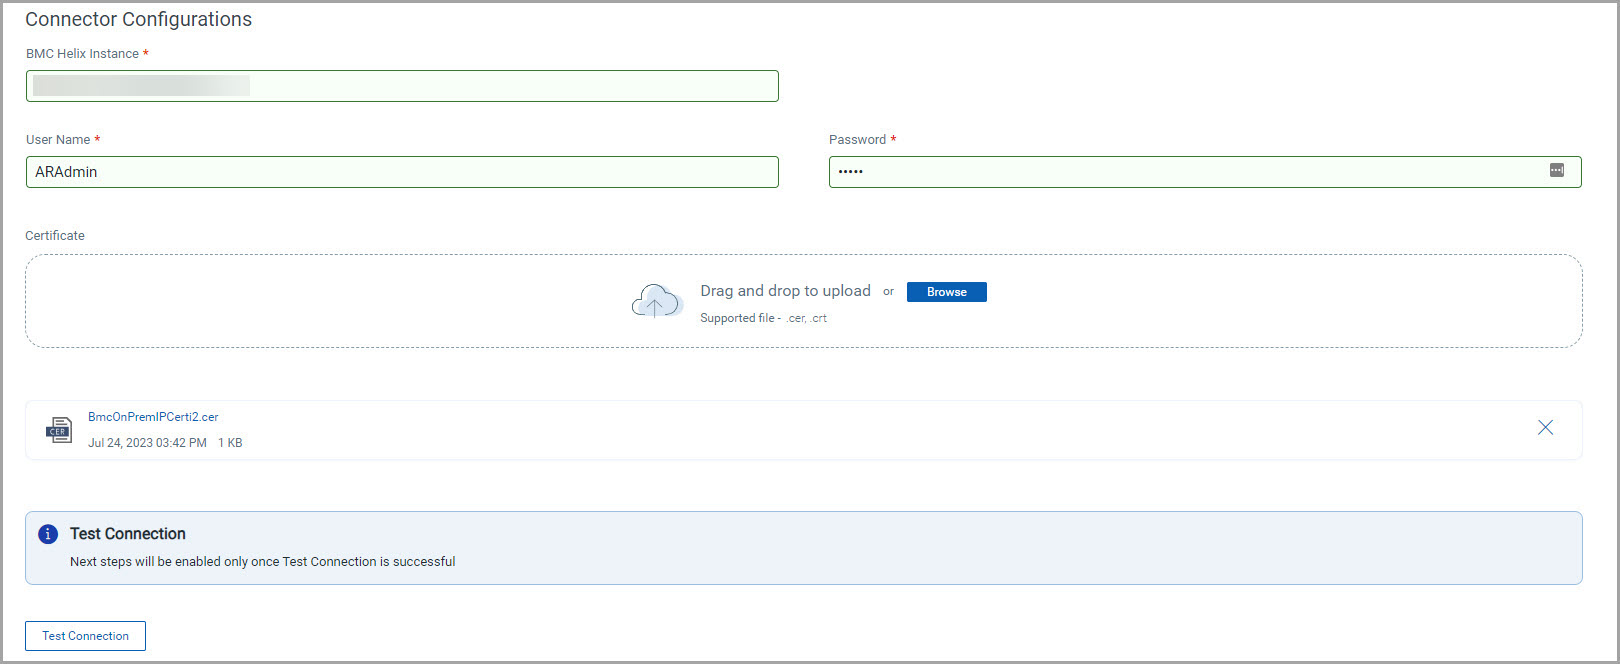
BMC Helix Instance – Provide the URL of the BMC Helix instance to authenticate.
Username and Password – Authenticate the BMC Helix account with your username and password.
Certificate – Upload a Root or Private Key certificate for added security.
Test Connection – Perform a test connection to ensure successful authentication. A successful test connection is mandatory to proceed with the next steps.
5. Click Next.
6. In the Schedules screen, create the schedule job for your connector.
The Schedules screen lets you create a scheduler job to specify what the connector must fetch from the BMC Helix environment or push to the BMC Helix environment. It also lets you specify the schedule intervals for the connector runs.
7. Click Create Schedule.

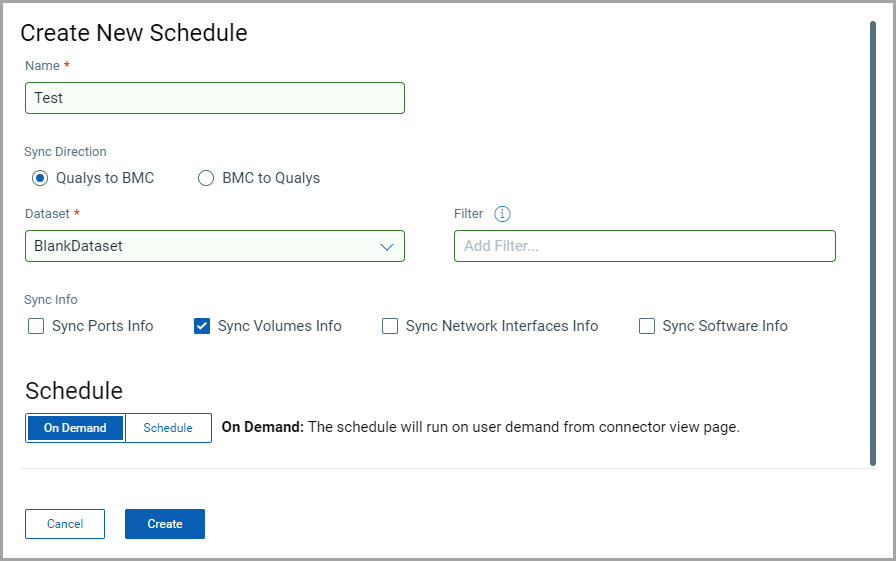
8. In the Create New Schedule screen, provide the details of the scheduled job.
Name - Name of the schedule.
Sync Direction – Specify how the connection should be established. A BMC to Qualys sync results in the connector fetching BMC Helix assets to the Qualys Asset Inventory. Meanwhile, a Qualys to BMC sync results in the connector pushing Qualys Asset information to the BMC Helix environment.
Dataset - Select the dataset from the BMC environment to which you want to fetch or push Qualys asset data. For BMC to Qualys sync direction, you can specify further which business class, attributes, and asset class the data has to be fetched from. The Filters for Qualys to BMC uses QQL to filter out the asset data. However, Filters for Qualys to BMC uses the BMC queries for data filtering.
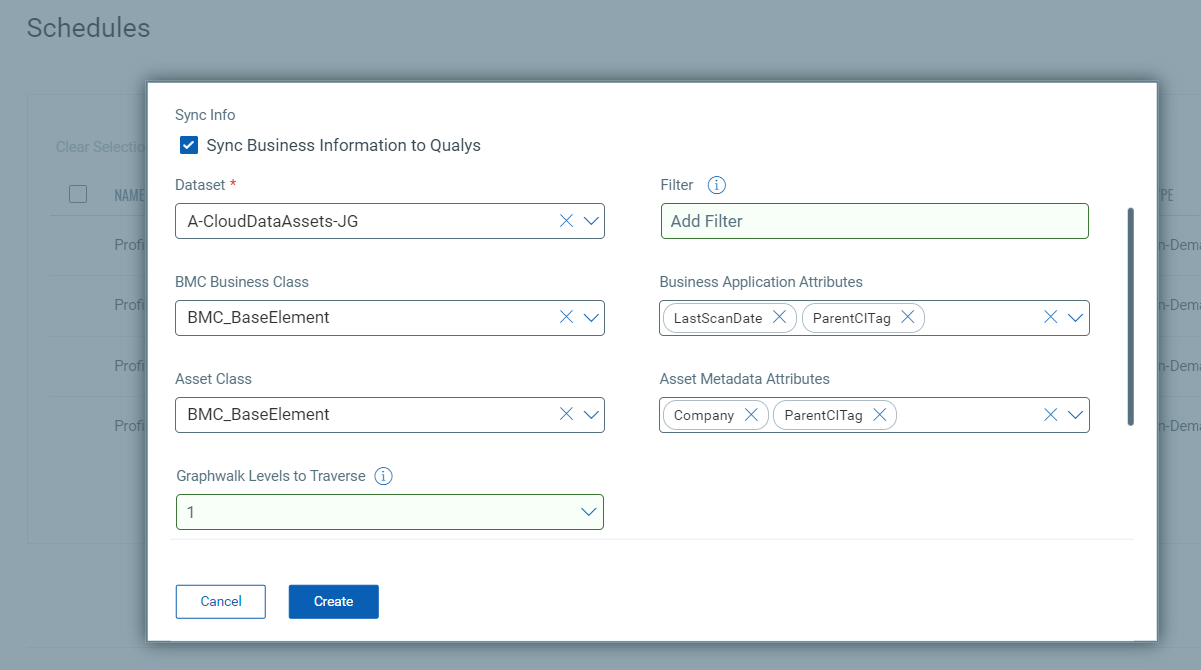
Sync Info – Specify the network data to sync from Qualys to BMC. If you selected BMC to Qualys, you can sync the BMC business info with Qualys.
Schedule – Select the schedule to run the connector.
- On-demand: The connector will run on user demand from the connector listing screen.
- Schedule: The connector will run on the specified intervals. Click Recurring to repeat the scheduled run on the selected interval.
When providing the data for BMC to Qualys, the above data fields remain and three additional fields are displayed.
Asset Class - This is a required field. Select the BMC asset class to be used for synchronization. All the assets under this class are considered for sync.
Asset Metadata Attributes - Select the asset metadata attributes from BMC that should be synchronized to Qualys.
Graphwalk Levels to Traverse - Select the number of relationship levels to traverse in the selected asset class to gather related data. The default value is 1. You can select 0 to avoid traversal.
9. Provide additional class details in the Class Mapping screen, if required. By default, the Class Mapping screen auto-populates a list of classes and Qualys Rules. The data filtered out from the Qualys Rules is pushed to the appropriate Target BMC class. You can add more data to the class mapping by providing a Qualys Name, Qualys Rules (using the QQL tokens) and specifying the Target BMC Class.
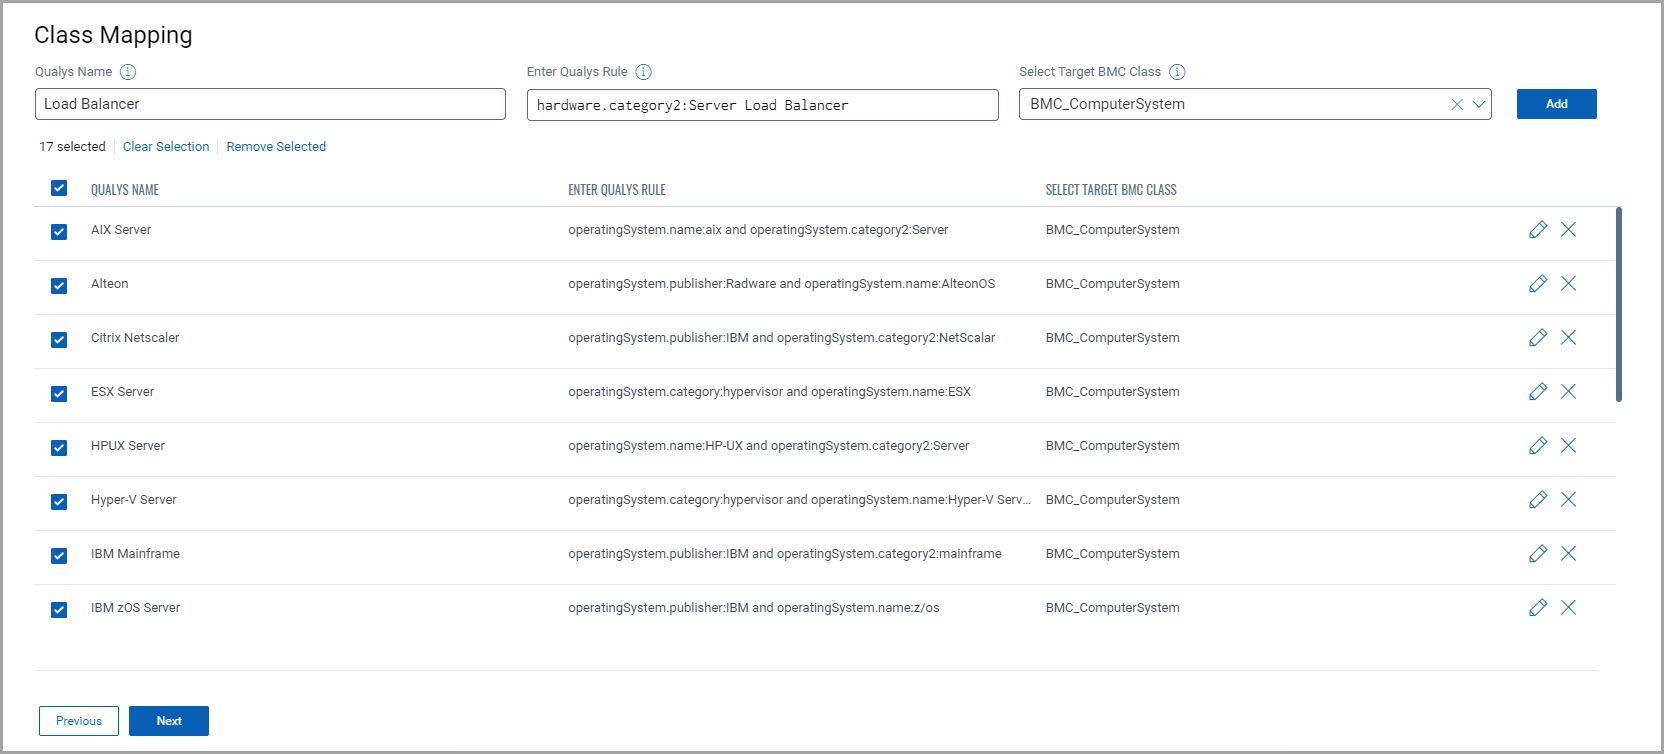
Once you have provided the necessary attributes, click Next.
10. Provide additional attribute details in the Attributes Mapping screen, if required. The Attributes Mapping screen auto-populates a list of classes and attributes by default. The specified attributes will be displayed in the Asset Summary screen in the Asset Inventory.
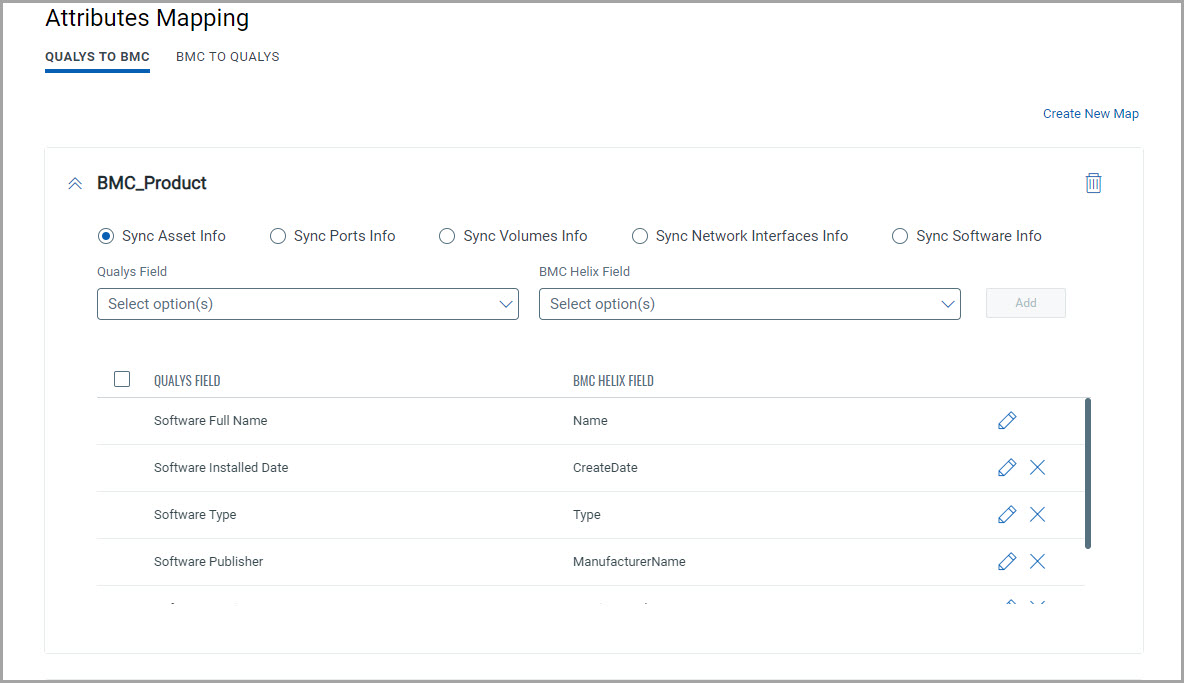
11. To create a new attribute mapping, click Create New Map.
12. Select the class to map the attributes for Qualys to BMC sync.
13. Click Create. The new mapping is visible on the attribute mapping list.
Once you have provided the necessary attributes, click Next.
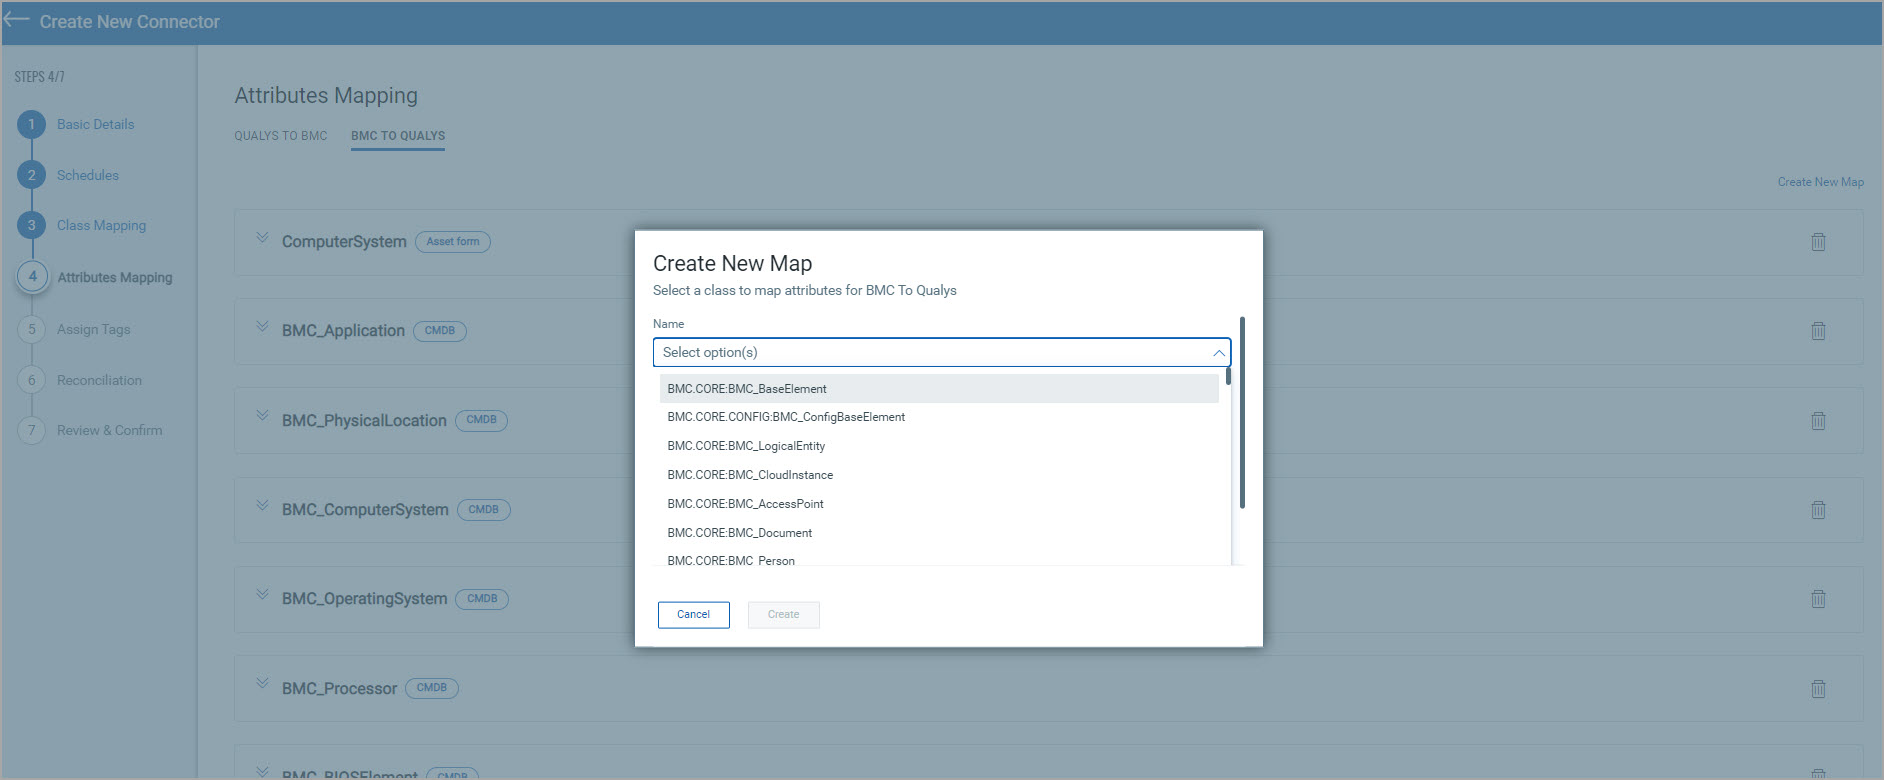
14. To create new attributes for BMC to Qualys sync, click on BMC to Qualys tab.
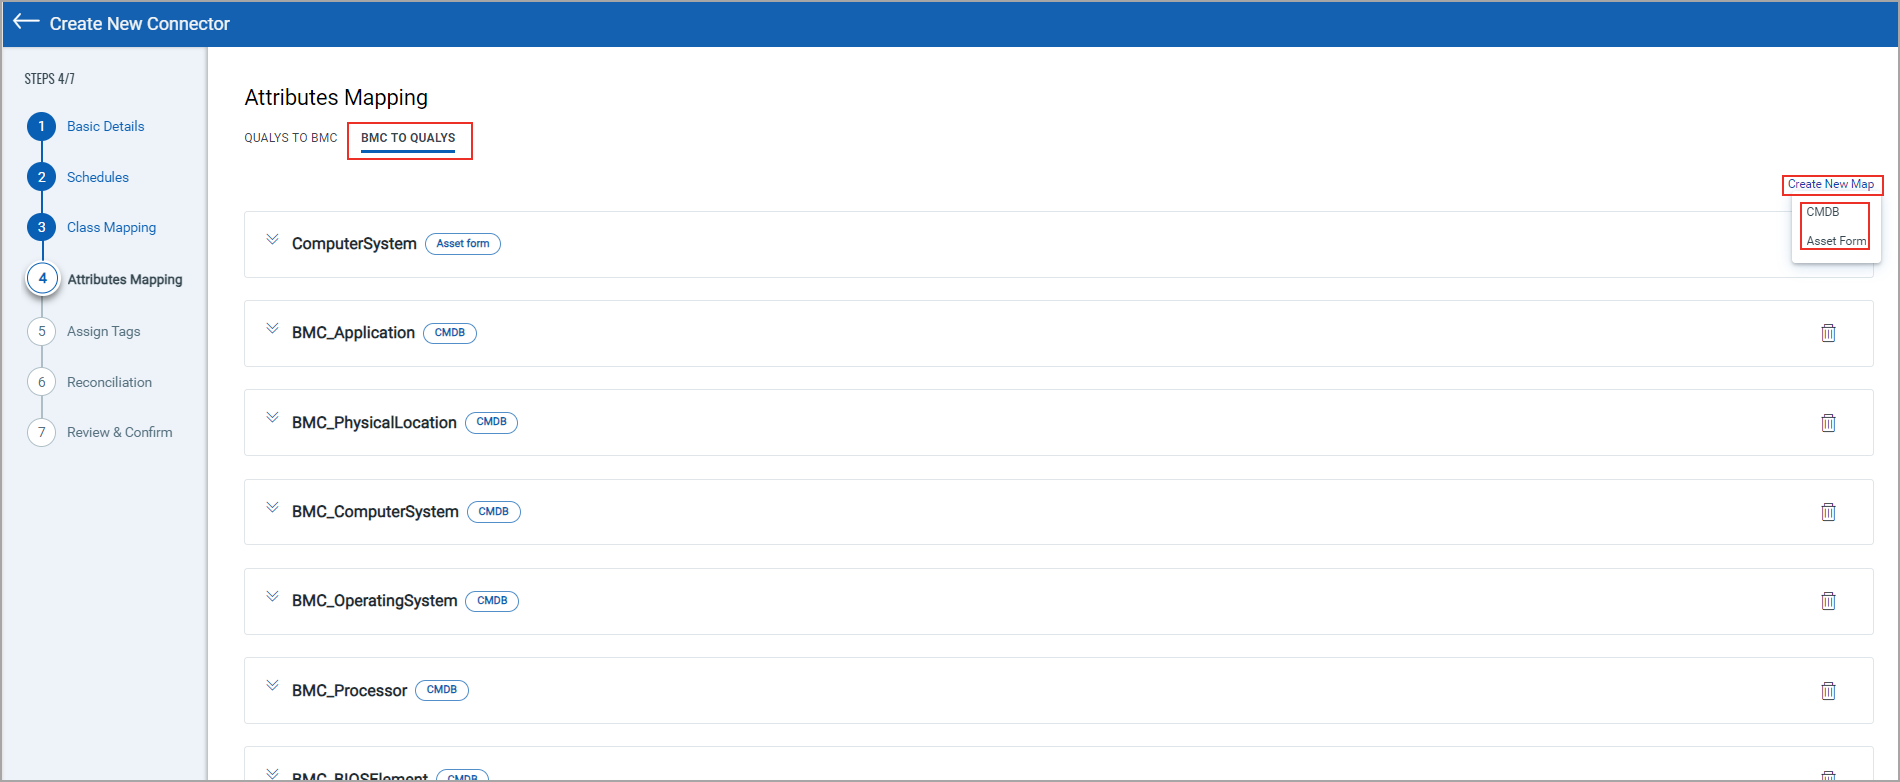
15. Click Create New Map, there are 2 options
- CMDB
- Asset Form
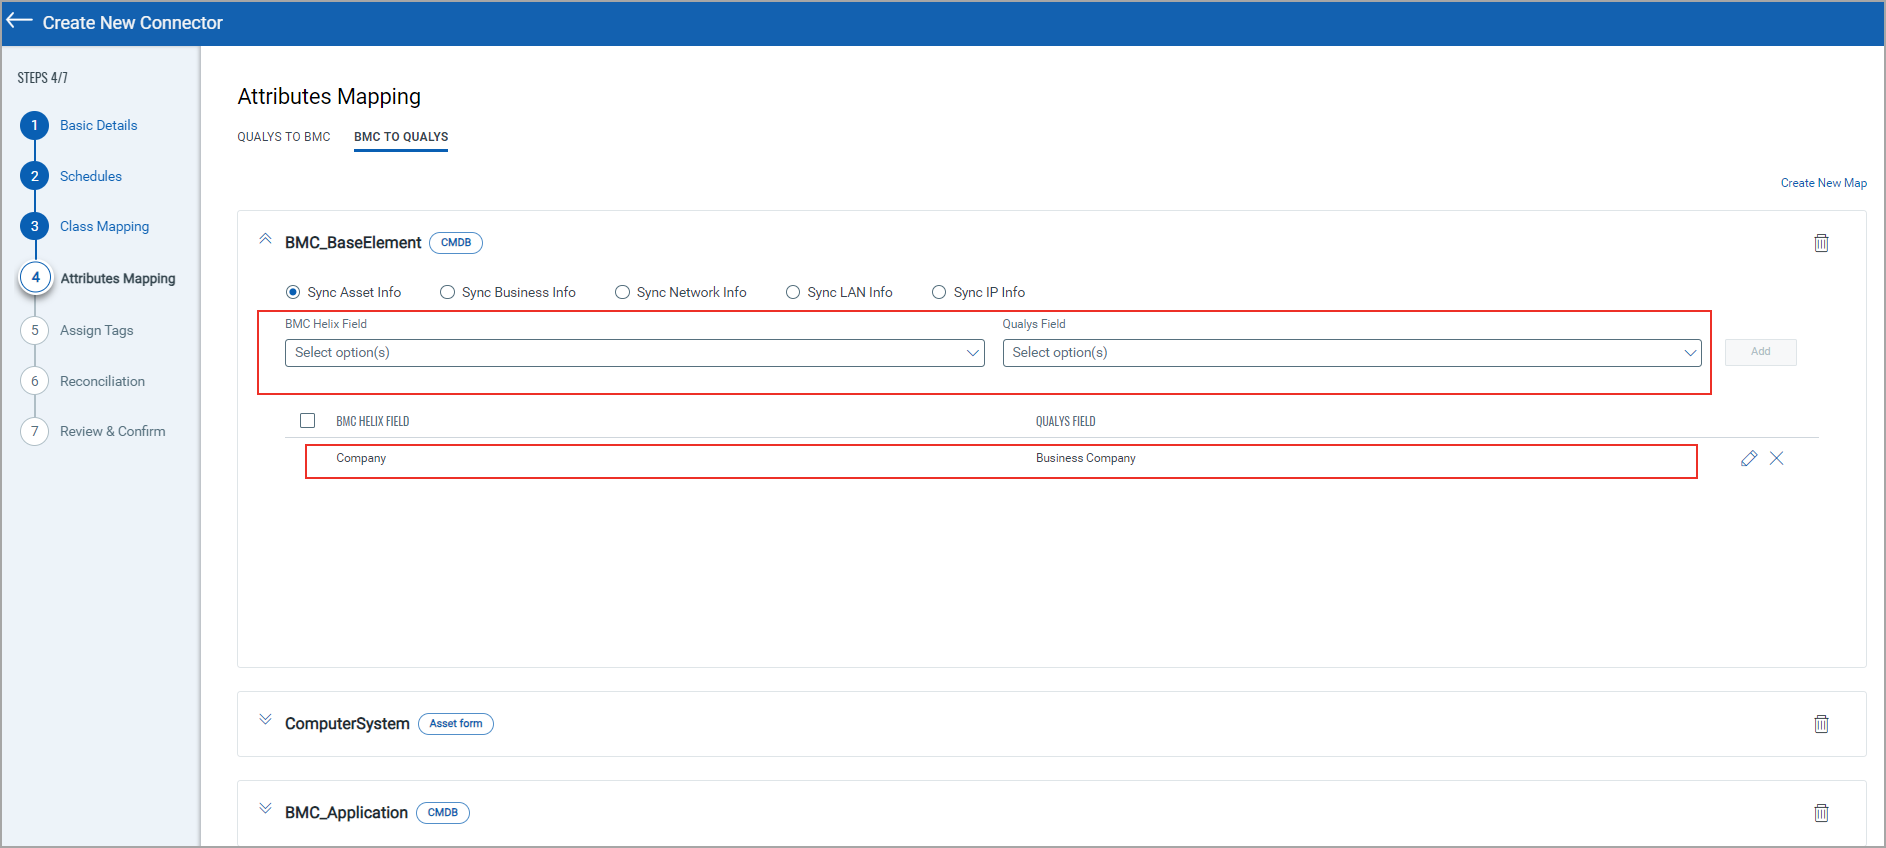
CMDB
- Select the CMDB class to add and click Create.
- Then, map the desired attributes from BMC fields to Qualys fields.
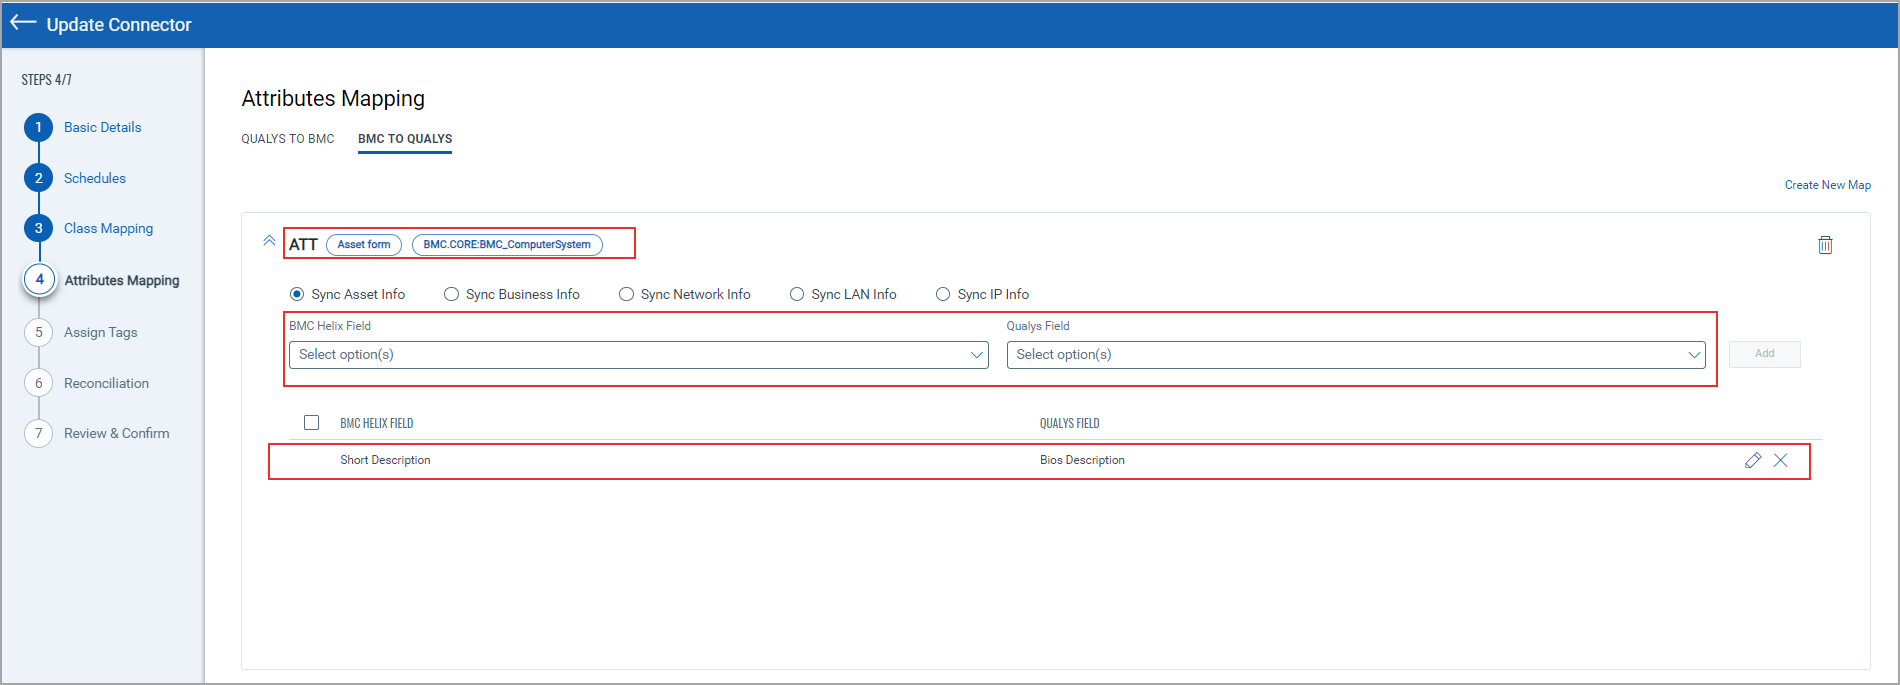
Asset Form
- Select the Asset Form class and the related CMDB to add and click Create.
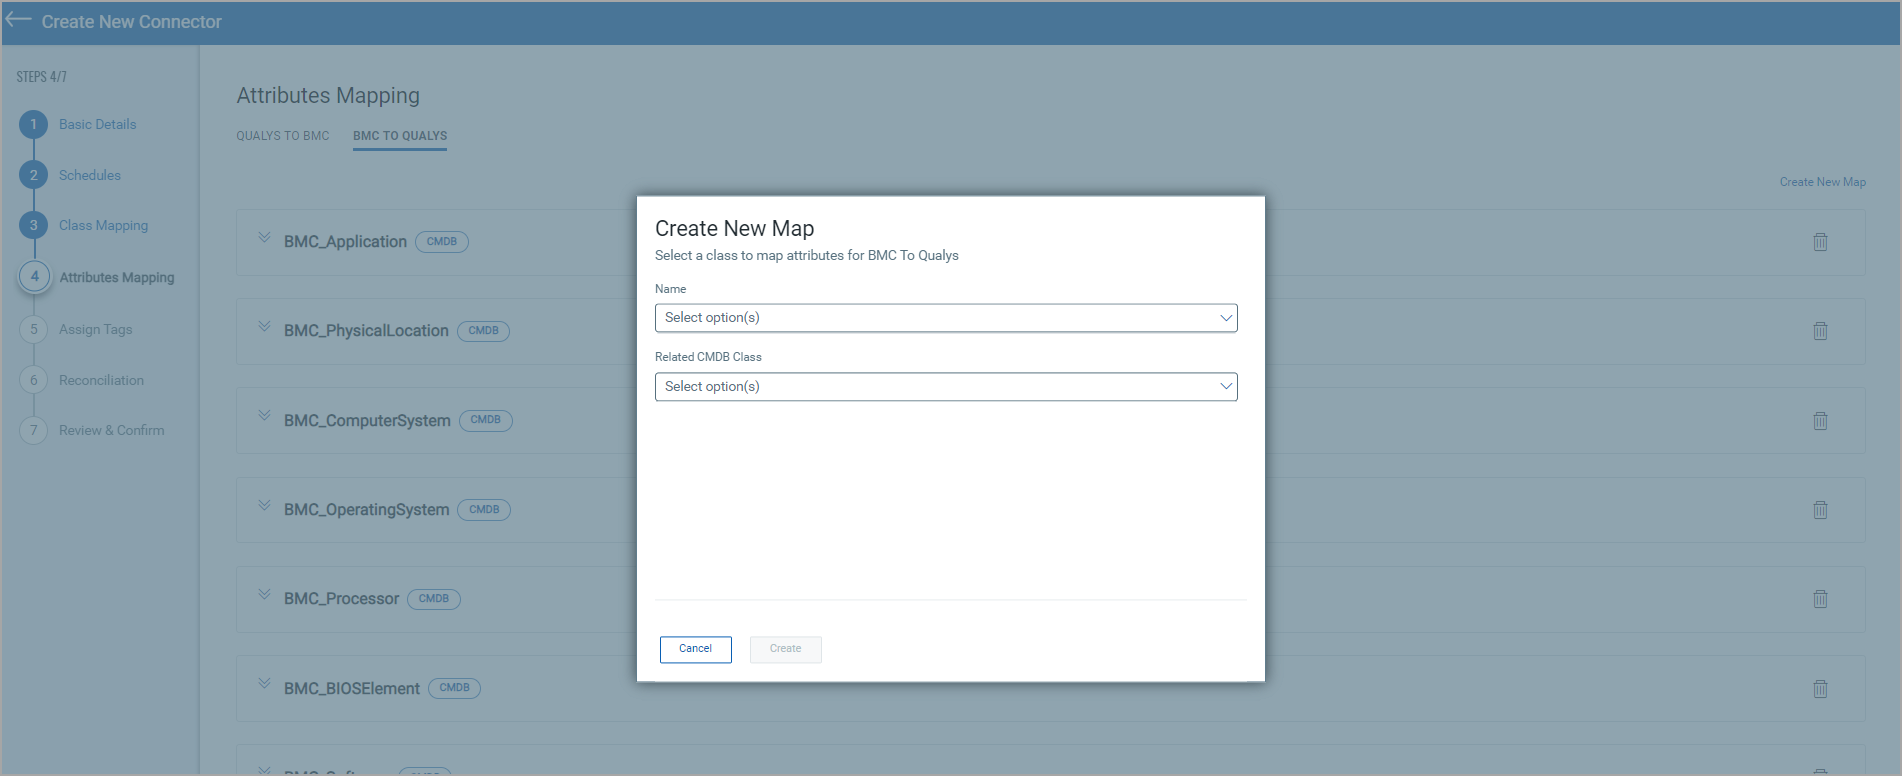
- Then, map the desired attributes from BMC fields to the Qualys fields.
14. Reconciliation is an optional step to reconcile duplicate CIs in your dataset. The reconciliation configurations are the same as those available in the BMC application. You can configure the identification and merge job by providing the name, source, and target dataset to identify the CIs. Set the merge order and precedence association to customize how the data should be merged.
The following are optional toggles to consider when creating a reconciliation job.
Status – Show the status of the job.
Continue on Error – Continue the identification/merge job even after encountering an error with a CI.
Generate IDs – Generate IDs for the CI.
Exclude sub-Classes – Only identify/merge the data of the discovered class.
Use All Classes and Instances – Identify/merge the data of all the discovered classes.
Select a Schedule for the reconciliation job, if required.
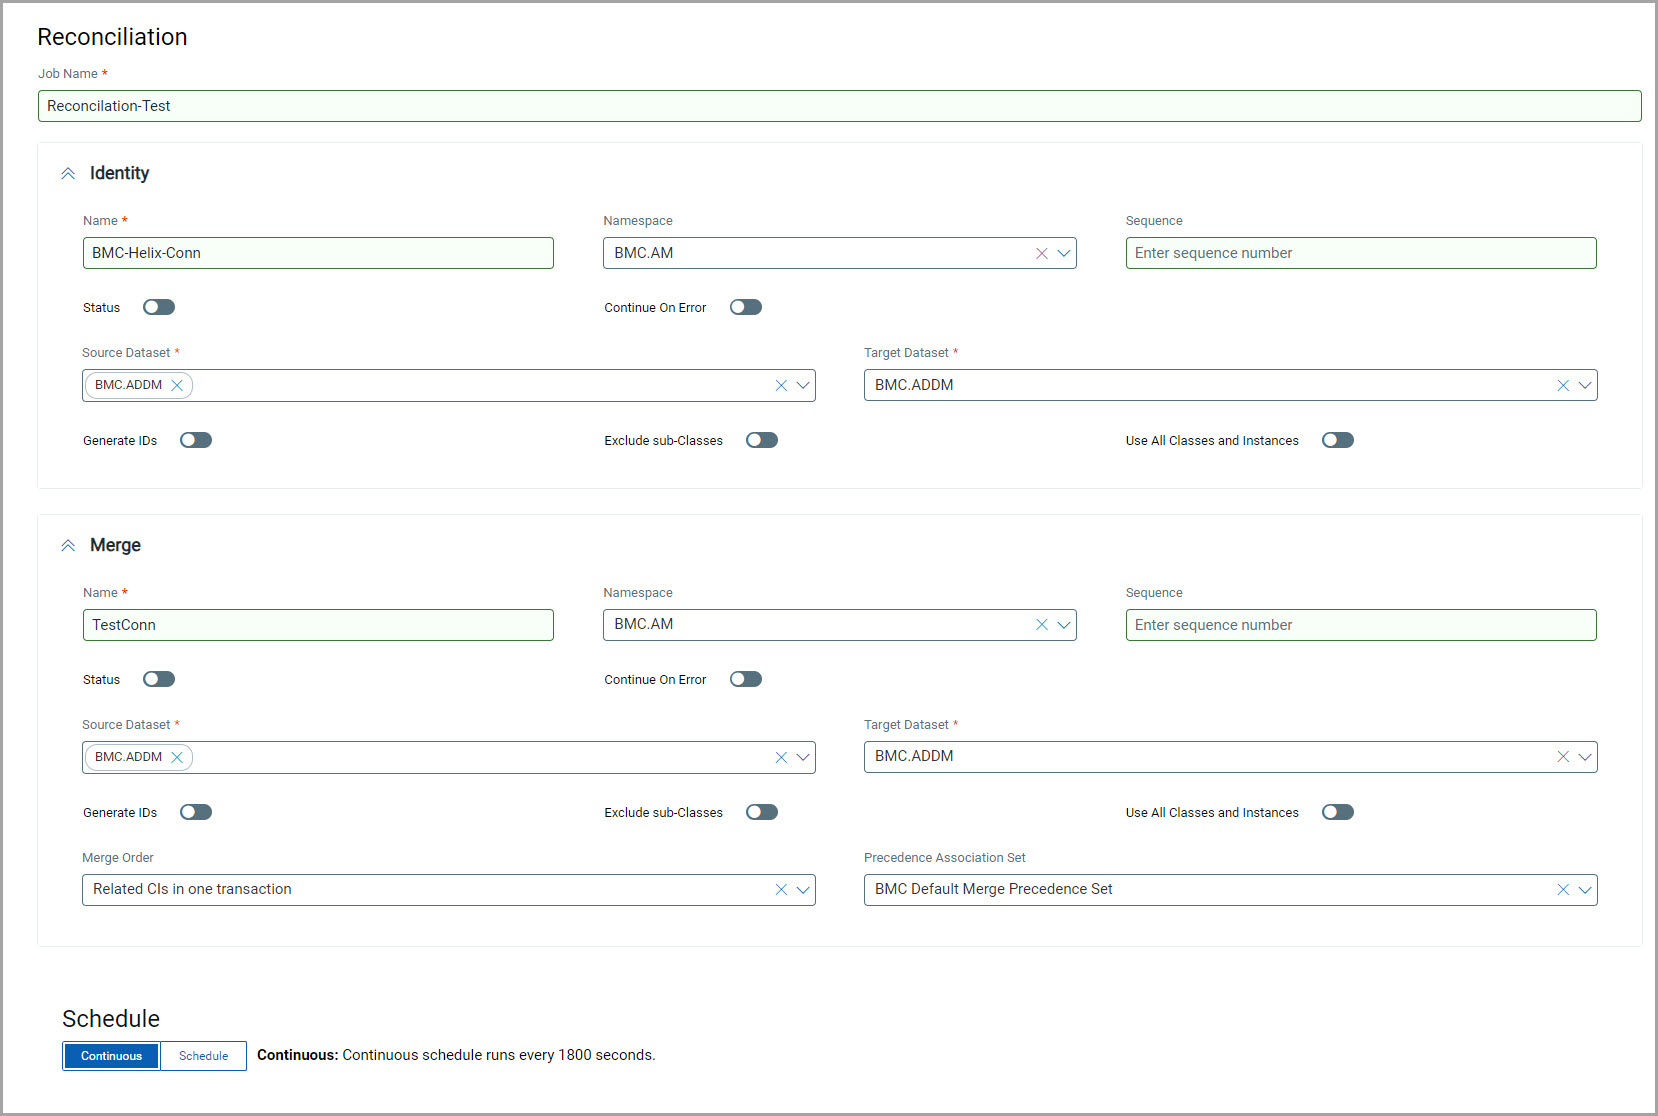
You can click Skip or Next to proceed.
15. Review your configurations and confirm.
16. Click Create.
Your connector is ready. You can change the state of your connector or edit their configurations by selecting them and clicking Actions.
Run the Connector
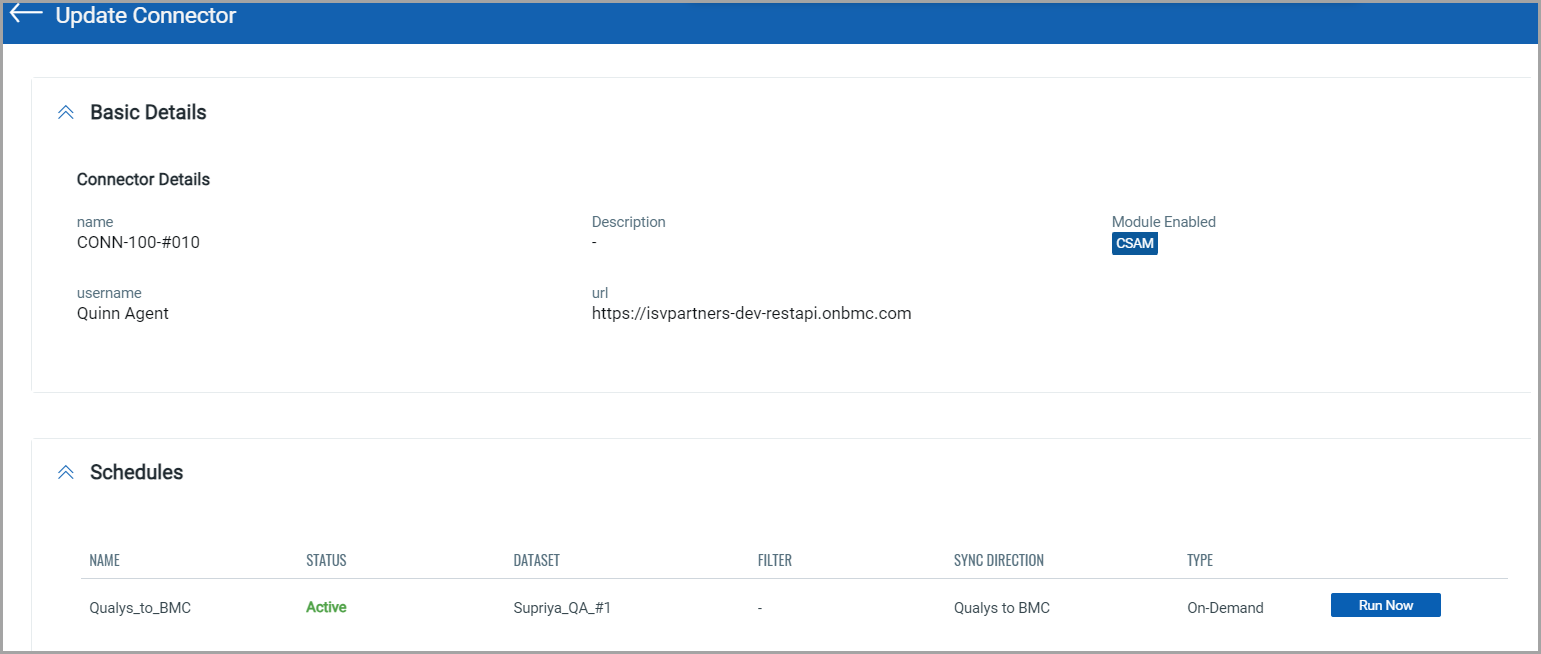
If you haven’t scheduled your connector run, you can manually run the connector by navigating to the connector details page.
Under Schedules, click Run Now to manually run your connector.
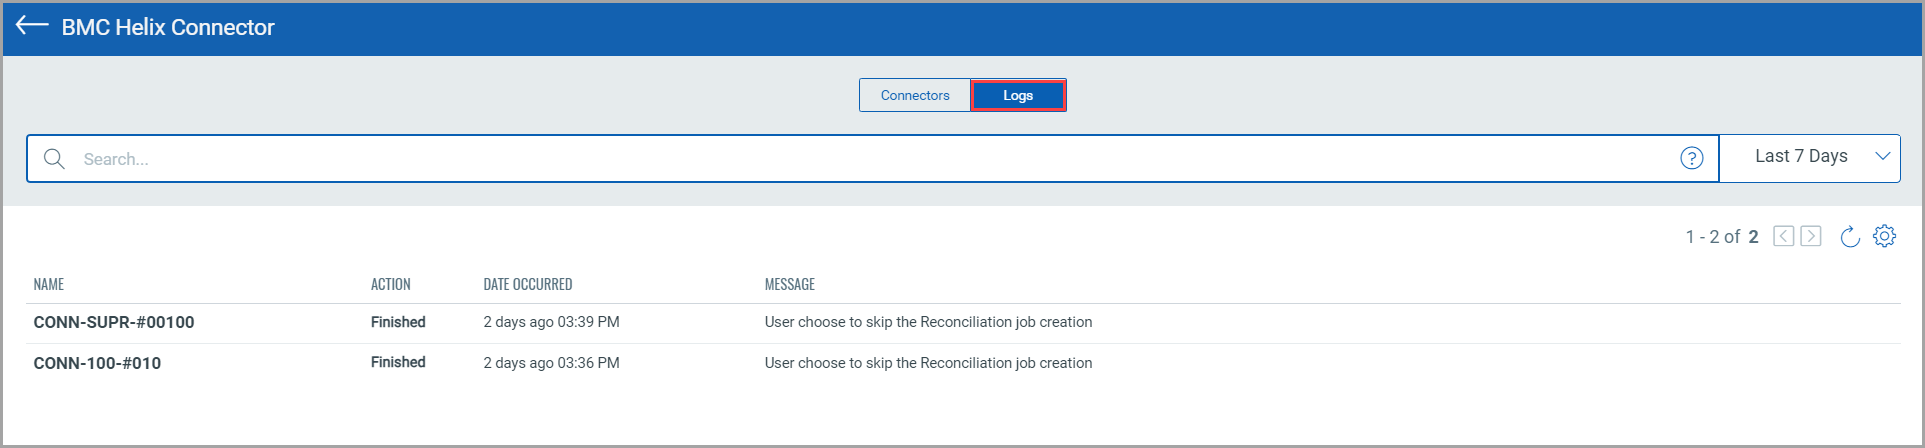
View Logs of Connector Runs
You can view the history of past executions with information on their statuses by navigating to the Logs tab. It tells you when the connector was run and whether its data was reconciled.
Asset Identification Rules
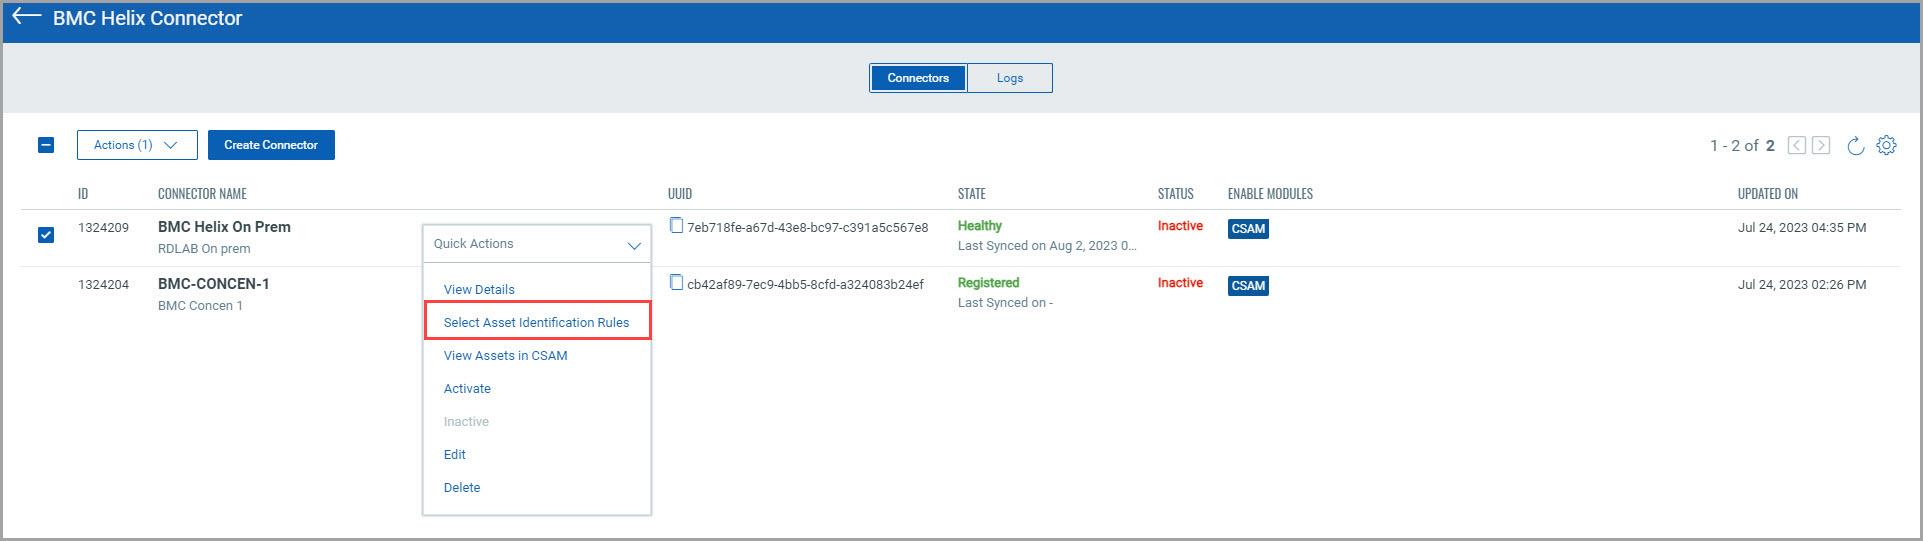
Once you have created a connector, you must specify the Asset Identification rules to determine which attributes must be fetched and in which order. Select a connector and click Actions. Click Select Asset Identification Rules to open the Identification rule wizard.
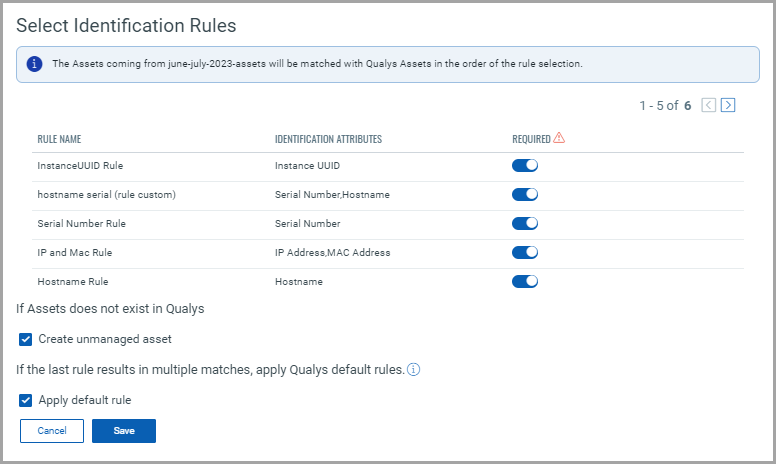
You can merge duplicate hostnames or assets or select rules for the BMC Helix inventory. Select the rules by toggling the Required button.
To create rules in the CSAM application, follow the steps documented in CSAM Online Help.
If you do not have any assets, create an unmanaged asset by selecting the ‘Create unmanaged asset’ checkbox.
Select the Apply default rule when faced with multiple matches under the final rule selected. The asset selected will be based on its most recent update and the trustworthiness of its source.
View Assets in CSAM
Your connector is created successfully and has Asset Identification rules provided. Now, it should start fetching from your BMC Helix account. To view the Asset information, you must navigate to the CSAM application.
Select any of your connectors, click Actions and click View Assets in CSAM.
.jpg)
This redirects you to the CSAM application, where you can view your assets fetched per the rules.