CheckmarxOne DAST Connector
The Checkmarx One DAST connector bridges application security scanning and enterprise risk management by automatically importing dynamic application testing findings into Qualys Enterprise TruRisk Management. Security teams gain centralized visibility into web application vulnerabilities discovered through simulated real-world attack scenarios, eliminating manual data transfers between platforms.
By consolidating these findings alongside other risk data, organizations can prioritize remediation efforts and understand how application vulnerabilities impact their overall security posture. The connector enables teams to activate web applications for continuous scanning within Qualys Web Application Security while maintaining a unified view of their application risk landscape.
Connector Details
|
Vendor |
Checkmarx |
|---|---|
|
Product Name |
CheckmarxOne DAST |
|
Category |
Application Security |
|
Findings Support |
Yes |
|
Supported Assets |
Web Applications |
|
Version |
1.0.0 |
|
Integration Type |
API Integration (REST) |
|
Direction |
Unidirectional |
|
Delta Support |
Not Supported |
Configure the Connector
To configure the CheckmarxOne DAST connector in Qualys ETM:
- Log in to your Qualys account and navigate to the Connectors module.
- Select the Integrations tab, locate the CheckmarxOne DAST connector, and click Manage.
- Click Proceed to Setup on the Setup Guide screen after reviewing the prerequisites.
Before You Begin - Authentication
Complete the following steps in your Checkmarx One environment before configuring the connector in Qualys ETM.
Note: The CheckmarxOne DAST connector is available on demand. To activate it for your subscription, contact your Technical Account Manager (TAM) or Qualys Support.
Generating an API Key in Checkmarx One
Reference: Creating API Keys – Checkmarx Docs
- Log in to your Checkmarx One environment using the appropriate regional URL for your deployment.
Select the base URL that matches your region:
- US: Show URLShow URL
- US2: Show URLShow URL
- EU: Show URLShow URL
- EU2: Show URLShow URL
- DEU: Show URLShow URL
- ANZ: Show URLShow URL
- India: Show URLShow URL
- Singapore: Show URLShow URL
- UAE: Show URLShow URL
- Israel (Gov): Show URLShow URL
- Navigate to Settings > Identity and Access Management > API Keys.
- Click Create Key.
- Optionally configure a note description, expiration period, and notification email addresses.
- Click Create and copy the generated API key immediately. Store it securely.
Important: The API key is displayed only once at creation. Copy and store it in a secure location before closing the dialog. If the key is lost, you must generate a new one.
Identifying Your Domain Name and Tenant Name
Your Domain Name is the base URL of your Checkmarx One environment (for example, https://deu.ast.checkmarx.net). Your Tenant Name is the Tenant ID associated with your user profile. Both values are required when configuring the connector in Qualys ETM.
Permissions Required
The API key used for this connector must have the following permission assigned in Checkmarx One.
|
Entity Type |
Permission |
|---|---|
|
Vulnerability Findings |
|
Scope and Data Access
The connector retrieves DAST scan results from the Checkmarx One environments, scans, and results API endpoints. Scan environments are fetched first, followed by scans per environment, and then individual scan results. Custom filtering is not supported during connector configuration. Applications appear in ETM, CSAM, and WAS after ingestion.
Important: WAS activation consumes WAS licenses. Activate only the web applications that require active scanning.
Key Rotation
When rotating the API key, generate a new key in Checkmarx One under Settings > Identity and Access Management > API Keys. Then update the credential in Qualys ETM by selecting the Edit Connector option and entering the new API key.
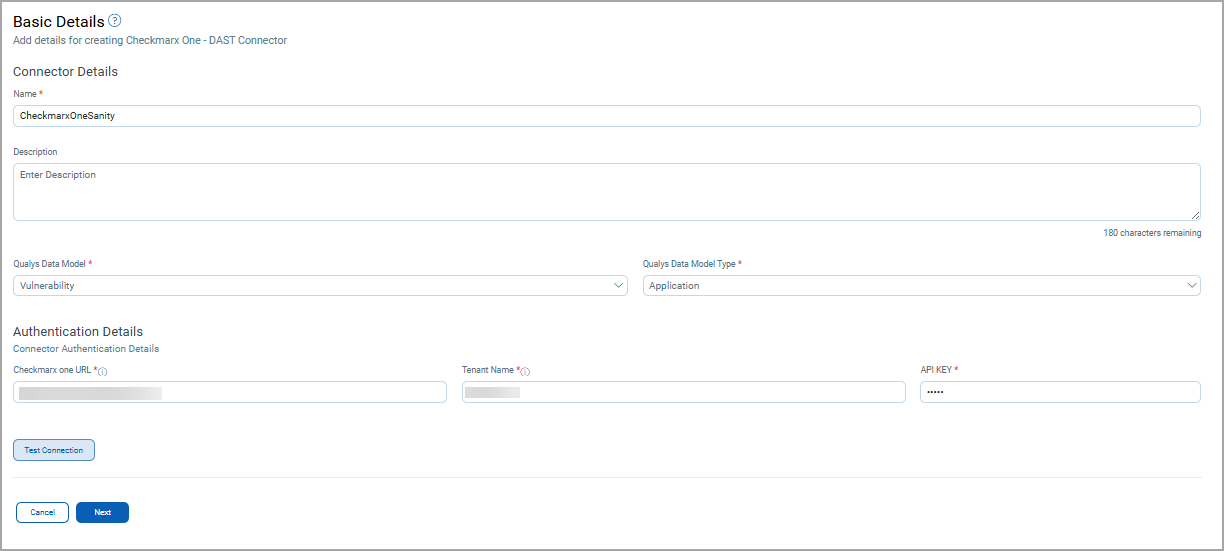
Create a Profile & Connection
Provide the connector name, description, and authentication credentials on this screen.
Connector Details
|
Field |
Description |
|---|---|
|
Connector Name |
A unique display name for this connector instance. |
|
Description |
An optional description to identify the purpose of this connector. |
|
Type of Findings |
Select Web Application Vulnerabilities. |
Authentication Details
|
Field |
Type |
Description |
|---|---|---|
|
Domain Name |
String |
Base URL of your Checkmarx One environment. |
|
Tenant Name |
String |
The Tenant ID associated with your Checkmarx One user profile. |
|
API Key |
Encrypted String |
API key generated in the Checkmarx One console. Used to obtain an OAuth 2.0 access token. |
After entering credentials, click Test Connection to validate connectivity before proceeding. The test verifies the following checks:
- Network Reachability
- TLS Handshake
- Authentication Credential Check
- Authorization Scope Check
- Data Fetch
Set the Scope & Schedule
The connector performs a full pull of all available DAST findings on each scheduled execution. Delta (incremental) synchronization is not supported.
- Select the Transform Map to apply to ingested data.
- Set connector Status to Active or Inactive.
- Configure the Schedule:
- Single Occurrence – runs once at the specified date and time.
- Recurring – runs at a defined interval with configurable start and end dates.
Note: Schedule times are based on UTC. Ensure the schedule accounts for the time zone of your operations team.
Review the connector configuration summary before saving. Verify that the authentication type, domain, tenant, and schedule settings are correct. Click Create to create the connector.
Advanced Settings
Note: Advanced Settings are available after the connector is saved. Navigate to the connector's detail view and select the relevant tab to configure these options.
Filters Tab
Custom filter queries are not currently supported for the CheckmarxOne DAST connector. The connector retrieves all available DAST scan results from the configured Checkmarx One environment on each run.
Transform Map Tab
The connector includes a default transformation map that maps Checkmarx One DAST source fields to Qualys ETM target fields. You may clone or create additional maps to customize field transformations for your environment.
![]()
CheckmarxOne DAST – Vulnerability MappingCheckmarxOne DAST – Vulnerability Mapping
|
Source Field (Checkmarx One) |
Target Field (Qualys ETM) |
|---|---|
|
|
|
|
|
|
|
|
|
|
|
|
|
|
|
|
|
|
|
|
|
|
|
|
|
|
|
|
|
|
|
|
|
|
|
|
How the Connection Works
The CheckmarxOne DAST connector ingests web application vulnerability findings from Checkmarx One DAST scans into Qualys ETM for unified risk analysis and prioritization. On each scheduled execution, the connector performs a full pull of DAST findings from Checkmarx One. Qualys ETM then processes the data by de-duplicating redundant entries, normalizing data formats, enriching findings with additional context, and calculating risk scores using TruRisk.
Ingested web applications appear in ETM, CSAM, and WAS after the first successful sync. This allows security teams to manage web application risk centrally and optionally activate applications for active scanning within WAS.
Connector States
A successfully configured connector progresses through the following states:
- Registered – The connector is successfully created and registered to fetch data from Checkmarx One.
- Scheduled – The connector is scheduled to execute a connection with the vendor.
- Processing – A connection is active and the connector is fetching asset and findings data.
- Processed – The connector has successfully fetched assets. Findings may still be processing; allow additional time for the import to complete.
Note: The Processed state confirms the connector is configured correctly, but findings import may continue in the background. The entire process may take up to 2 hours to complete on the first run.
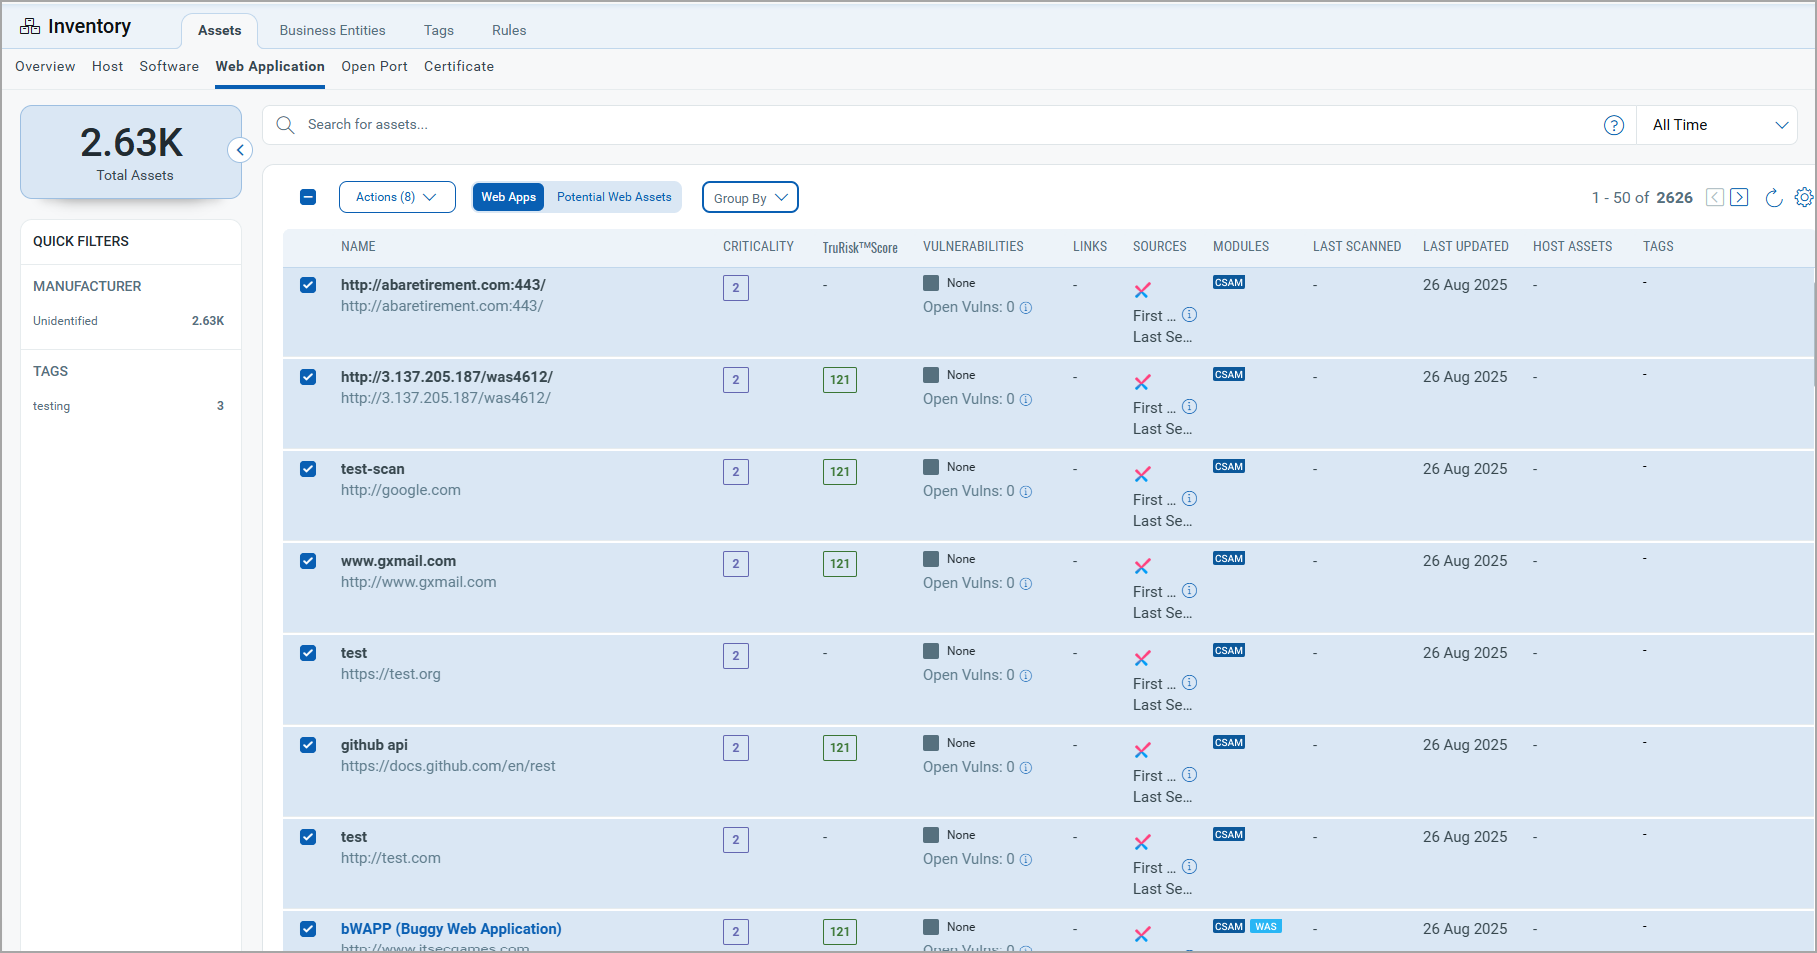
Viewing Assets and Findings in ETM
After the connector reaches the Processed state, imported data is available in Qualys ETM.
- Navigate to Enterprise TruRisk Management > Inventory.
- Go to Assets > Web Applications to view imported Checkmarx applications.
- Use the inventory filter:
inventory:(source:"Checkmarx")
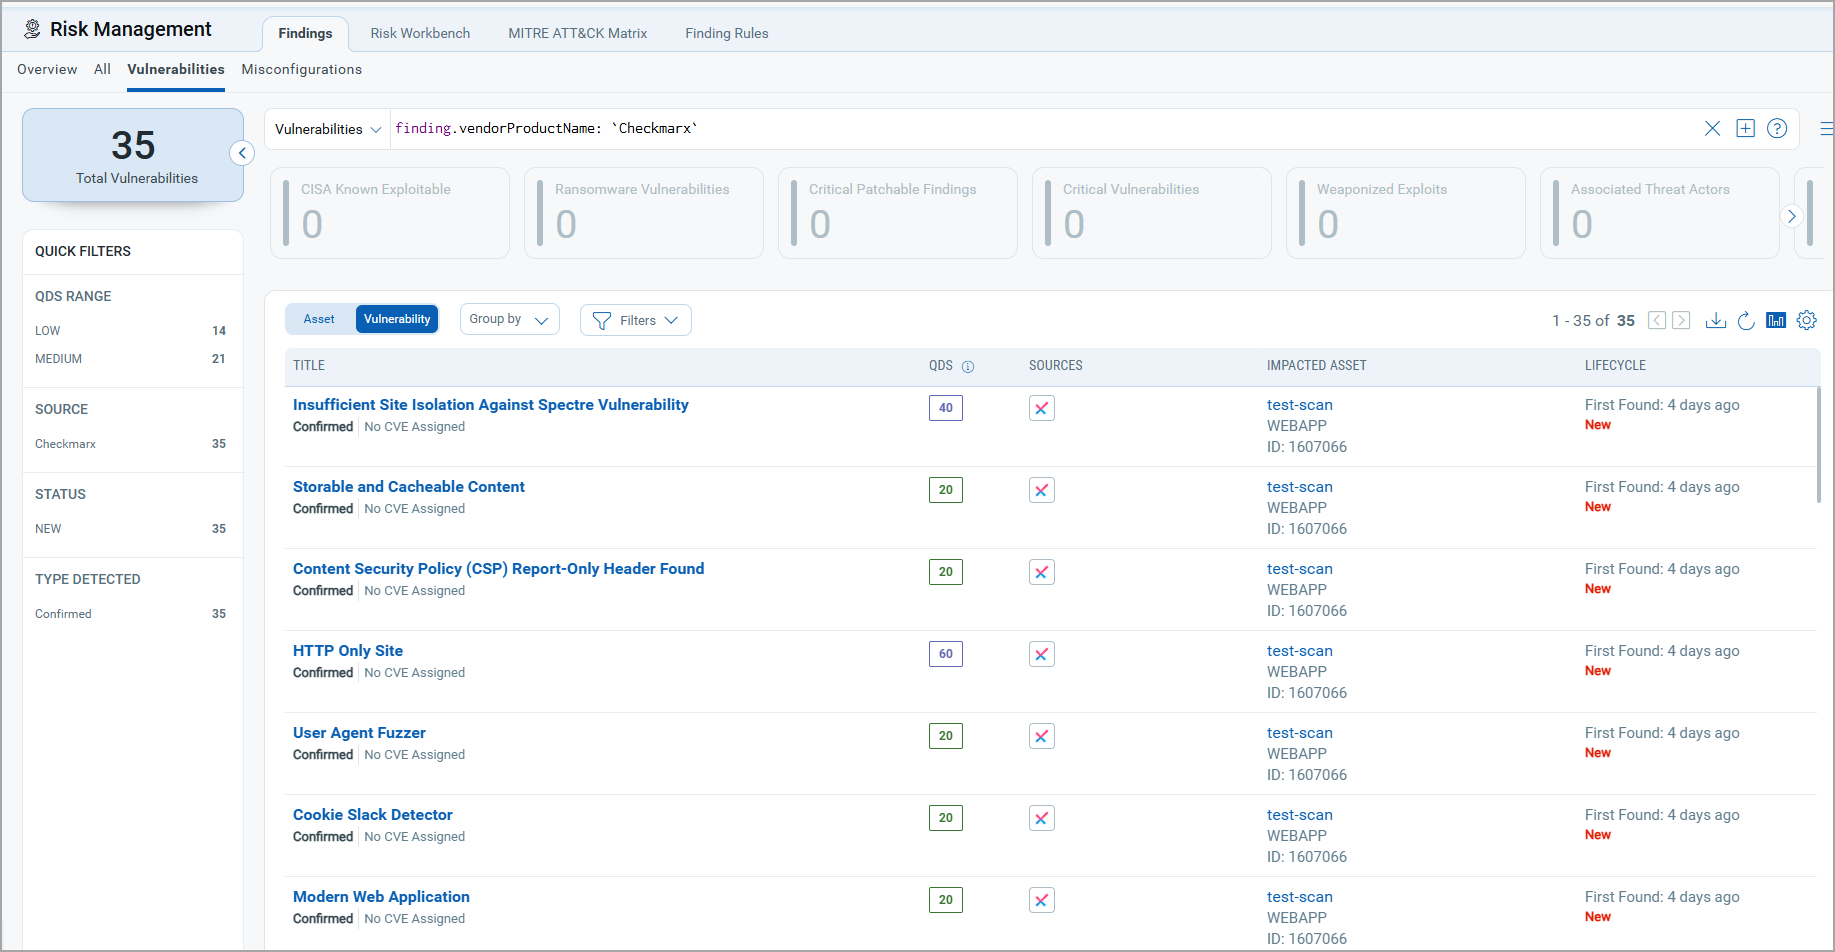
- Navigate to Risk Management > Findings > Vulnerability.
- Use the findings filter:
findings.vendorProductname:"CheckmarxOne DAST"
- Use the findings filter:
Activating Web Applications in WAS
Web applications synced from the CheckmarxOne DAST connector appear in ETM, CSAM, and WAS. By default, these applications are not activated for scanning in WAS.
To activate web applications in WAS:
- Navigate to CSAM > Web Applications.
- Select the desired web application.
- Choose Quick Actions > Activate WAS.
Important: Activating web applications consumes WAS licenses. Activate only the applications that require active scanning in WAS.
Troubleshooting
|
Issue |
Resolution |
|---|---|
|
Authentication failure on connector run |
Verify the Domain Name, Tenant Name, and API Key entered in Qualys ETM are correct. Confirm the API key has not expired. Ensure the Domain Name matches your Checkmarx One regional deployment URL. |
|
Connection test fails |
Verify the Domain Name includes the correct regional prefix (for example, |
|
No findings imported after first run |
The connector transitions through Registered, Scheduled, Processing, and Processed states. The entire process may take up to 2 hours. Verify that Checkmarx One has completed DAST scans with results available. Delta synchronization is not supported; each run performs a full pull. |
Additional Information
API Reference
The connector uses the following Checkmarx One API endpoints to retrieve DAST data:
|
Name |
Endpoint |
Notes |
|---|---|---|
|
Authorization API |
|
Grant type: |
|
Fetch Environments |
|
Example domain: |
|
Fetch Scans |
|
Example environment ID: |
|
Fetch Scan Results |
|
Example scan ID: |