CheckmarxOne SAST Connector
The Checkmarx One SAST connector ingests code repository security findings into Qualys Enterprise TruRisk Management, enabling organizations to centralize static application security testing results alongside other risk data.
By analyzing source code and binaries for vulnerabilities without execution, it identifies flaws that might otherwise escape detection during runtime testing. Security teams benefit from consolidated visibility across their application portfolio, allowing them to prioritize remediation efforts through integrated risk visualization and TruRisk Insights.
The unidirectional integration performs full data pulls on schedule, making it straightforward to maintain current vulnerability assessments within a unified risk management platform.
Connector Details
|
Vendor |
Checkmarx |
|---|---|
|
Product Name |
Checkmarx |
|
Category |
Application Security |
|
Findings Support |
Yes |
|
Supported Assets |
Code Repository, Generic Application |
|
Version |
1.0.0 |
|
Integration Type |
API Integration (REST) |
|
Direction |
Unidirectional |
|
Delta Support |
Not Supported |
Configure the Connector
The configuration wizard consists of three steps. A valid connection test is required before you can proceed.

Before You Begin - AuthenticationBefore You Begin - Authentication
Have the following ready before starting the connector configuration in Qualys ETM:
- Ensure you have access to your Checkmarx One environment with permissions to create API keys.
- Generate an API key in Checkmarx One. Navigate to Settings > Identity and Access Management > API Keys and click Create Key. Store the generated key securely.
- Note your Checkmarx region URL and Tenant Name (Tenant ID). Your region determines the base URL (for example,
eu.ast.checkmarx.netfor EU orast.checkmarx.netfor US). - Contact your Technical Account Manager (TAM) or Qualys Support to activate the connector for your subscription.
Generate an API Key in Checkmarx One
- Log in to your Checkmarx One environment using the appropriate regional URL (see the region table below).
- Navigate to Settings > Identity and Access Management > API Keys.
- Click Create Key.
- Optionally configure a note description, expiration period, and notification emails.
- Click Create and copy the generated API key immediately. Store it securely.
Important: The API key is shown only once at creation. If you navigate away before copying it, you must delete and recreate the key. If an expiration period is configured, rotate the key before expiry to maintain uninterrupted data ingestion.
Reference: Creating OAuth Clients – Checkmarx Docs
Checkmarx One Regional URLs
Use the URL that corresponds to your Checkmarx One deployment region. Enter this full URL as the Checkmarx Region field in Qualys ETM.
| US | https://ast.checkmarx.net |
| US2 | https://us.ast.checkmarx.net |
| EU | https://eu.ast.checkmarx.net |
| EU2 | https://eu-2.ast.checkmarx.net |
| DEU | https://deu.ast.checkmarx.net |
| Australia & New Zealand | https://anz.ast.checkmarx.net |
| India | https://ind.ast.checkmarx.net |
| Singapore | https://sng.ast.checkmarx.net |
| UAE | https://mea.ast.checkmarx.net |
| Israel (Gov) | https://gov-il.ast.checkmarx.net |
Permissions Required
The API key must have read access to vulnerabilities in Checkmarx One. The required permission is read:vulnerabilities on the VulnerabilityFindings entity type.
Scope and Data Access
The connector retrieves the latest completed SAST scan results for each project in Checkmarx One. Data is fetched from the projects and scan results API endpoints. Custom filtering is not supported during connector configuration. The default asset class is Generic Application, and applications appear in ETM, CSAM, and WAS after ingestion (not activated by default in WAS).
Key Rotation
When rotating the API key, generate a new key in Checkmarx One under Settings > Identity and Access Management > API Keys. Update the credential in Qualys ETM via the Edit Connector option and enter the new API key. If an expiration period was configured on the key, rotate before expiry to maintain uninterrupted data ingestion
Create a Profile & ConnectionCreate a Profile & Connection
This step establishes the connector's identity and authenticates it with your Checkmarx One environment.
- Log in to Qualys ETM.
- Navigate to Connectors > Integration.
- Locate the CheckmarxOne SAST Connector on the Connector Marketplace and click Add. This is a one-time task.
Note: If the connector is already added, navigate to My Connectors, search for the CheckmarxOne SAST connector, and click Manage Connections.
- From the connector tile, click Manage Connections.
- Click Create Connection. The Setup Guide opens with the Before You Begin checklist and four reference tabs: Overview, Auth Setup, Permissions, and Troubleshooting. Review these before continuing.
- Click Proceed to Setup.
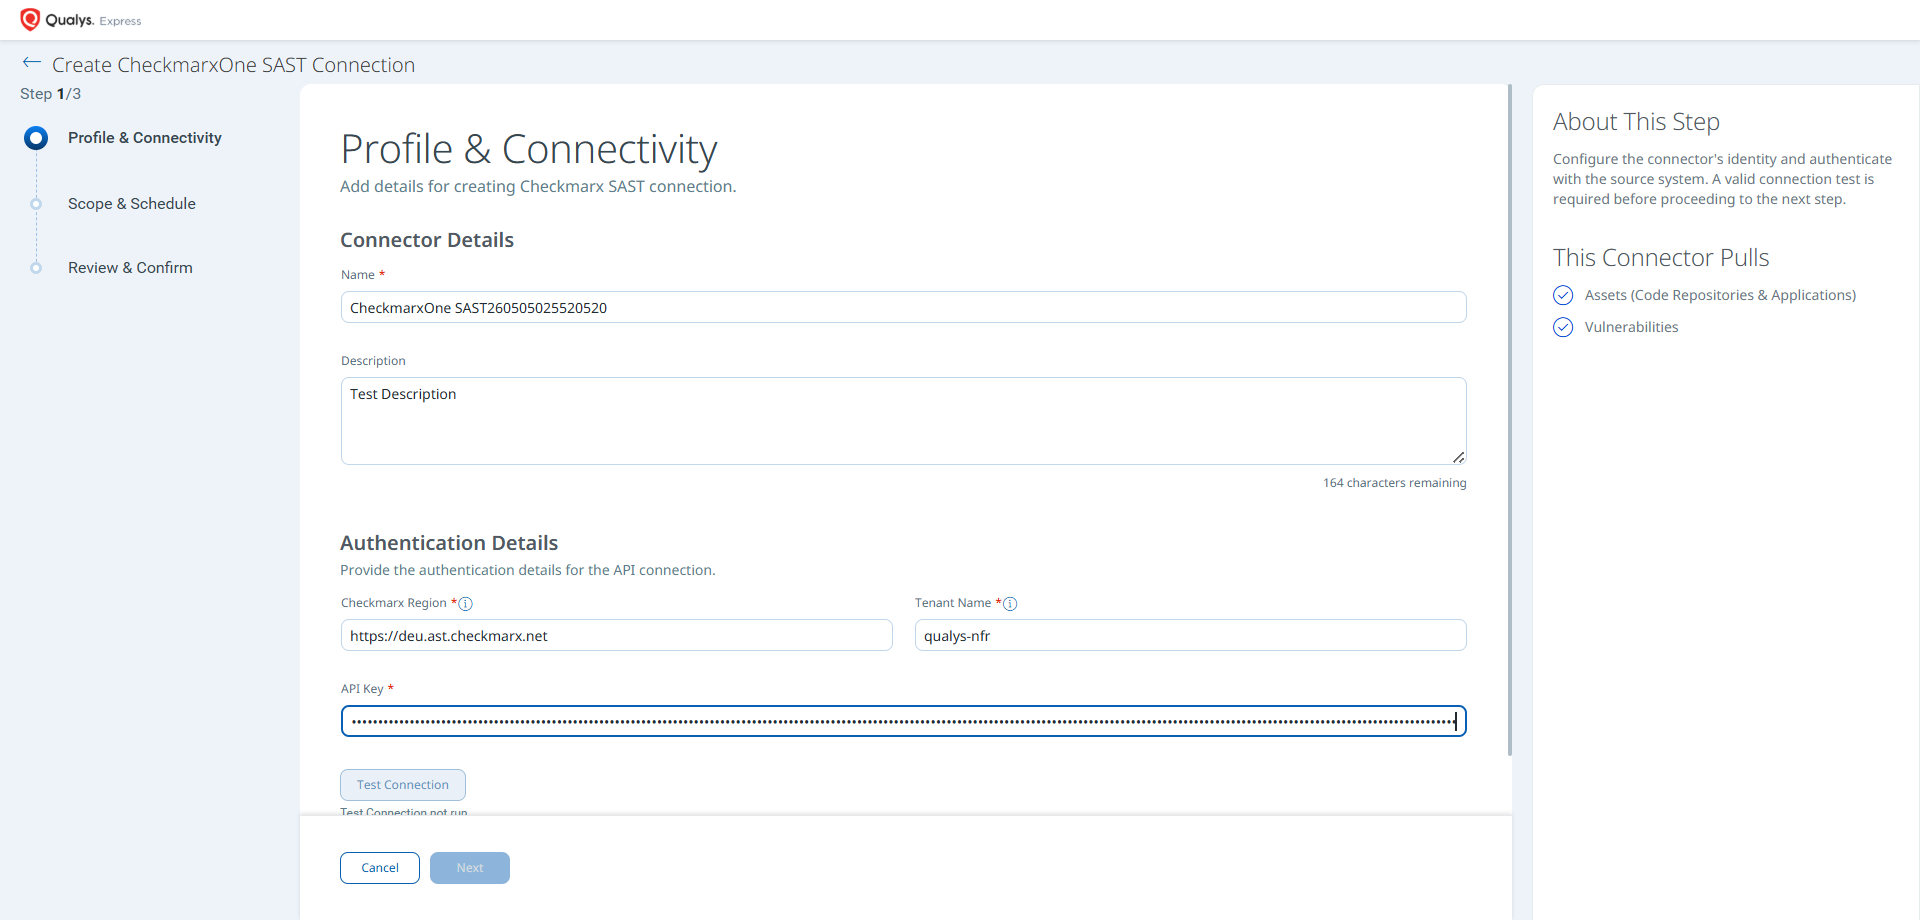
- On the Profile & Connectivity page, complete the following fields:
Connector Details
Field Description Name (required) A unique display name for this connector connection. Description An optional description of the connection's purpose. Authentication Details
Provide the following values to authenticate the connector with your Checkmarx One environment.
Field Type Description Checkmarx Region (required) String The base URL of your Checkmarx One environment. Example: https://deu.ast.checkmarx.net. See the regional URL table above.Tenant Name (required) String The Tenant ID associated with your Checkmarx One user profile. Example: qualys-nfrAPI Key (required) Encrypted String The API key generated from Checkmarx One under Settings > Identity and Access Management > API Keys.
- Click Test Connection. A modal appears showing the status of five sequential checks:
- Network Reachability — Verifies the Checkmarx One regional endpoint is reachable over HTTPS (port 443).
- TLS Handshake — Confirms a secure connection can be established.
- Authentication Credential Check — Validates the API key, Region, and Tenant Name against the Checkmarx OAuth endpoint.
- Authorization Scope Check — Confirms the API key has
read:vulnerabilitiespermission on the VulnerabilityFindings entity. - Data Fetch — Verifies that project and scan data can be retrieved from the Checkmarx One API.
Important: All five checks must pass before you can proceed. If Network Reachability fails with an Unknown Host error, verify that the Checkmarx Region value matches your deployment (for example,
https://deu.ast.checkmarx.netfor the DEU region) and that Qualys cloud can reach the endpoint over HTTPS (port 443).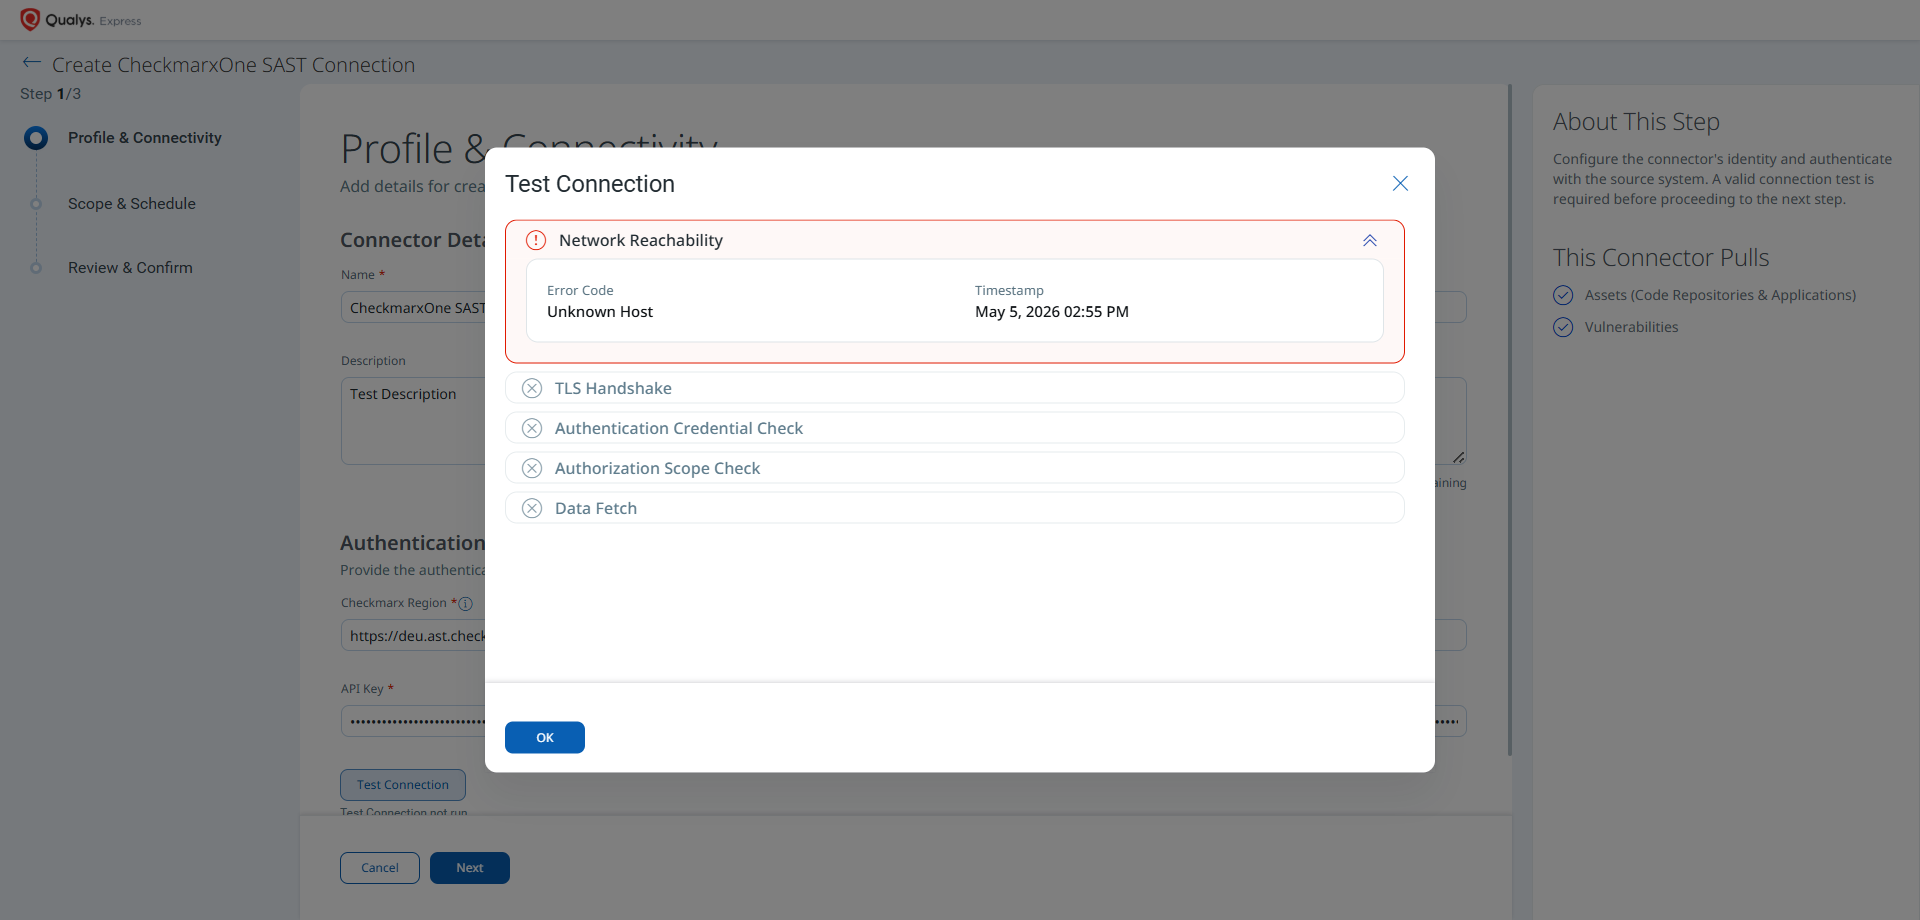
- Click OK to dismiss the modal, then click Next.
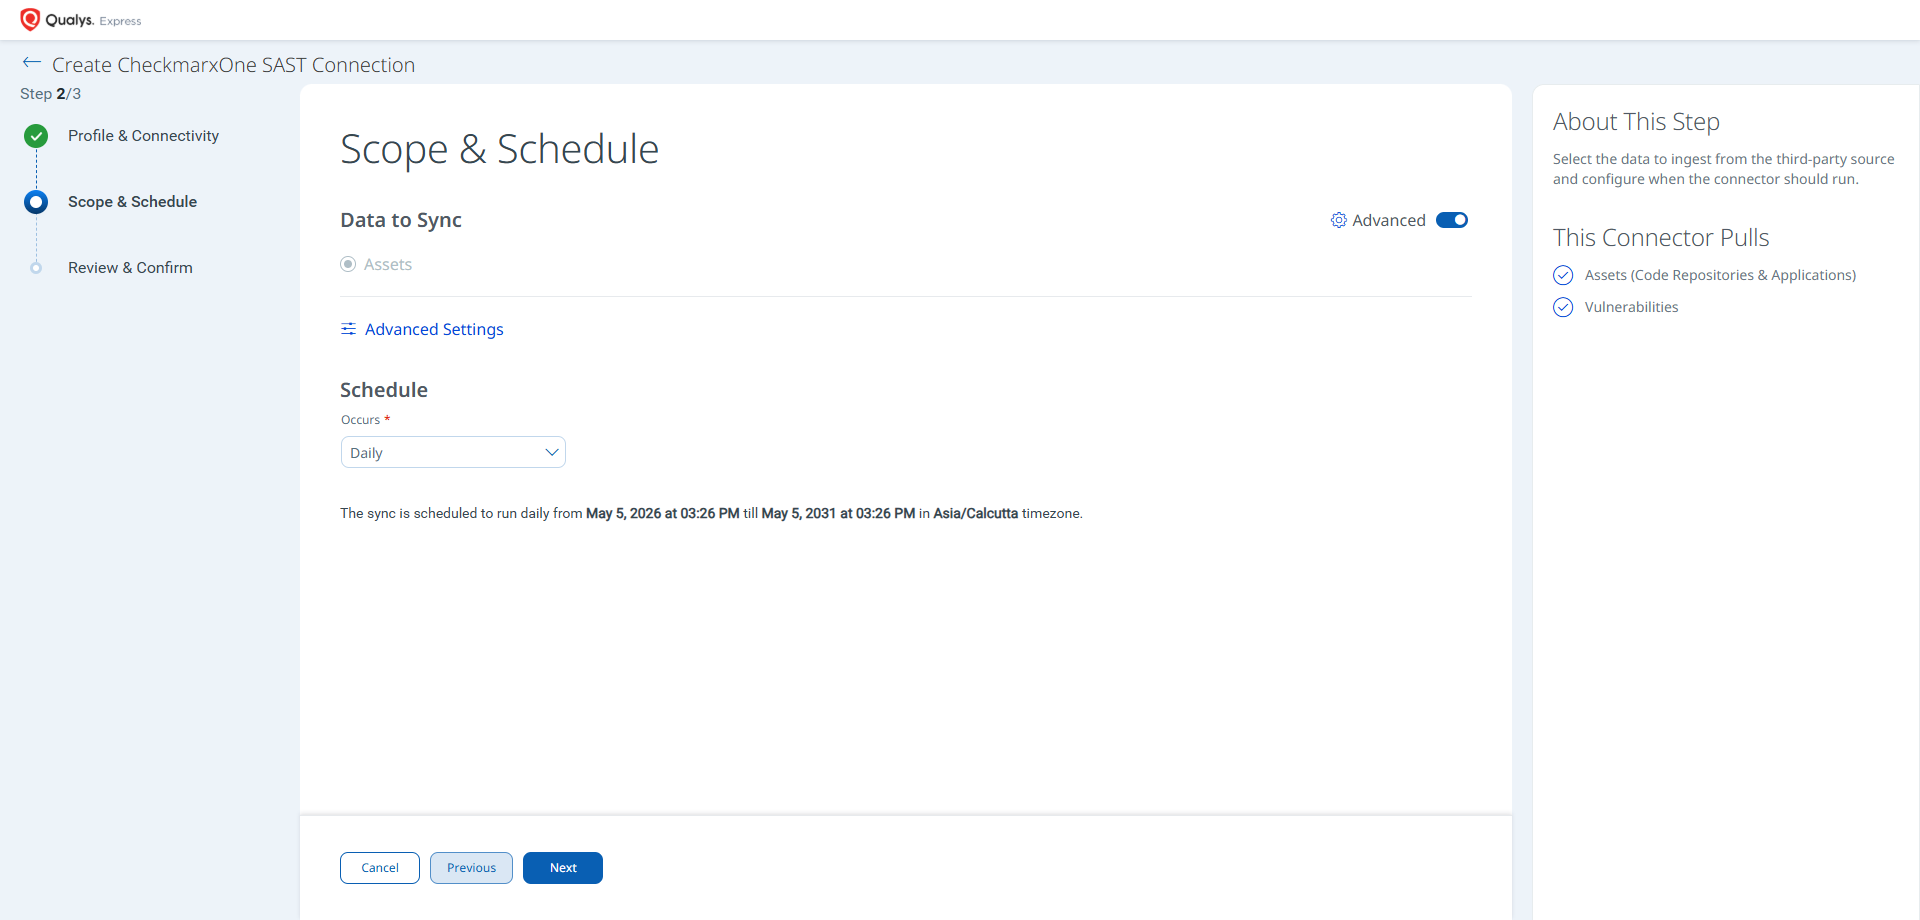
Set the Scope & ScheduleSet the Scope & Schedule
This step defines what data is ingested and when the connector runs.
- Data to Sync — This connector supports Assets only. Assets & Findings is not available as a separate radio option; findings are always ingested as part of the asset sync.
- Advanced Settings (optional) — Click Advanced Settings to restrict which asset types are ingested or to view the active transform map. See Advanced Settings below.
- Schedule — Select an execution frequency from the Occurs dropdown (for example, Daily). The system displays the calculated start date, end date, and timezone.
Note: The timezone is determined by your Qualys account settings. The connector runs from the configured start date for a default period of 5 years.
- Click Next.
Advanced Settings
Enabling the Advanced toggle on the Scope & Schedule page or clicking the Advanced Settings link opens a panel with two tabs: Filters and Transform Map.
Filters Tab
The Filters tab provides chip-based selectors for asset types and findings. The following options are available:
- Asset Types: Code Repository, Generic Application. Both are selected by default. Remove chips to restrict ingestion to a specific asset class.
- Findings: Vulnerability. Selected by default when asset sync is active.
Note: Click Save after making changes in the Advanced Settings panel. Closing without saving discards any modifications.
Transform Map Tab
The Transform Map tab displays the active transformation map applied during connector execution. The default active map is the Checkmarx SAST Transformation Map, predefined by Qualys and applied automatically. See Transformation Maps for the full field-level mapping details.
How the Connection Works
On each scheduled or on-demand run, the CheckmarxOne SAST connector retrieves the following from Checkmarx One and imports it into ETM:
- Assets (Code Repositories & Applications) — Code repository assets and Generic Application assets representing scanned projects in Checkmarx One. Assets appear in ETM, CSAM, and WAS after ingestion (not activated by default in WAS).
- Vulnerabilities — The latest completed SAST scan results for each project, including finding type, status, severity, CWE IDs, query names, descriptions, and first/last discovery dates.
Note: The connector retrieves the latest completed SAST scan results for each project. Delta synchronization is not supported; each run performs a full pull of all current findings.
Connector States
- Registered — Connection created; data fetch has not yet begun.
- Scheduled — Queued for the next scheduled execution.
- Processing — Assets and findings are actively being fetched from Checkmarx One.
- Processed — Assets have been imported; findings may continue processing in the background.
Note: The Processed state indicates the connector has successfully fetched assets but may still be importing all findings. This entire process may take up to 2 hours. Once complete, imported data is available in ETM.
Viewing Assets and Findings in ETM
- Assets: Navigate to Enterprise TruRisk Management > Inventory > Assets > Applications > Other Applications to view imported Checkmarx applications.
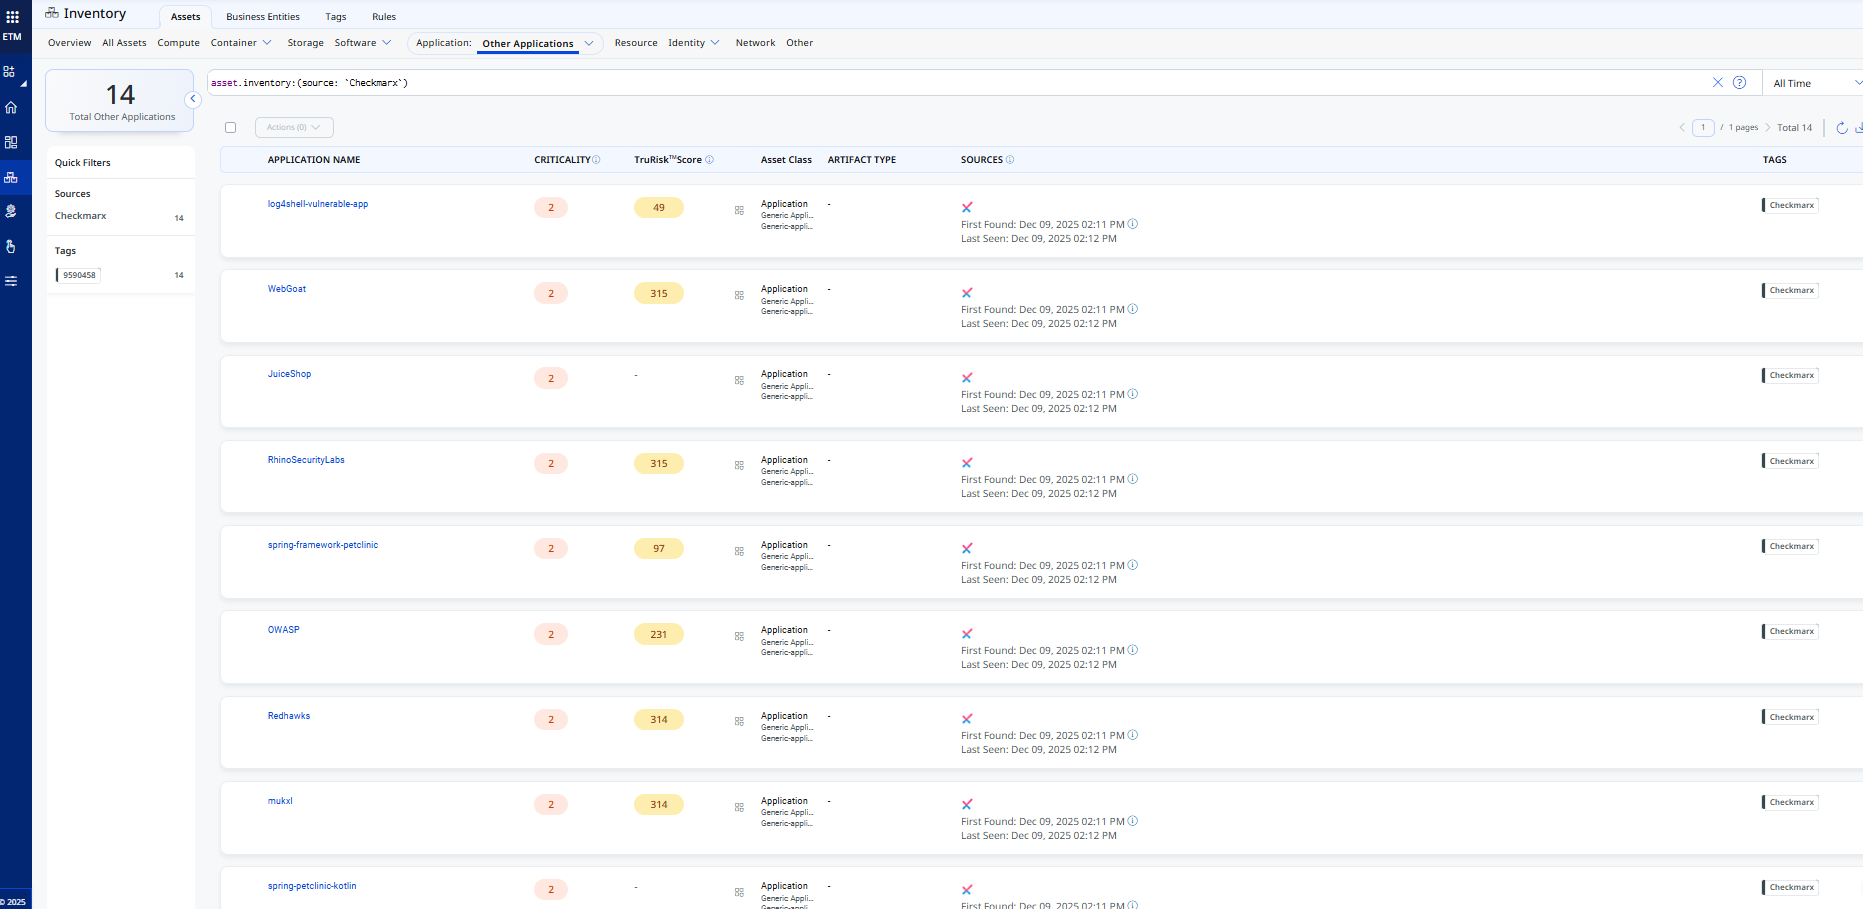
- Findings (Vulnerabilities): Navigate to Enterprise TruRisk Management > Risk Management > Findings > Vulnerability.
Use the filter:finding.vendorProductName:"Checkmarx"
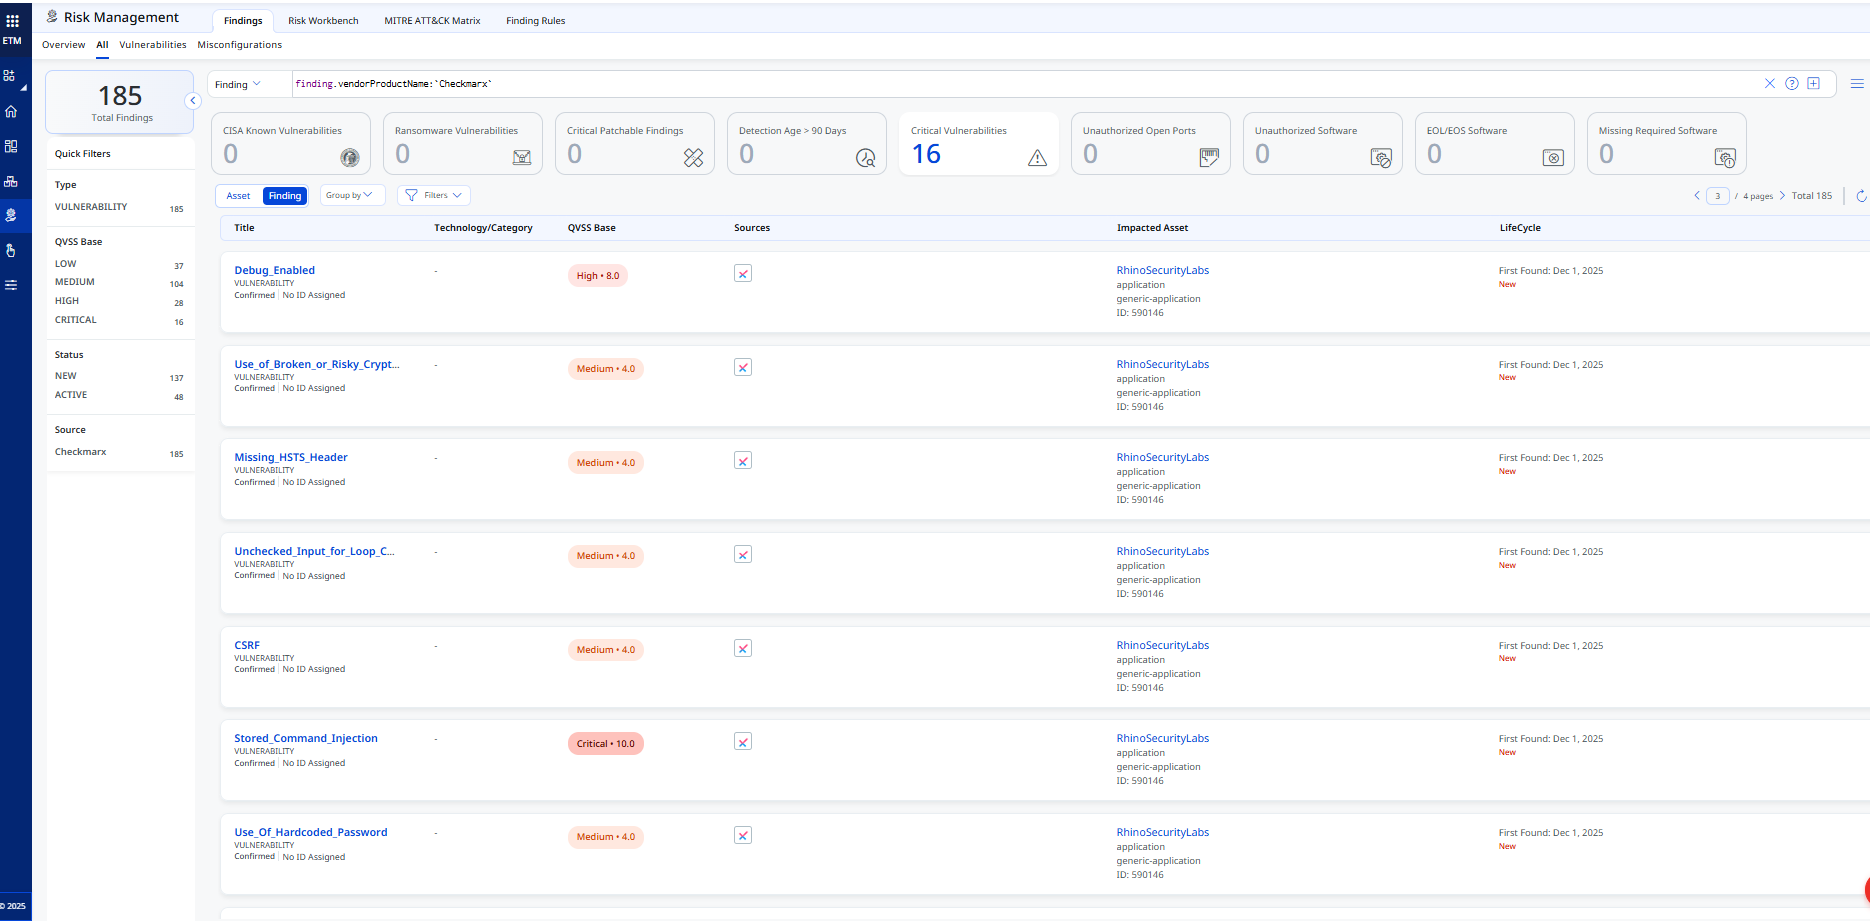
Activating Web Applications in WAS
Assets (Code Repositories) synced from the CheckmarxOne SAST Connector appear in ETM, CSAM, and WAS, but are not activated for scanning in WAS by default.
To activate a web application in WAS:
- Navigate to CSAM > Web Applications.
- Select the desired web application.
- Choose Quick Actions > Activate WAS.
Note: Activating web applications consumes WAS licenses. Activate only the applications that require scanning. This connector fetches the latest scans for activated web applications.
Troubleshooting
| Issue | Resolution |
|---|---|
| Authentication failure on connector run | Verify the Checkmarx Region, Tenant Name, and API Key entered in Qualys ETM are correct. Confirm the API key has not expired. Ensure the regional URL matches your Checkmarx One deployment. |
| Connection test fails (Network Reachability — Unknown Host) | Verify the Checkmarx Region value matches your deployment (for example, https://deu.ast.checkmarx.net for the DEU region, including the full https:// prefix). Confirm Qualys cloud can reach the Checkmarx One API endpoint over HTTPS (port 443). Check that the Tenant Name matches your Checkmarx One Tenant ID. |
| No findings imported after first run | The connector transitions through Registered, Scheduled, Processing, and Processed states. The entire process may take up to 2 hours. Verify that Checkmarx One has completed SAST scans with results available. Delta synchronization is not supported; each run performs a full pull. |
| Connector not available in the integrations list | The connector requires activation on your Qualys account. Contact your Technical Account Manager (TAM) or Qualys Support to activate it for your subscription. |
| Test Connection fails at Authorization Scope Check | Ensure the API key has the read:vulnerabilities permission on the VulnerabilityFindings entity type in Checkmarx One. Regenerate the key with the correct permissions if needed. |
Additional Information
API Reference
The CheckmarxOne SAST connector calls the following Checkmarx One REST API endpoints during each execution:
| Name | Endpoint | Notes |
|---|---|---|
| Authorization | https://<domain>.checkmarx.net/auth/realms/<tenantId>/protocol/openid-connect/token |
Grant Type: client_credentials |
| Fetch Projects | https://<domain>api/projects/?limit=10&offset=0 |
Example domain: deu.ast |
| Fetch Last Scan | https://<domain>.checkmarx.net/api/projects/last-scan?scan-status=Completed&project-ids=<projectId>&engine=sast |
Retrieves the latest completed SAST scan per project |
| Fetch Scan Details | https://<domain>.checkmarx.net/api/results/?scan-id=<scanId>&limit=5000&offset=0 |
Retrieves all findings for a given scan ID |
Transformation Map
Checkmarx SAST — Vulnerability Transformation MapCheckmarx SAST — Vulnerability Transformation Map
| Source Field | Target Field |
|---|---|
name |
asset.assetDetail.genericApplicationAssetClass.name |
createdAt |
asset.assetDetail.sourceCreatedAt |
id |
externalAssetId |
name |
asset.assetDetail.name |
id |
vendorAssetId |
findings[].type |
findingGroup.findings[].subCategory |
findings[].id |
findingGroup.findings[].externalFindingId |
findings[].status |
findingGroup.findings[].findingStatus |
findings[].severity |
findingGroup.findings[].severity |
findings[].firstFoundAt |
findingGroup.findings[].firstFoundOn |
findings[].foundAt |
findingGroup.findings[].lastFoundOn |
findings[].description |
findingGroup.findings[].description |
findings[].data.queryName |
findingGroup.findings[].name |
findings[].vulnerabilityDetails.cweId |
findingGroup.findings[].findingType.vulnerability.cweId |