CSV Automation
The CSV Automation connector solves the challenge of manually uploading vulnerability and security data by enabling scheduled, automated processing of CSV files to a gateway URL. Rather than requiring security teams to repeatedly execute upload tasks, the system can run on a defined schedule (hourly, daily, or weekly) to continuously ingest new or updated CSV data.
The connector intelligently handles large files by splitting them into chunks of 10 MB before transmission, eliminating manual intervention bottlenecks. This automation ensures security teams maintain current findings in their systems while freeing analysts to focus on remediation and investigation rather than data pipeline management.
Now let's begin with creating your first CSV automation.
How to Download the CSV Automation Script?
- Navigate to Generic CSV Connector.
- Select any connector from your connector list.
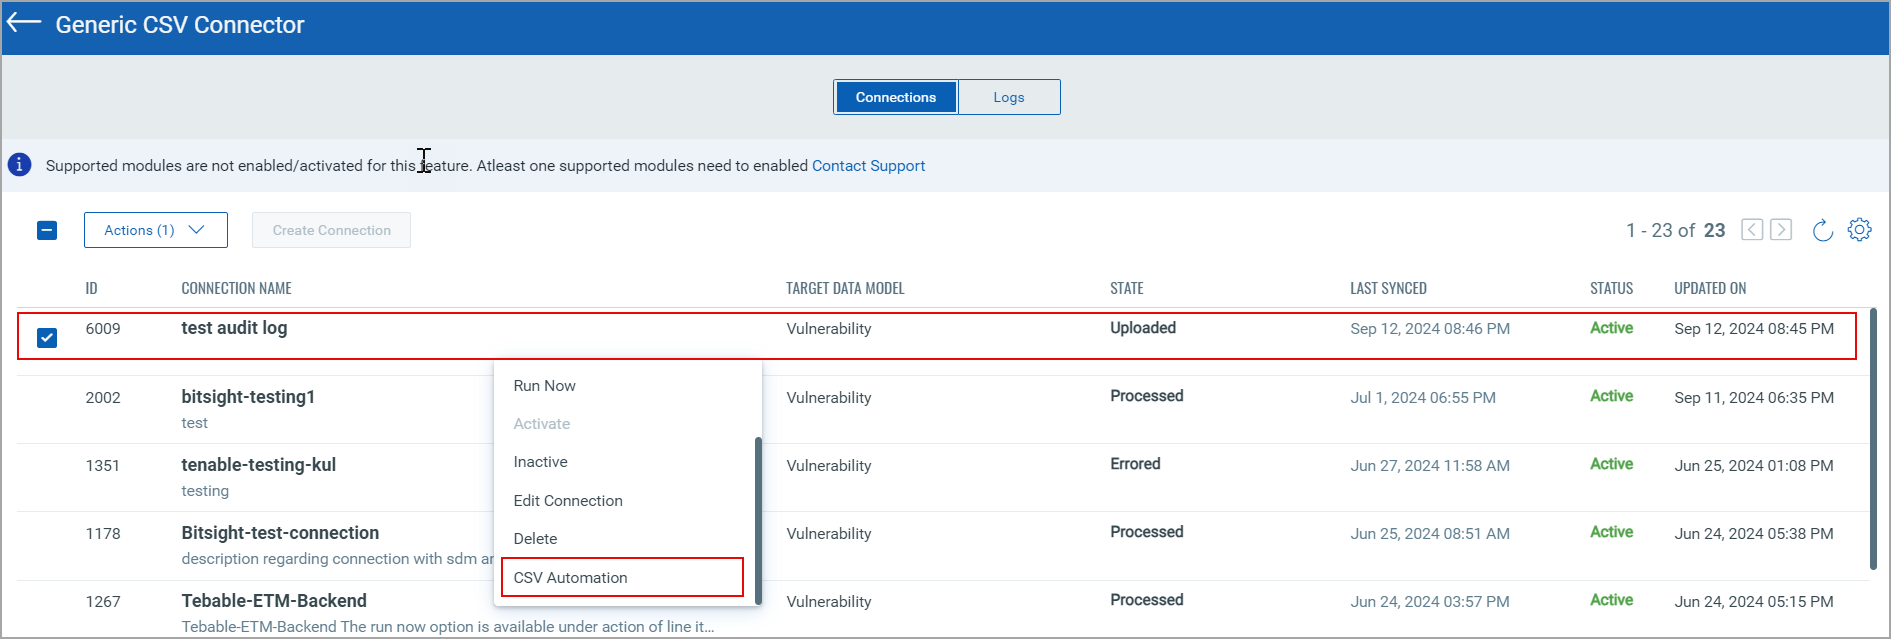
- From the Quick Actions Menu, select CSV Automation.
How To Run The CSV Automation Script?
Before running the CSV Automation script, you must ensure you have the following set up and running.
- You can install the latest version of Python here.
- Download the zip files from CSV Connector as described above.
- Navigate to the Project Directory.
cd connector-config-automation - Install Dependencies.
pip install -r requirements.txt - Create Configuration file with name config.json in same folder as main.py
{
"header": 1,
"baseUrl": "https://yourapi.example.com",
"username": "your_username",
"password": "your_password",
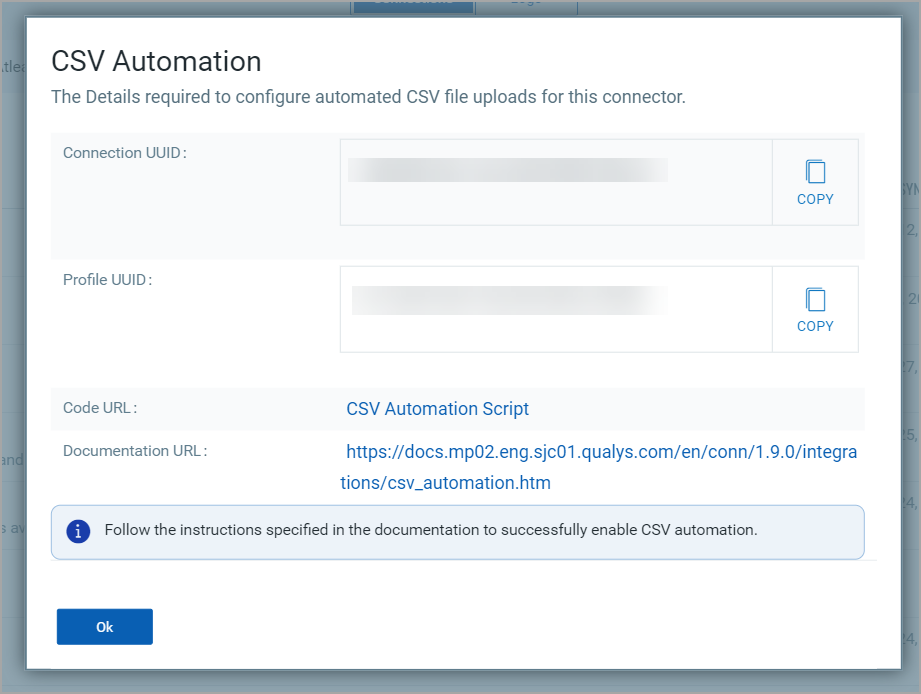
"connectionUuid": "your_connection_uuid",
"profileUuid": "your_profile_uuid",
"envQualysUsernameProperty": "ENV_QUALYS_USERNAME",
"envQualysPasswordProperty": "ENV_QUALYS_PASSWORD"
}
Running the Script
Execute the following command to run the script.
cd connector-config-automation python3 main.py --header <header-line> --csvPath <csv-file-path> --baseUrl <base-url> --username <username> --password <password> --profileUuid <profile-uuid> --connectionUuid <connection-uuid>
Below, you can find the list of available commands and their descriptions.
|
Command |
Description |
|---|---|
|
--header |
Line number of the header row (default: 1). |
|
--csvPath |
Path to the CSV file (required). |
|
--baseUrl |
Base apigateway Qualys URL for uploading chunks (required). |
|
--username |
Qualys Username for authentication (optional, if you provide value for envQualysUsernameProperty property we will read it from env). |
|
--password |
Qualys Password for authentication (optional, if you provide value for envQualysPasswordProperty property we will read it from env). |
|
--connectionUuid |
Connection UUID (required, this will be available on connector UI). |
|
--profileUuid |
Profile UUID (required, this will be available on connector UI). |
|
--envQualysUsernameProperty |
Environment variable name for username (optional). |
|
--envQualysPasswordProperty |
Environment variable name for password (optional). |
To use this script as part of other scripts, run the following command.
   import start from connector-config-automation.main.py
   start(csv_path)
Your selected connector can now upload new CSV files automatically to run the connection and fetch findings.