PortSwigger BurpSuite
The PortSwigger Burp Suite connector bridges web application scanning and vulnerability management by automatically transferring security findings from Burp Suite Enterprise into Qualys ETM.
It solves the integration challenge of consolidating web vulnerability data with other security findings through deduplicating redundant entries, normalizing data formats, enriching findings with additional context, and calculating risk scores using TruRisk.
For security teams, this integration streamlines vulnerability prioritization by enabling unified risk assessment across multiple sources while reducing manual data handling and analysis overhead.
Connector Details
Here is a comprehensive overview of what the PortSwigger BurpSuite Connector supports.
|
Vendor |
PortSwigger |
|
Product Name |
BURPSUITE |
|
Category |
Risk Source |
|
Findings Support |
Yes |
|
Supported Assets |
Web Applications |
|
Version |
1.0.0 |
|
Integration Type |
API Integration (REST) |
|
Direction |
Unidirectional |
|
Delta Support |
Supported |
| Import of Installed Software | Not Supported |
| Import of Source Tags | Not Supported |
| Filters/Filter Query | Yes |
Prerequisites
These are the required configurations to successfully create a PortSwigger Burp Suite connection with Qualys ETM.
User Roles and Permissions
The minimum role required in Burp Suite Enterprise to generate API credentials is Scan Viewer.
How to Generate the API Key?
-
Open Burp Suite Enterprise Edition.
-
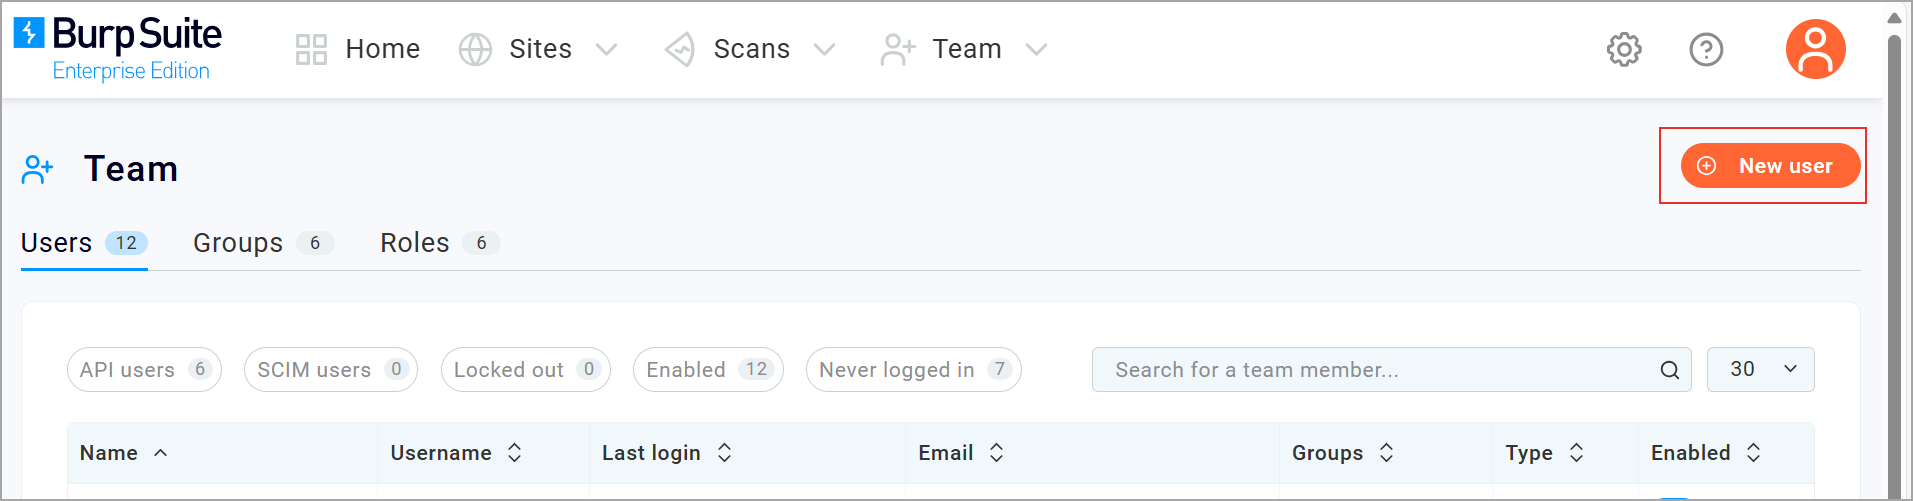
Navigate to Teams > All Users.
-
Click New User and fill in required fields (Name, Username, Email).
-
Set Login Type to
API Key. -
Assign the user to the appropriate group.
-
Save the user. The API Key will be displayed—copy it immediately for use in Qualys ETM.
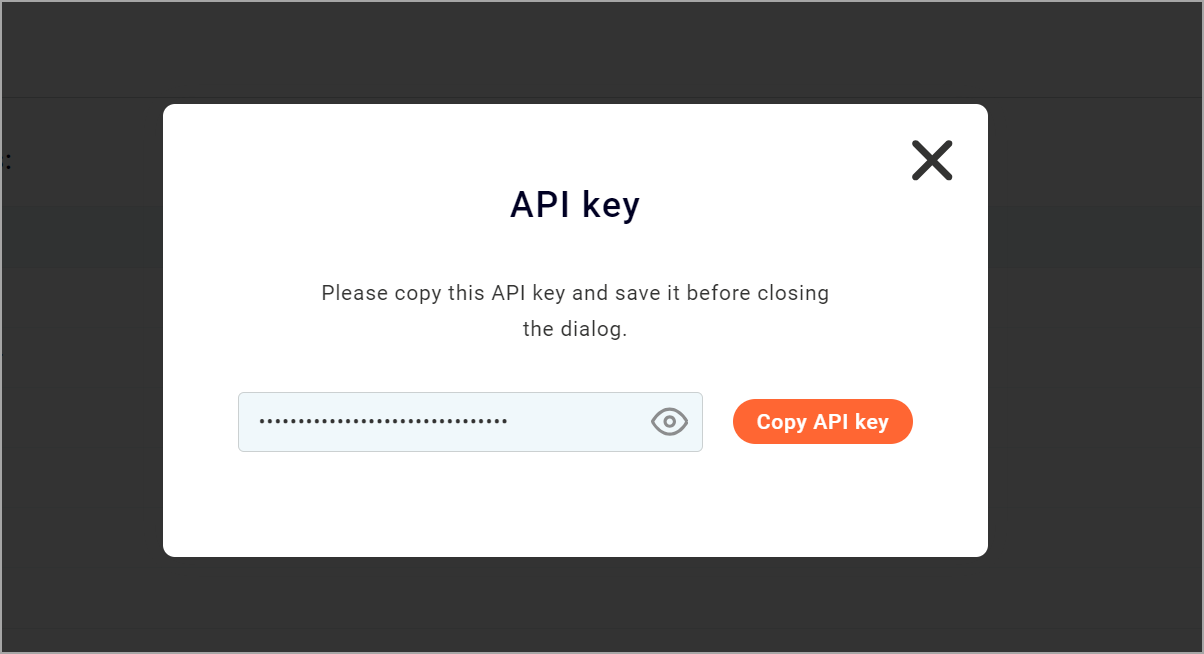
If the API key expires, it must be regenerated and updated in the Qualys ETM connector settings.
Create a New API Connector
Basic Details
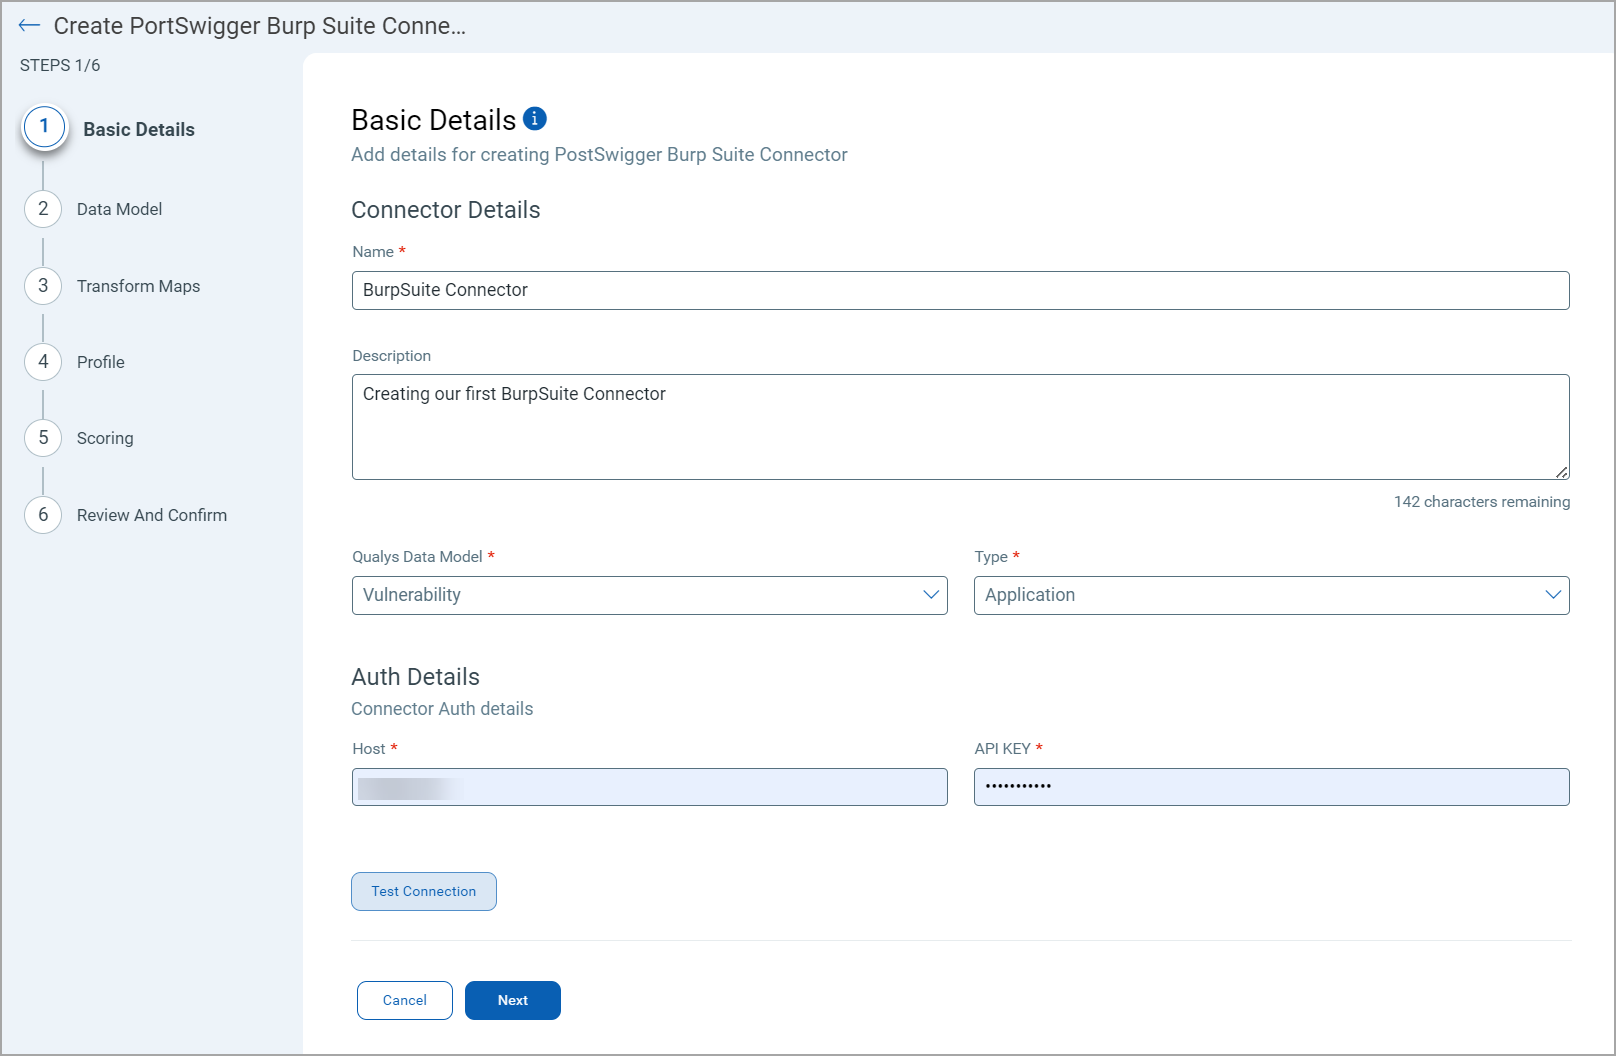
- Provide the Connector's Name and Description.
- Select the Qualys Data Model you want to import or export - currently, we support Vulnerability.
- Select the Type - currently we support Application.
The following screenshot displays the Basic Details fields. -
Next, provide the API authentication details of the PortSwigger BurpSuite environment. You need to provide the Host and API Key.
-
The Host can be your cloud account URL, or if you are on-premise, you can use IP Address+Port Number.
-
The steps to generate the API Key are described in the prerequisites section.
-
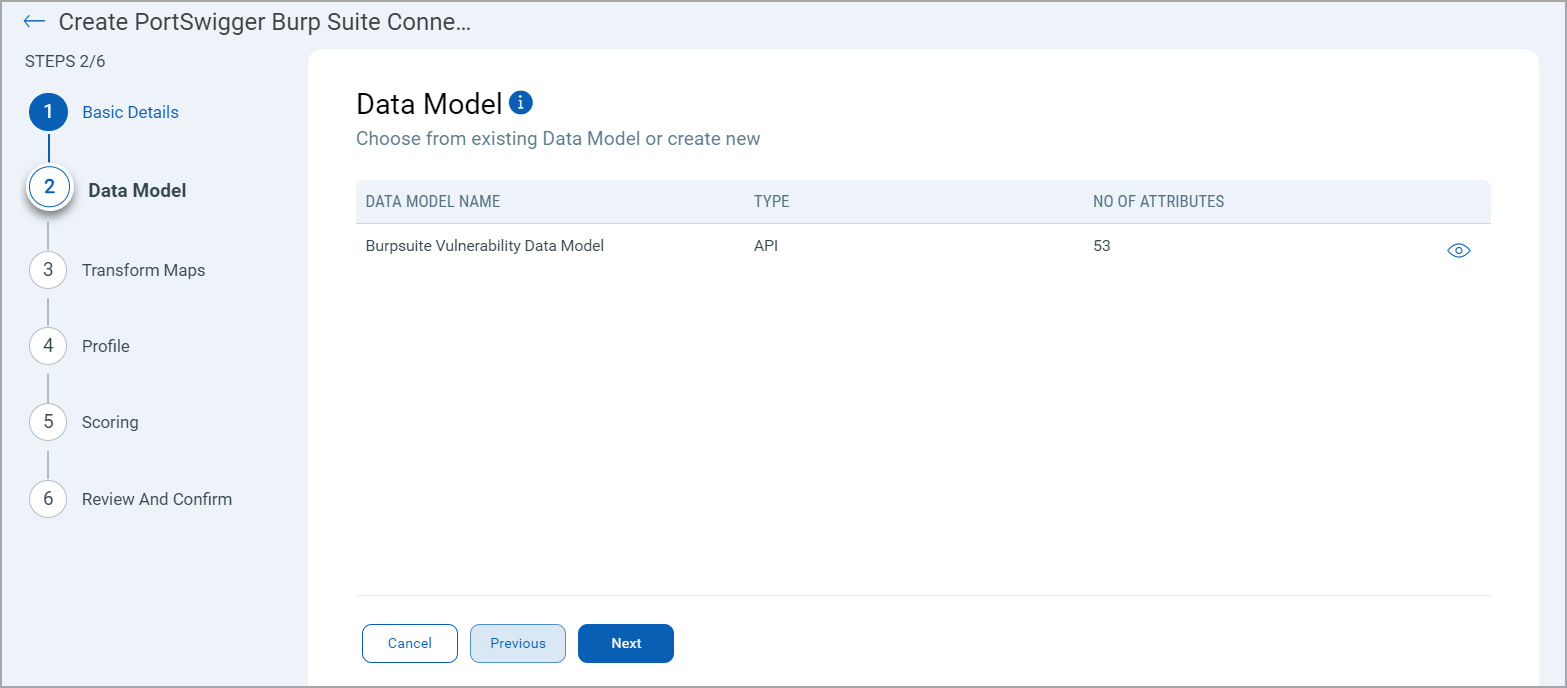
Data Model
The PortSwigger BurpSuite Connector offers an out-of-box data model mapping for you to map with Qualys ETM schema. You can view the schema to understand the attributes in the data model.
Transform Maps
Transform Maps ensure the data is transformed correctly during the import or export process.
The PortSwigger BurpSuite Connector offers an out-of-box transform map for you to proceed without further configuration. View the map to understand the data transformation or clone the map to edit its configurations.
![]()
Click Create New for a new Transform Map.
Perform the following steps to configure a Transform Model:
- Transform Map Name: Enter a unique name for the Transform Map. This name helps identify the specific transformation configuration within this connector.
- Source Data Model: Select the data model that serves as the input for the transformation. This is the model from which data will be extracted.
- Target Data Model: Choose the data model that receives the transformed data. This model defines how the data will be structured after the transformation.
Refer the following Transform Map screenshot:
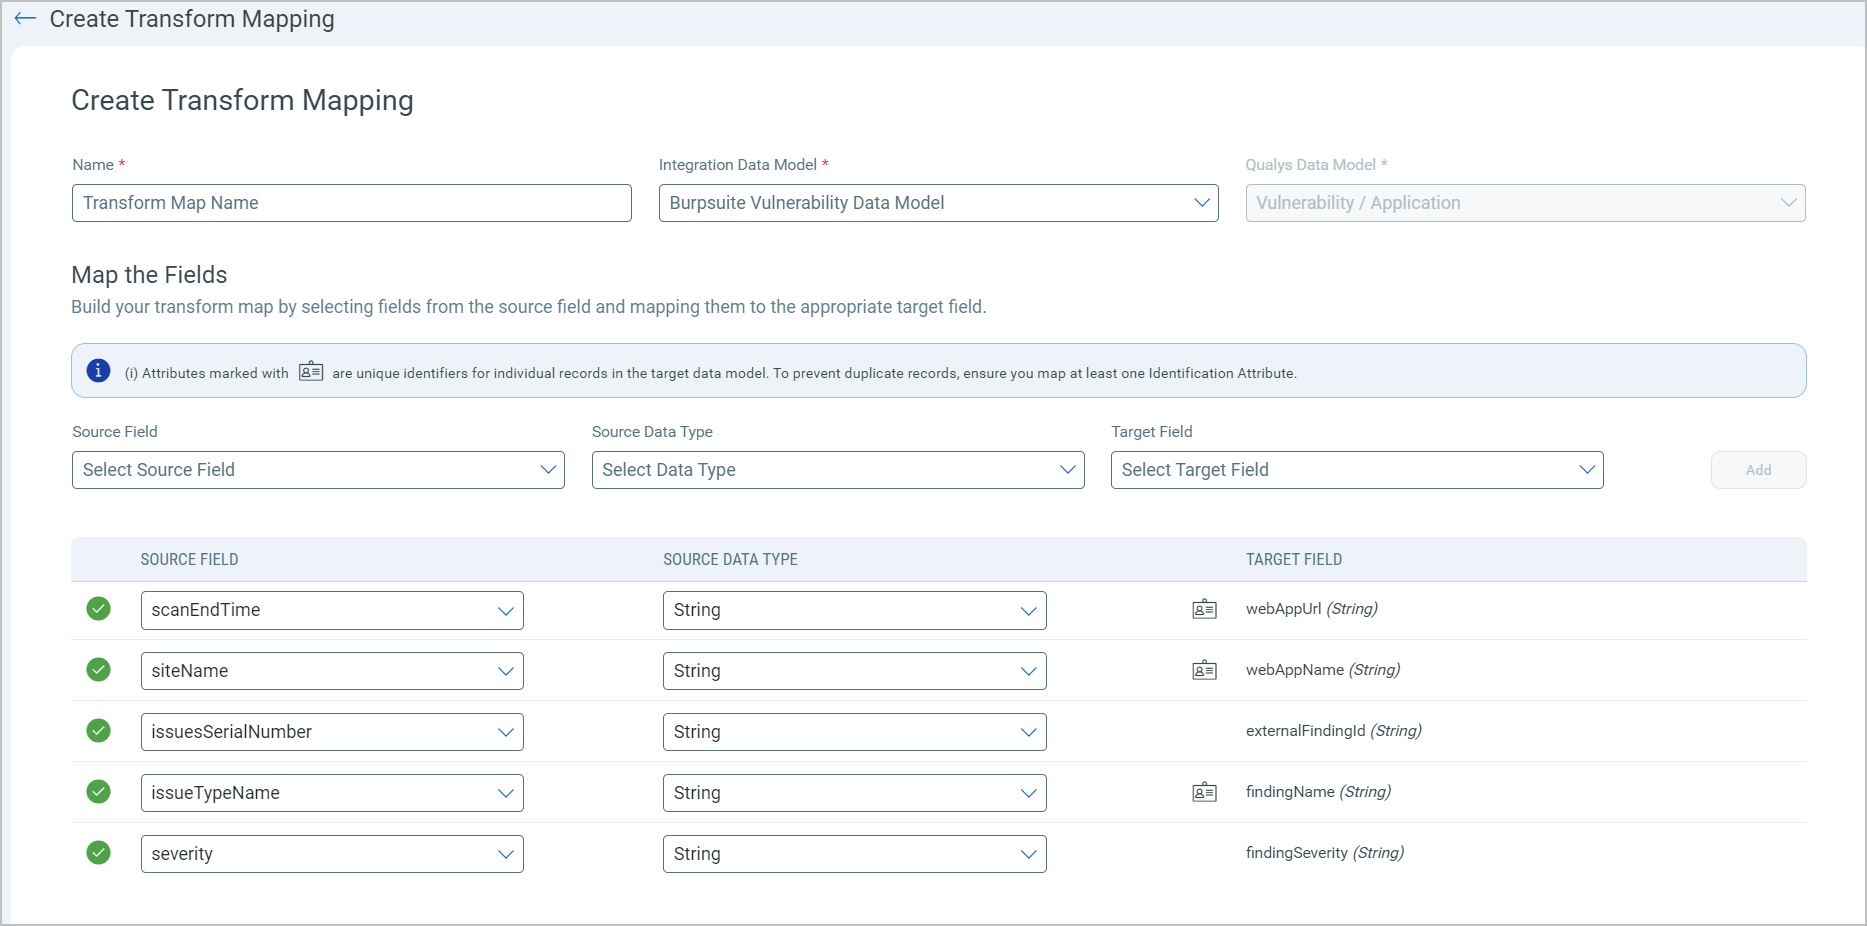
Fields Mapping
The Fields Mapping section maps fields from the Source Data Model to the Target Data Model.
- Source Field: Specify the field in the Source Data Model containing the transformed data.
- Data Type: Indicate the data type of the Source Field (e.g., string, integer, date).
- Target Field: Designate the corresponding field where the transformed data will be placed in the Target Data Model.
Click Add to create and display the mapping for the Source Field, Data Type, and Target Field below the section. This visual helps ensure that all necessary fields are mapped correctly and allows easy verification and adjustments.
Profile
Create a profile for your connector. A profile decides the connector status, execution schedule and transform map to choose. The connector follows the configurations of this profile for all future executions.
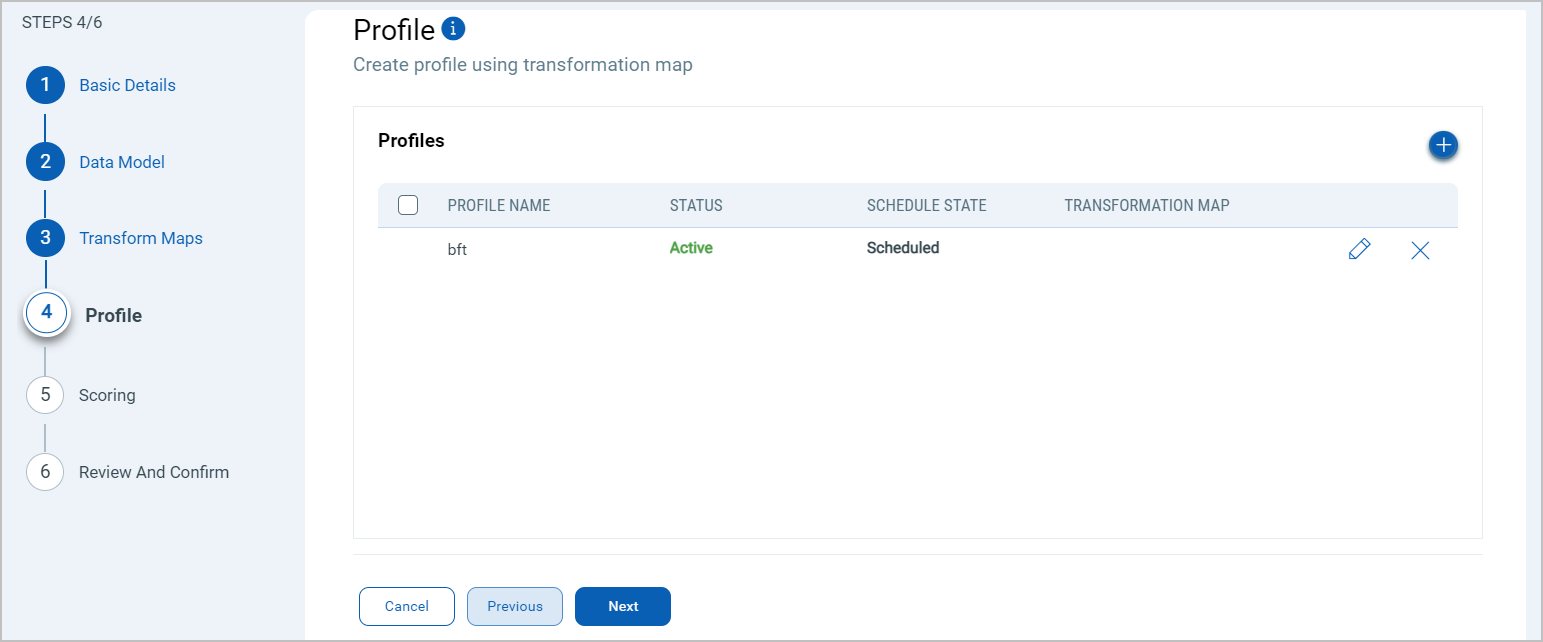
Click the "+" to create a new profile.
In the Add Profile screen, provide the necessary inputs for your new profile.
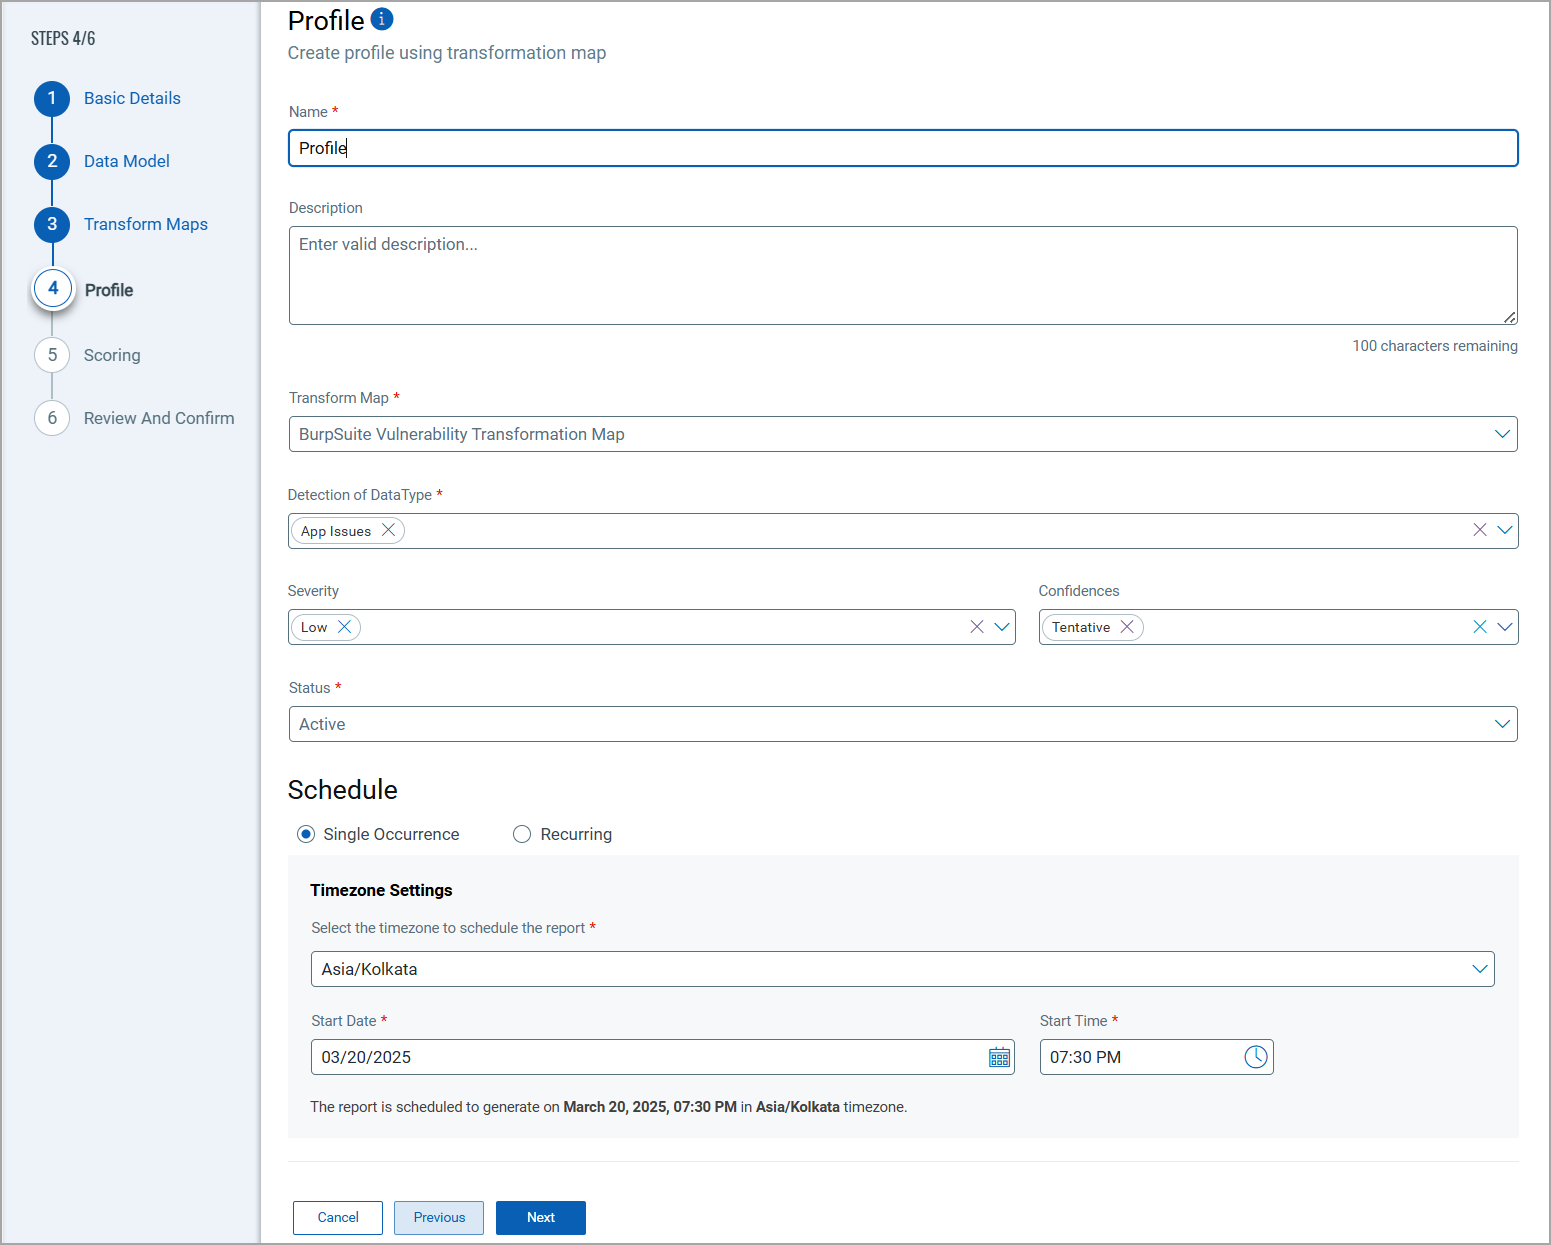
Provide a Name and Description.
Select the required Transform Map for the data mapping.
The Detection of DataTypes determine which findings to select for the profile. The Asset Types determine the required resource whose findings should be ingested by Qualys ETM.
The Severity dropdown determine the severity score of the findings to select for the profile. You can select multiple options from this field.
The Confidence dropdown determine the confidence level (Firm, Tentative, and False Positive) of the findings to select for the profile. You can select multiple options from this field.
The Status field determines whether the connector should be in Active or Inactive state after creation.
Lastly, the Schedule section lets you either create a Single Occurrence schedule or a Recurring schedule. Provide the exact date and time for the Single Occurence execution and provide the Start and End date/time for the Recurring schedule.
Scoring
The Scoring screen lets you map non-CVE vulnerability scores from your vendors to Qualys Detection Score (QDS) system.
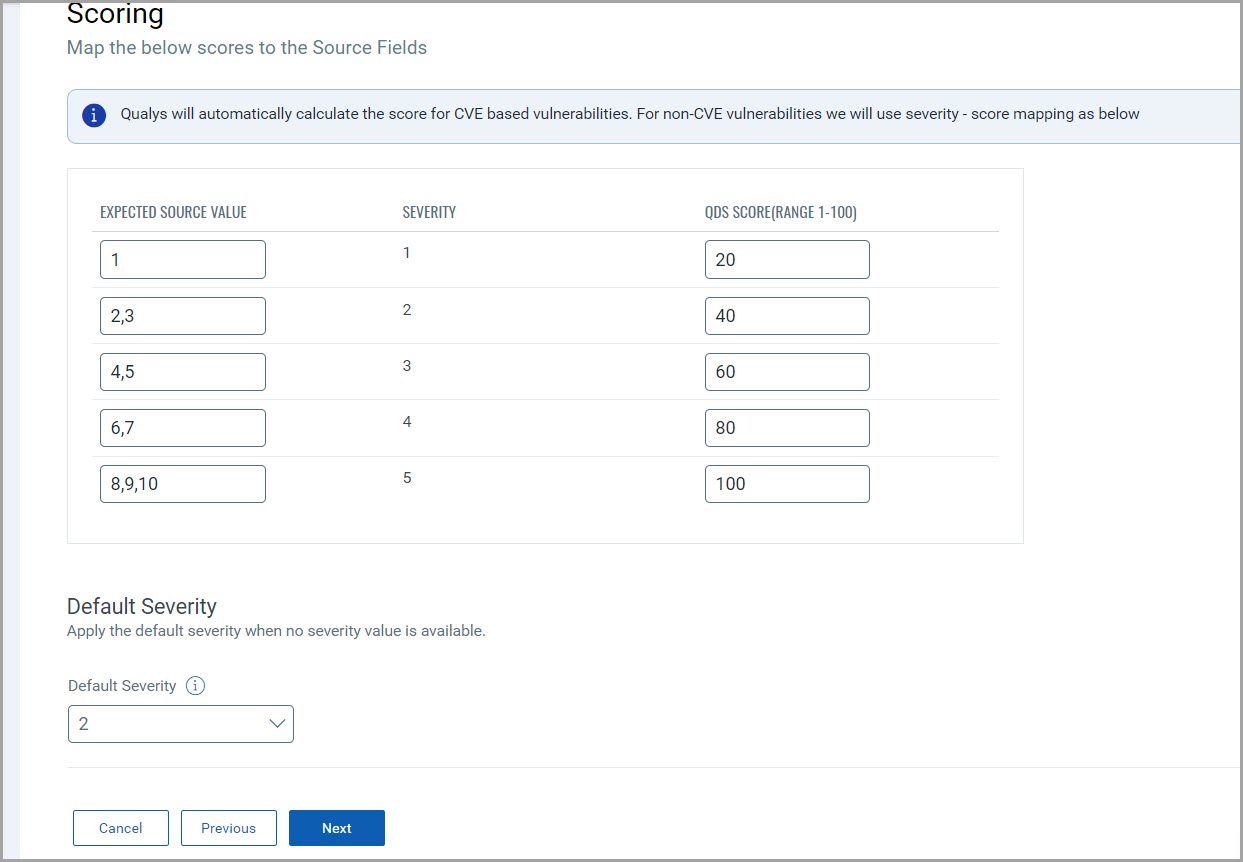
You have two columns with 5 input fields in each of them. These fields correspond to a specific severity starting from the least severe (1), to the most severe (5).
Fill out all 5 rows to create a comprehensive score mapping. This allows for translation between various vendor scoring systems and Qualys' Detection Score.
The specifics of the mapping is explained below.
Expected Source Values - Enter the vendor's original score or rating for non-CVE vulnerabilities.
This can be alphanumeric values. (e.g., "High", "Critical", "A", "3", etc.).
Severity - This column is pre-populated with severity levels from 1-5. These represent the severity levels in Qualys. The Source Value must be mapped such that it utilizes these 5 severity levels.
QDS - Enter the corresponding Qualys Detection Score. Use values from 0-100, where higher numbers indicate higher severity.
Default Severity
Below the scoring map, find the 'Default Severity' dropdown menu.
Select a default severity level from 1-5, this is applied when a vendor's score for a non-CVE vulnerability doesn't match any 'Expected Source Value' in your mapping table.
Review and Confirm
Review the configurations provided in the previous steps. Ensure all details are correct and complete. Confirm the setup to finalize the configuration of the API connector.
This streamlined process allows for efficient data integration, ensuring accuracy and consistency across systems.
Saving and Running the Connector
Save and run the connector to process the data accordingly, transforming and importing it as per the configurations set.
How Does a Connection Work?
The PortSwigger Burp Suite connector functions through configured profiles that determine what data gets synchronized and when.
A connection usually involves creating a profile that defines which scan results to import based on filters for severity and confidence. The connector then executes on a schedule (or on-demand), pulling vulnerability data from Burp Suite into Qualys ETM where it is integrated with other findings.
With the PortSwigger Burp Suite API Connector successfully configured, you are almost ready to view all web applications and findings from your Burp Suite environment.
In the Connector screen, you can find your newly configured connector listed and marked in the Processed state.
Connector States
A successfully configured connector progresses through the following states:
-
Registered – Connector created and registered to fetch data from Burp Suite.
-
Scheduled – Connector scheduled to run.
-
Processing – Actively retrieving data from the APIs.
-
Processed – Data retrieval complete for applications; vulnerability findings may still be loading.
This process may take up to 2 hours for completion. Once completed, the imported data will be available in Enterprise TruRisk Management (ETM).
View Assets and Findings in ETM
Navigate to Enterprise TruRisk Management (ETM) to analyse your PortSwigger Burp Suite data.
-
Go to Assets > Web Application to view imported applications.
-
Use the filter:
inventory: (source: PortSwigger)to isolate these assets.
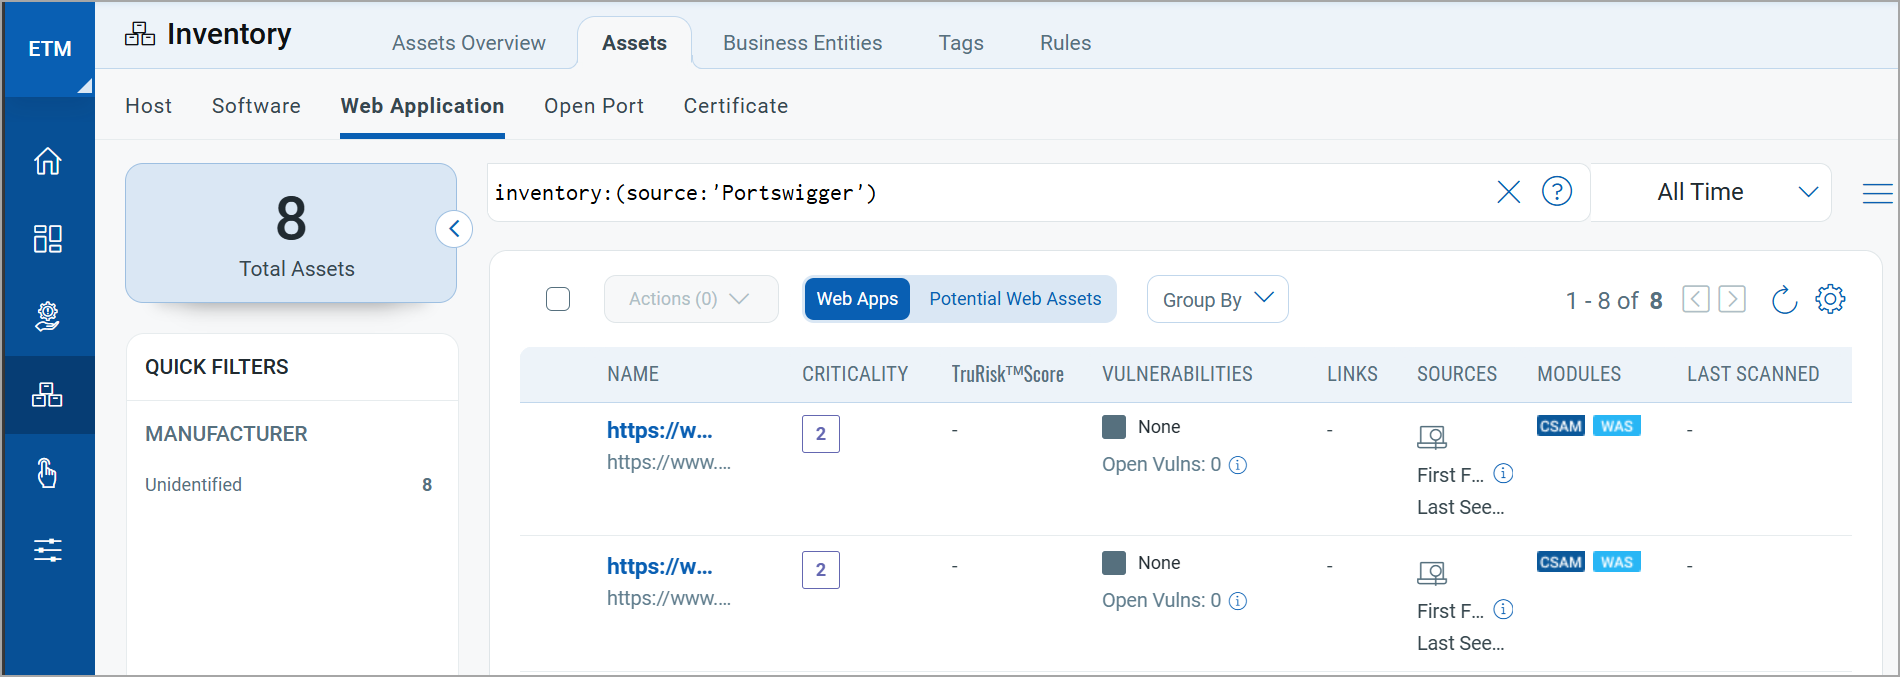
These entries include contextual information such as application name, scan history, and risk scores.
All applications synced from Burp Suite appear under Web Application assets in ETM, CSAM, and WAS (if subscribed). These entries are initially inactive in WAS.
Next, navigate to the Risk Management tab to view your vulnerability findings.
To view vulnerabilities:
-
Go to Findings > Vulnerability
-
Use the filter
finding.vendorProductName: PortSwiggerto view vulnerabilities from Burp Suite scans.
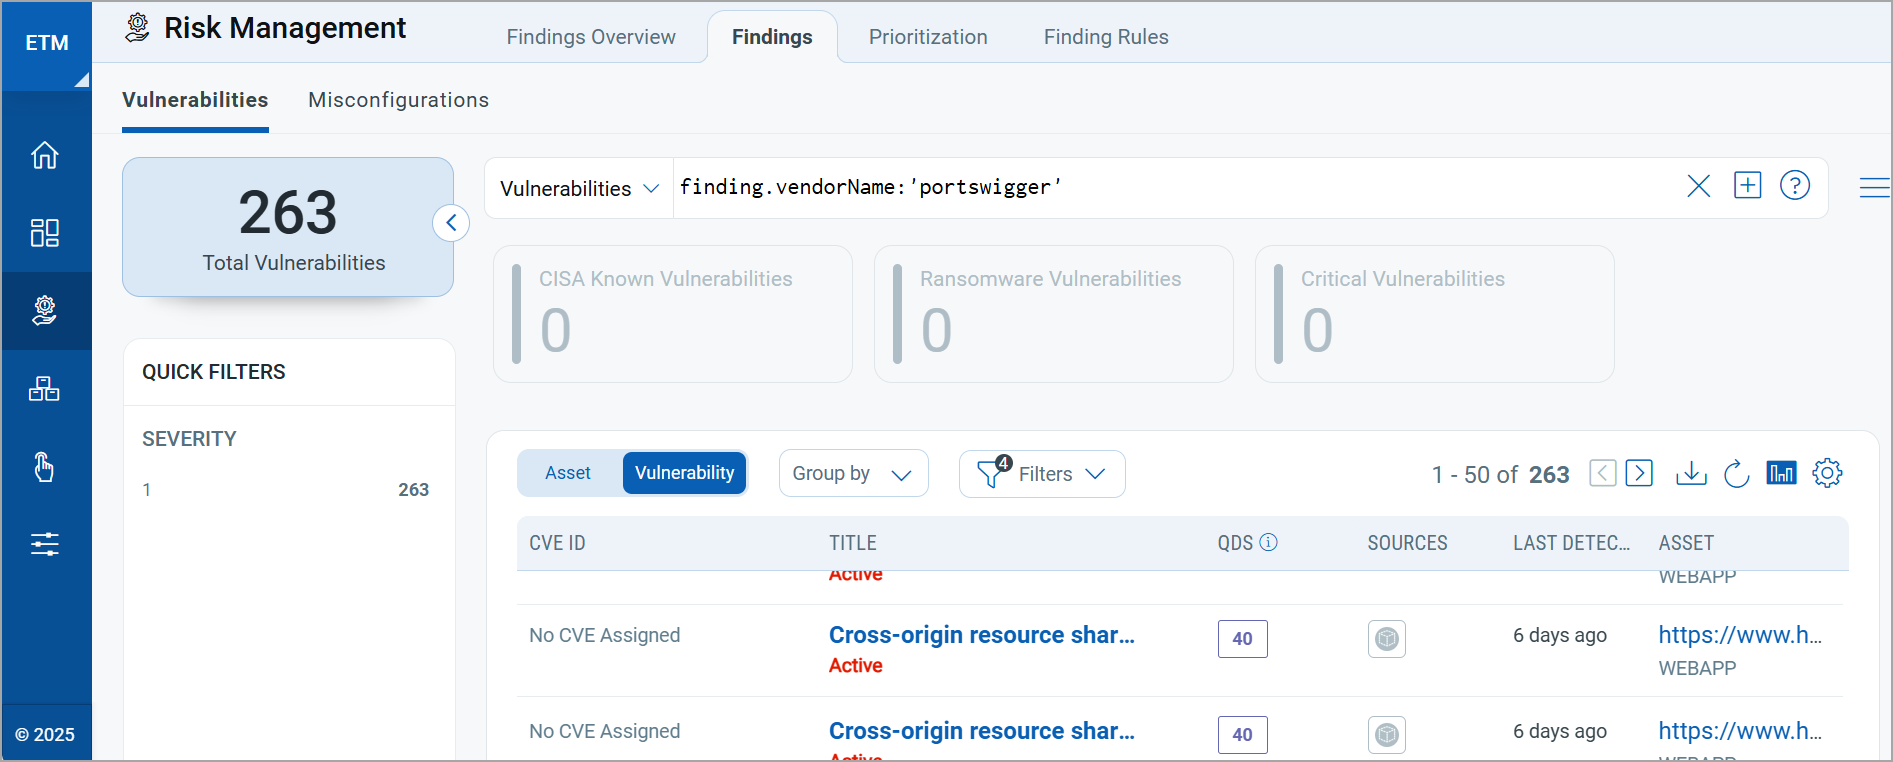
These findings are integrated with the Qualys TruRisk scoring system, allowing for unified risk prioritization and management.
Additional Information
API Reference
| Name | Endpoint | Body Parameter | Info |
|---|---|---|---|
| Get Site Tree | http://<INSTANCE-IP>/graphql/v1 |
{ "query": "query GetSiteTree { site_tree { sites { id parent_id name } folders { id name } } }" } |
Retrieves folder and site hierarchy. Required to get Site IDs. |
| Get Latest Scan ID | http://<INSTANCE-IP>/graphql/v1 |
query getScans($siteId:ID) { scans(site_id: $siteId, limit: 1,sort_column: start, sort_order: desc) { id, status, start_time, end_time, scan_delta { new_issue_count } } } | Retrieves the most recent scan for a given site. Site ID must be obtained from Site Tree. |
| Get All Issues (per scan) | http://<INSTANCE-IP>/graphql/v1 |
query GetScan($scanId: ID!, $severity: [Severity], $confidences: [Confidence], $novelties: [Novelty], $count: Int!, $start: Int!) { scan(id: $scanId) { id site_id site_name start_time end_time status issue_counts { total high { total firm tentative certain } medium { total firm tentative certain } low { total firm tentative certain } info { total firm tentative certain } } agent { id name } scan_configurations { id name } scan_delta { new_issue_count repeated_issue_count regressed_issue_count resolved_issue_count } issues(start: $start, count: $count, severities: $severity, confidences: $confidences, novelties: $novelties) { issue_type { type_index name description_html remediation_html remediation_html references_html } evidence { ... on Request { request_index request_count request_segments { ... on DataSegment { data_html } ... on HighlightSegment { highlight_html } ... on SnipSegment { snip_length } } } ... on Response { response_index response_count response_segments { ... on DataSegment { data_html } ... on HighlightSegment { highlight_html } ... on SnipSegment { snip_length } } } } serial_number severity confidence display_confidence description_html remediation_html path origin novelty generated_by_extension { name } generated_by_bcheck { name } } } } |
Retrieves vulnerability findings for a scan. Accepts filters for severity and confidence. |
Data Model Mapping
This section explains the attribute mappings of the values from Portswigger and Qualys ETM.
Portswigger Burpsuite Vulnerability Transformation Mapping
Here's the Portswigger Burpsuite Transformation Map:
| Source Attribute Key | Target Attribute Label |
|---|---|
| data.scan.end_time | findingLastFoundOn |
| data.scan.issues[].description_html | findingDescription |
| data.scan.issues[].issue_type.name | findingName (Required) |
| issuesOrigin+issuesPath | applicationURL |
| data.scan.issues[].serial_number | externalFindingId (Required) |
| data.scan.site_name | webAppName (Required) |
| data.scan.site_name | webAppUrl (Required) |
|
severity info | low | medium | high |
findingSeverity (Required) 1 | 2 | 3 | 4 |
|
Novelty first | repeated | regressed | resolved |
findingStatus NEW | ACTIVE | REOPENED | FIXED |
Activating Web Applications in Qualys WAS
Web applications synced from the Burp Suite Connector are not automatically activated in WAS.
To activate:
-
Go to CSAM > Web Application Inventory
-
Select the desired application.
-
Use Quick Actions > Activate WAS
Activation consumes a WAS license. Ensure you have a WAS subscription before activating.