Tenable IO Connector
The Tenable IO Connector bridges vulnerability management and enterprise risk analysis by ingesting asset and vulnerability data from Tenable IO into Qualys Enterprise TruRisk Management for unified risk assessment.
Security teams gain a consolidated view of their attack surface, eliminating data silos between vulnerability scanners and risk management platforms. By centralizing findings from Tenable alongside other security data sources, organizations can prioritize remediation efforts more effectively based on comprehensive risk context rather than isolated vulnerability scores.
Connector Details
The following table provides a comprehensive overview of what the Tenable IO Connector supports.
| Vendor | Tenable |
| Product Name | Tenable IO |
| Category | Vulnerability Management |
| Findings Support | Supported |
| Supported Assets | Host Assets (Compute) |
| Version | 1.0.0 |
| Integration Type | API Integration (REST) |
| Direction | Unidirectional |
| Delta Support | Supported |
| Supported Version & Type | SaaS (Latest) |
| Import of Installed Software | Not Supported |
| Import of Source Tags | Not Supported |
| Filters/Filter Query | Not Supported |
Configure the Connector
The connector setup wizard guides you through the required steps. A successful Test Connection is required to complete the process.
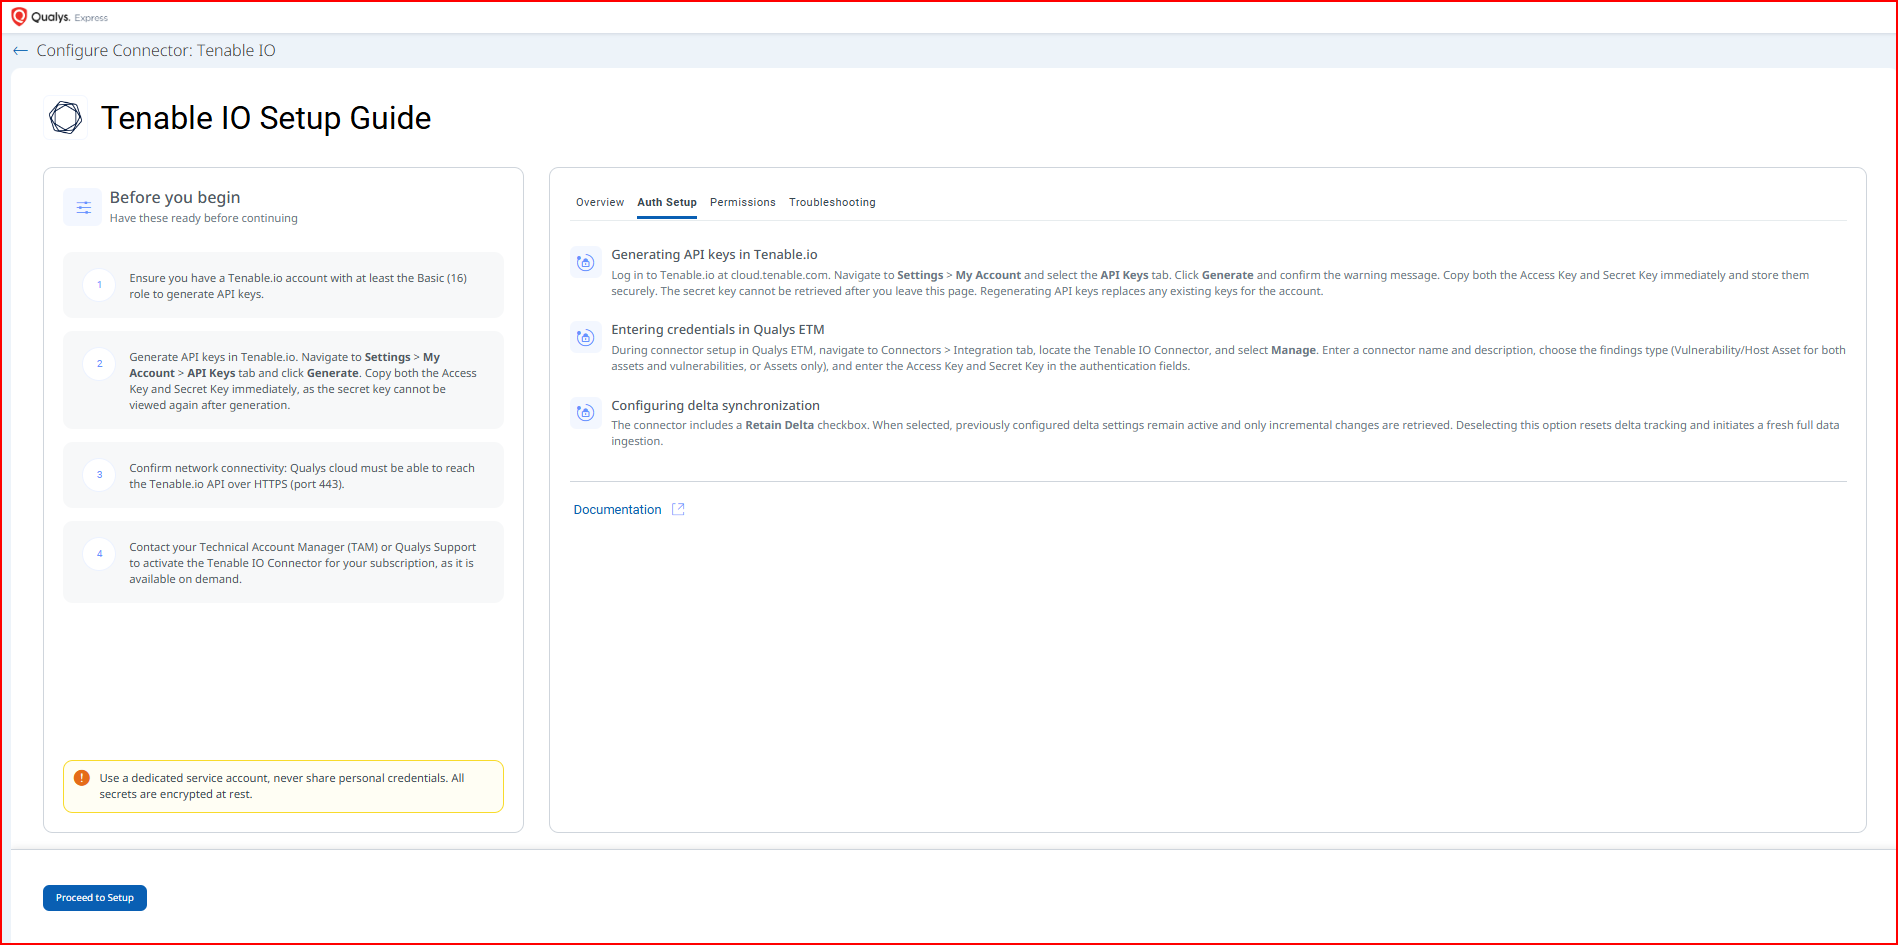
Before You Begin - AuthenticationBefore You Begin - Authentication
Complete the following prerequisites before configuring the connector in Qualys ETM:
- Ensure you have a Tenable.io account with at least the Basic (16) role to generate API keys.
- Generate API keys in Tenable.io. Navigate to Settings > My Account > API Keys tab and click Generate. Copy both the Access Key and Secret Key immediately, as the Secret Key cannot be viewed again after generation.
- Confirm network connectivity: Qualys cloud must be able to reach the Tenable.io API over HTTPS (port 443).
- Contact your Technical Account Manager (TAM) or Qualys Support to activate the Tenable IO Connector for your subscription, as it is available on demand.
Generating API Keys in Tenable.io
Follow these steps to generate the Access Key and Secret Key required for connector authentication:
- Log in to Tenable.io at
cloud.tenable.com. - Navigate to Settings > My Account and select the API Keys tab.
- Click Generate and confirm the warning message.
- Copy both the Access Key and Secret Key immediately and store them securely.
One-Time Visibility: The Secret Key cannot be retrieved after you leave the API Keys page. Regenerating API keys replaces any existing keys for the account and revokes the previous credentials.
Reference: Generate API Keys – Tenable Documentation
Permissions Required
The Tenable.io user account generating the API keys must have at least the Basic (16) role. API keys inherit the permissions of the user account, so the account must have sufficient access to view asset and vulnerability data in Tenable.io.
Scope and Data Access
The connector retrieves endpoint and host asset data along with vulnerability findings from Tenable.io. Note the following data access constraints:
- Custom filtering and filter queries are not supported.
- Asset-only data exports from Tenable expire within 24 hours (limit imposed by Tenable).
- Asset plus vulnerability data exports expire within 72 hours (limit imposed by Tenable).
- Import of installed software and source tags is not supported.
Key Rotation
If the Access Key or Secret Key is exposed or needs to be rotated, regenerate the keys in the Tenable.io My Account > API Keys page. Regenerating keys replaces the existing keys and revokes the previous credentials. Update both the Access Key and Secret Key in Qualys ETM using the Edit Connector option.
Create a Profile & ConnectionCreate a Profile & Connection
Configure the connector's identity and authenticate with Tenable.io. A valid connection test is required before proceeding to the next step.
- Log in to Qualys ETM.
- Go to Connectors > Integration tab and locate the Tenable IO Connector.
- Click Manage from the ellipsis menu to open the setup wizard.
Connector Details
Provide the basic details of the connector.
| Field | Description |
| Name | A unique display name for this connector instance. Example: tenable-prod-01 |
| Description | Optional free-text description of this connector. Maximum 180 characters. |
Authentication Details
Provide the Access Key and Secret Key for Tenable.io in the Auth Details section.
| Field | Type | Description |
| Access Key | Encrypted String | The Access Key generated from the Tenable.io My Account > API Keys page. Required. |
| Secret Key | Encrypted String | The Secret Key generated alongside the Access Key. Copy this immediately; it cannot be retrieved after initial generation. Required. |
Key Expiry and Regeneration: If keys are regenerated in Tenable.io, the previous keys are automatically revoked. Update both values in Qualys ETM via the Edit Connector option immediately to avoid authentication failures.
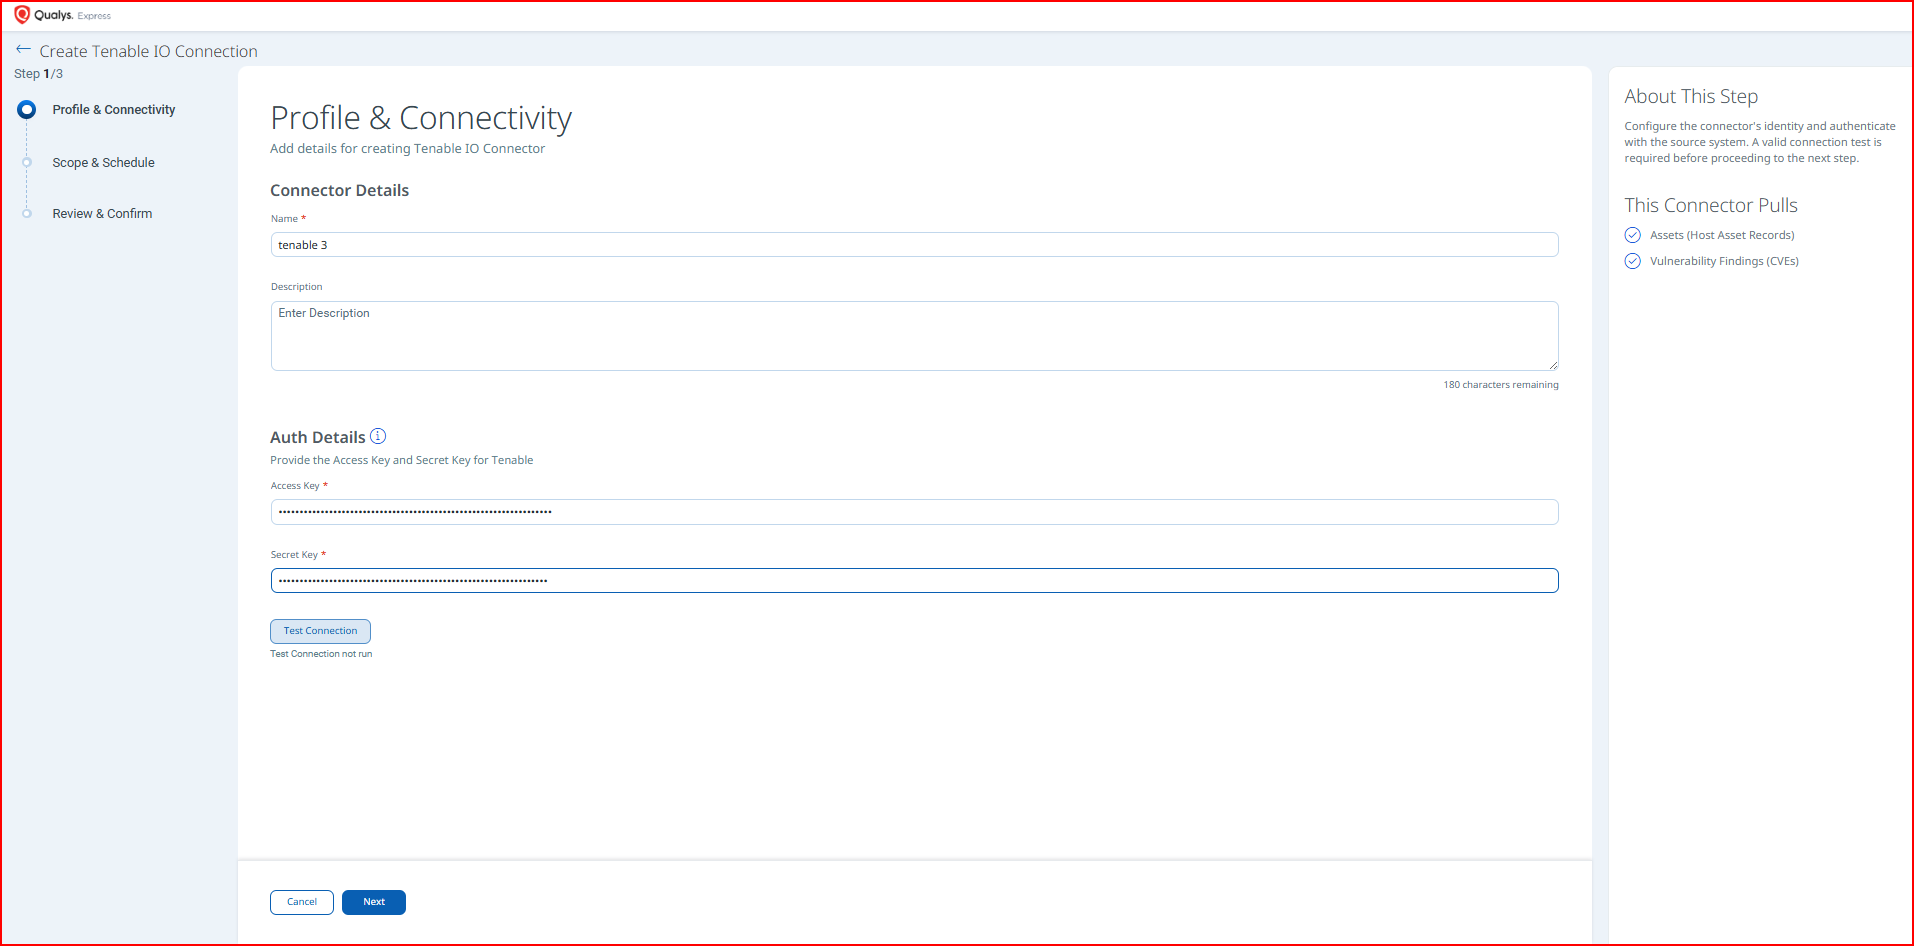
After entering credentials, click Test Connection. The wizard runs the following checks:
- Network Reachability — Verifies the API endpoint is reachable.
- TLS Handshake — Confirms a secure connection can be established.
- Authentication Credential Check — Validates the Client ID, Client Secret, and Token URL.
- Authorization Scope Check — Confirms the service account has the required permissions.
- Data Fetch — Verifies that data can be retrieved from the Tenable API.
All checks must pass before you can proceed to Step 2. If a check fails, refer to the Troubleshooting section for resolution steps.
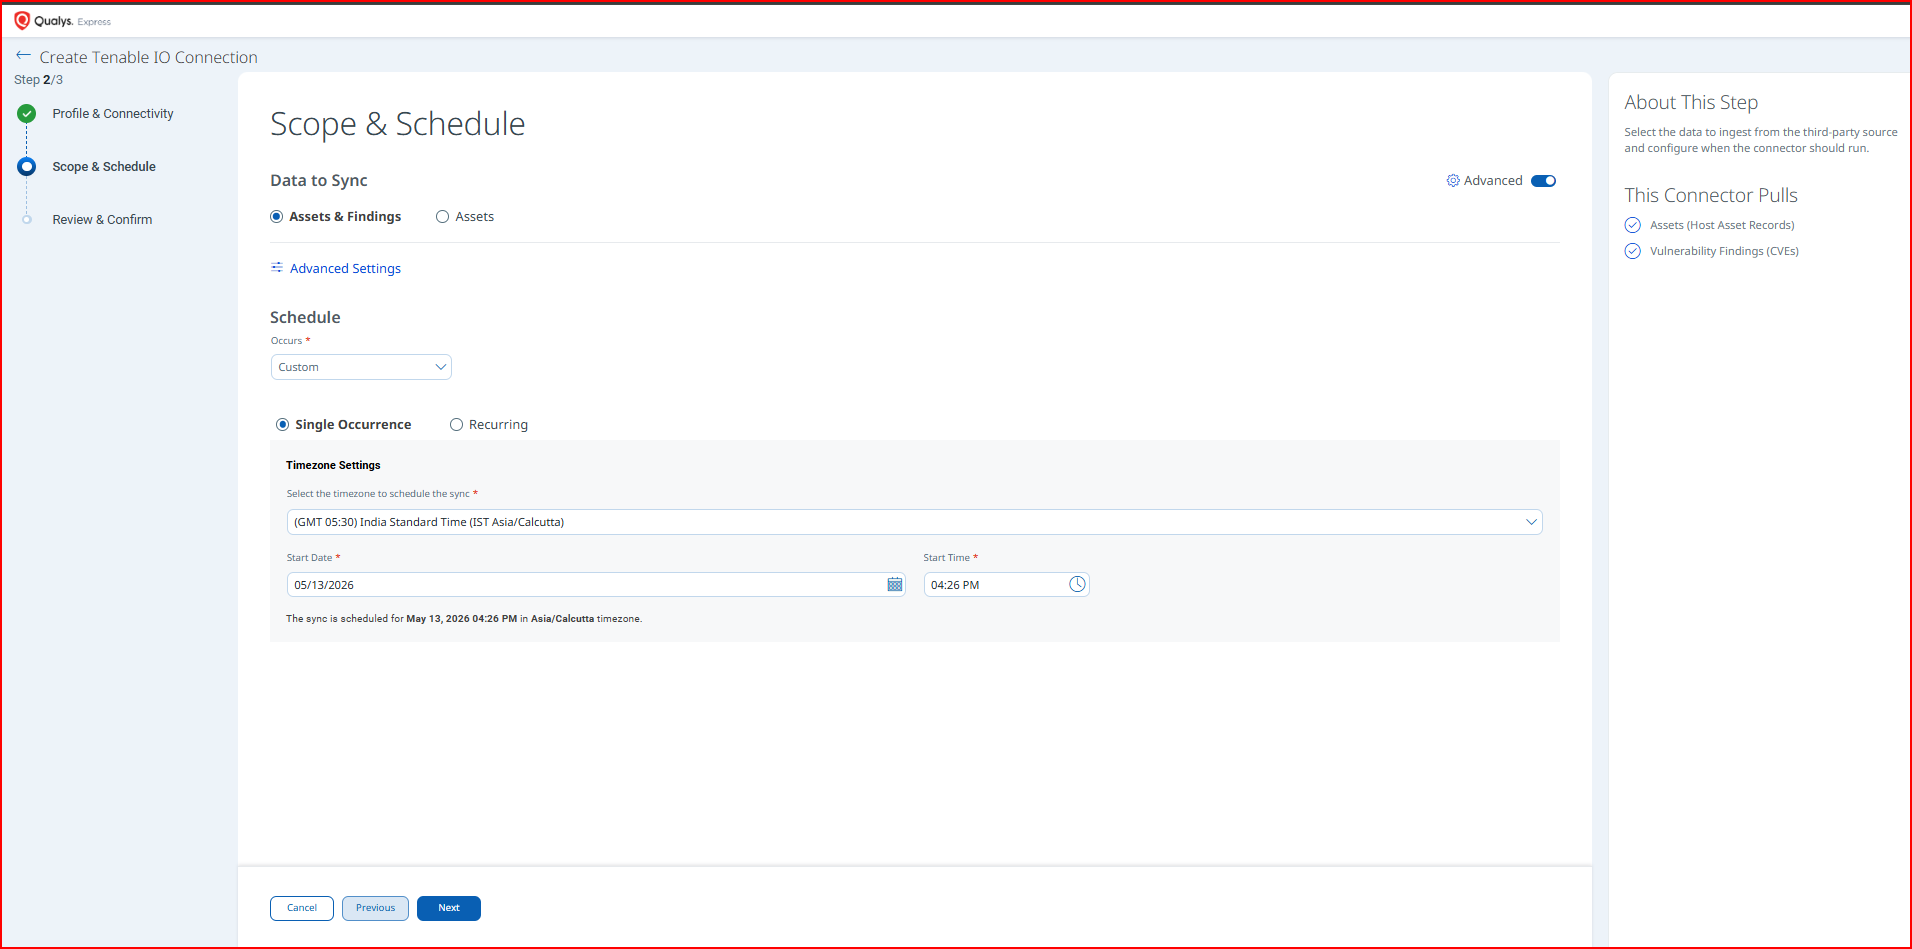
Set the Scope & ScheduleSet the Scope & Schedule
Select the data to ingest from Tenable.io and configure when the connector should run.
Data to Sync – Choose one of the following ingestion modes:
- Assets & Findings (default) – Imports host asset records and associated vulnerability findings (CVEs) from Tenable.io.
- Assets – Imports host asset records only, without vulnerability findings.
Data Export Expiration: Asset-only data chunks expire within 24 hours; asset plus vulnerability data chunks expire within 72 hours (limits set by Tenable). Ensure the connector schedule allows sufficient time for data processing to complete within these windows.
Advanced Settings – Click the Advanced Settings link to open the Advanced Settings panel and configure optional Transform Map and Risk Severity Mapping options. See the Advanced Settings section for details.
Schedule – Configure when the sync occurs using the Occurs dropdown:
- Daily – Runs automatically once per day at the configured time.
- Custom – Allows configuration of Single Occurrence or Recurring schedule with explicit Start Date, Start Time, and Timezone Settings.
Timezone: The schedule timezone is set per connector instance. Verify the correct timezone (for example, Asia/Calcutta or UTC) to ensure sync runs at the intended local time.
Review all configuration settings before creating the connector. The Review & Confirm screen displays two collapsible sections:
Click Create to save the connector. Click Previous to return to an earlier step to make changes.
Advanced Settings
Advanced Settings are accessible from the Scope & Schedule step by clicking the Advanced Settings link. These settings are optional.
Remember to Save: Click Save within the Advanced Settings panel to preserve any changes before returning to the main wizard flow.
Filters Tab
The Tenable IO Connector does not currently support filter queries. The filter field is present in the interface but custom OData filter expressions and chip-based asset type filters are not supported for this connector. All available assets and findings that the authenticated account has access to are retrieved on each sync run.
Transform Map Tab
The Transform Map tab displays the active data model mapping used to translate Tenable.io source fields into Qualys ETM target fields. The following map is active by default:
- Vulnerability Host Asset Tenable IO Map (Active)
Refer to the Transformation Maps section in Additional Information for the complete field-level mapping details.
How the Connection Works
The Tenable IO connector executes on schedule (or on-demand if triggered manually) based on the configured profile. On each run, it calls the Tenable.io REST API to export host asset records and, when configured, vulnerability findings. Qualys ETM de-duplicates, normalizes, and enriches the imported data before making it available for risk analysis.
When delta (incremental) synchronization is enabled, the connector retrieves only changes since the last successful run. The Retain Delta option in the Edit Connector view controls this behavior: selecting it preserves the existing delta state; deselecting it resets delta tracking and initiates a full fresh data ingestion on the next run.
Connector States
After the connector is created and saved, it transitions through the following states visible in the Connections list:
| State | Description |
|---|---|
| Registered | The connector has been created and saved successfully. It is awaiting its first scheduled run. |
| Scheduled | The connector run is queued and will begin at the configured schedule time. |
| Processing | The connector is actively retrieving and importing data from Tenable.io. |
| Processed | The connector run completed successfully. Asset and finding data is available in ETM. |
| Errored | The connector run encountered an error. Review the error details and refer to the Troubleshooting section. |
First-Run Processing Time: Initial data ingestion may take up to 2 hours or longer depending on the volume of assets and vulnerability findings in your Tenable.io account. The connector state will show Processing during this time. Vulnerability findings may continue processing even after the connector reaches the Processed state.
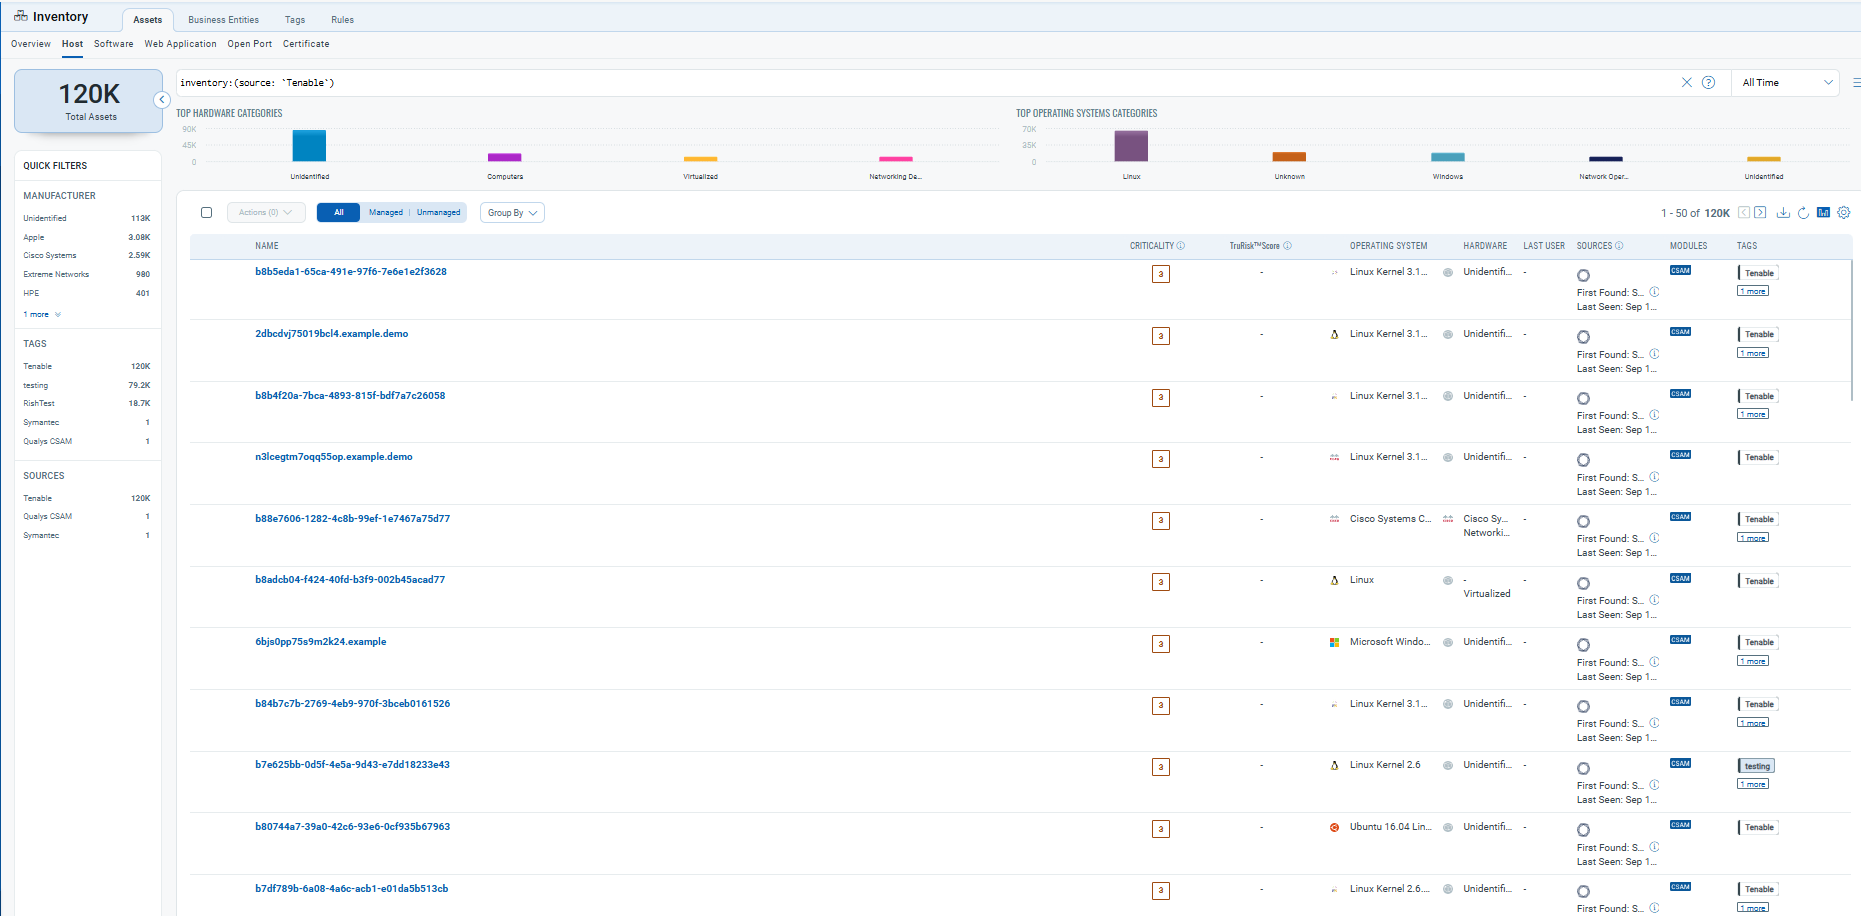
Viewing Assets and Findings in ETM
After a successful connector run, Tenable.io data is available in Qualys ETM as follows:
Assets – Navigate to Inventory > Assets > Host and apply the following filter to display assets imported from Tenable.io:
inventory:(source:"Tenable")
Troubleshooting
The following table describes common issues and their resolutions for the Tenable IO Connector.
| Issue | Resolution |
|---|---|
| Authentication failure on connector run | Verify the Access Key and Secret Key entered in Qualys ETM match the current credentials in Tenable.io. If keys were regenerated, the previous keys are automatically revoked. Confirm the Tenable.io user account has at least the Basic (16) role. |
| Duplicate connector configuration fails | Configuring the same connector twice will cause the second instance to fail due to Tenable export API concurrency restrictions. Only one active connector configuration should exist per Tenable.io account. Remove or disable the duplicate configuration. Reference: Tenable API Concurrency. |
| No assets imported after first run | Verify the connector has been activated for your subscription by contacting your TAM or Qualys Support. Check the connector state in Qualys ETM to confirm it has reached the Processed state. Ensure the Tenable.io account has data available for export. |
| Data export expiration | Asset-only data chunks expire within 24 hours and asset plus vulnerability data chunks expire within 72 hours. If a connector run does not complete within these windows, the export may need to be restarted. Ensure the connector schedule allows sufficient time for data processing. |
Additional Information
API Reference
The Tenable IO Connector uses the Tenable.io REST API. The following resources are referenced during connector operation:
- Tenable.io API base URL:
https://cloud.tenable.com - Asset export endpoint:
/assets/export - Vulnerability export endpoint:
/vulns/export - API key generation:
Settings > My Account > API Keysin the Tenable.io console
Reference: Tenable.io API Reference
Transformation Maps
The following transformation map is active for the Tenable IO Connector. It defines how Tenable.io source fields are mapped to Qualys ETM target fields.
| Source Field (Tenable.io) | Target Field (Qualys ETM) |
| Asset ID | externalAssetId (Required) |
| Primary Hostname | assetName |
| IPv4 Addresses | ipAddress |
| IPv6 Addresses | ipAddress |
| MAC Addresses | macAddress |
| Operating System | operatingSystemName |
| Cloud Instance ID | cloudInstanceId |
| Cloud Provider Type
AWS | Azure | GCP | OCI | Alibaba | VMWare, Inc |
cloudProvider
EC2 | Azure | GCP | OCI | ALIBABA | SOURCE_TYPE_UNKNOWN |
| Fully Qualified Domain Names | fqdn |
| NetBIOS Names | netBiosName |
| Source Field (Tenable.io) | Target Field (Qualys ETM) |
| Asset ID | externalAssetId (Required) |
| Plugin Name | findingName (Required) |
| Finding ID | externalFindingId (Required) |
| Severity ID | findingSeverity (Required) |
| Operating System | operatingSystemName |
| IPv4 Addresses | ipAddress |
| MAC Addresses | macAddress |
| Cloud Type | cloudProvider |
| Solution | remediationStrategy |
| CVSS v2 Base Score | cvssV2Base |
| CVSS v3 Base Score | cvss3Base |
| CVSS v2 Temporal Score | cvss2Temporal |
| CVSS v3 Temporal Score | cvss3Temporal |
| Vulnerability State | findingStatus |
| FQDNs | fqdn |
| NetBIOS Names | netBiosName |
| CVE | cveId |
| Has Patch | isPatchAvailable |
| Exploit Available | isExploitAvailable |
| Port | findingPort |
| Protocol | findingProtocol |
| Plugin Description | findingDescription |
| VPR Score | detectionScore |
| Asset Name | assetName |
| First Found | findingFirstFoundOn |
| Last Found | findingLastFoundOn |
| Synopsis | detectionResult |
| VPR Exploit Code Maturity | exploitCodeMaturity |
| CVSS v2 Temporal Vector | vector |
| AWS EC2 Instance IDs | cloudInstanceId |
| GCP Instance IDs | cloudInstanceId |
| Azure VM IDs | cloudInstanceId |