Create Oracle Cloud Infrastructure Connectors
Learn how to create an OCI Connector to onboard your OCI account with Qualys.
Steps to Create a Connector
Go to the Connectors tab, click Oracle Cloud Infrastructure Connectors, and then click Create Connector, and our wizard can walk you through the steps.
Basic Details
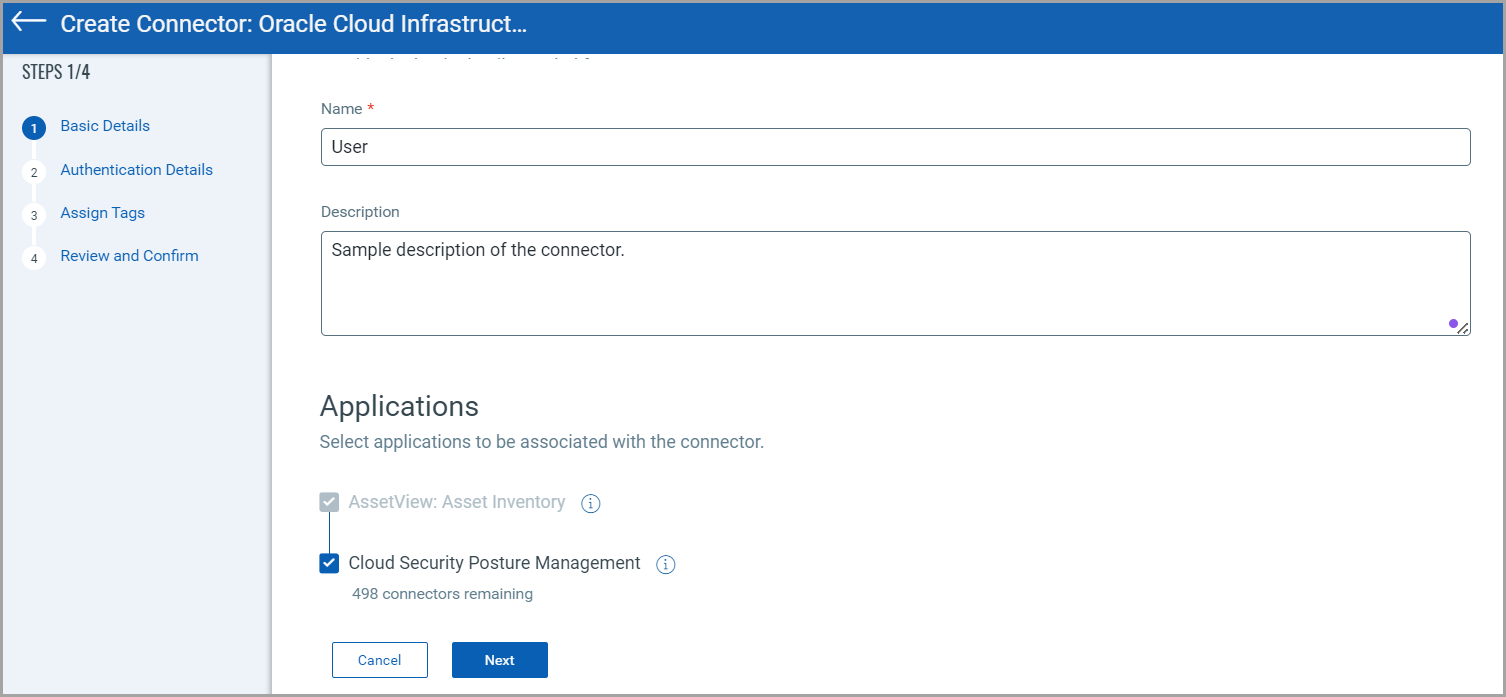
Provide a name and description for the connector. We recommend you provide a unique name for the connector.
Under applications, you can find two checkboxes.
- AssetView: Asset Inventory - The connector fetches cloud resource data and populates your Asset Inventory on CSAM. This is active by default for all connectors. This cannot be disabled.
- CSPM - The connector fetches cloud resource data and populates your Cloud Inventory on TotalCloud.
Authentication Details
Authenticate your cloud account with Qualys.
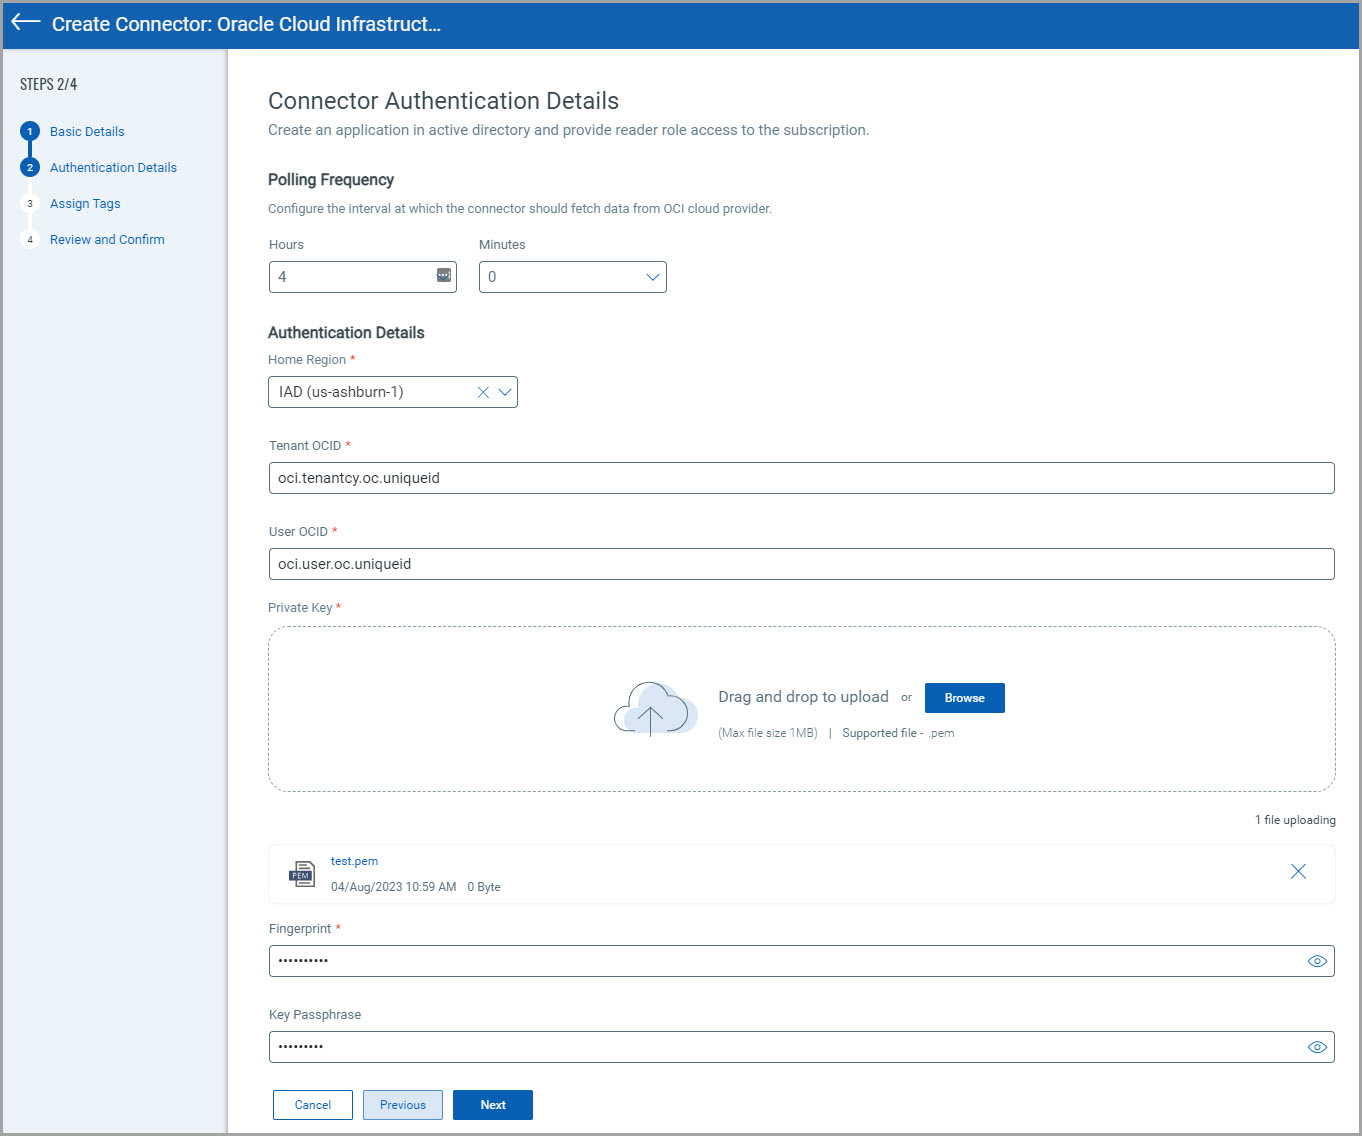
Polling FrequencyPolling Frequency
Select a frequency at which the connector should poll the cloud provider and fetch data.
By default, the connector polling frequency is configured to be every 24 hours. As a result, the connector connects with the cloud provider every 24 hours to fetch the data.
You can configure frequency from one hour to a maximum of 24 hours. We recommend configuring a frequency of 24 hours or more for optimal use of your connector. Configuring a low polling frequency (less than 4 hours) can affect the connector's performance and may result in OCI API throttling error.
Authentication DetailsAuthentication Details
This lets you grant Qualys access to your OCI resources without sharing your OCI security credentials.
To grant access to Qualys, you have to provide the following information.
Home Region
Set the region where you want to fetch OCI assets from.
1. To get the home region of your OCI account,
-
Navigate to your OCI account.
-
Go to Governance and Administration > Administration > Tenancy Details.
-
Identify the Home region and its identifier.
For example, if the Home region is US East (Ashburn), its region identifier is us-ashburn-1.
2. Select the home region from the menu.
OCID
Oracle Cloud Infrastructure resources have an Oracle-assigned unique ID called an Oracle Cloud Identifier (OCID). It is part of the resource's information in the console and API.
Authenticate the Qualys connector by providing the Tenant and User OCID.
Tenant OCID
To get the Tenant OCID of your OCI account,
-
Navigate to your OCI account.
-
Go to Governance and Administration > Administration > Tenancy Details.
-
The Tenancy OCID is shown under the Tenancy Information.
-
Click Copy.
-
Paste it on the Tenant OCID field.
User OCID
You must first create an IAM user and assign the required permissions and policies on Oracle cloud console.
Create IAM User and Policy
Oracle Cloud Infrastructure Identity and Access Management (IAM) lets you control who has access to your cloud resources. You can control the type of access a group of users has and the resources.
1. To create an IAM User and Policy,
-
Navigate to Identity & Security > Identity > Users on the Oracle Cloud console.
-
Create local IAM user (for example, AuditUser).
-
Navigate to Identity > Groups > create group (for example, audit-group). Now, associate the user with the group.
-
Navigate to Identity > Policies > select root Compartment > Create Policy (for example, AuditPolicy).
-
Attach the group to the policy in the root compartment.
-
Policy Statements for AssetView Connectors:
-
Allow group
audit-groupto inspect all-resources in tenancy -
Allow group
audit-groupto read instances in tenancy -
Allow group
audit-groupto read audit-events in tenancy -
Allow group
audit-groupto use virtual-network-family in tenancy -
Allow group '
IdcsDev'/'audit-group-dev' to read all-resources in tenancy (Applicable if the user and the group are created in IdcsDev domain)
-
-
Policy Statements for AssetView+CSPM Connectors:
-
Allow group
audit-groupto read all-resources in tenancy -
Allow group '
IdcsDev'/'audit-group-dev' to read all-resources in tenancy (Applicable if the user and the group are created in IdcsDev domain)
-
2. Once you create the user and assign the required permissions, you can copy the user’s OCID. Go to Identity > Users > User Details > Select the Users from the list.
3. The user OCID is shown under User Information. Copy and paste in the Connector creation wizard.
Private Key
You can obtain the Private Keys in a PEM format from your OCI account.
1. To obtain the Private Keys,
-
Navigate to your OCI Account.
-
Go to Identity > Users > User Details > API Keys > Add API Key > Select Generate API Key Pair.
-
Download the Private key and save it on your local file.
-
Click Add.
-
Once you have added the private key, OCI prompts the Configuration File Preview.
-
Copy the Private key's SHA fingerprint.
If you have closed the prompt, you can look for your recently added key in Users and copy the fingerprint from the Fingerprint column.
2. Upload the PEM file to the connector creation wizard and provide the fingerprint below.
Assign Tags
Assign tags to the connector that you are creating. You can also create a new tag. For details on creating new tags, see Configure Tags.
Confirmation
Review the connector settings you configured and then click Create Connector.
That’s it! The connector connects with Oracle Cloud Infrastructure to discover resources from the configured region.
Once the connector is created, you can run the connector, disable or delete the connector, and view assets and resources information.
The Oracle Cloud Infrastructure page displays the list of OCI connectors. The Status column indicates the status of the connector created: Completed successfully, Completed with errors, Queued, Synchronizing, and Disabled.