Enter Configuration Details
To use the plugin, provide the following configuration details:
-
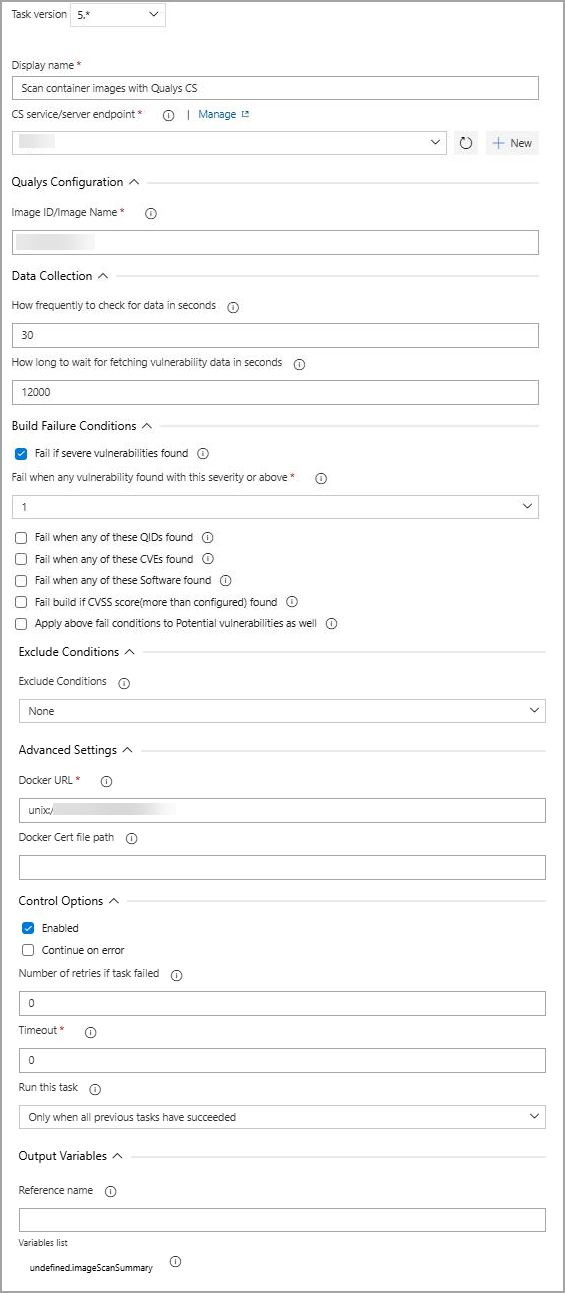
Enter the Display name.
-
To connect with CS APIs, you need to configure the service endpoint using a Qualys account and, if necessary, a proxy on your Azure DevOps instance for the organization where the QualysContainer Scanning Connector is installed.
To create work items through the API, you will need a Personal Access Token (PAT) to securely authenticate your access to Azure DevOps.
To configure service endpoints, perform the following steps:
- Go to the CS service/server endpoint field and click New.
-
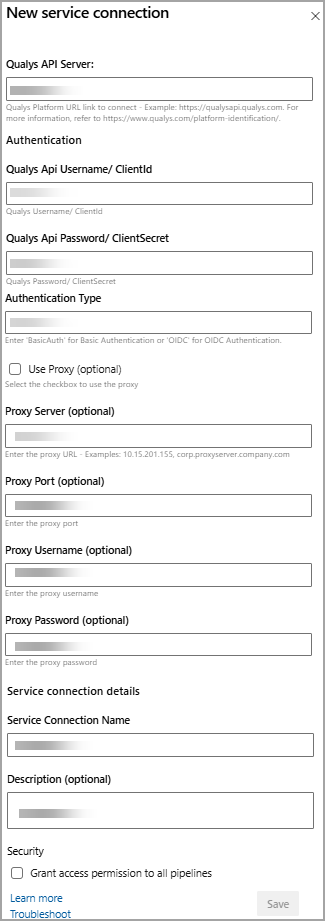
In the New Service connection window, enter the Qualys Server URL where your Qualys CS account resides. For more information, refer to the Qualys Platform Identification page.
-
Enter your account credentials to authenticate with the CS API server.
The Qualys application supports two authentication methods for connecting to your Qualys account:
- Basic Authentication.
- OIDC (OpenID Connect)
You can choose either method based on your organization’s security policies and access setup.
Basic Authentication
Use this method if your Qualys setup uses a standard Username and Password.
Provide details in the following required fields:
-
Username
Enter Qualys username used for API access.
-
Password
Enter password for the above username.
Configure OIDC Authentication
Use this method if your Qualys environment is configured for OpenID Connect withClient IDandClient Secret.
Provide the details in the following required fields:
-
Client ID
Enter the Client ID received from your Qualys OIDC configuration.
-
Client Secret
Enter the corresponding Client Secret.
-
In the Authentication Type field, enter 'BasicAuth' for Basic Authentication or 'OIDC' for OIDC Authentication.
-
Provide a Service connection name to the new connection.
-
You can use this service connection to all pipelines in the same project by selecting the Security checkbox.
-
Click Save.
Once added, the CS service endpoint is listed in the CS service/server endpoint drop-down field.
If your Azure DevOps instance does not have direct Internet access and requires a proxy, select Use Proxy Settings check box, and enter the proxy server information.
- Go to the CS service/server endpoint field and click New.
- API login information (Select Use Proxy to provide proxy information).
Due to Azure DevOps limitations password string is visible on UI. To avoid disclosing password, use pipeline variable.
-
Enter Container image ID or image name that you want to scan.
Internally, image ID or image name is replaced with sha value of the image. -
Enter Data collection frequency.
-
Select the checkboxes if you want to set Build failure conditions.
-
Specify the docker daemon URL in the Advance Settings section for the plugin to connect to the docker daemon and tag the images specified in the input.
-
Specify the variable in the Output Variable section. The Output variable contains the evaluation result of the image vulnerabilities data against the build failure conditions.
This is an optional setting, and the CS extension does not control the formatting of the JSON file. Hence, to have output in the proper JSON format, use any JSON specific utility.
For example, in case of NodeJS script runner, you can add this line, 'console.log (JSON.stringify($(qcs.imageScanSummary)))' in the code along with the Output Variable from Qualys task as input to print the file in the proper JSON format. ('qcs.imageScanSummary' is the output variable created in the qualys task with 'qcs' provided as a reference name by the user)
When you are ready, click Save Configuration.