Create Reports in Container Security
You can create customizable, QQL-query-driven, on-demand and scheduled report jobs. Reports are driven by report templates. You can create the following report templates: Image Vulnerability Report, Container Vulnerability Report, Image Secrets Report, and Image Malware Report. When your report is finished, you can download it in CSV format from the Reports list.
- In the Reports tab, click Create Report.
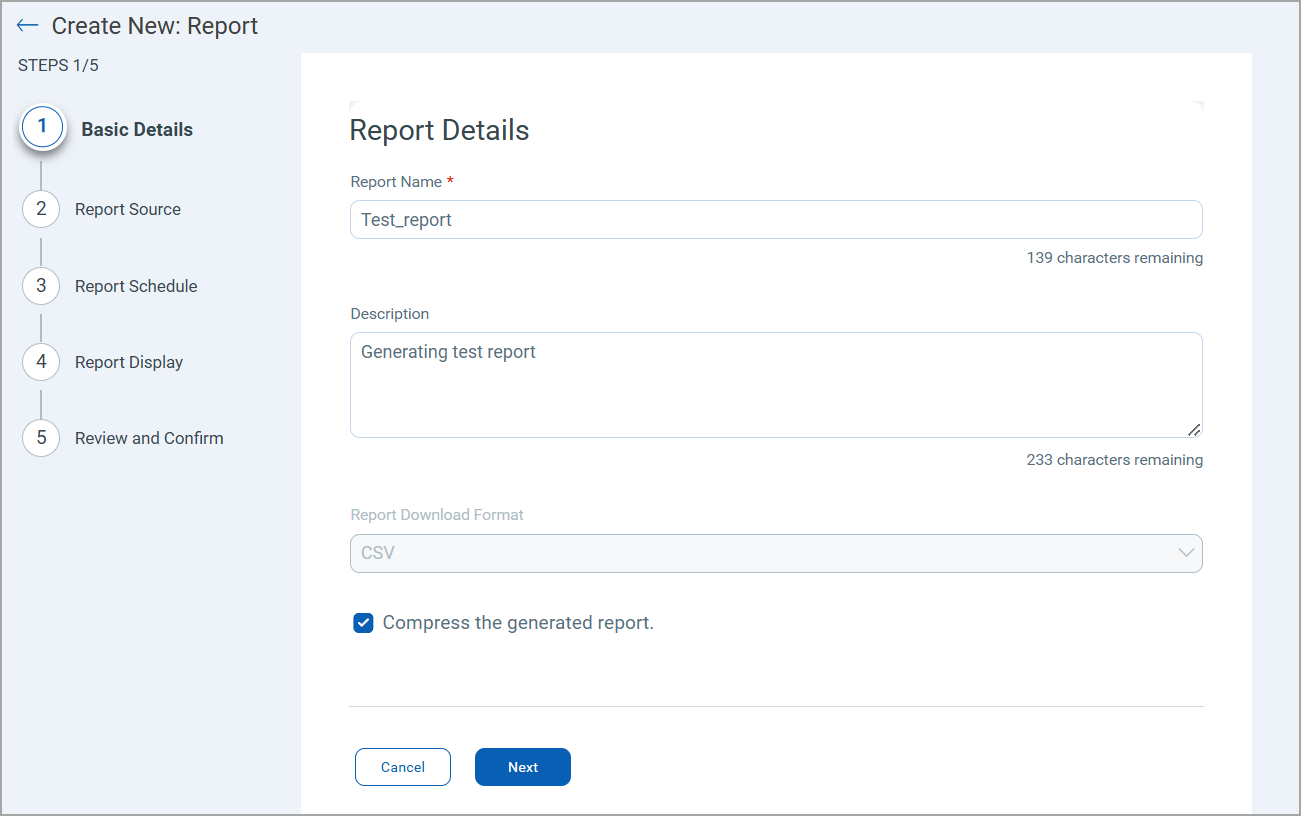
Under Report Details, enter a name and description for the new report. If you want to compress the generated report, select Compress the generated report checkbox and click Next.
- Under Report Source, select a report template:
- Image Vulnerability: creates a vulnerability report on your scanned images.
- Image Secrets: creates a secrets report on your scanned images.
- Container Vulnerability: creates a vulnerability report on your scanned containers.
- Image Malware: creates a malware report on your scanned images.
-
(Optional) Specify a QQL search query to limit the report to only certain images or containers. For Image Secrets report template, you can click Add Secret Query and specify the secrets query which you want to search. For Image Malware report template, you can click Add Malware Query to specify the malware query you want to search.
Only the images or containers that match your query are included in the report. For example, apply a search query to focus on a particular scope or time-frame. Reports with a large number of records are truncated and this is indicated in the report.After providing your query, click Next to continue.
To learn more about search tokens, see Searching Images | Searching Containers
-
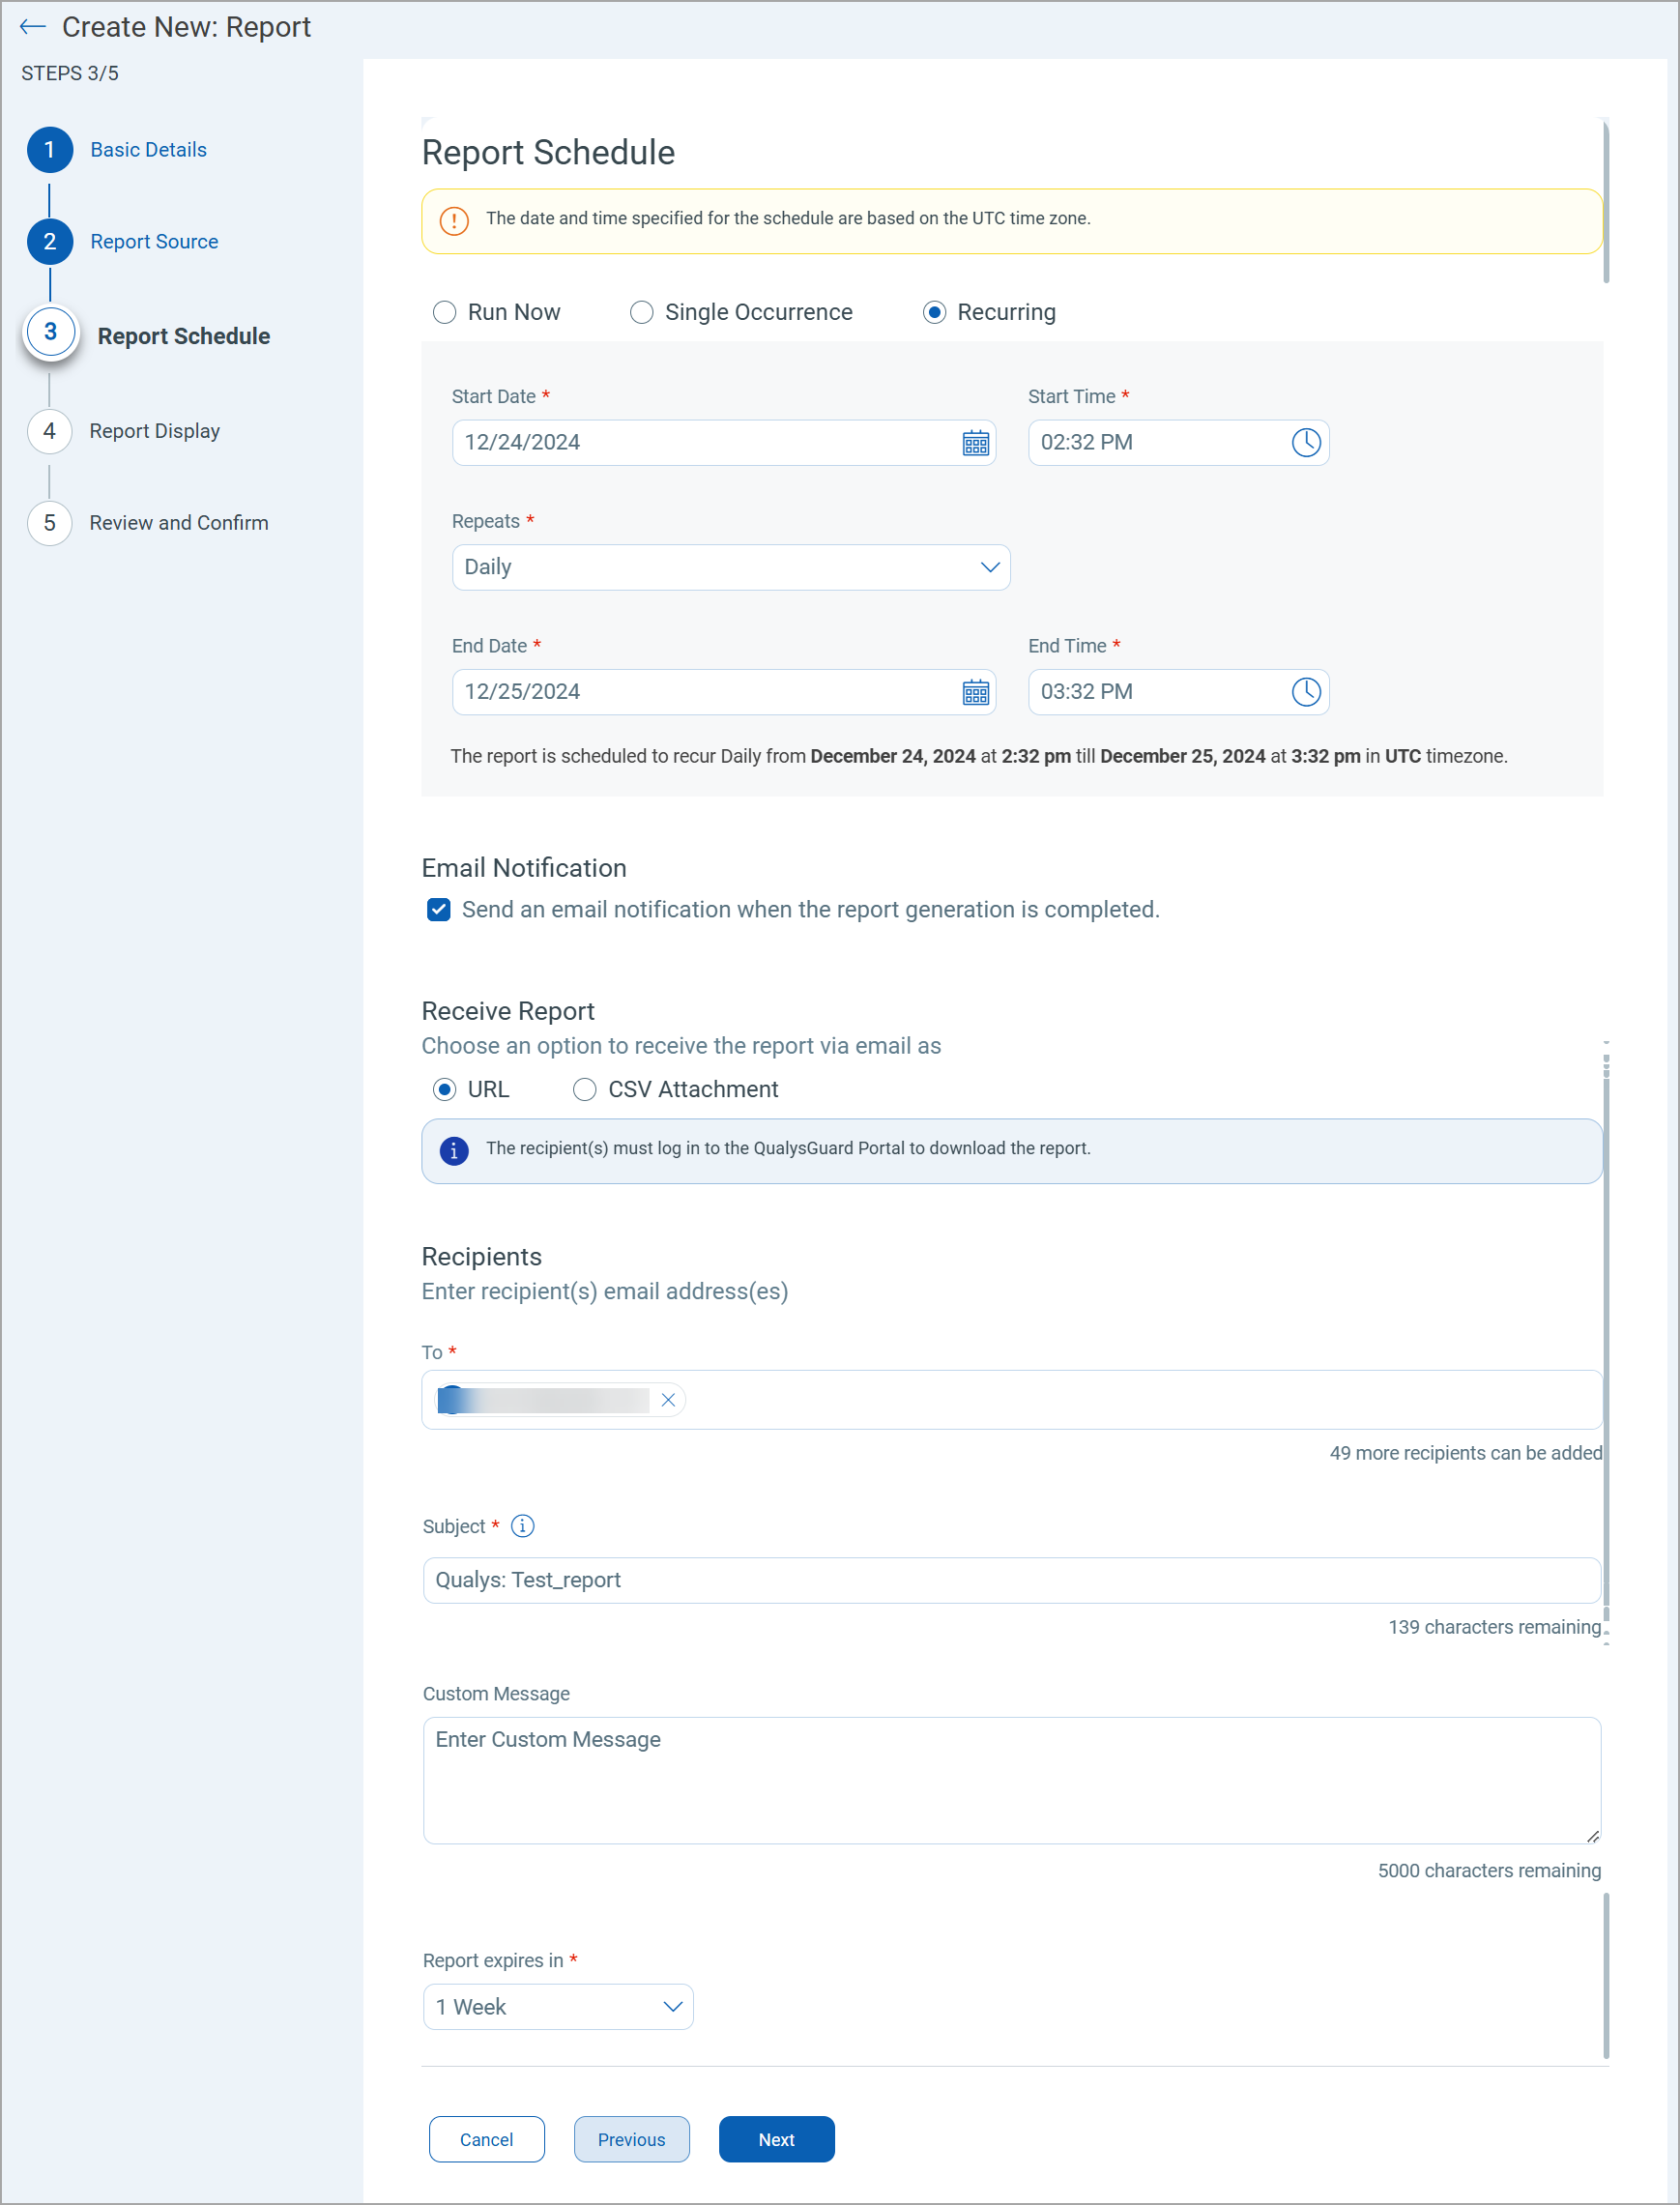
Under Report Schedule, specify whether you want to create an on-demand report or a scheduled report. You can immediately generate a report using Run Now option.
For a scheduled report, you need to define a schedule using Single Occurrence or Recurring to run the report at specified time or at regular intervals. You can create a daily, weekly, or monthly recurring schedule.
Specify the date and time based on the UTC timezone.
To create a non-recurrent report scheduled at a future date and time, use the Single Occurrence option and specify the start date and time.
Daily recurring reportDaily recurring report
To create a daily recurring report:
-
Select the Recurring option.
-
Choose Daily from the Repeats dropdown.
-
Specify the start date and time, and the end date and time for the schedule. The schedule runs within this specified timeframe.
Weekly recurring reportWeekly recurring report
To create a weekly recurring report:
-
Select the weekly frequency and then select a day of the week on which you want the report to run.
-
Specify the start date and time, and the end date and time for the schedule. The schedule runs within this specified timeframe.
Monthly recurring reportMonthly recurring report
To create a monthly recurring report:
-
Select the monthly frequency.
-
Define the schedule using either of the following methods:
-
Select a day of the month between 1 to 31. For example, 12. The report runs on the 12th day of every month.
-
Select a week and then a day of the week. For example, Sunday of the second week. The report runs every second Sunday of the month.
-
-
Specify the start date and time, and the end date and time for the schedule. The schedule runs within this specified timeframe.
-
- Select the Email Notification checkbox if you want to notify the recipients about the report.
- In Receive Report, choose one of the following options.
- URL - Sends an URL of the report. The URL takes the email recipients to Qualys Enterprise TruRisk™ Platform. Recipients who have a Qualys account can access the report using the URL.
- CSV Attachment - Attaches the report (.csv) to the email. If your report size is more than 15MB, then, by default, it is sent using the URL method.
- From the Report expires in list, select a time period after which the report expires and gets deleted from your account.
- Under Report Display, choose the details you want to see in your report. Your selections determine which columns appear in the CSV report output. Note that certain details are selected by default and cannot be cleared. Optionally, select Select All to include all details in the report.
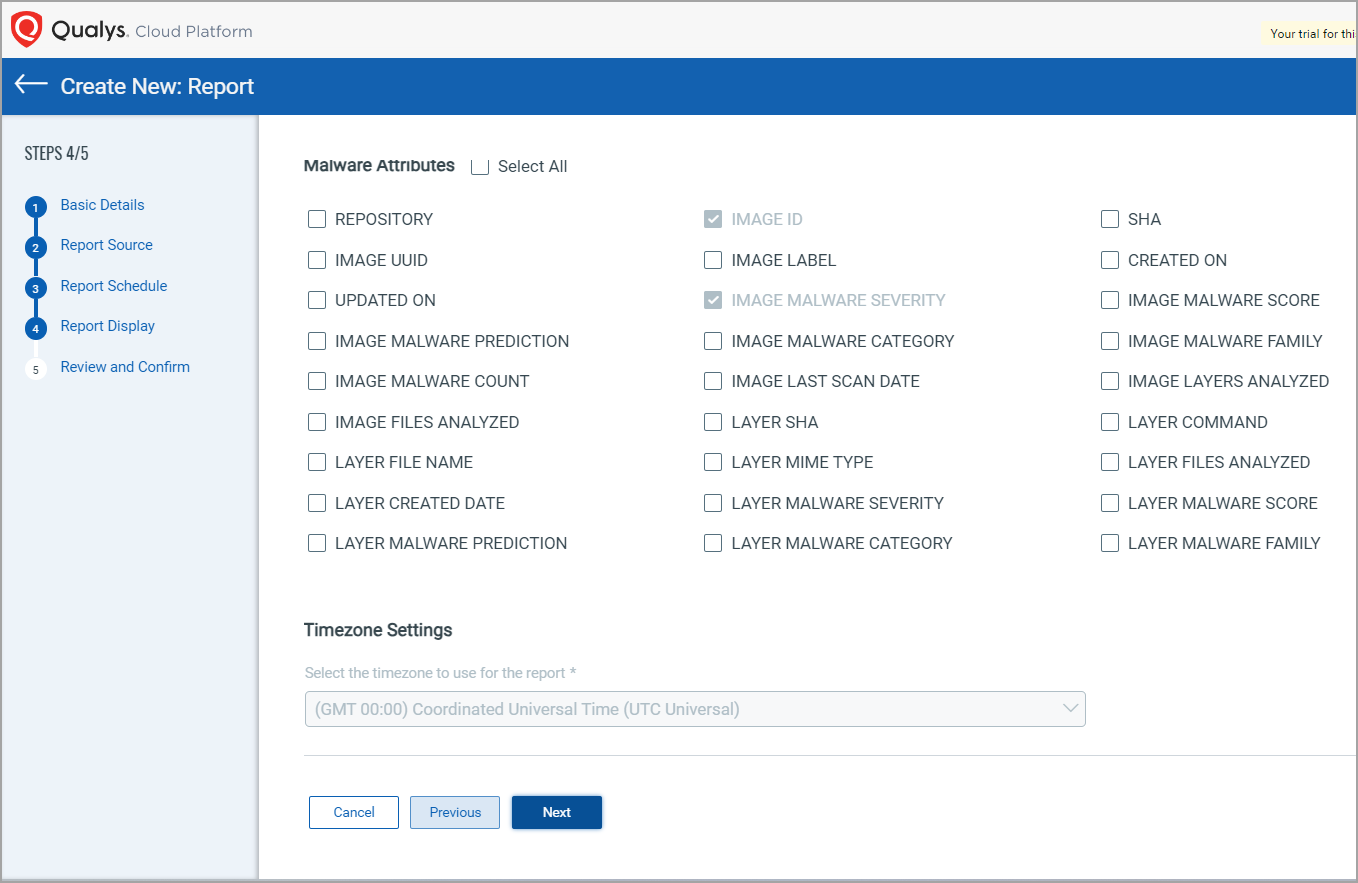
The image above shows you Report Display page of an Image Malware report. - For an on-demand report, specify the time zone where you want to view the date and time in your report.
-
Click Next. Review the report summary and then click Submit to submit the report job.
In the case of an on-demand report job, it appears in the Reports tab with the Accepted status. Once the report is generated, its status changes to Completed and it is ready to download. Select Download from the Quick Actions menu to view the completed report.
In the case of a scheduled report job, the schedule appears in the Schedule tab. When a schedule is triggered, a report job is created in the Reports tab. The Report Type column helps you identify the report type, on-demand or scheduled.
See also