Create EASM Organization/Subsidiary Report
You can create this report to view the business valuations of Organizations/subsidiaries discovered by EASM.
To create this report, follow these steps:
- Navigate to Reports > Create Report > EASM Organization/Subsidiary.
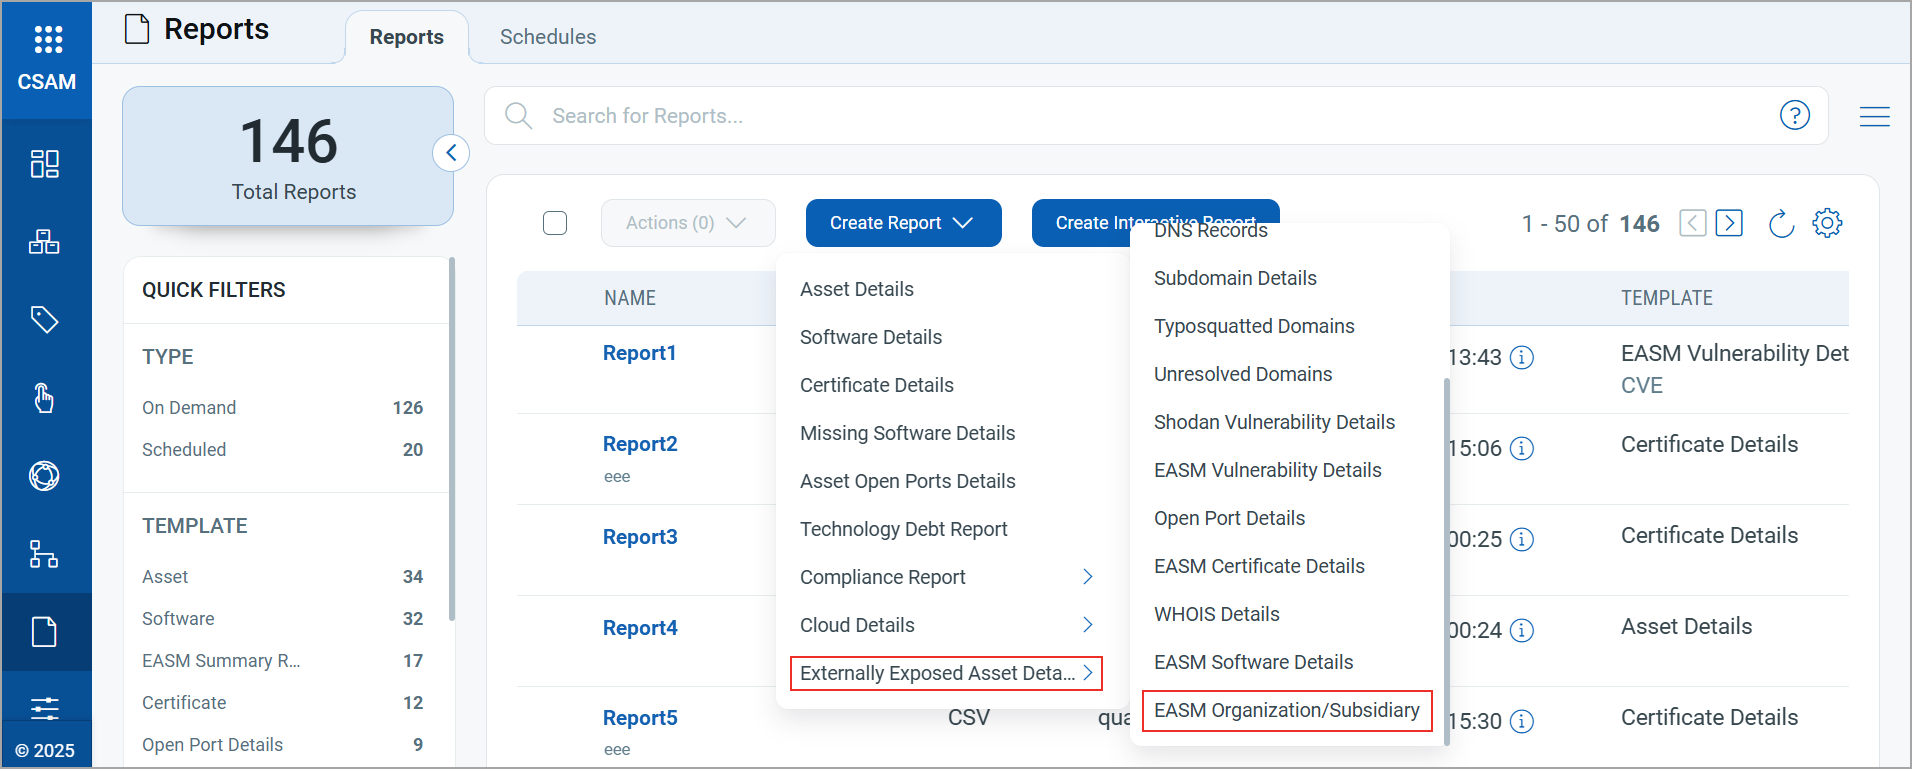
- On the Basic Details page, enter the Report Title and Report Description.
- Click Next.
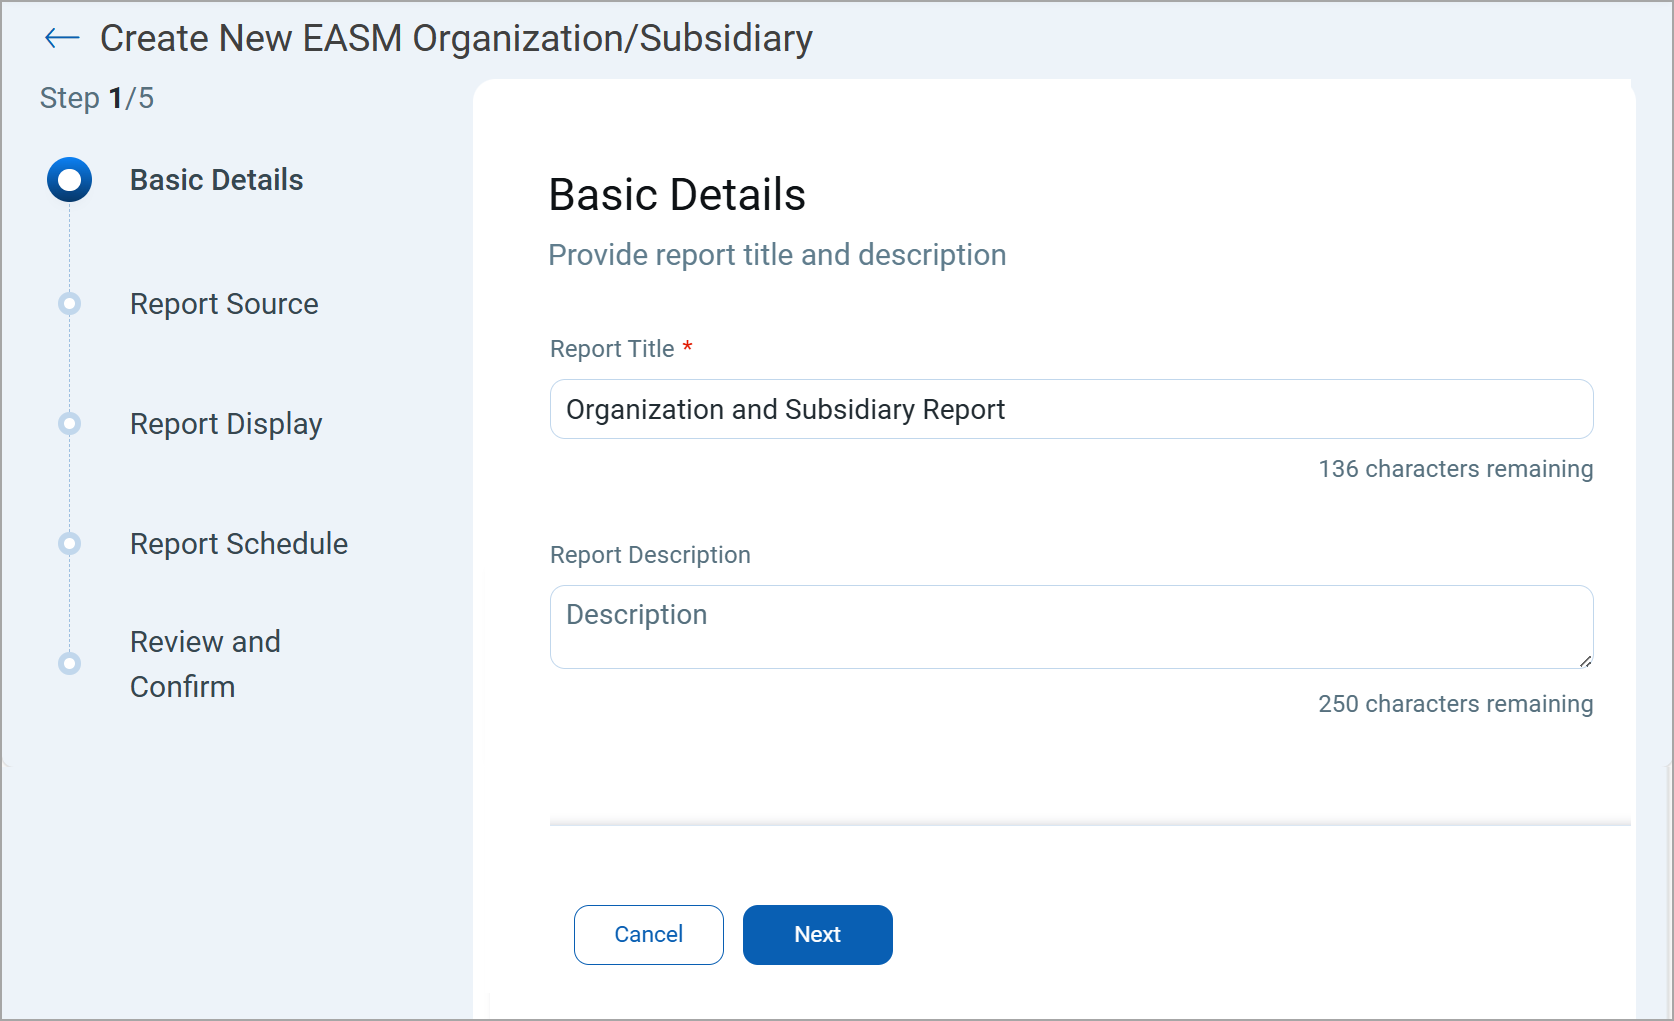
- On the Report Source page, complete the sections below to define the data that you want to include in the report.
Section Action Include Assets
Add assets to include in the report. - Click
 to select assets.
 - Select the assets you want and click Add Assets.
Include hosts for the tags
Add assets that have the selected tags. - Click to select asset tags.
- Select the tags you want and click Add tag.
- To specify the condition for tags, select the Any or All option from the list. These options determine how assets are filtered and included in the report based on your selected tags.
- Any: When you select Any, the report includes the asset if it has at least one of the selected tags.
- All: When you select All, the report includes the asset if it has all the selected tags.

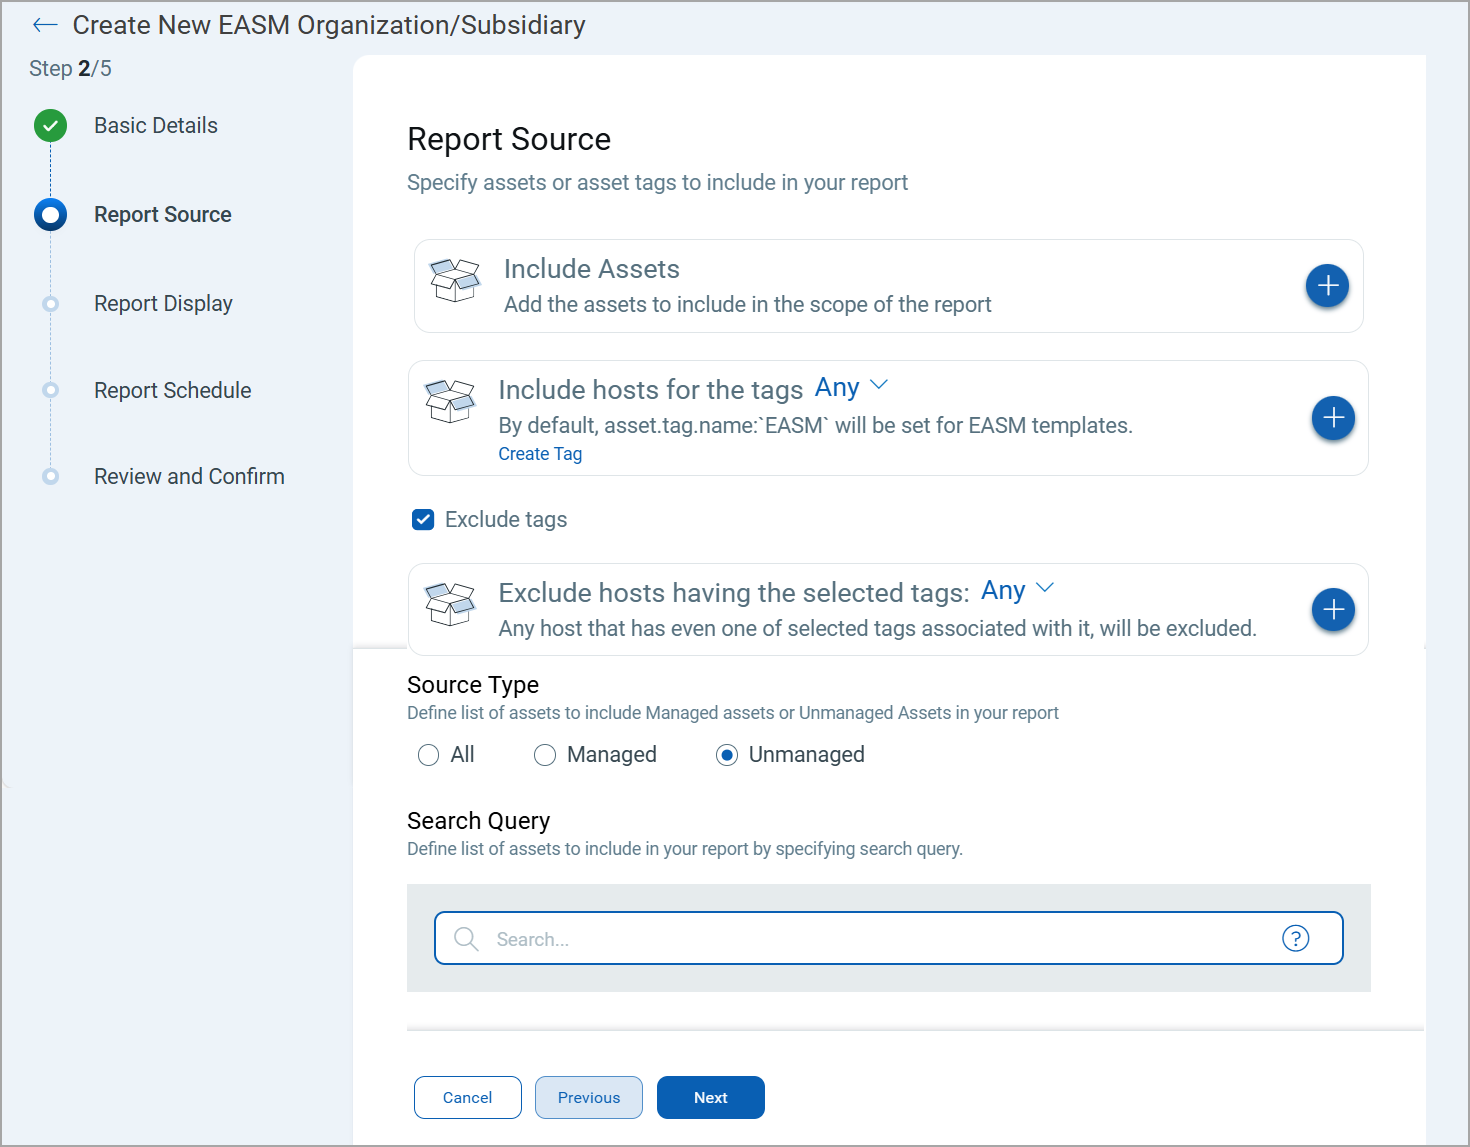
Exclude tags Exclude assets that have the selected tags.
- Click to select tags.
- Select the tags you want and click Add Tag.
- To specify the condition for tags, select the Any or All option from the list. These options determine how assets are filtered and excluded in the report based on your selected tags.
- Any: When you select Any, the report excludes the asset if it has at least one of the selected tags.
- All: When you select All, the report excludes the asset if it has all the selected tags.
Source Type
Select the asset type to include in the report. You can select All or any of the following asset types:
- Managed
- Unmanaged
Search Query
Define the list of assets to include in the report using the QQL query.
- Click
-
Click Next.
-
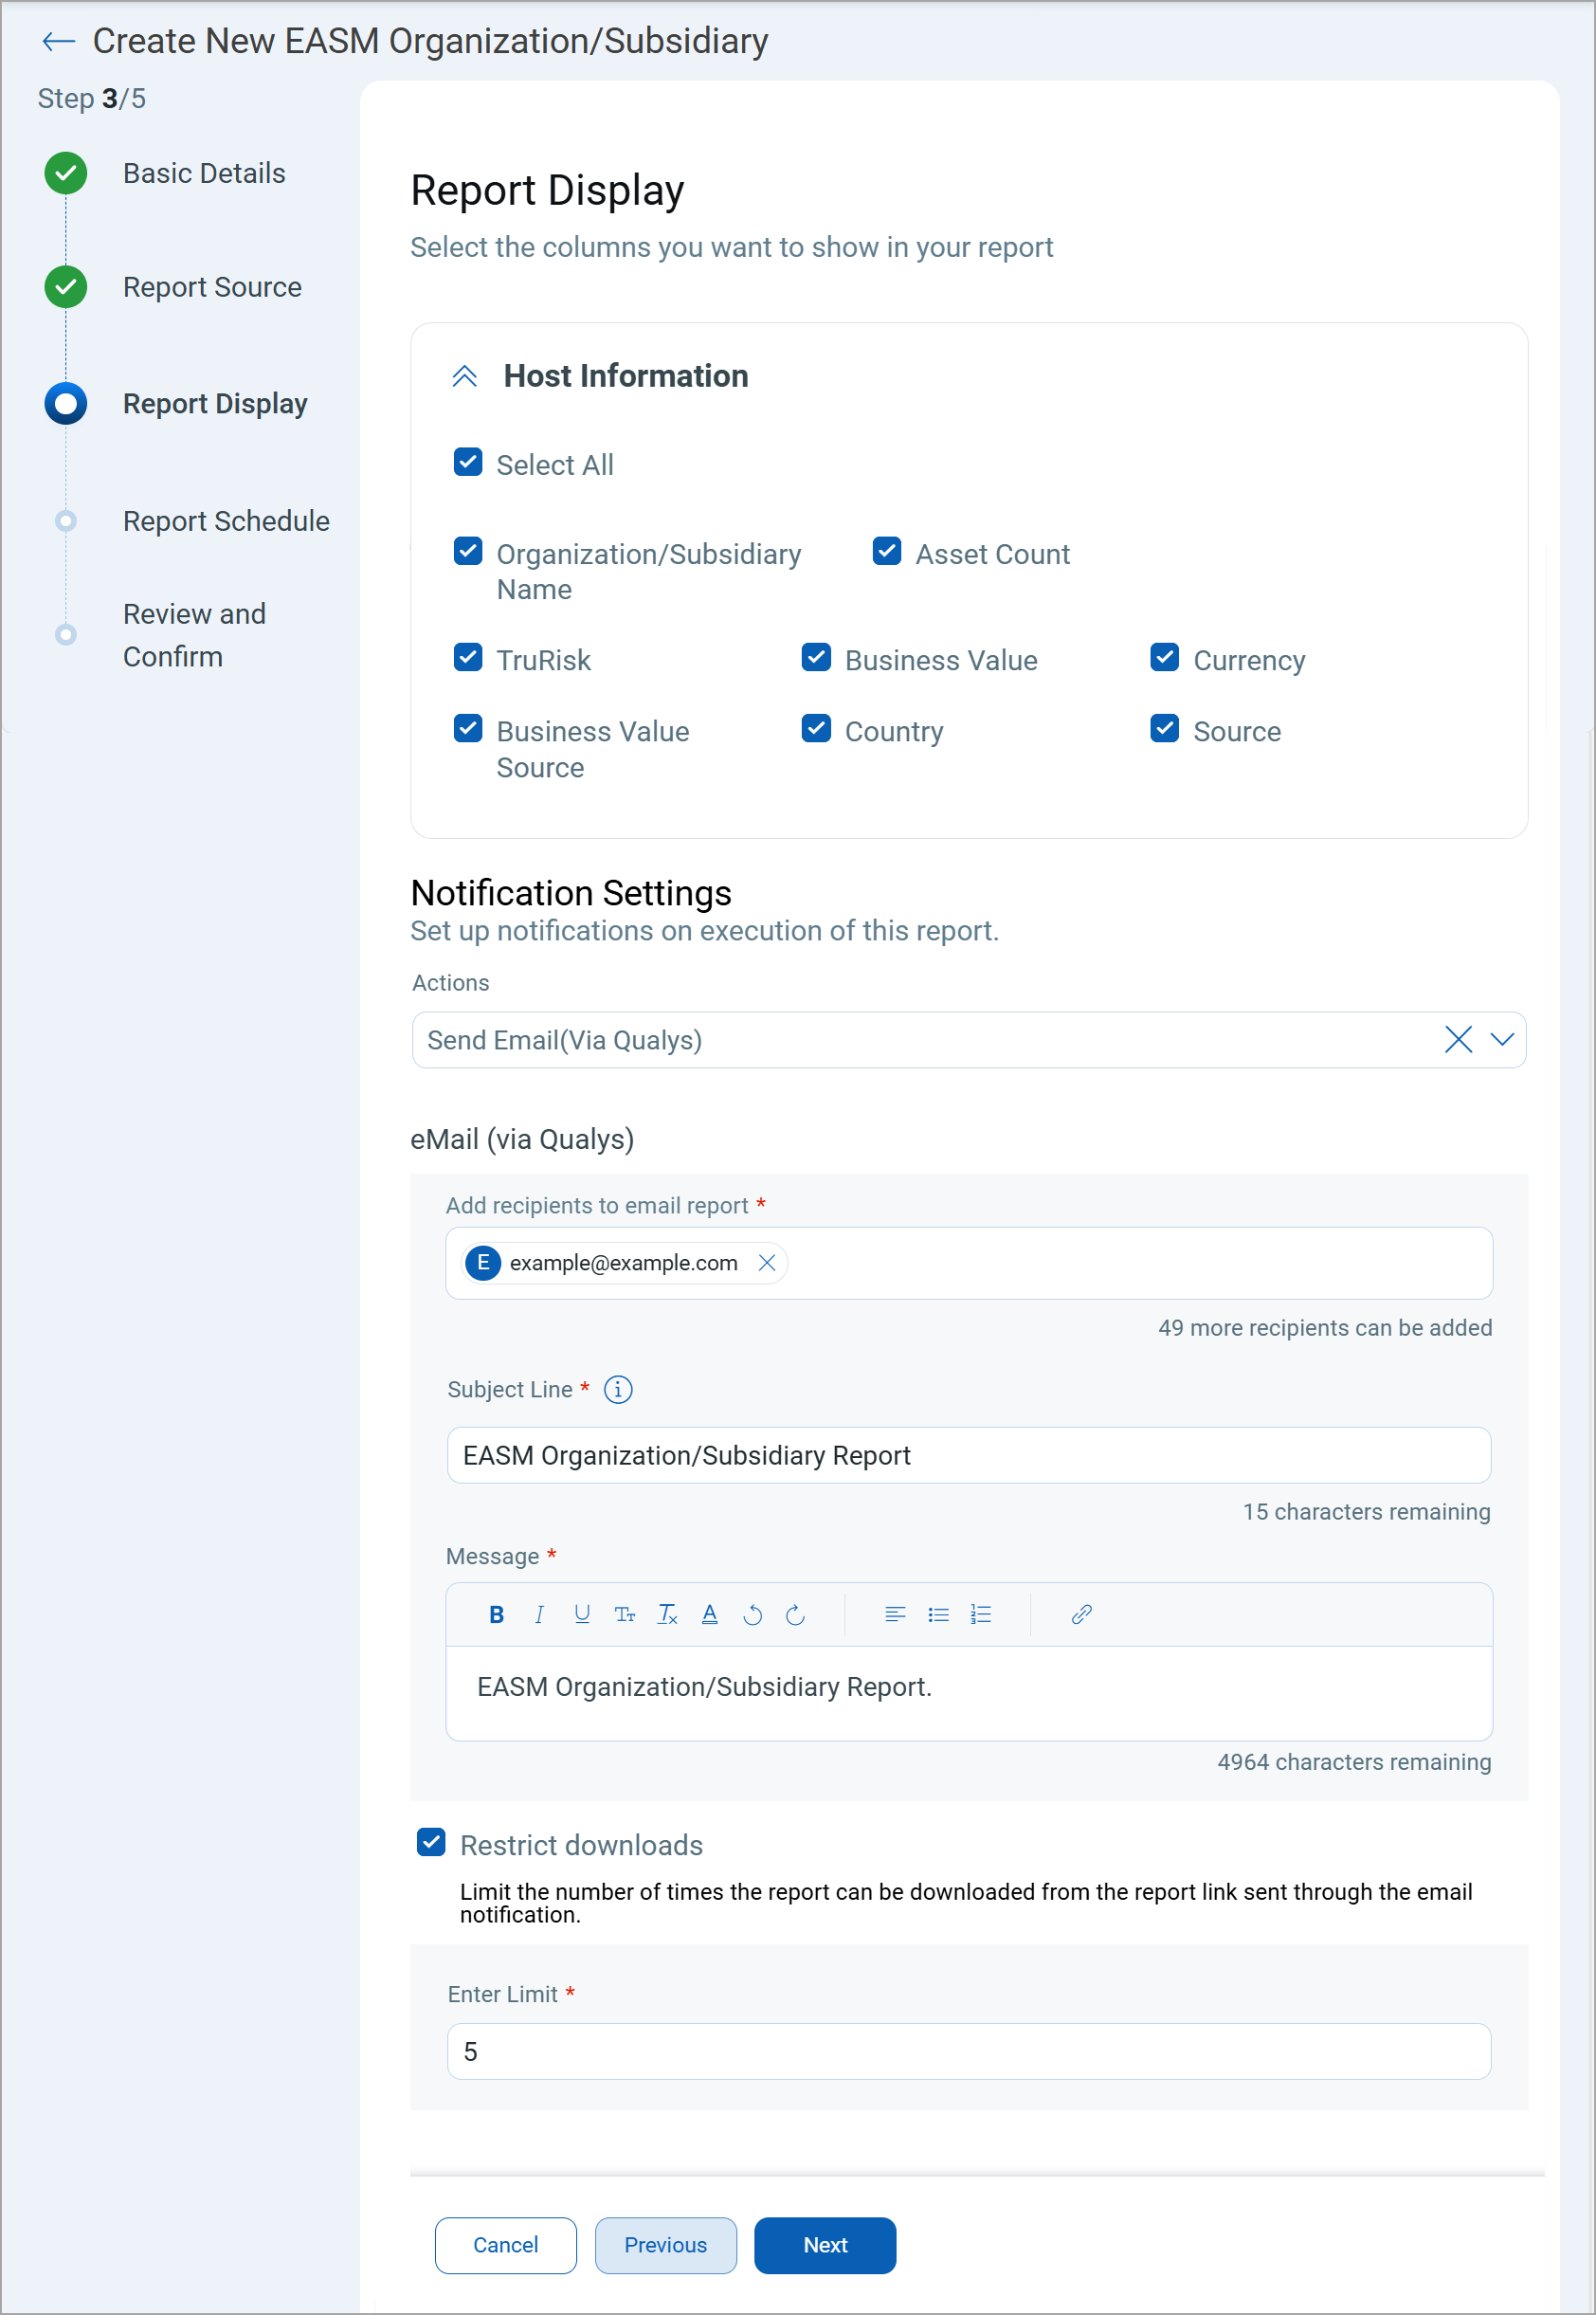
On the Report Display page, select the columns that you want to show in the report from the Host Information section.
-
(Optional) Set up a Notification to send alerts of report generation to stakeholders through email.
Select Send Email (via Qualys) from the Actions list and complete the following steps:
- Enter the Recipients email addresses.
You can enter up to a maximum of 50 email addresses separated by a comma.
- Enter the email Subject Line.
- Enter a Message.
- Select the Restrict downloads checkbox if you want to limit the number of times the report can be downloaded from the report link sent through the email notification.
The email notification is sent after the report is generated for reports with Completed, Failed, or Incomplete statuses. When you download the report, it is downloaded as a CSV file. When you attempt to download the report after the download limit you set is reached, a text file is downloaded instead. When you open the text file, it mentions that the Maximum download limit reached. In this case, contact Qualys Support.
- Enter the number in the Enter Limit field.
- Enter the Recipients email addresses.
-
On the Report Schedule page, you can select one of the following options to generate reports:
- Run Now: Generate the report immediately after creating the report. Click On Demand, select the timezone, and click Next.
- Schedule: Set up a schedule to run the report automatically at specified intervals.
- To set up a schedule, follow these steps:
-
Click the Schedule tab.
-
To generate the report at a specified time, select the Start Date and Start Time.
-
Select the Recurring checkbox if you want the report to generate automatically at a specific interval.
-
Complete the following fields that are displayed depending on the schedule you select from the Repeats list:
Schedule Description Daily 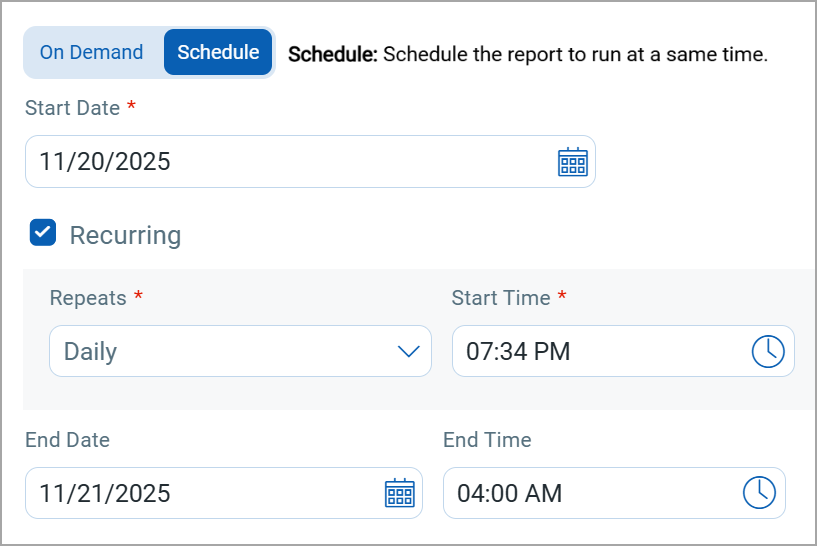
Select this option to schedule the report to run daily on the selected Start Date and Start Time.
Weekly
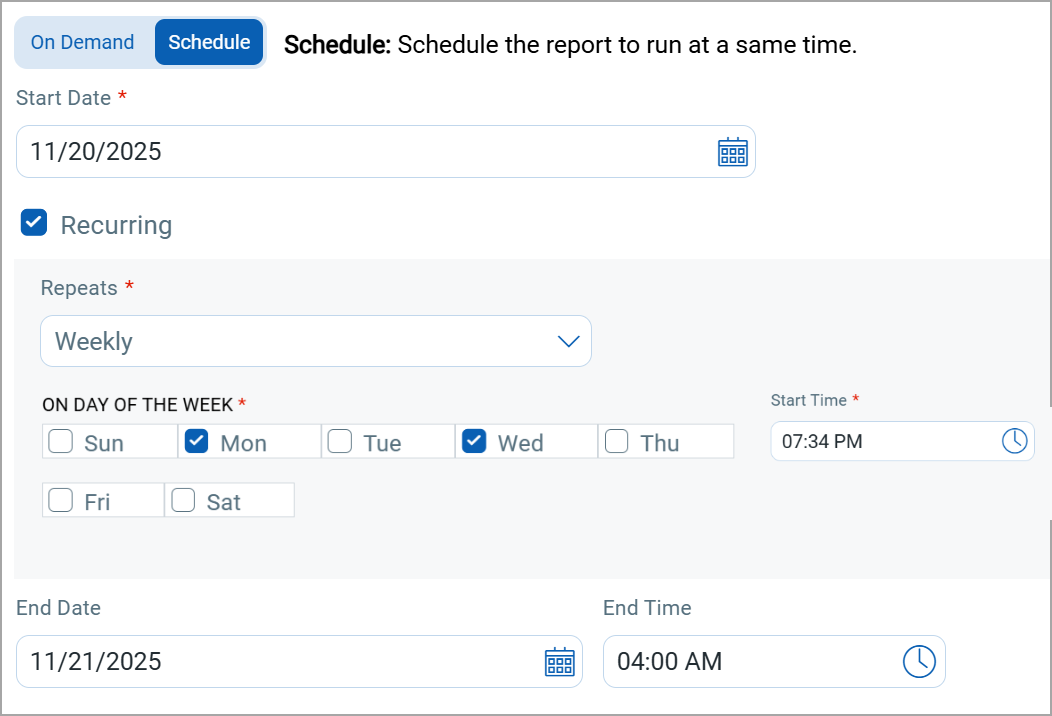
Select this option to schedule the report to run on the selected days every week.
The Start Date and Start Time indicate when the schedule begins.
Monthly Date of the month
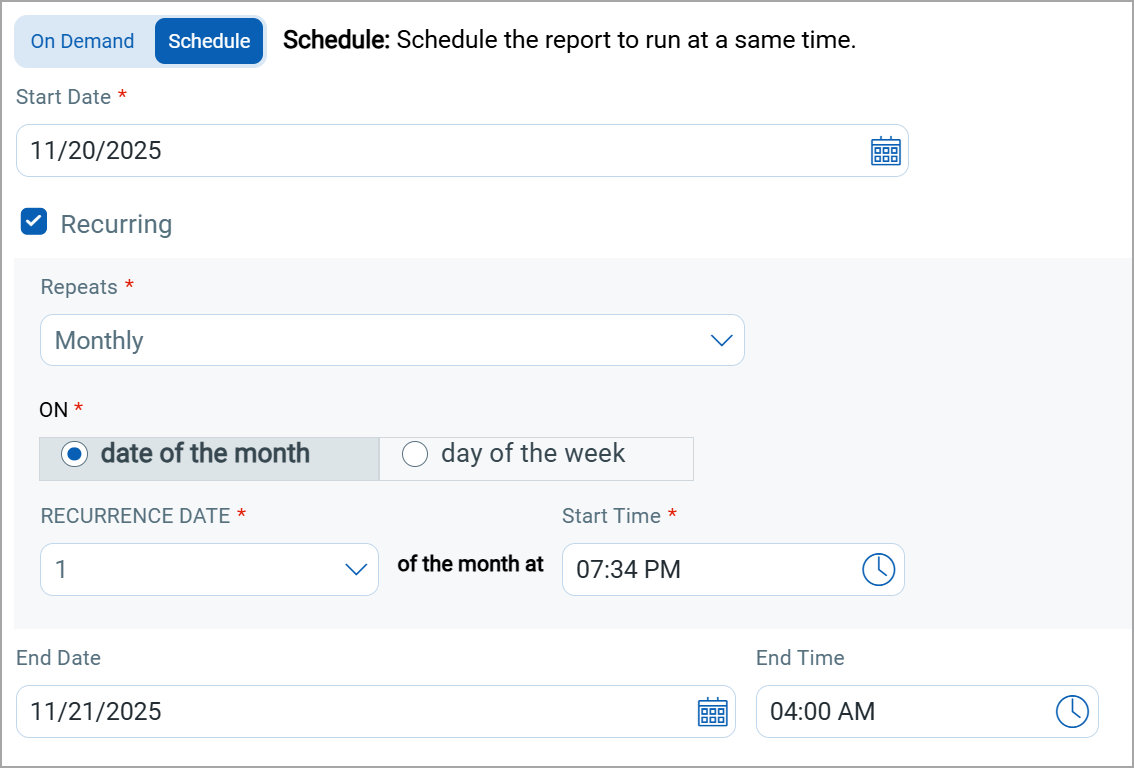
Select this option to schedule the report to run on the selected date every month.
The Start Date and Start Time indicate when the schedule begins.
Day of the week
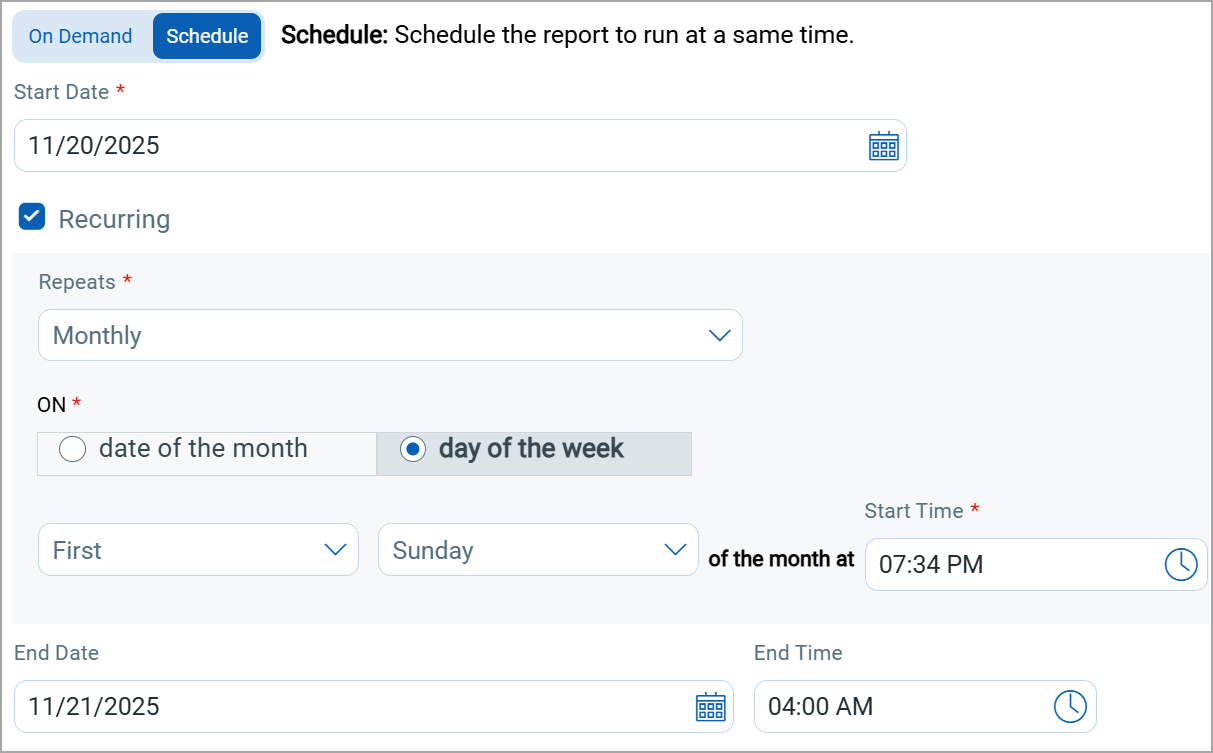
Select this option to schedule the report to run on the selected day of the week every month.
The Start Date and Start Time indicate when the schedule begins.
- Use the End Date and End Time fields to specify when the recurring report schedule ends.
- Select the Timezone and click Next.
-
- On the Review and Confirm page, review all the details.
- Click the Edit icon to update information on the respective pages if needed.
- Click Finish.
Once the report is generated, you can download it.