External Attack Surface Reports
You can create EASM reports by following any of the two approaches:
- Creating EASM reports by Using the EASM-specific Report Templates
- Creating EASM Tag-based Interactive Reports
Creating EASM reports by Using the EASM-specific Report Templates
You can use the following EASM-specific report templates and generate the reports.
- EASM Summary Report: To get visibility into the summary of your external attack surface.
You can create an on-demand or a scheduled EASM summary report. You can choose to send the notification after the report is executed through email. Optionally, you can limit the number of times the report can be downloaded from the link sent through the email notification. - EASM Asset Details: To include EASM-specific asset details, such as Asset ID, Asset Name, Asset Risk Score, ISP, ASN, and Domain in your report.
- Domain Details: To include assets with their domain-specific details, such as Asset ID, Asset Name, Domain, Asset Category, and Tags in your report.
- Domain Security: To include missing or misconfigured DomainKeys Identified Mail (DKIM) and Sender Policy Framework (SPF) records.
- DNS Records: To include detailed information about the DNS records of your resolved, unresolved, and typosquatted domains on your report. For more information on this report, refer to DNS Records report.
- Subdomain Details: To include assets with their subdomain details, such as Asset ID, Asset Name, Primary Domain, Subdomain, Asset Category, and Tags in your report
- Typosquatted Domains: To include the typosquatted domain details in the report.
- Unresolved Domains: To get details, such as the Domain, Subdomain, Registrar, Registrant org, Registrant Email ID, and Creation Date for the unresolved domains and subdomains you selected.
- Shodan Vulnerability Details: To include assets with their vulnerability details, such as Asset ID, Asset Name, Asset Risk Score, CVE, Type, and Summary in your report.
- EASM Vulnerability Details: To include details about vulnerabilities detected through EASM lightweight scans.
- Open Port Details: To include assets having open port details, such as Asset ID, Asset Name, Asset Category, ISP, and Domain in your report.
- EASM Certificate Details: To include asset certificate details, such as Asset ID, Asset Name, Issuer Common Name, Issuer Country, and Issuer Organization in your report.
- WHOIS Details: To include asset WHOIS details, such as Asset ID, Asset Name, Asset Risk Score, and Domain Status in your report.
- EASM Software Details: To include EASM software details, such as Software product, software version, software category, software lifecycle stage, software license category, and so on.
- EASM Organization/Subsidiary: To get a consolidated view of the business valuations of Organizations/subsidiaries discovered by EASM.
No null entries are allowed in any of the corresponding reports when using these report templates to generate the reports. For example, for the Open Port Details report, the open port column can never be null. For the Vulnerability Details report, the CVE column can never be null.
As an example, refer to the following steps to understand how to create an EASM-specific report by using a Domain Details template.
From the Reports tab, go to Reports > Create Report > Externally Exposed Asset Details, and select the report template that you want to use to create a report.
By default, tags.name:`EASM` is set for the EASM reports.
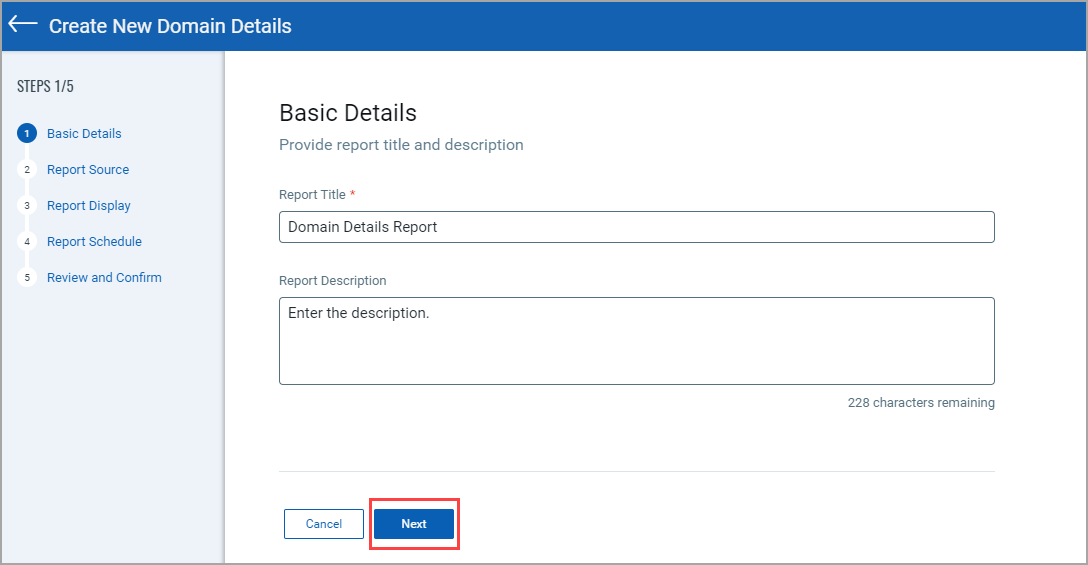
Step 1: Basic Details
On the “Basic Details" page, enter the report title and description, and then click Next.
Step 2: Report Source
On the "Report Source" page, define the scope of the assets that you want to include in the report by referring to the following sub-steps, and click Next.
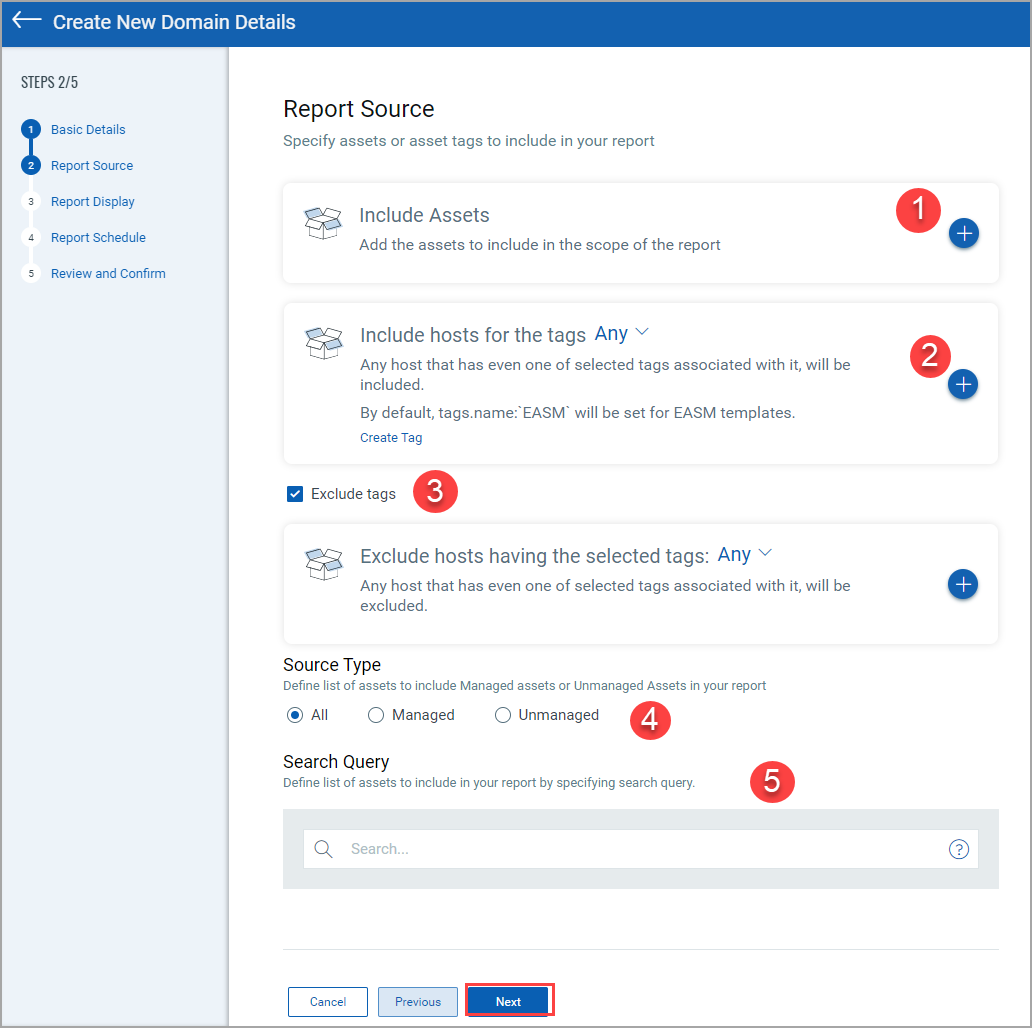
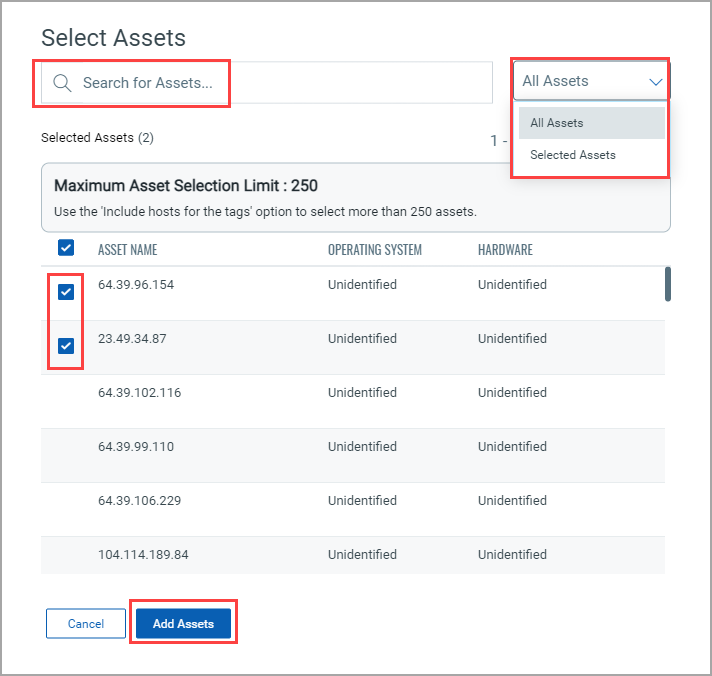
(1) Include Assets: To include assets in the scope of the report.
i) Click  to add assets. From the "Select Assets" window, select the assets that you want to add and click Add Assets.
Note: In the “Select Assets” window, the All Assets option is shown by default. After you select the assets, you can choose to select the Selected Assets option to view only the assets that you selected.
(2) Include hosts for the tags: To include the host with the selected tags associated with it in the report.
i) Click from the Include hosts for the tags section.
Note: You can see Any option next to the Include hosts for the tags, which is shown by default. The other available option is All.
- If you select Any, the assets that are tagged with any of the tags that you select are included in the report.
- If you select All, only the assets that are tagged with all tags that you select are included in the report.
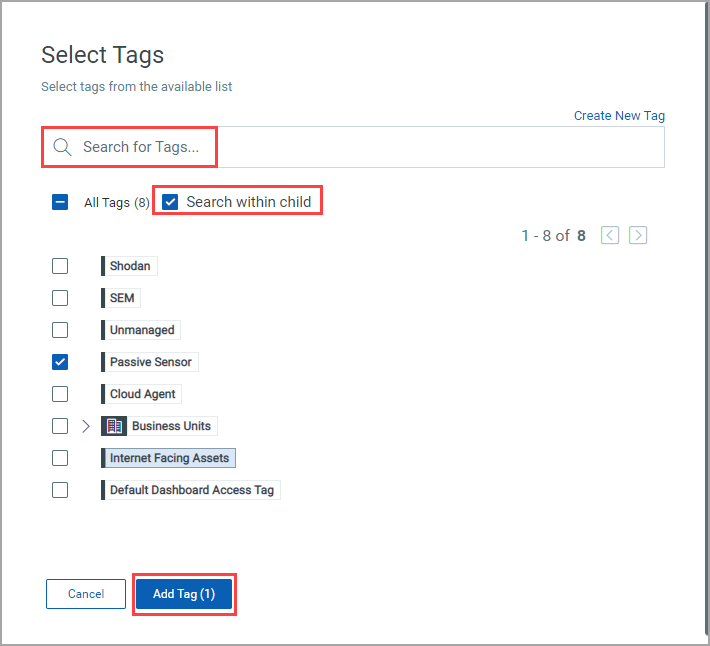
ii) From the "Select Tags" window, select the tags that you want to add and click Add Tags.
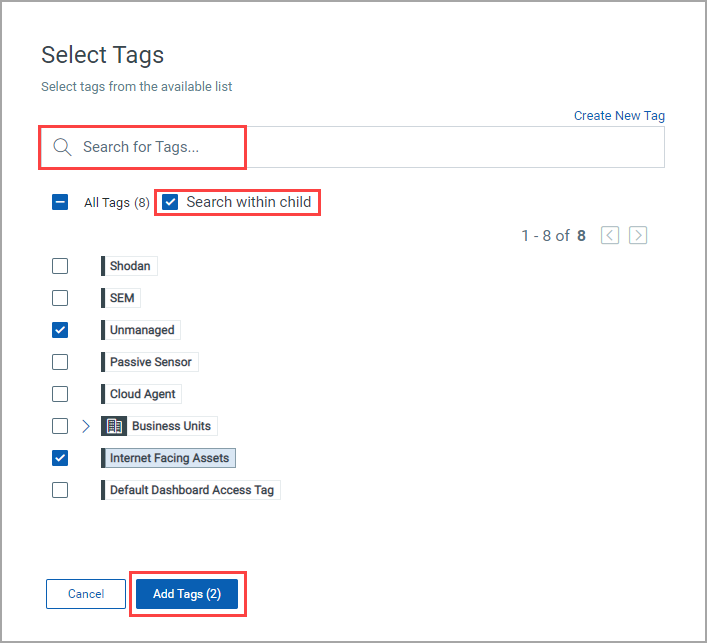
(3) Exclude tags: To exclude host with the selected tags associated with it in the report.
Note: You can see the Exclude hosts having the selected tags section only after you select the Exclude tags checkbox. You can see Any option next to it, which is shown by default. The other available option is All.
- If you select Any, the assets that are tagged with any of the tags that you select are excluded from the report.
- If you select All, only the assets that are tagged with all the tags that you select are excluded from the report.
i) Click from the Exclude hosts having the selected tags section.
ii) From the "Select Tags" window, select the tags that you want to add and click Add Tags.
(4) Source Type: To include All, Managed, or Unmanaged assets in the report.
Choose All, Managed, or Unmanaged type of assets you want to include in your report.
(5) Search Query: Define the list of assets to include in the report by specifying a search query.
Enter the query in the Search Query field that specifies the assets that you want to include in the report.
Step 3: Report Display
1) On the "Report Display" page, select the columns that you want to show in the report and click Next.
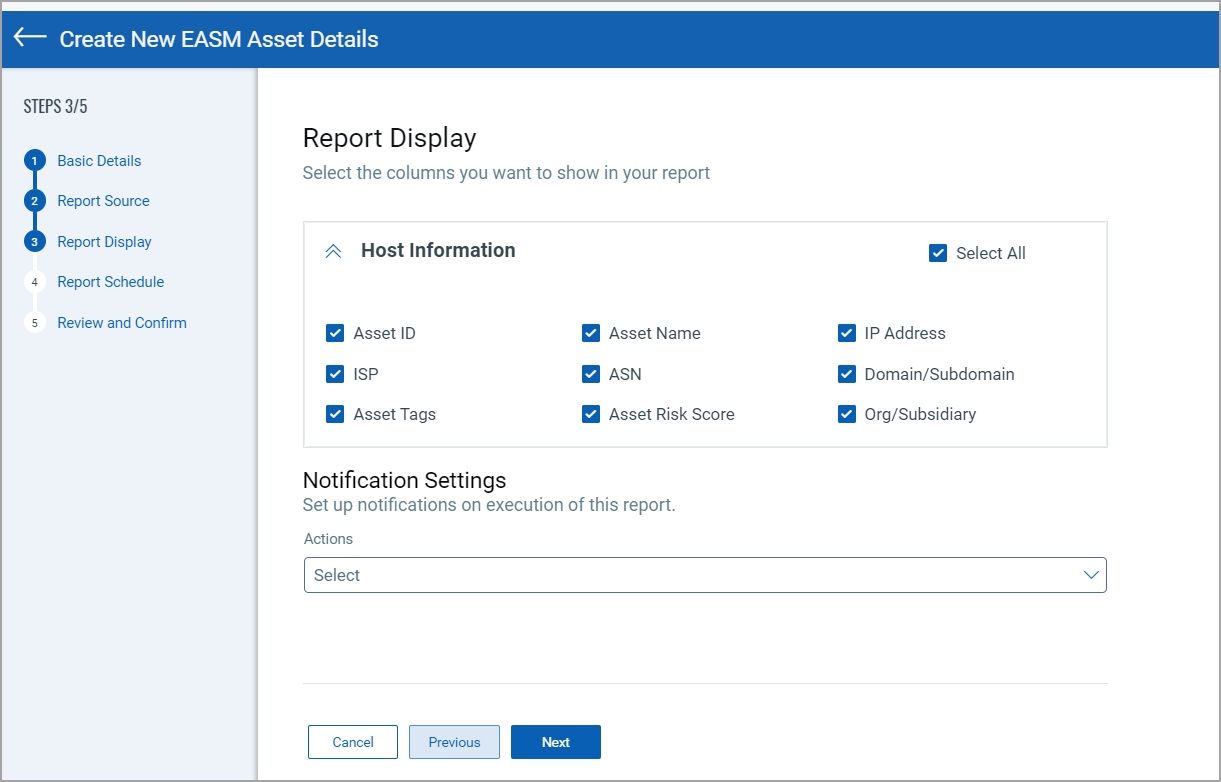
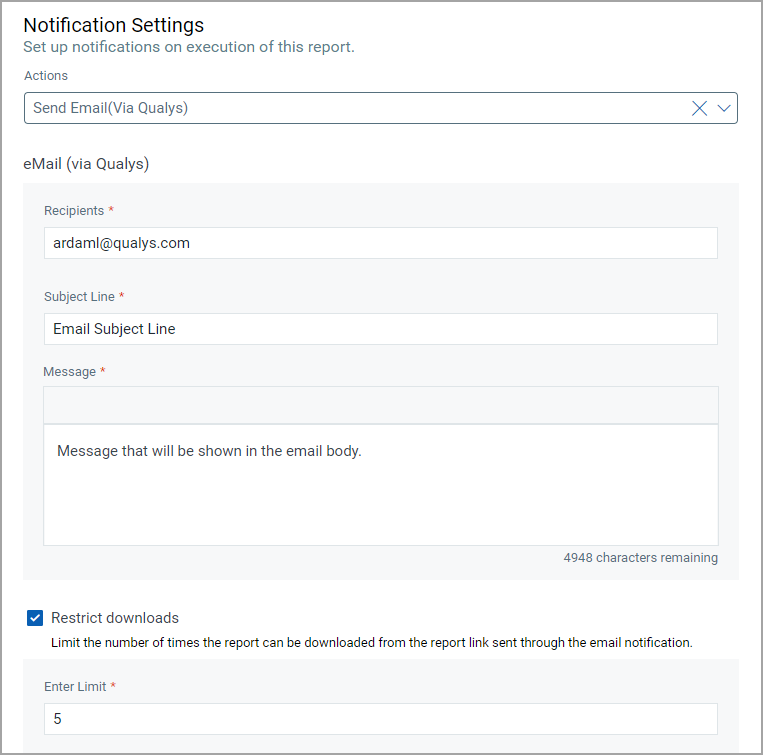
(2) (Optional) You can also choose to set up an email notification. Select Send Email (via Qualys) from the Actions list and complete the following steps:
i) Enter the email addresses in the Recipients field. You can enter up to a maximum of 50 email addresses separated by a comma.
ii) Enter the email subject line in the Subject Line field.
iii) Enter the message text in the Message field.
iv) Select the Restrict downloads checkbox. Enter the number in the Enter Limit field to limit the number of times the report can be downloaded from the report link that will be sent through the email notification.
Note:
- The email notification is sent after the report is generated for reports with ‘Completed’, ‘Failed’, or ‘Incomplete’ statuses.
- When you download the report, it is downloaded as a CSV file. When you try to download the report after the download limit that you set is reached, a text file is downloaded. When you open the text file, it mentions that the ‘Maximum download limit reached. Contact Support’.
3) Click Next.
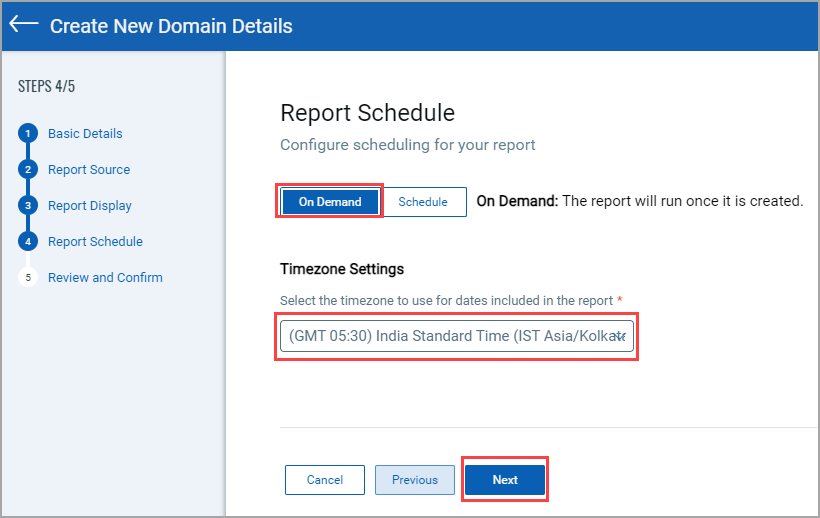
Step 4: Report Schedule
1) On the "Report Schedule" page, configure an On Demand or Schedule report.
2) Click On Demand, select the timezone, and click Next. The report is generated immediately after it is created.
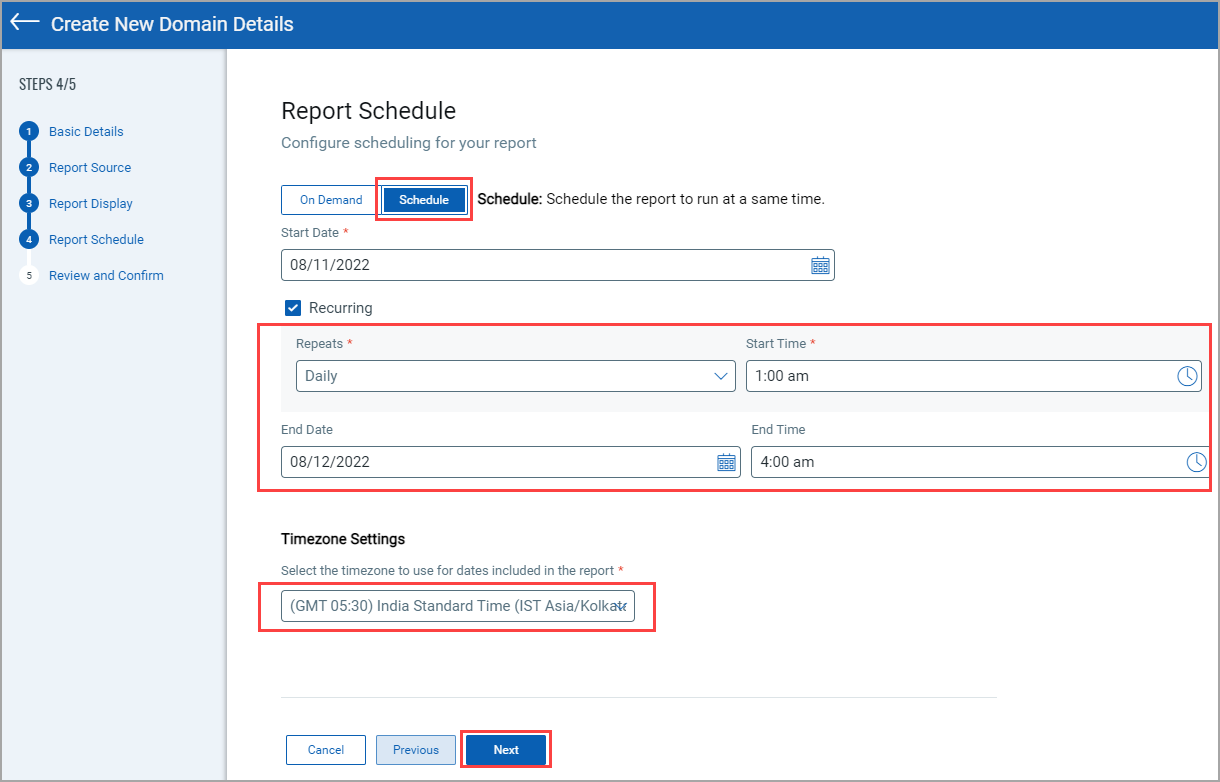
3) Click Schedule. Provide the following details and click Next.
i) From the Repeats field, select the frequency of report generation that is Daily, Weekly, or Monthly.
ii) Select the start time, end date, and end time for the report.
iii) Select the Timezone.
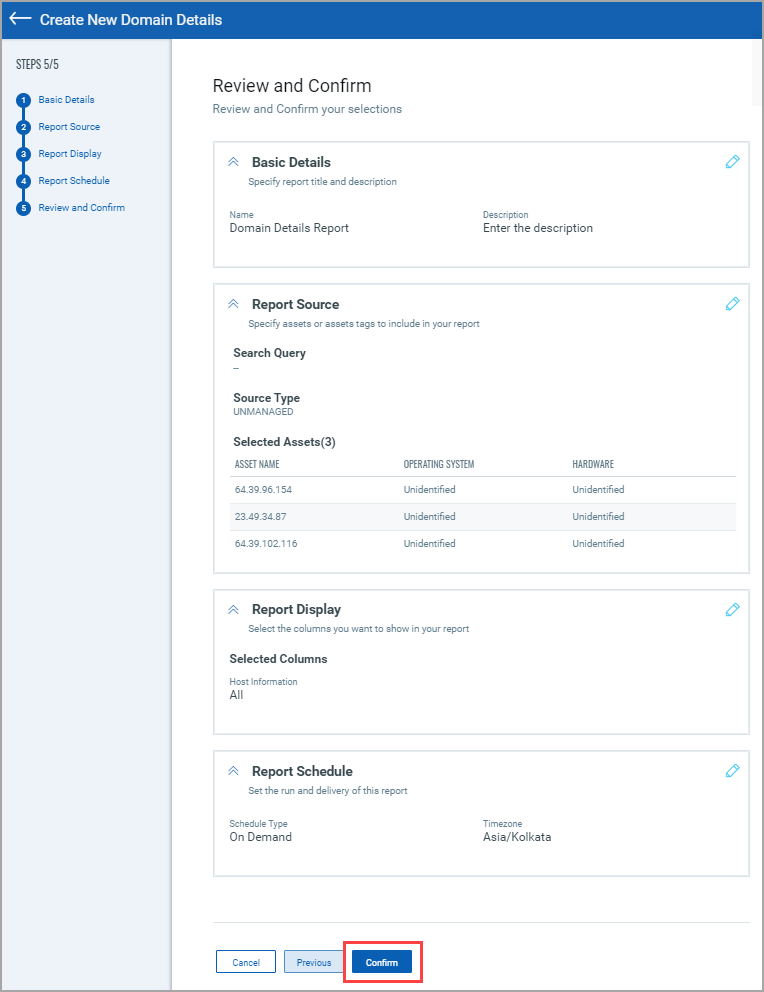
Step 5: Review and Confirm
Review and confirm your selections and click Finish.
Note: If required, you can edit the Basic Details, Report Source, Report Display, and Report Schedule at this step too.
You can download the report then.
Creating EASM Tag-based Interactive Reports
In an interactive report, you can choose to include any or all of the following assets details: Assets Summary, Software Summary, and Missing Software Summary.
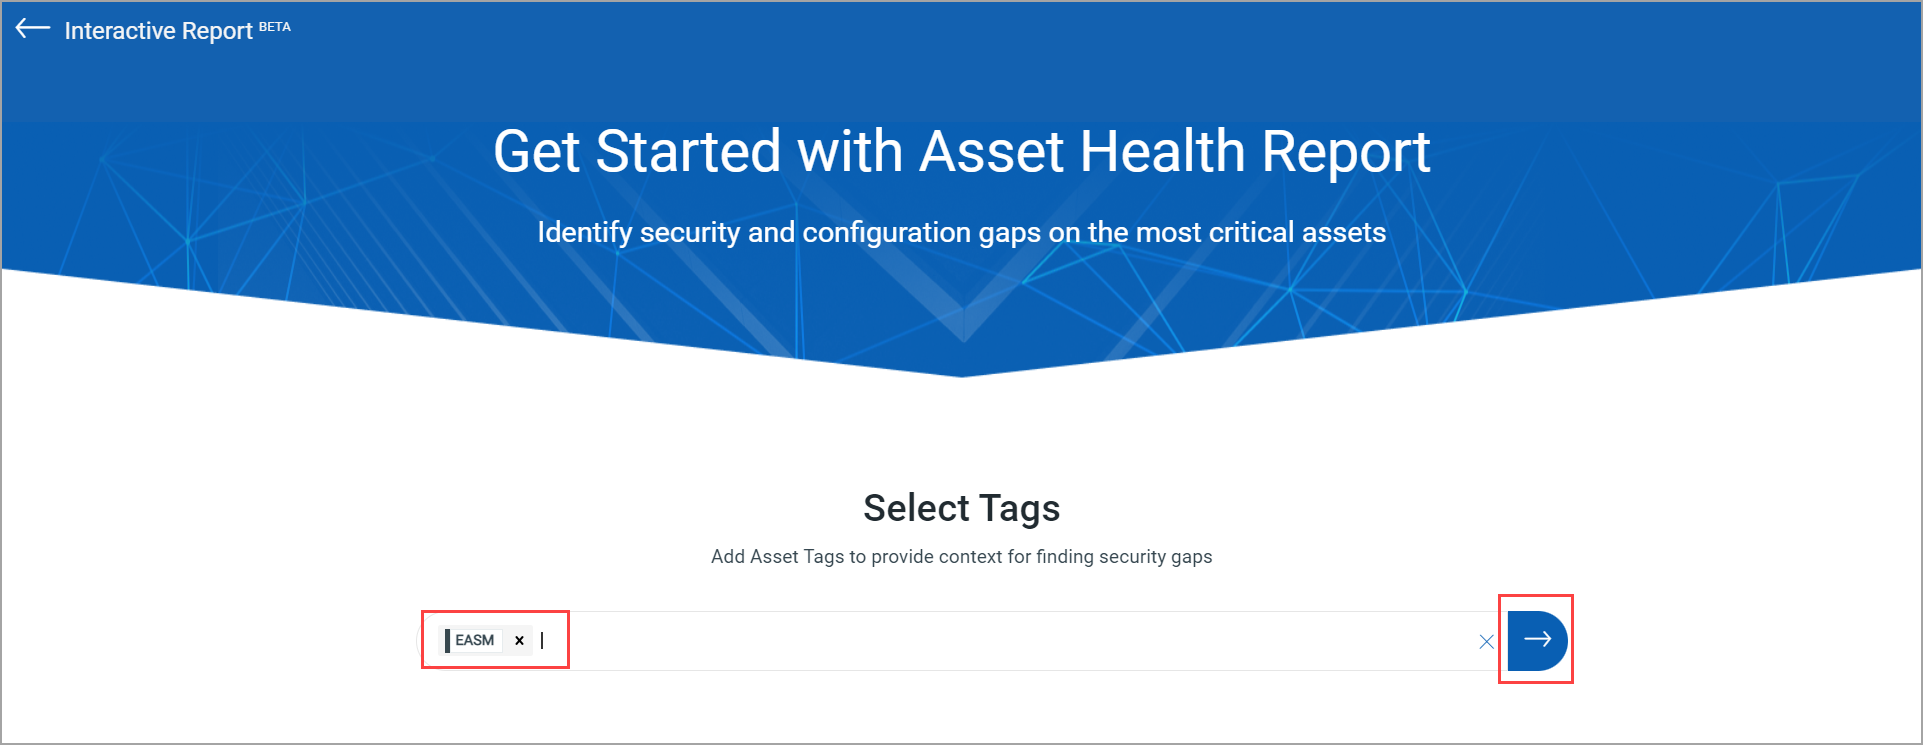
1) Go to REPORTS > Reports and click Create Interactive Report.
2) Enter the EASM tag and click the next arrow.
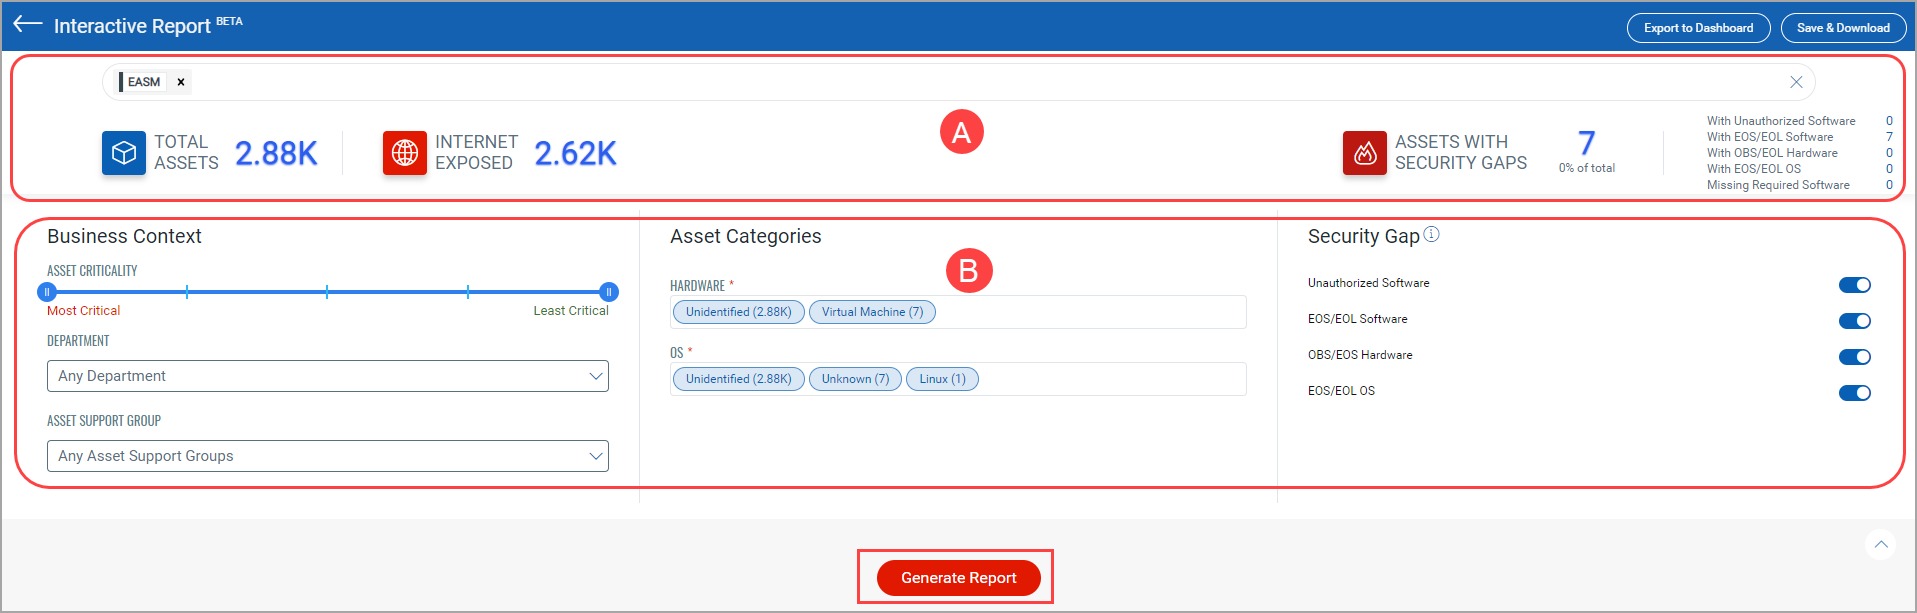
3) On the Interactive Report page, click Generate Report.
Note:
(A) You can see total assets, internet exposed assets, and assets with security gaps.
(B) You can limit your report based on the inclusion of business context, asset categories, and security gaps.
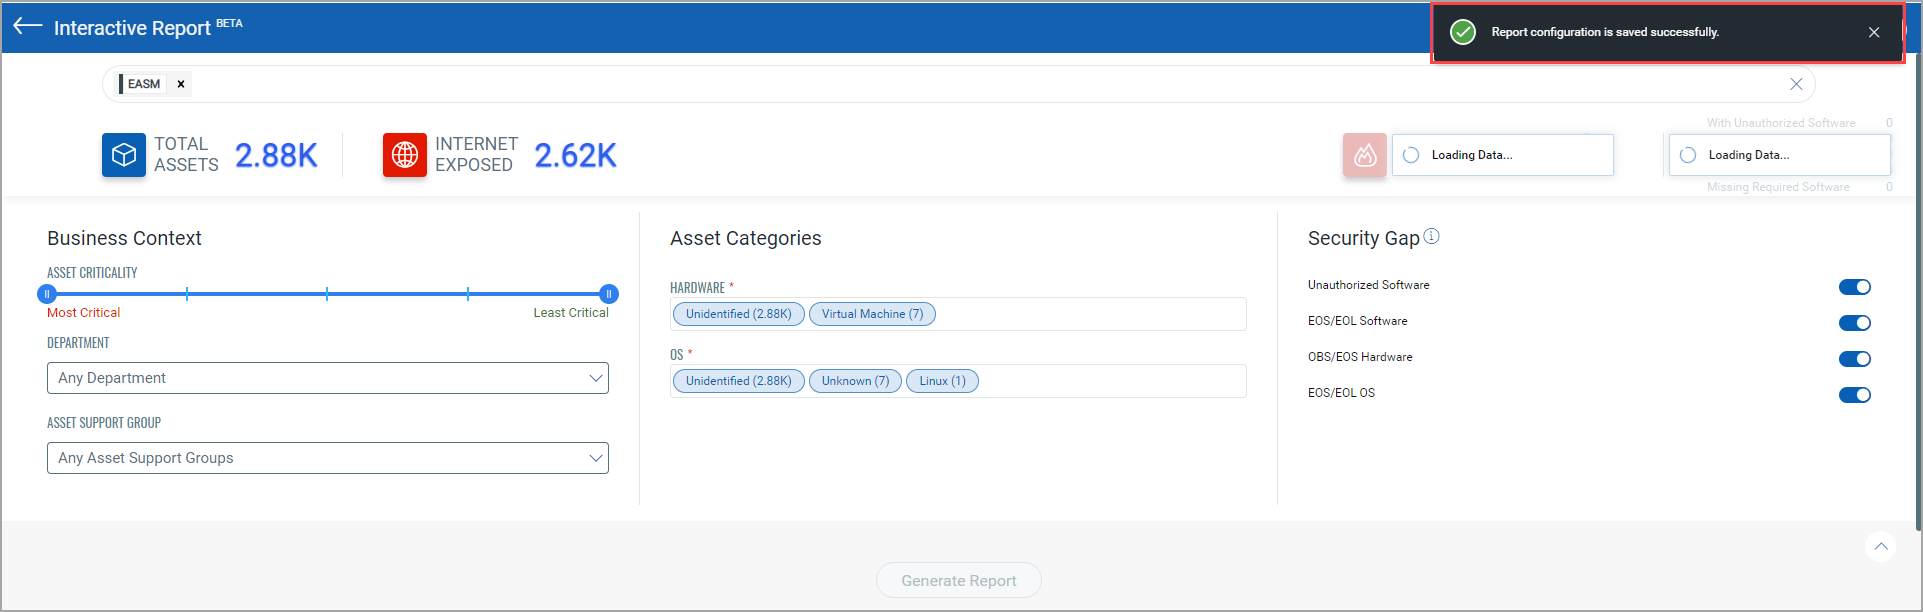
4) The "Report configuration is saved successfully." message is shown.
5) Click Save & Download.
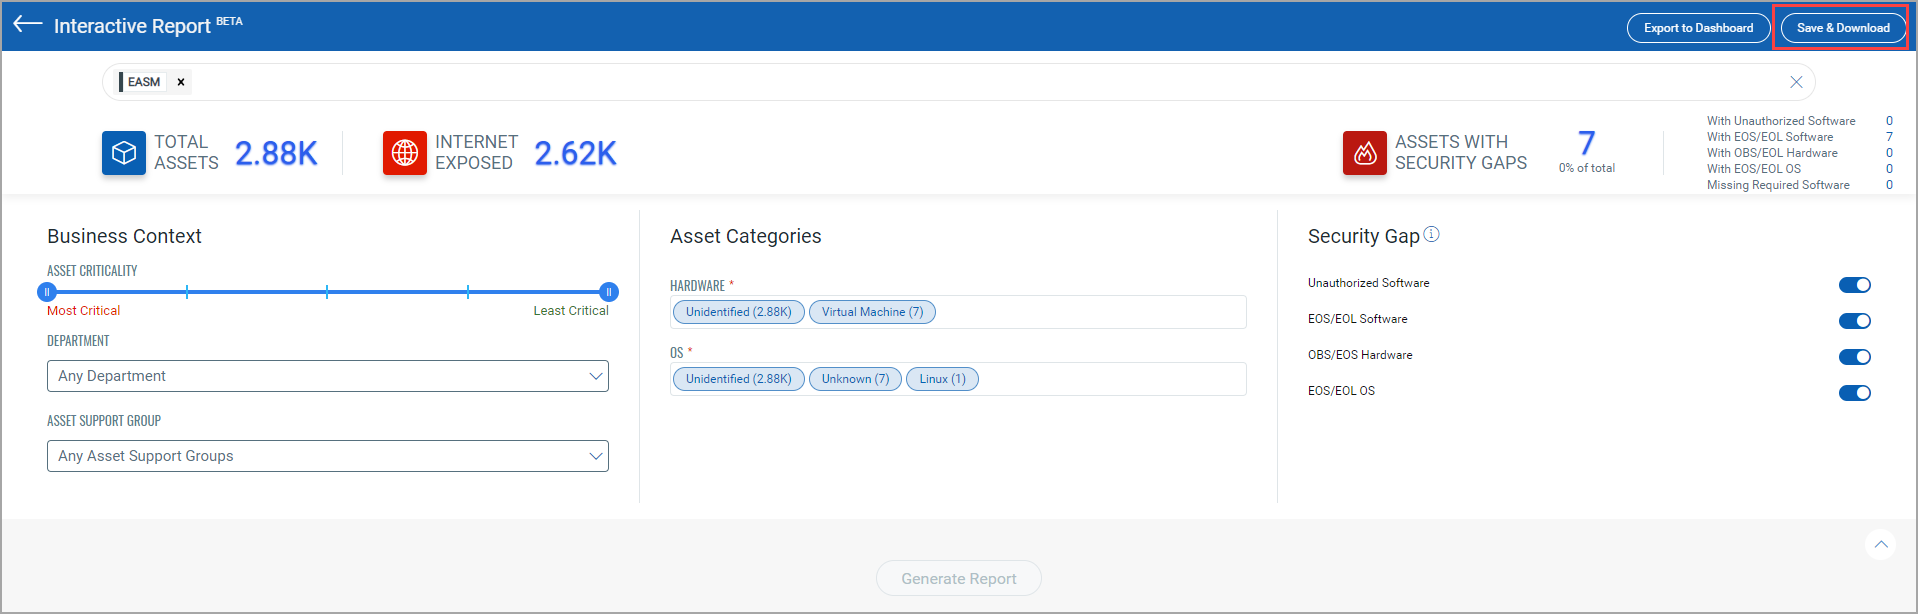
6) On the "Save and Download Report" page, enter the following details and click Save or Save & Download.
- Enter the report name and description in the Name and Description fields respectively.
- Select the checkboxes next to Assets Summary, Software Summary, and Missing Software Summary based on the details you want to include in the report.
- Select CSV or PDF report format.
- Select the timezone.

- If you click Save, the report is saved and you can download it later.
- If you click Save & Download, the report is saved and downloaded.
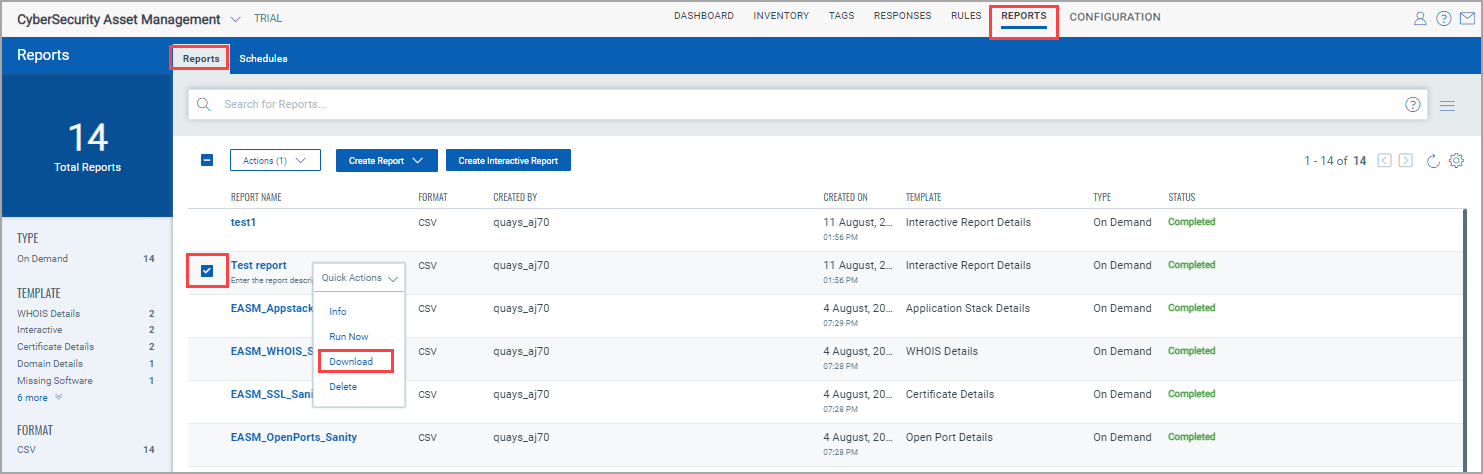
Downloading Reports
Go to the Reports tab > Reports and select the checkbox next to the report that you want to download. From the Quick Actions menu, click Download to download the report.