Missing Software Details Report
Missing Software Details report shows a detailed report of the selected assets based on missing software and host information (attributes).
To create Missing Software Details report, go to Reports > Create Report > Missing Software Details.
Step 1: Basic Details
Provide report title and report description for the asset details report. Click Next.
Step 2: Report Source
In the Report Source step, you can define the scope of the assets to be included in the report. You can select assets with asset name(1), asset tag(2), Software Type(3) or using search query(4).
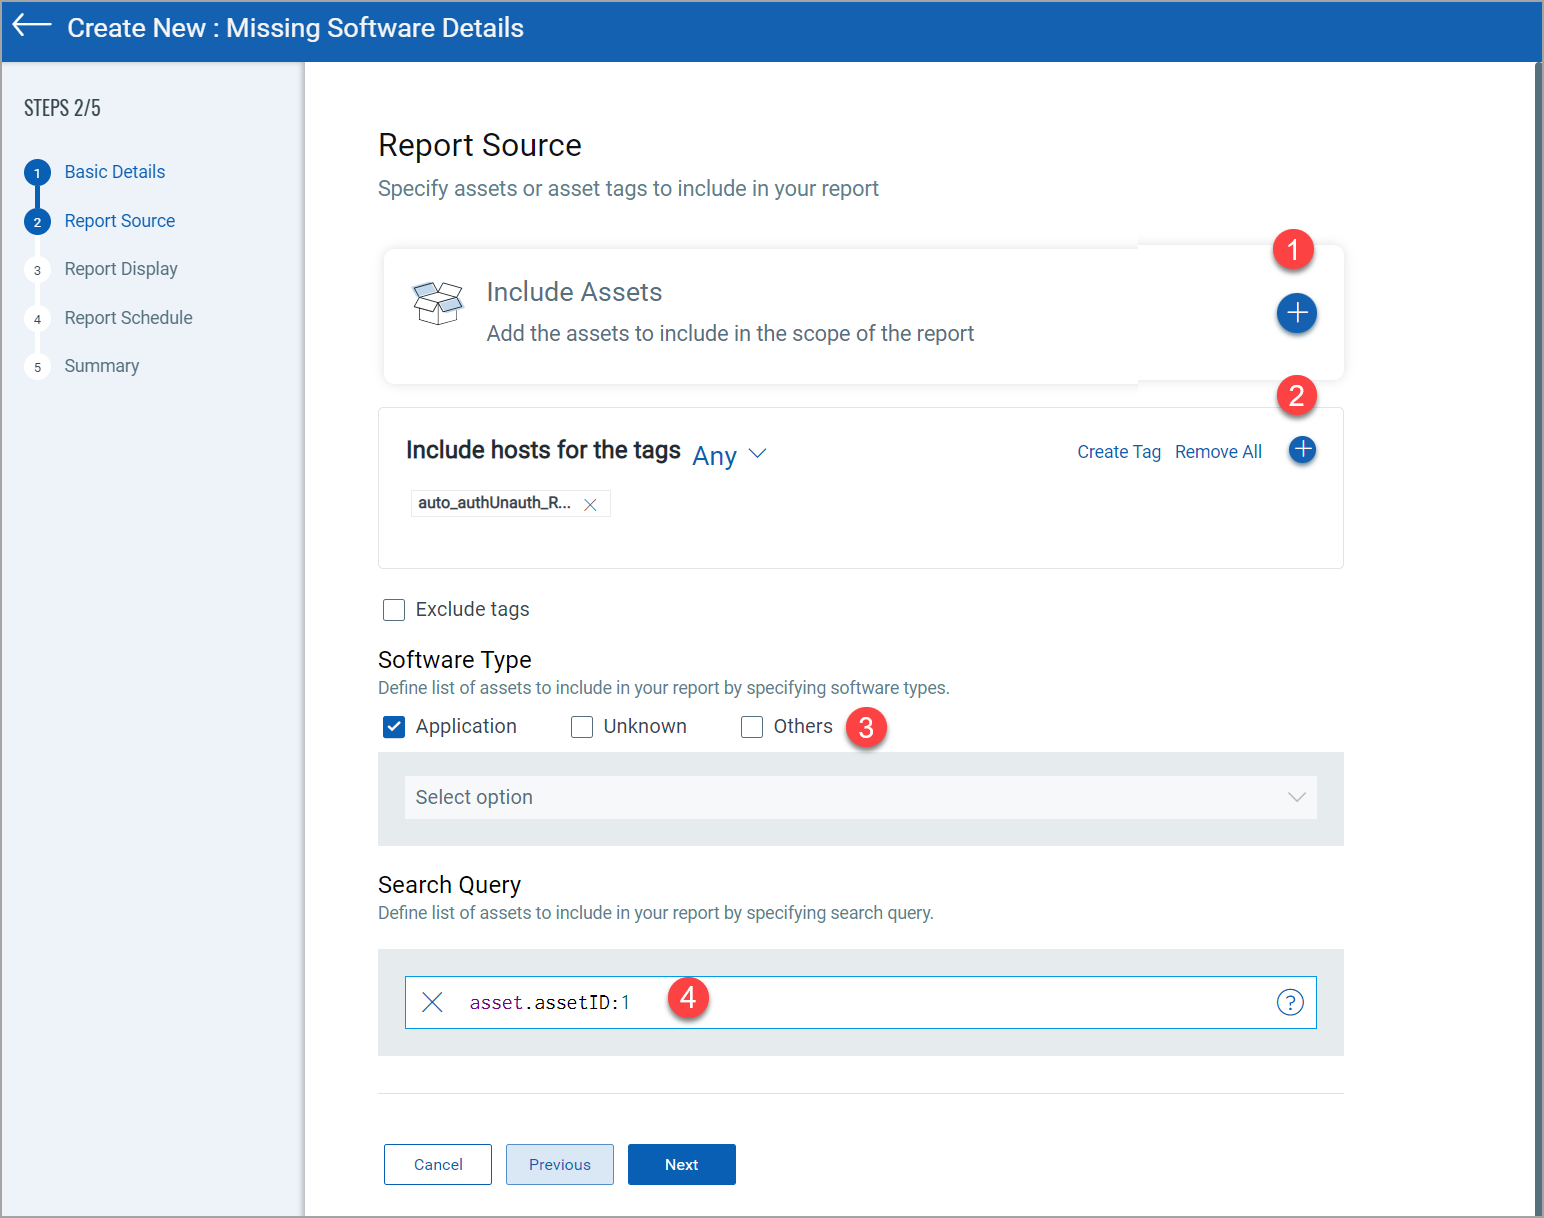
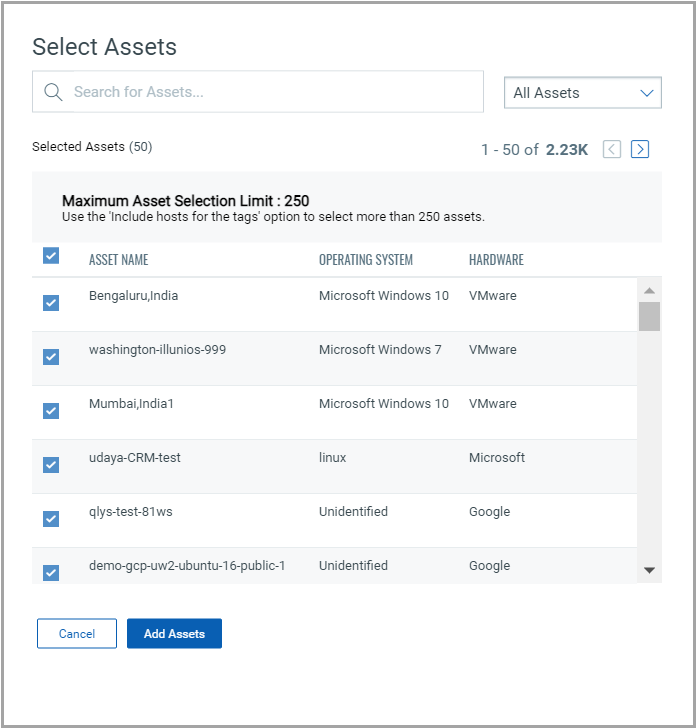
(1) Include Assets: Click  to add the assets with asset name. You can search and select asset with asset name.
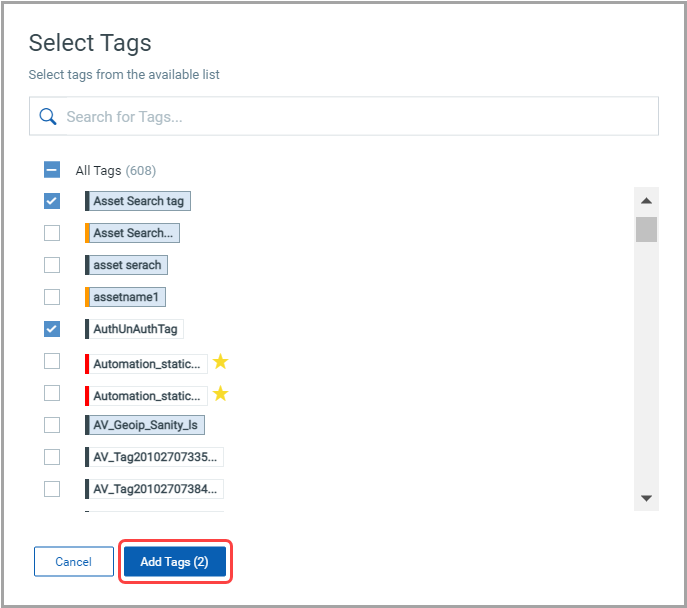
(2) Include hosts with for tags: Click to add the assets with tags. You can search and select asset with tags.
(3) Software Type: Using this option, choose software types: Application, Unknown, and Others to define the list of assets to include in your report.
(4) Search Query: You can select the assets using search query.
Once you've selected the report source, click Next.
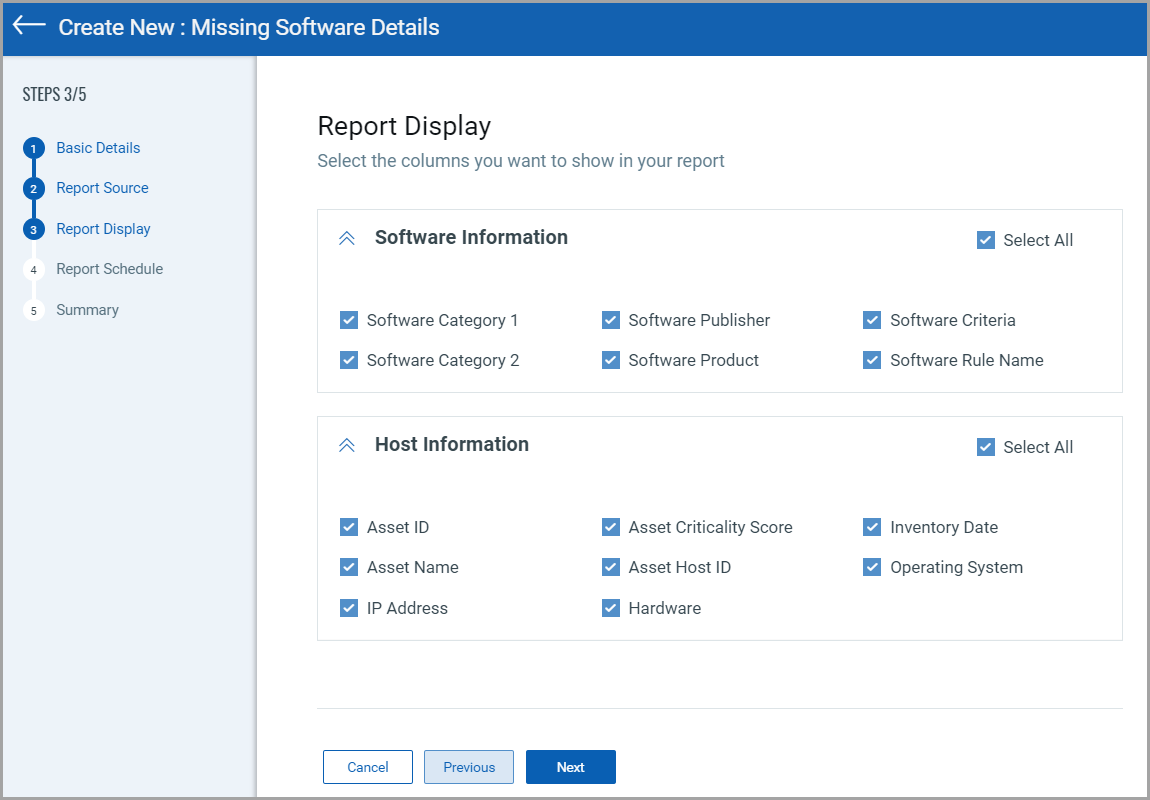
Step 3: Report Display
In the Report Display step, select missing software and host attributes to be included in the report. The selected attributes will be column headers in the report.
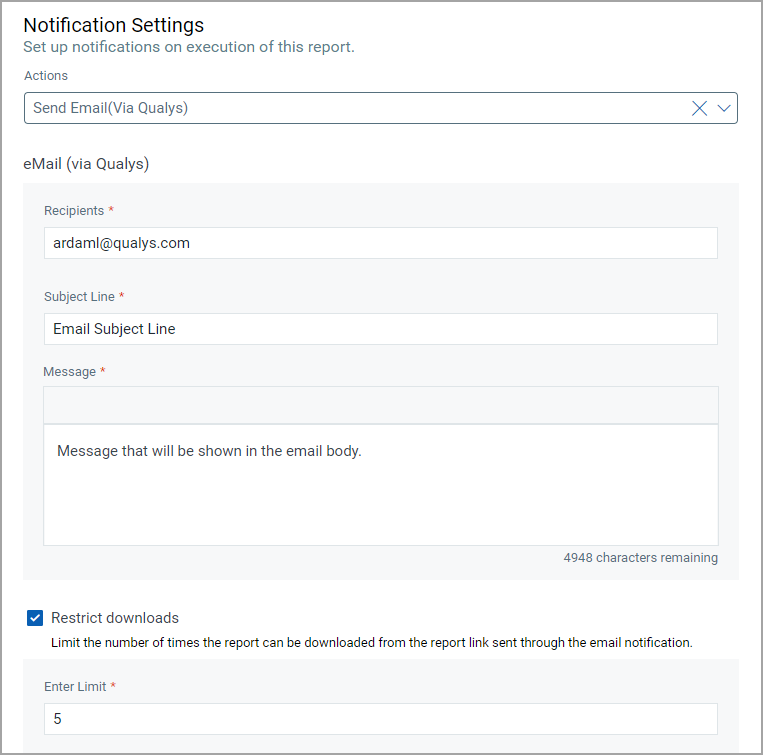
(2) (Optional) You can also choose to set up an email notification. Select Send Email (via Qualys) from the Actions list and complete the following steps:
i) Enter the email addresses in the Recipients field. You can enter up to a maximum of 50 email addresses separated by a comma.
ii) Enter the email subject line in the Subject Line field.
iii) Enter the message text in the Message field.
iv) Select the Restrict downloads checkbox. Enter the number in the Enter Limit field to limit the number of times the report can be downloaded from the report link that will be sent through the email notification.
Note:
- The email notification is sent after the report is generated for reports with ‘Completed’, ‘Failed’, or ‘Incomplete’ statuses.
- When you download the report, it is downloaded as a CSV file. When you try to download the report after the download limit that you set is reached, a text file is downloaded. When you open the text file, it mentions that the ‘Maximum download limit reached. Contact Support’.
(3) Click Next.
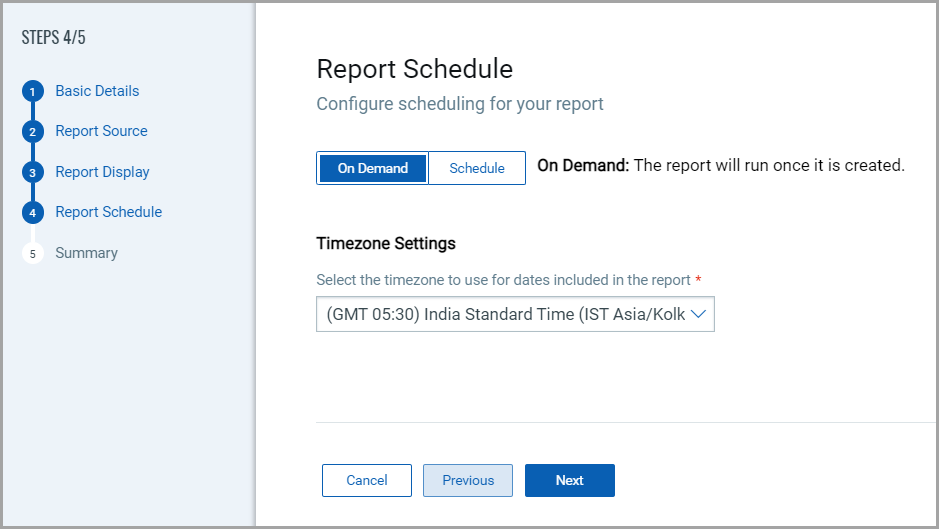
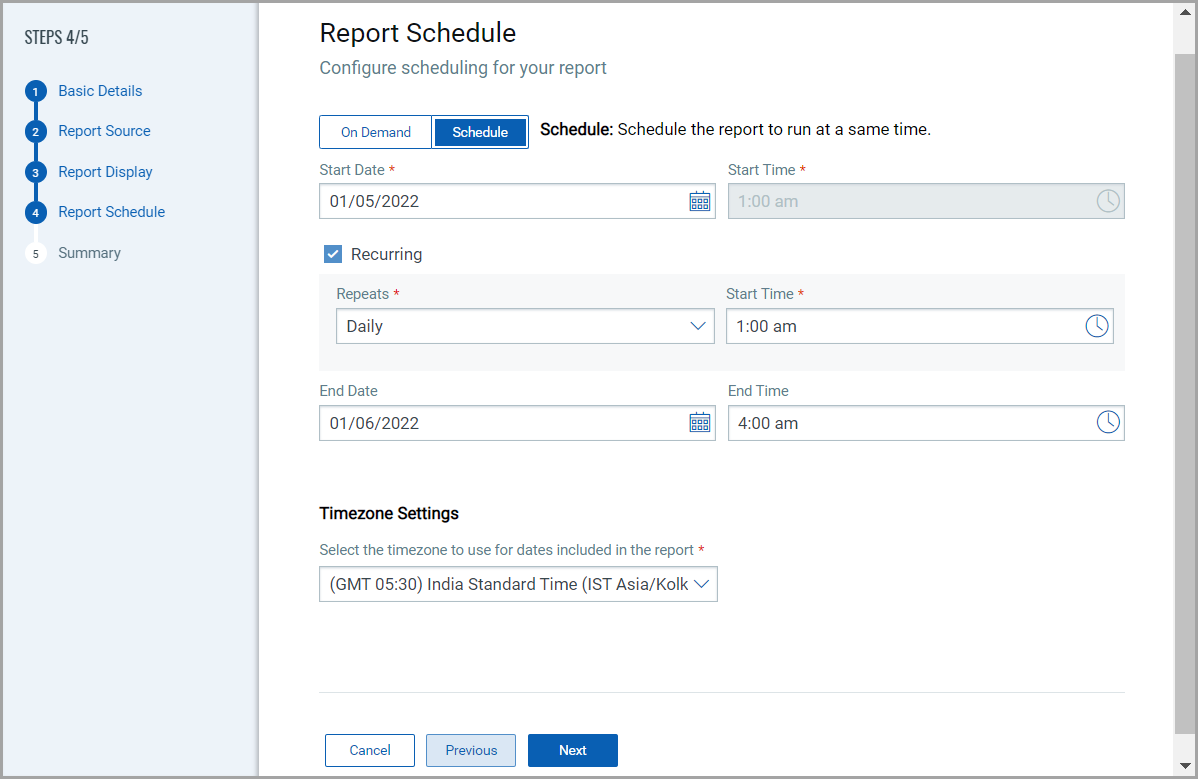
Step 4: Report Schedule
In the Report Display step, you can define the schedule of the report for its execution.
On Demand: If this option is selected in the report, report will be generated once it is created. Select the timezone for dates in the report to be generated.
Schedule: If this option is selected in the report, report will be generated as per defined schedule. You can create a recurring schedule for report execution. Select the timezone for dates in the report to be generated.
You can manage schedules (view info, delete, and pause/resume schedule) from Reports > Schedule tab.
Step 5: Review and Confirm
Review and confirm your selections. You can edit basic details, report source, and report display from this step as well if required.
Click Finish. Once report is created, it will be listed on the Reports page.
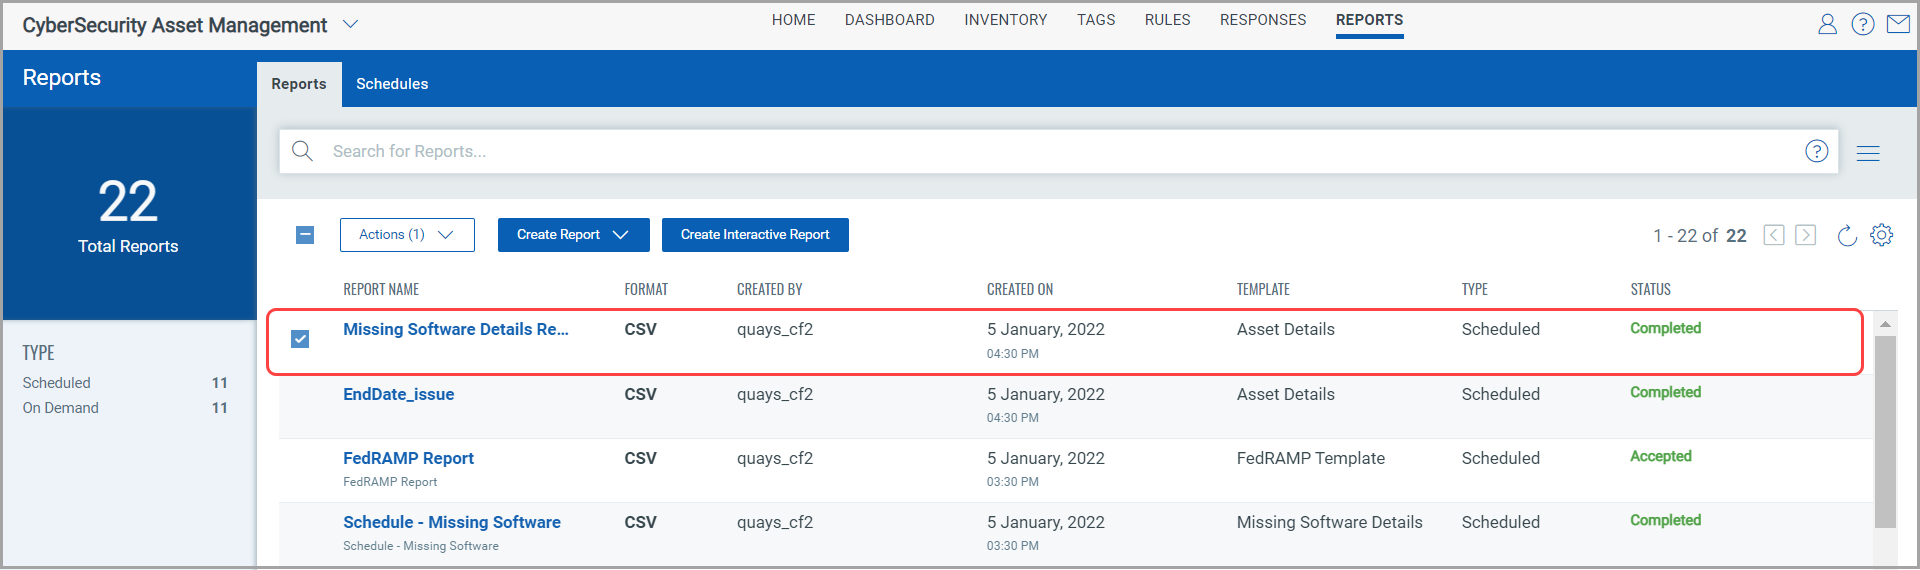
Once you create a report, it shows 'Processing' status. Once report execution is finished, it shows status as 'Completed' and you'll be able to download the report.
From the Quick Actions option for a particular report, you can
- execute the report at any time with Run Now option
- download CSV format report with Download option
- delete the report with Delete option
- see report information with Info option