Agent Provisioning Rule
When the “Agent Provisioning Rules” for Cloud Agents were not in the picture, if the existing cloud agents were deactivated and new ones were created with the same attributes, such as hostname or operating system, the cloud agents were duplicated.
Now, with the help of the "Agent Provisioning Rules", instead of cloud agent duplication, the agents are merged based on the identification attributes selected for the rule. You can edit and create a set of Agent Provisioning Rules by defining multiple conditions and selecting the required identification attributes. The rules run sequentially, and the assets are merged based on the match found.
You can watch the following video to learn more.
This feature is also available in Global AssetView (GAV). For more details, refer to GAV Online Help.
Prerequisites:
- Cloud Agent for Windows: version 5.1
- Cloud Agent for Linux: version 5.9
- Cloud Agent for MacOS Intel: version 5.4
- Cloud Agent for MacOS Apple-Silicon: version 5.5
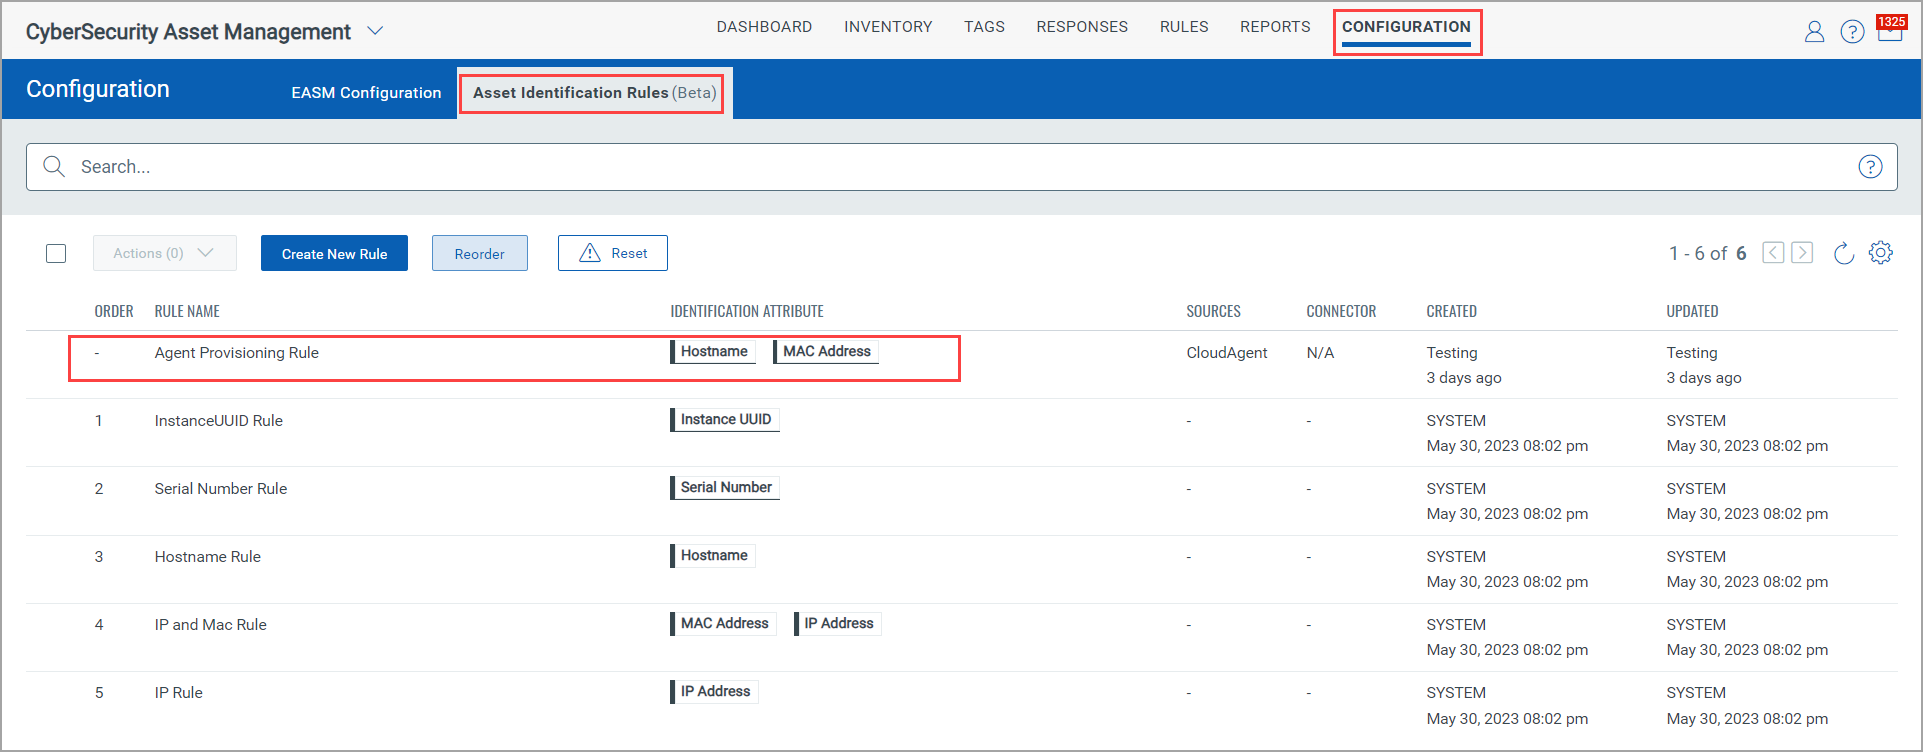
In the following screen capture, you can see the default Agent Provisioning Rules. This rule is edited.
Learn more about how to edit and view the Agent Provisioning Rules.
- Editing the Agent Provisioning Rule
- Viewing the Agent Provisioning Rule details
- Validating AIS Provisioning Rule Trigger for Cloud Agent Assets
Editing the Agent Provisioning Rule
- Go to the Rules > Asset Identification > Rules tab, and you can see the default “Agent Provisioning Rules” for Cloud Agents.
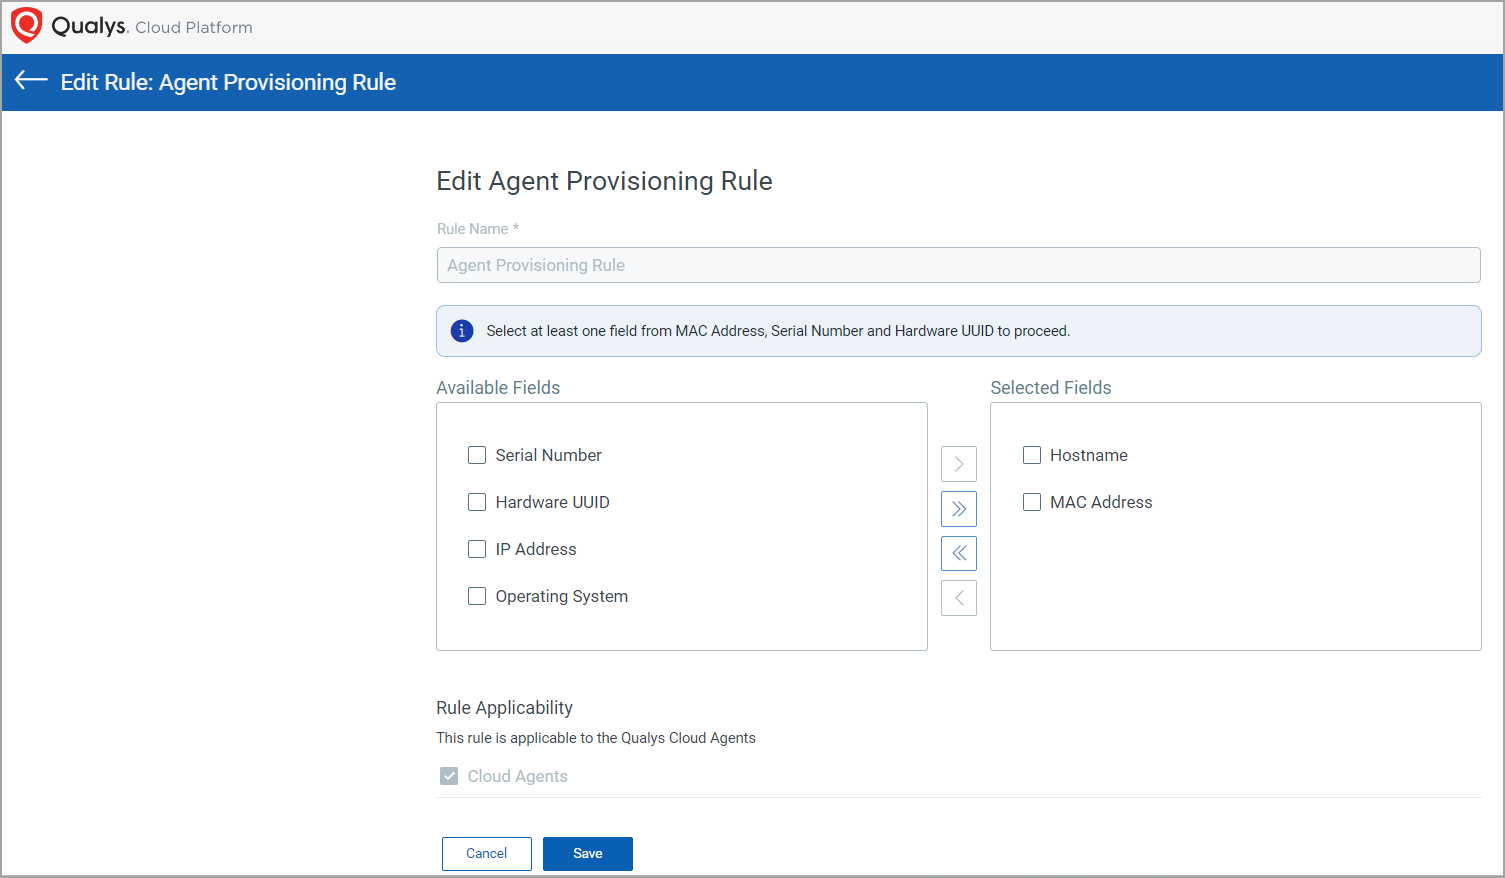
- Click Edit from the Quick Actions menu of the Agent Provisioning Rules.
- You can add conditions and required attributes.
We also introduced conflict resolution when multiple matches are found with the final condition. When the Apply Conflict Resolution for Asset Merge checkbox is selected, the following criteria are considered for conflict resolution, enabling the assets to merge: The most recent update, the trustworthiness of its source, and the pre-defined weightage on the same asset identified by other conditions.
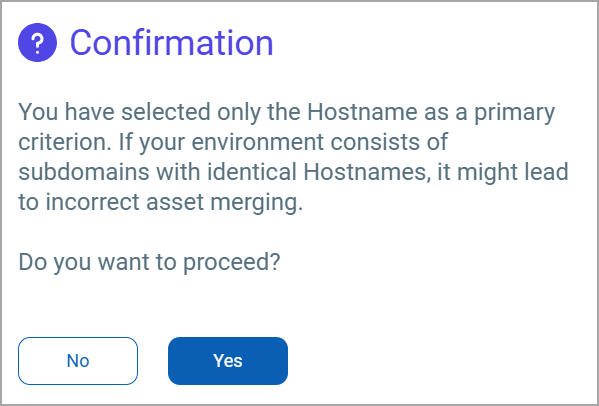
To prevent incorrect merging of assets, a Confirmation window is displayed when you select only the Hostname as primary attribute. This window prompts you to confirm whether you want to proceed with merging agents based solely on Hostname. Click Yes or No as required.
- Click Save.
The Agent Provisioning Rule is edited.
If you click Reset, the rule is reset, and the identification attributes are also deleted from the Identification Attribute column; you can choose to edit the Agent Provisioning Rule by selecting different identification attributes as you require.
Viewing the Agent Provisioning Rule details
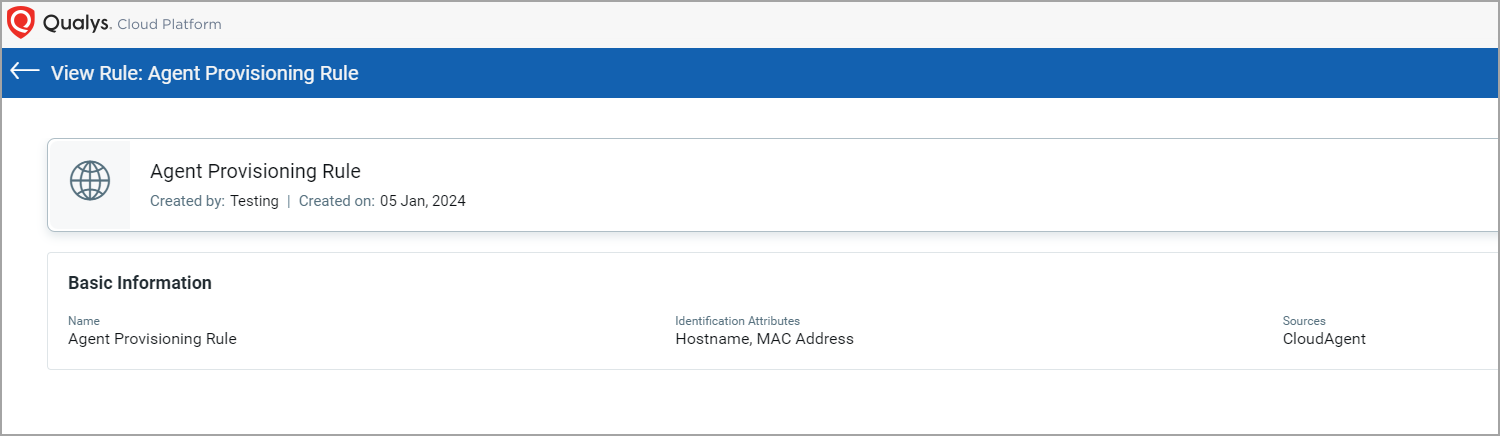
- Go to the Rules > Asset Identification > Rules tab, and you can see the default “Agent Provisioning Rule” for Cloud Agents.
- Click View from the Quick Actions menu of the Agent Provisioning Rule. You can see the Rule details.
Validating AIS Provisioning Rule Trigger for Cloud Agent Assets
The configuration of the Agent Provisioning Rule allows the Cloud Agent assets to automatically merge when the newly provisioned Agent matches the specific rule parameter configured in the rule.
- Navigate to the Inventory > Assets tab.
- Select the required asset, and from the Quick Actions menu, click View Details.
- On the Asset Details page, on the Summary tab, click Identification Log.
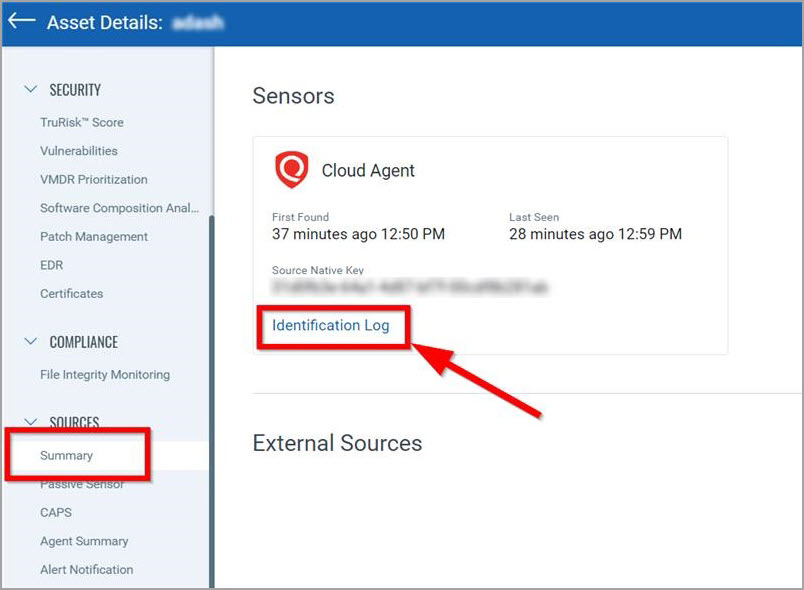
The log information provides the Agent provisioning rule name, Identification Attribute, timestamp, and the result. The Result column displays the attribute match status.
To view the complete rule condition setting of the Agent Provisioning Rule, edit the rule, and under the Conditions section, view the primary and secondary rule conditions.