Application Control
Applications Control is a shared configuration area for both Endpoint Detection and Response (EDR) and Endpoint Protection Platform (EPP).
Add to Blocklist
You can manually add entries to the blocklist or perform a bulk import to block multiple items at once.
Supported input types include SHA256, IP, URL, and Application Name.
Before uploading a JSON file for bulk import, refer to the Exclusion Support topic for details on the supported format and structure.
Manually Add Entries
To add to the blocklist manually
- Click the plus (+) icon.
- In the Add to Blocklist window, choose Add Manually.
- From the drop-down list (next to the Add button), select the type of item you want to block — SHA256, IP, URL, or Application Name.
- Enter the corresponding value for your selection. Example: If you select IP, enter the IP address to be blocked.
- Click Save.
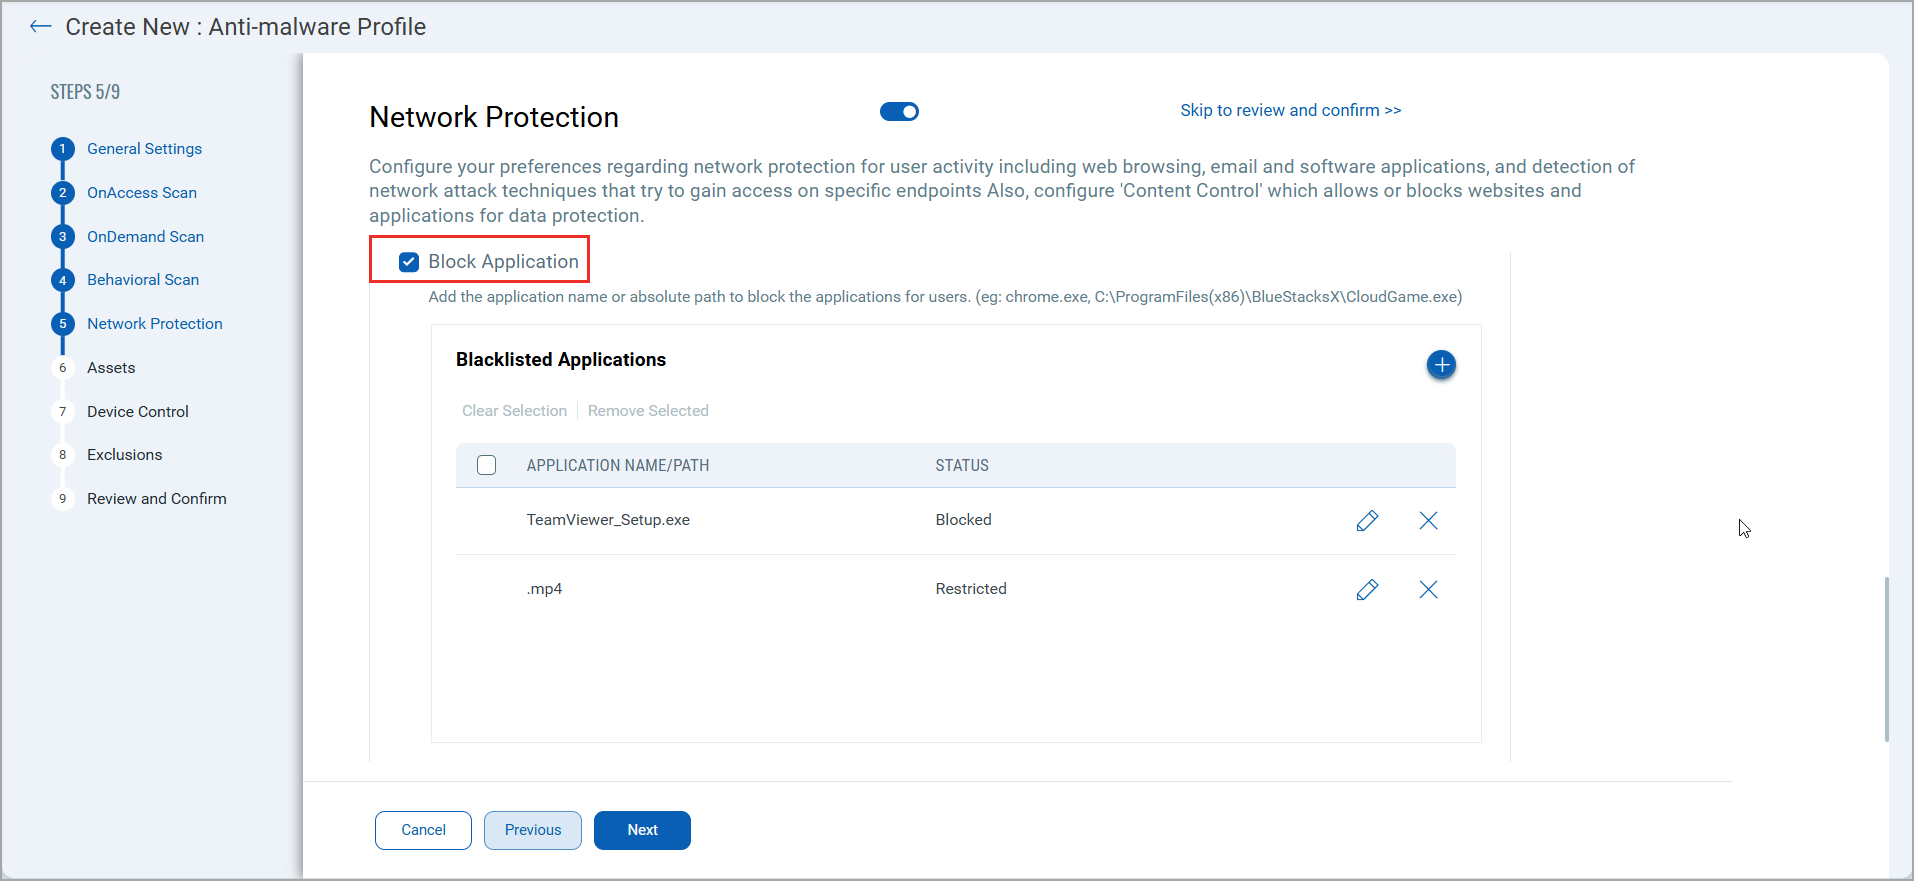
If you select SHA256, IP, or URL for blocking, the entries are blocked at all times. However, if you select an Application Name, you can define a schedule to control when the application is blocked.
Schedule Blocking
Schedule Blocking is a handy cybersecurity and IT management feature. It helps you control which apps can be used at different times. For example, EDR Manager and EDR Analyst users can block non-work apps during business hours or prevent unauthorized software use after work. This ensures that only approved apps are used when they should be, boosting productivity, reducing security risks, and keeping everything in line with company rules.
How do you open the Schedule Application Blocking window?
To open the Schedule Application Blocking window, follow these steps:
- On the EDR's menu bar, click Configuration.
- In the EDR Profile tab, click New Profile. To edit a profile, hover on the profile name, click the downward arrow that appears next to the profile name, and then click Edit.
- In the Settings tab, click Next.
- In the Application Control tab, go to Add to Blocklist section and then click the plus sign.
- In the Add To Blocklist window, select Appname in the drop-down and in the corresponding field, add the application name. See How do you use the scheduler.
- Click Schedule Blocking and then click Configure.
How do you use this scheduler?
You can either completely block an application or set specific times for when it should be restricted.
Follow these steps:
- After entering the application details, you have two options:
- Completely Block the Application: This will prevent the application from running on your system.
- Set a Schedule for Blocking: You can specify specific times when the application should be blocked.
Set a Schedule for Blocking
Limit access during certain times - Click and drag your mouse over the time slots you want to block. We call this 'Restricted' blocking. During these times, your users cannot access the blocked applications.

Completely Block an Application
For a full 24/7 block, including weekends, click Block All. This is what we call "Blocked." Your users cannot access the specified applications until the schedule is completely or partially unblocked.
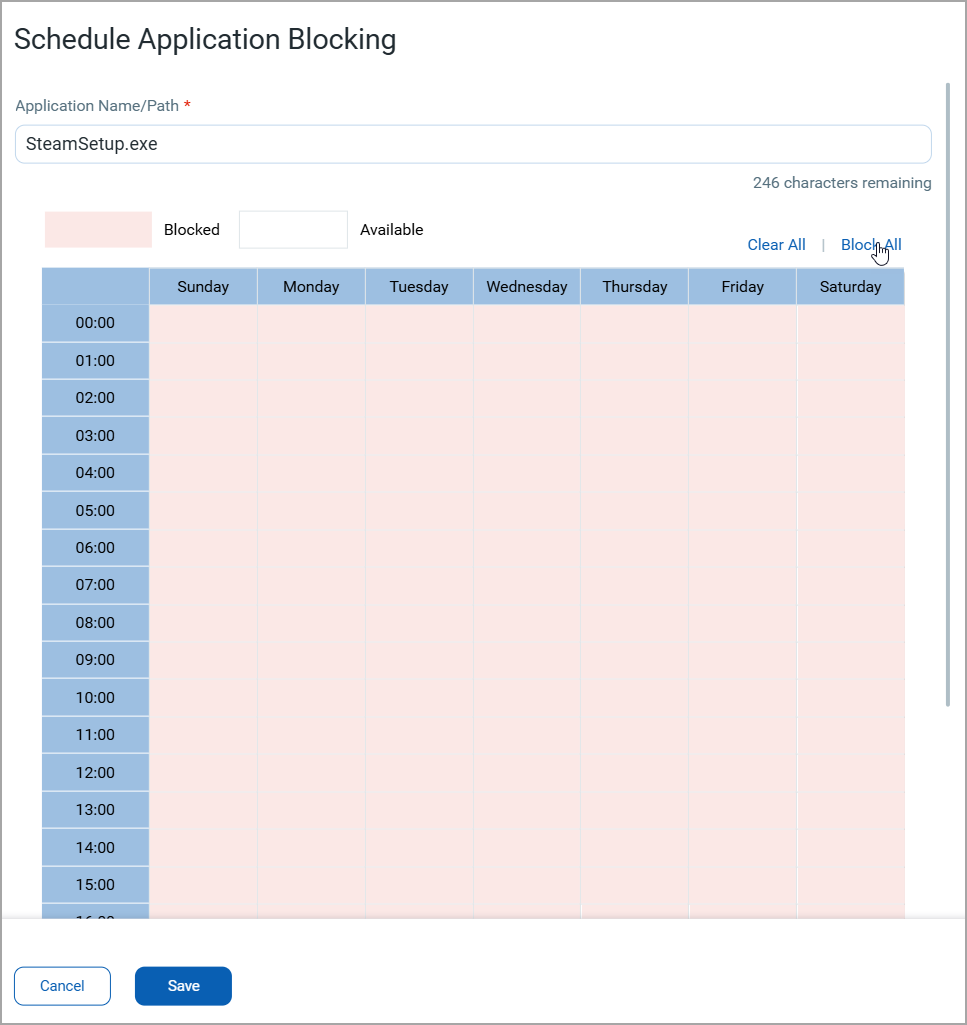
Manage Blocked Schedule
You can unblock a blocked time slot by clicking it, or use the "Clear All" functionality to reset your entire schedule.
![]()
How do you Delete Schedules for Blocked or Restricted Applications?
To delete your schedules for blocking or restricting access to applications, do the following:
- Find the schedule you want to delete.
- Click
 next to the schedule.
Perform a Bulk Import
To perform a bulk import
- Click the plus (+) icon.
- In the Add to Blocklist window, choose Bulk Import.
- Browse and upload the JSON file.
- Click Save.
Sample JSON
Blocklist Bulk Import .JSON
{

    "data": [

        {

            "type": "APP",

            "values": [

                {

                    "name": "VisualStudio.exe"

                },

                {

                    "name": "C:/Program Files/MyApp/test.db",

                    "schedule": "[[{\"start\":0,\"end\":23}]]"

                }

            ]

        },

        {

            "type": "URL",

            "values": [

                {

                    "name": "www.twitter.com"

                },

                {

                    "name": "www.x.com"

                }

            ]

        },

        {

            "type": "IP",

            "values": [

                {

                    "name": "xxx.xx.xx.xx"

                },

                {

                    "name": "xxx.xx.xx.xx"

                }

            ]

        },

        {

            "type": "SHA256",

            "values": [

                {

                    "name": "2cf24dba5fb0a30e26e83b2ac5b9e29e1b161e5c1fa7425e73043362938b9844"

                },

                {

                    "name": "ef92b778bafe771e89245b89ecbc08a44a4e166c06659911881f383d4473e943"

                },

                {

                    "name": "2cf24dba5fb0a30e26e83b2ac5b9e29e1b161e5c1fa7425e73043362938b9842"

                },

                {

                    "name": "2cf24dba5fb0a30e26e83b2ac5b9e29e1b161e5c1fa7425e73043362938b9841"

                },

                {

                    "name": "2cf24dba5fb0a30e26e83b2ac5b9e29e1b161e5c1fa7425e73043362938b9840"

                },

                {

                    "name": "2cf24dba5fb0a30e26e83b2ac5b9e29e1b161e5c1fa7425e73043362938b9839"

                },

                {

                    "name": "2cf24dba5fb0a30e26e83b2ac5b9e29e1b161e5c1fa7425e73043362938b9838"

                },

                {

                    "name": "2cf24dba5fb0a30e26e83b2ac5b9e29e1b161e5c1fa7425e73043362938b9837"

                },

                {

                    "name": "2cf24dba5fb0a30e26e83b2ac5b9e29e1b161e5c1fa7425e73043362938b9836"

                },

                {

                    "name": "2cf24dba5fb0a30e26e83b2ac5b9e29e1b161e5c1fa7425e73043362938b935"

                },

                {

                    "name": "2cf24dba5fb0a30e26e83b2ac5b9e29e1b161e5c1fa7425e73043362938b9834"

                },

                {

                    "name": "2cf24dba5fb0a30e26e83b2ac5b9e29e1b161e5c1fa7425e73043362938b9833"

                },

                {

                    "name": "2cf24dba5fb0a30e26e83b2ac5b9e29e1b161e5c1fa7425e73043362938b9832"

                },

                {

                    "name": "2cf24dba5fb0a30e26e83b2ac5b9e29e1b161e5c1fa7425e73043362938b931"

                },

                {

                    "name": "2cf24dba5fb0a30e26e83b2ac5b9e29e1b161e5c1fa7425e73043362938b9830"

                }

            ]

        }

    ]

}