Quarantine Assets
The Quarantine Asset feature limits the network capabilities of the compromised asset while retaining connectivity to the Qualys Cloud for continuous monitoring.
This approach effectively prevents the potential spread from infected asset to other assets in the network while offering administrators the flexibility to define specific exceptions for applications, IP addresses, or domains that should remain accessible during quarantine.
Supported Protocols
The quarantine feature restricts network communication for the following protocols:
- Windows: HTTP, HTTPS, FTP, SMB, RDP, TCP, UDP (Only on 80 & 443 ports)
- Linux: NTP, SNMP, LDAP, POP3, IMAP, SMTP, Telnet, DHCP, FTP, TCP, UDP (expect port 53), IGMP (IPV4)
Minimum Agent Version Requirements
To enable quarantining of assets, ensure that the installed agent meets the minimum version requirements.
| Windows | You can quarantine an asset if the Windows Agent Version is 5.6.0 and above. |
| Linux |
You can quarantine an asset if its Linux Agent version is 7.1.1 and above and the operating system is one of the supported distributions and versions:
|
Key Points to Consider
Consider the following key points:
Domain Exclusions
A maximum of 250 domains can be configured for exclusion. To exclude a domain entirely, ensure you add all relevant domains and subdomains to the exclusion list. Exclusions will not apply if the domain is unresolved or invalid.
DNS Requirements
When the Domain Exclusion Policy is applied, restricted domains can only be accessed using the organization's DNS or Google Public DNS. Users must either be connected to the organization's network or VPN, or have Google Public DNS configured.
Proxy Network Support
If your network uses a proxy, the following exclusions are supported:
- Application-based exclusion
- IP-based exclusion
- Local network shared path
- RDP
Important Proxy Limitations
Static websites with IP and domain-based exclusions are not supported when using a proxy. When a system-level proxy is configured, all connections are redirected through the proxy server before reaching the destination. Domain-based exclusions only function with direct connections, not proxied traffic.
Why are Assets Quarantined
Assets are quarantined to:
- Prevent Damage: Quarantined assets have limited network capabilities, preventing them from causing more harm.
- Allow Analysis: It gives you or your IT team time to check whether the asset is harmful or a false alarm.
- Protect Data: Keeps your personal information and files safe from potential threats.
Assets can be quarantined on Windows and Linux systems using the same process. This section outlines the steps for quarantining Windows assets.
How to Quarantine Assets
You can quarantine assets from the Incidents or Asset tab.
Quarantine an Asset from the Incidents tab
To quarantine an asset based on the incident description, perform the following steps:
- Hover the mouse over an Incident Description to view the Quick Actions menu.
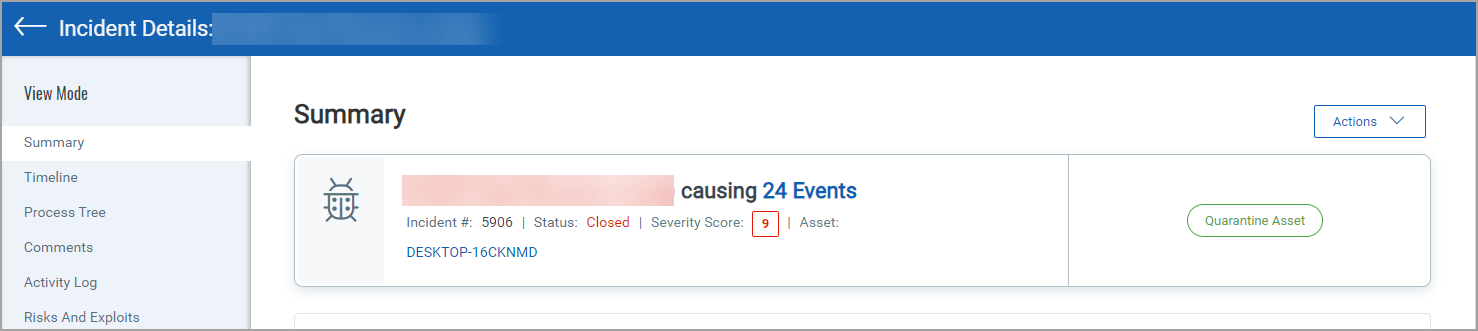
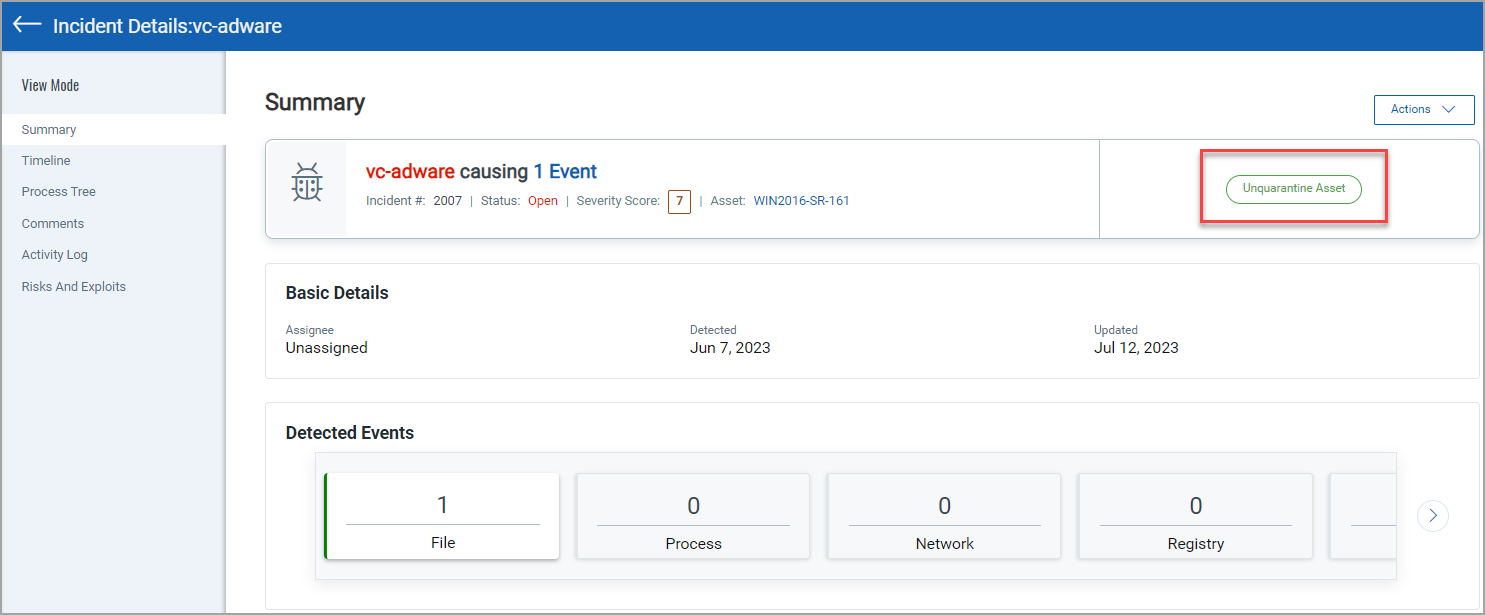
- Click the Incident Details that you want to quarantine.
- In the Summary section, click Quarantine Asset.
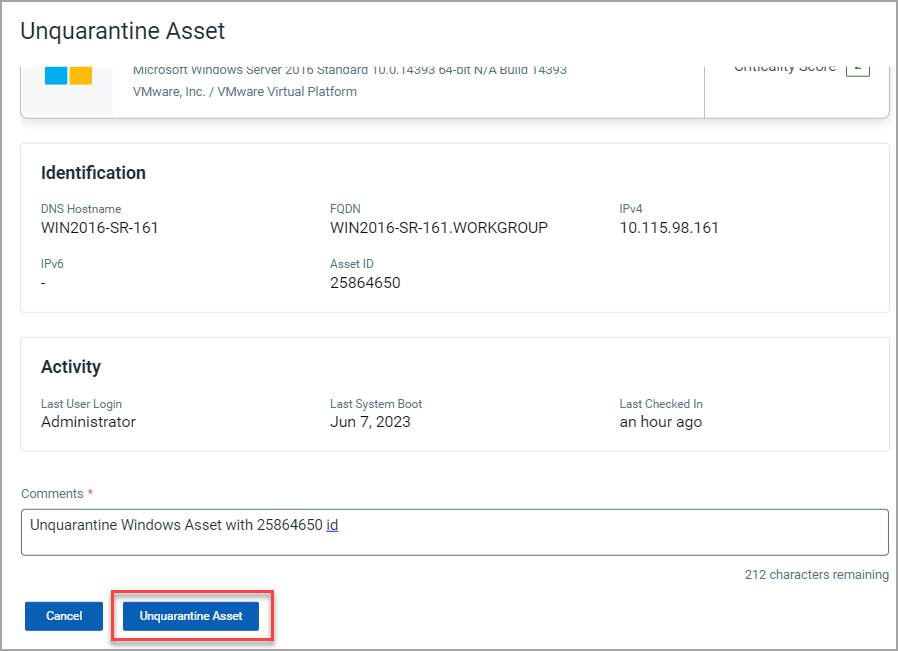
- In the Quarantine Asset window, add your comments.
- You can optionally allow specific domains, applications, or IP addresses to access a quarantined asset.
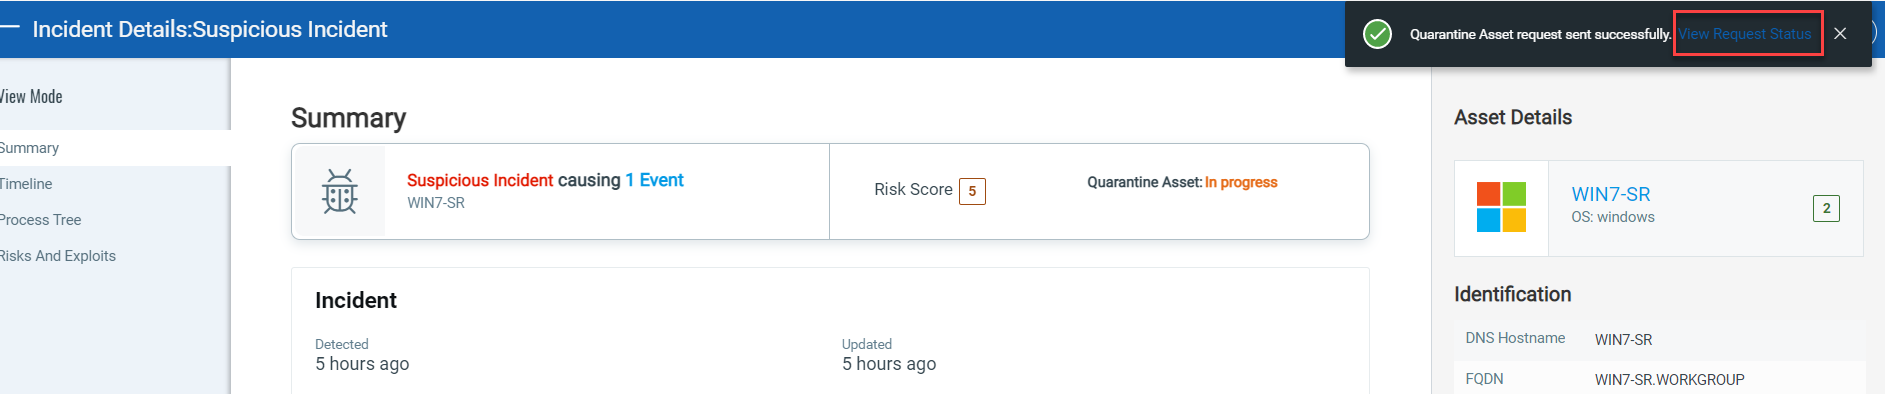
- Click Quarantine Asset.
A notification Quarantine Asset request sent successfully. View Request Status is generated.
- Click the View Request Status to follow the asset quarantine status.
Once the asset is successfully quarantined the following status is displayed:
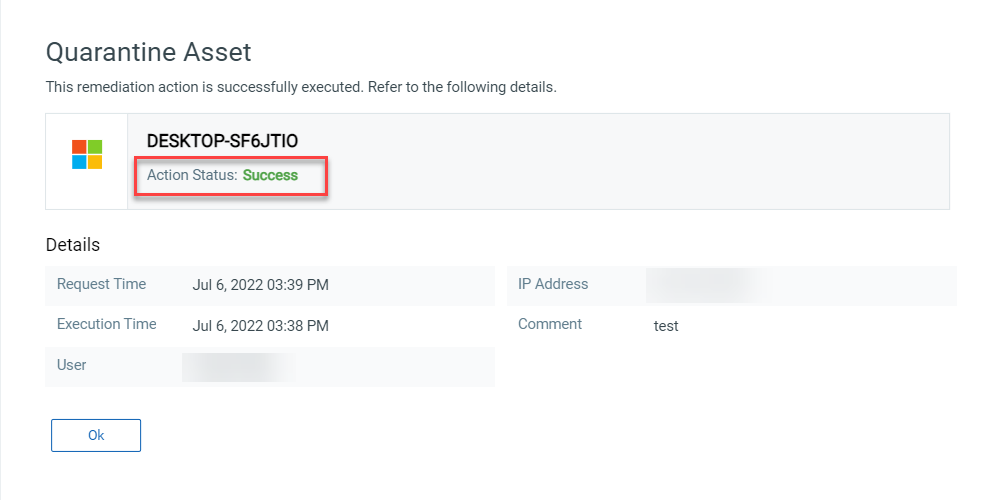
Quarantine an Asset from the Assets tab
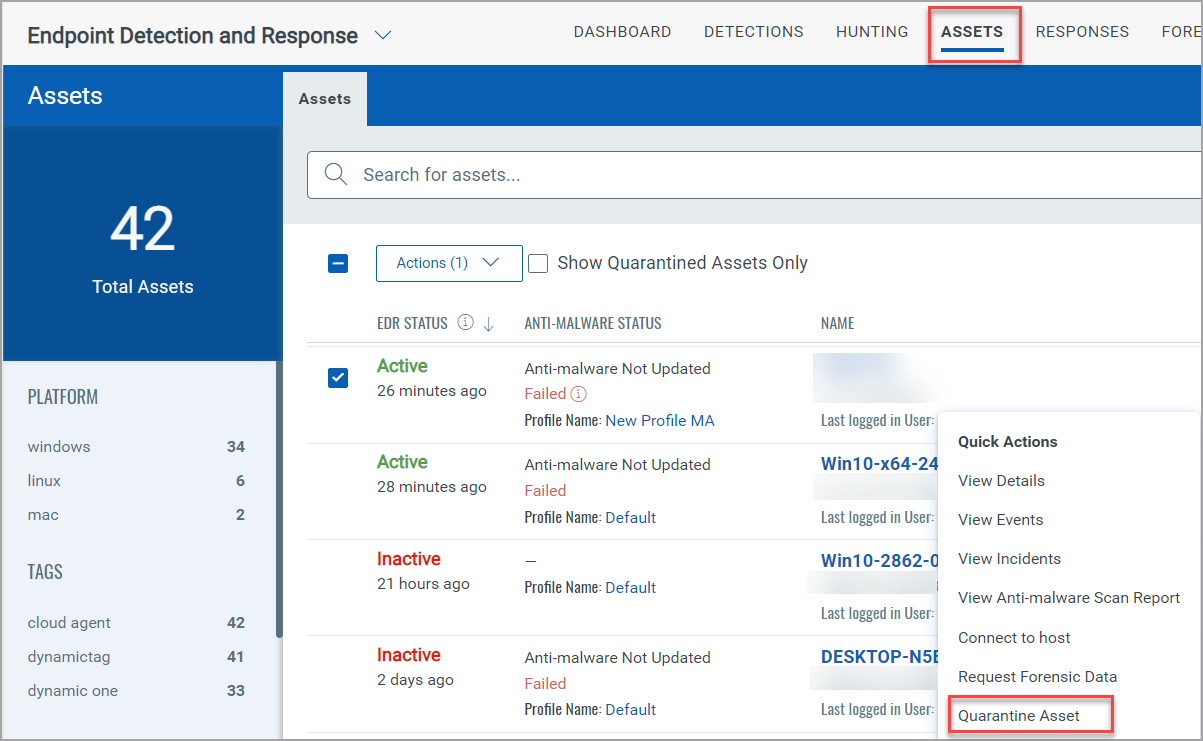
To quarantine an asset from the Assets tab, perform the following steps:
- In the Assets tab, select the Asset that you want to quarantine.
- From the Quick Actions menu, click Quarantine Asset.
- In the Quarantine Asset window, add your comments.
- You can optionally allow specific domains, applications, or IP addresses to access a quarantined asset.
- Click Quarantine Asset.
A notification Quarantine Asset request sent successfully. View Request Status is generated.
- Click the View Request Status to follow the asset quarantine status.
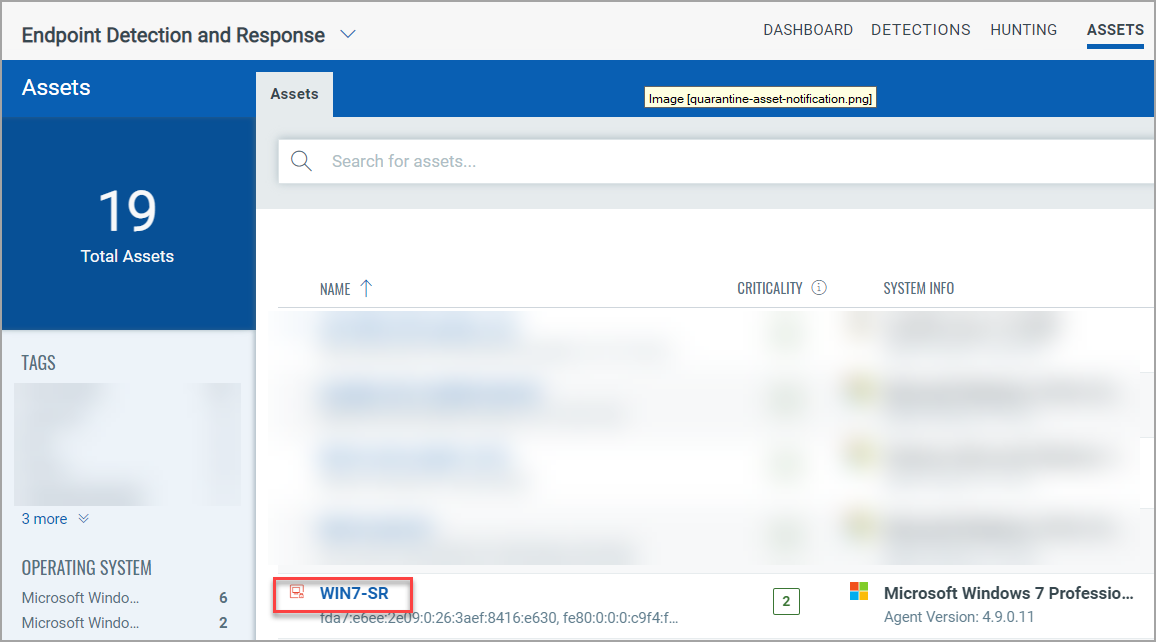
A quarantined asset will have the ![]() icon displayed.
icon displayed.
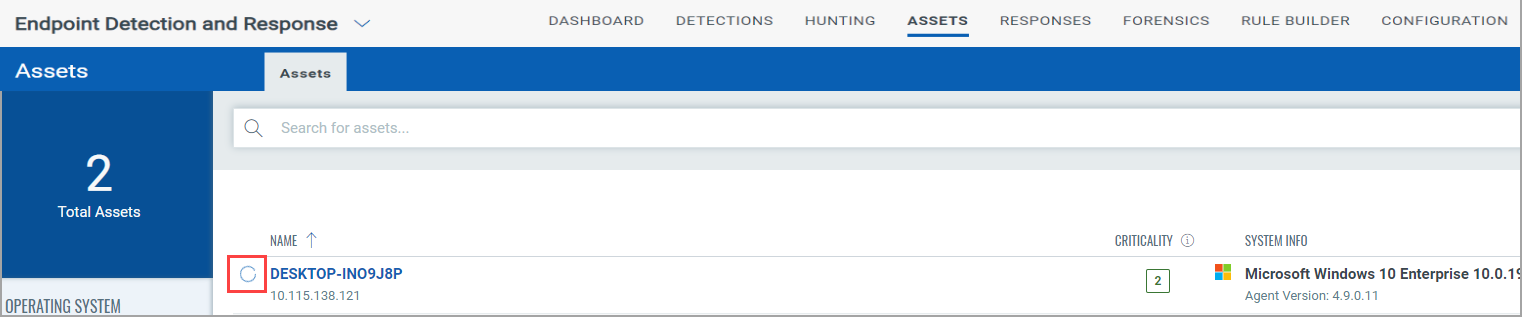
The ![]() icon signifies the asset is in progress state.
icon signifies the asset is in progress state.
Allow Domains, IPs, and Applications on Quarantined Assets
Allowing specific domains, IPs, and applications on quarantined assets is not just about addressing security concerns. It's also about maintaining certain functionalities and minimizing disruption to business operations. Here's why these exceptions are crucial:
| Ensure Operational Continuity |
Critical Services: Our business uses certain domains, IPs, and applications to function effectively. Allowing these guarantees that vital services remain available even during asset quarantines. Business Processes: Smooth operation depends on specific applications and trusted communications. Keeping these operational minimizes disruptions. |
| Minimal Disruption |
Maximize User Productivity: To maintain productivity, our employees must access critical applications and services like email, project management tools, and customer relationship systems. Enabling these ensures seamless workflow. Uninterrupted Customer Service: Essential tools and services are crucial for consistent customer-facing operations. |
| Security and Monitoring |
Enhanced Control: By specifying allowed domains, IPs, and applications, we tighten control over quarantined assets' activities, reducing further compromise risks. Focused Monitoring: Allowing specific entities to streamline monitoring efforts, simplifying the detection and response to suspicious activities. |
| Incident Response and Remediation |
Efficient Security Communication: Certain security tools and remediation processes rely on access to specific servers or services. By enabling these, security operations can proceed smoothly. Swift Data Recovery: Access to backup servers or cloud storage solutions facilitates rapid data restoration efforts. |
| Regulatory and Compliance Requirements |
Seamless Compliance Processes: Continuous access to specific domains or services is necessary to ensure compliance with regulations. Audit Trails: Maintaining operational access while quarantined is not just important; it's a crucial step in generating essential, continuous audit logs for compliance. |
Allowing Applications
Quarantined assets are typically kept separate from the rest of the network to stop a potential security threat, such as a virus. When specific applications can connect to the network, even if the asset is quarantined, those applications can still access the network.
Quarantining Assets: Agent Version Requirements
To enable quarantining of assets, ensure that the installed agent meets the minimum version requirements.
| Windows | You can quarantine an asset if the Windows Agent Version is 5.6.0 and above. |
| Linux |
You can quarantine an asset if its Linux Agent version is 7.1.1 and above and the operating system is one of the supported distributions and versions:
|
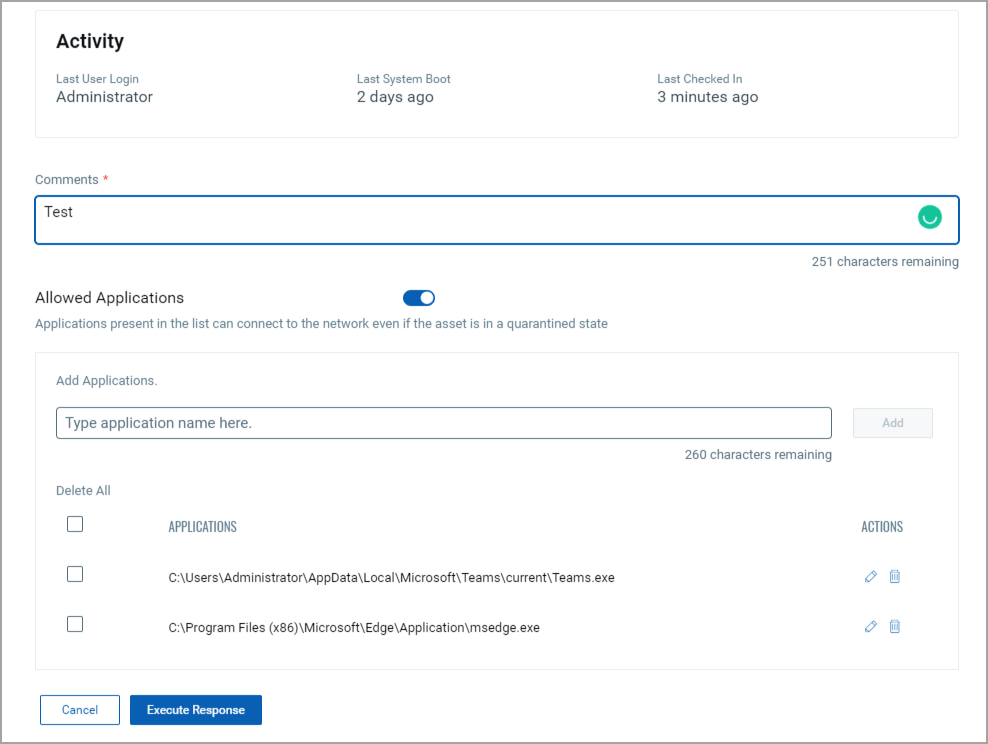
Steps to Allow Applications
To allow applications, perform these steps:
- Open the Quarantine Asset window from the Asset or Incident or Configuration tab.
-
Click Allowed Applications to toggle it on.
-
Enter the application path in the Application Path field and click Add.
-
Depending on the view, perform one of the following actions:
-
Save your changes by clicking Quarantine Asset if you are accessing this window from the Asset or Incident tab.
-
Save your changes by clicking Apply if you are accessing this window from the Configuration tab.
-
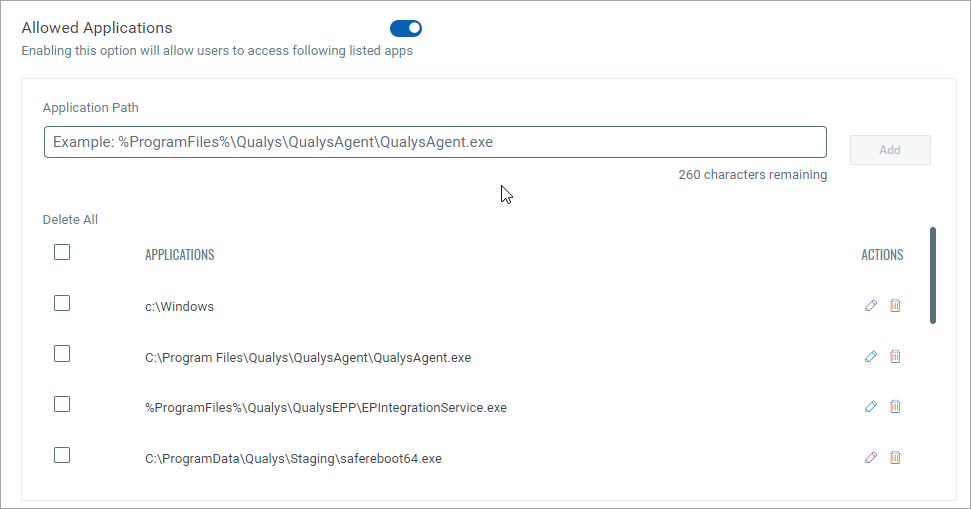
Editing and Deleting Allowed Applications
Editing an Allowed Application
- Go to the Allowed Applications section.
- Find the application name you want to edit.
- Click the Edit icon next to the application name.
- Make the necessary changes in the edit field.
- Click Save to update the application name.
Deleting an Allowed Application
- Go to the Allowed Applications section.
- Find the domain name you want to delete.
- Click the Delete icon next to the application name.
- Click Save to update your changes.
Allowing IPs
Allowing specific IP addresses to connect to the network during quarantine ensures that necessary functions can continue and security measures can be applied without completely isolating the device from all network communications.
Quarantining Assets: Agent Version Requirements
To enable quarantining of assets, ensure that the installed agent meets the minimum version requirements.
| Windows | You can quarantine an asset if the Windows Agent Version is 5.6.0 and above. |
| Linux |
You can quarantine an asset if its Linux Agent version is 7.1.1 and above and the operating system is one of the supported distributions and versions:
|
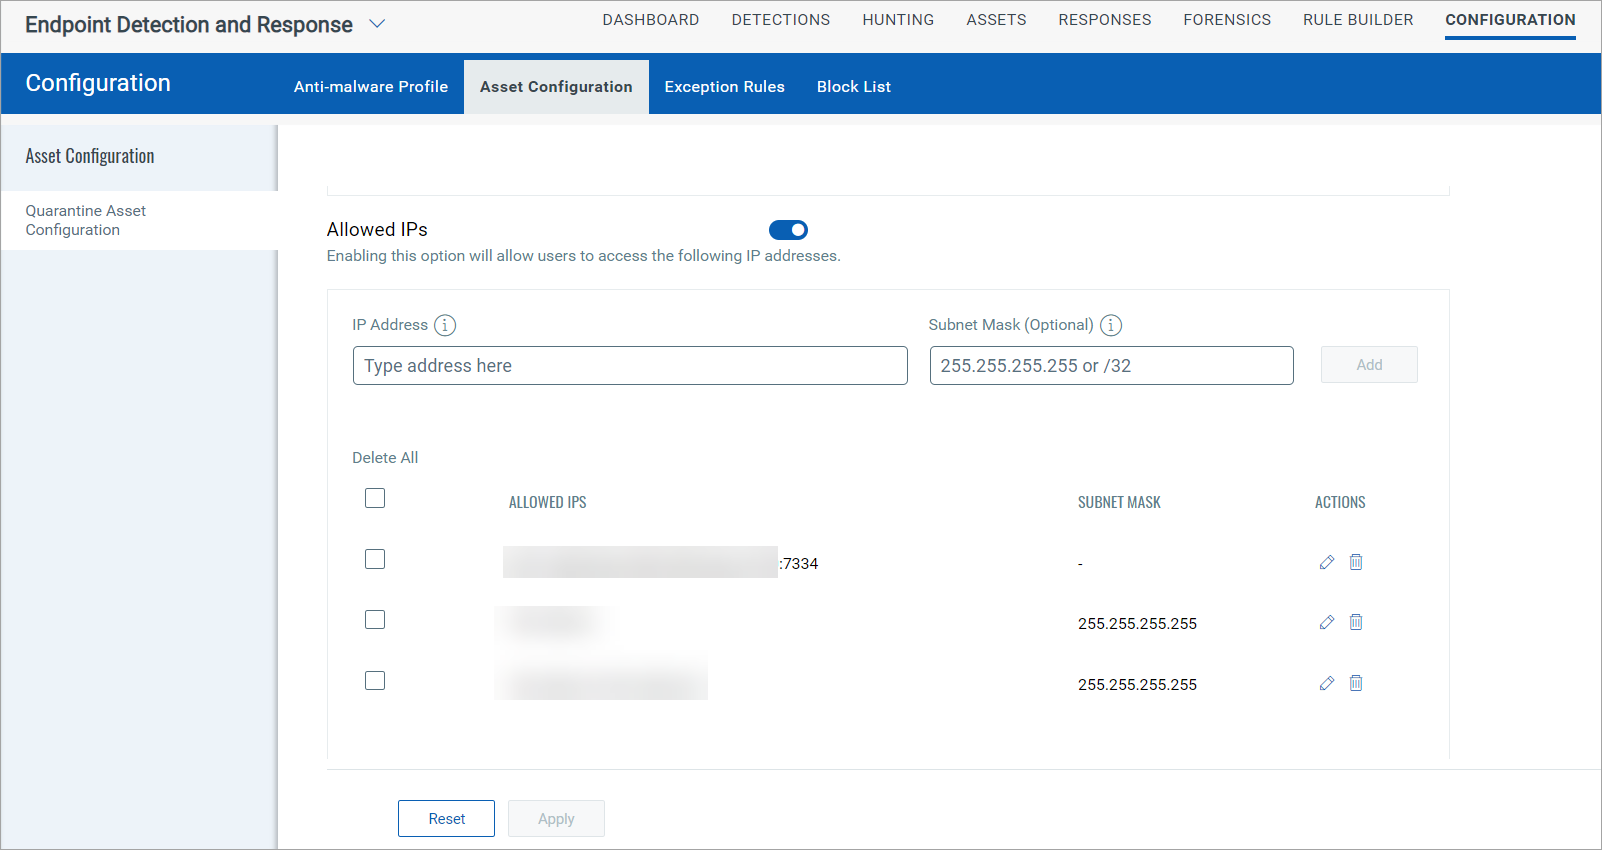
Steps to Allow IPs
To allow IPs, perform these steps:
- Open the Quarantine Asset window from the Asset, Incident, or Configuration tab.
-
Click Allowed IPs to toggle it on.
-
In the IPv4 Address section, enter the IPv4 address. Optionally, you can also add the subnet mask and then click Add.
IP Address (IPv4): Enter a single IP address (e.g., 10.1.43.104)
IP Range (IPv4): Enter a range of IP addresses using a hyphen (e.g., 10.1.43.104 - 10.1.43.114)
-
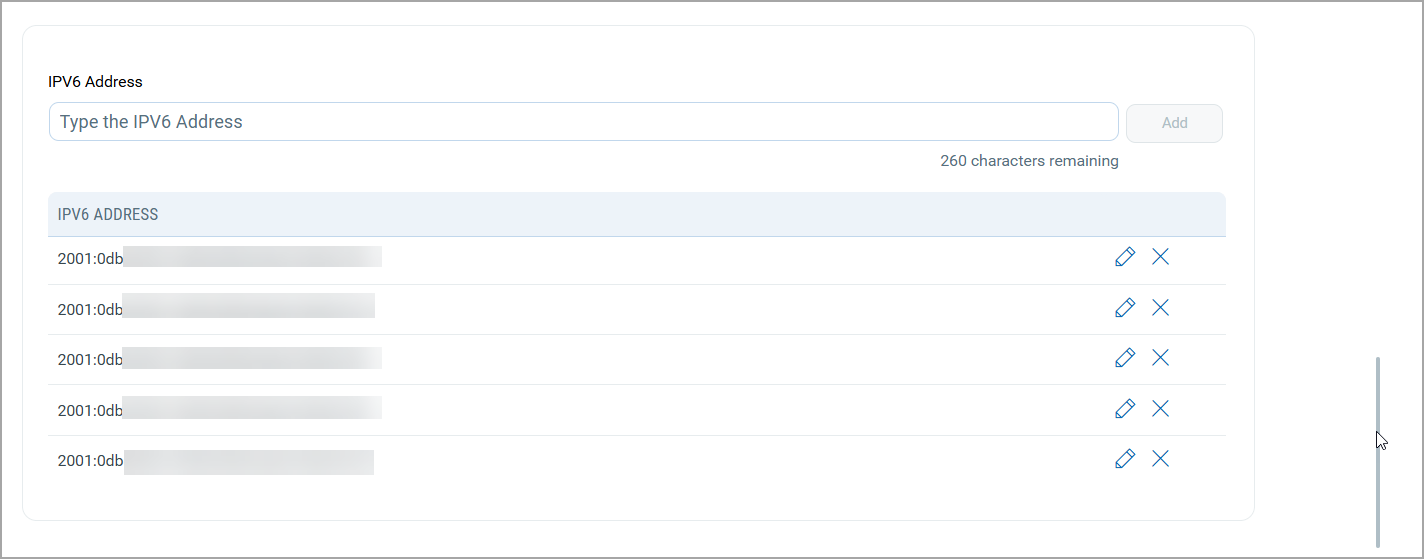
In the IPv6 Address section, enter the IPv6 address.
IP Address (IPv6): Enter an IP address (e.g., 2602:fdaa:60:9::a0e:2b37)
-
Depending on the view, perform one of the following actions:
-
Save your changes by clicking Quarantine Asset if you are accessing this window from the Asset or Incident tab.
-
Save your changes by clicking Apply if you are accessing this window from the Configuration tab.
-
Editing and Deleting Allowed IPs
Editing Allowed IPs
- Go to the Allowed IPs section.
- Find the IP address you want to edit.
- Click the Edit icon next to the IP address.
- Make the necessary changes in the edit field.
- Click Save to update the IP address.
Deleting Allowed IPs
- Go to the Allowed Applications section.
- Find the IP address you want to delete.
- Click the Delete icon next to the IP address.
- Click Save to update your changes.
Allowing Domains
A domain is a website address, like "example.com." Allowing certain domains to connect to the network during quarantine is a strategic decision. It ensures that essential services, security measures, and support can continue operating while the device is isolated for safety, thereby maintaining the network's crucial functionality.
Steps to Allow Domains
To allow domains, perform these steps:
- Open the Quarantine Asset window from the Asset or Incident or Configuration tab.
-
Click Allowed Domains to toggle it on.
-
Enter the domain name in the Domain Names field and click Add.
Note: HTTP or HTTPS addresses (e.g., http://www.example.com and https://www.example.com) are not supported. -
Depending on the view, perform one of the following actions:
-
Save your changes by clicking Quarantine Asset if you are accessing this window from the Asset or Incident tab.
-
Save your changes by clicking Apply if you are accessing this window from the Configuration tab.
-
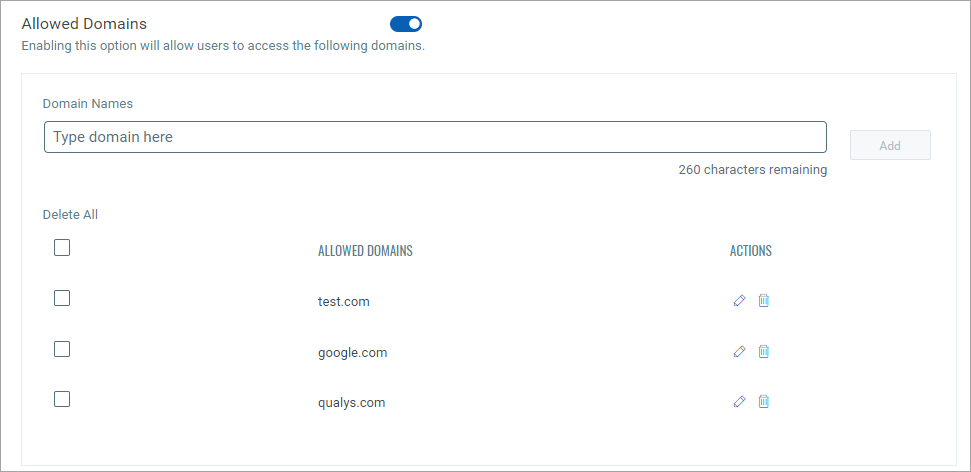
Editing and Deleting Allowed Domains
Editing an Allowed Domain
- Go to the Allowed Domains section.
- Find the domain name you want to edit.
- Click the Edit icon next to the domain name.
- Make the necessary changes in the edit field.
- Click Save to update the domain name.
Deleting an Allowed Application
- Go to the Allowed Domains section.
- Find the domain name you want to delete.
- Click the Delete icon next to the application name.
- Click Save to update your changes.
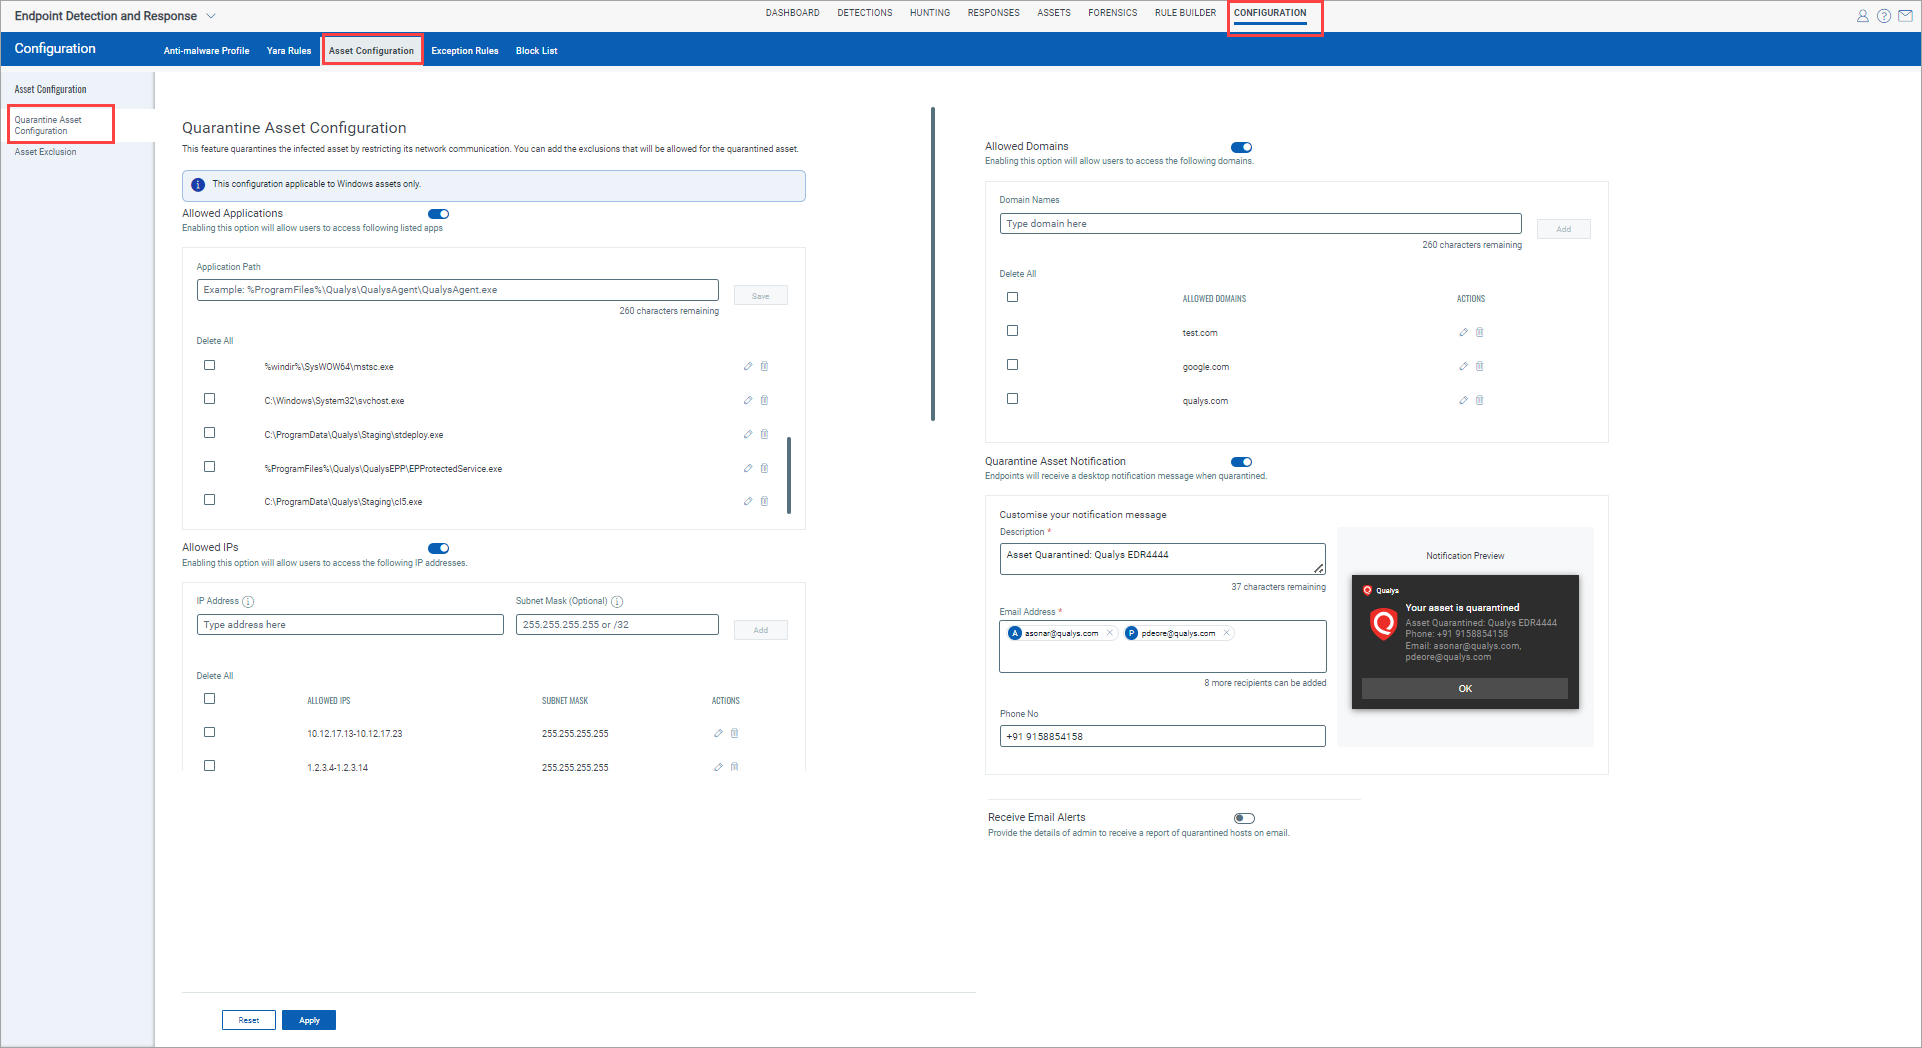
Quarantine Asset Configuration from the Configuration tab
From the Configurations tab, you can allow the applications while the asset is quarantined.
Perform the following steps to white list applications for the Quarantined asset:
- In the Configuration tab, select Asset Configuration.
- Toggle Allowed Applications.
- In the Add Applications field, provide the complete path of the application. You can provide environmental variables in the field. Wild cards inputs are not supported.
Add the following paths to allow the Qualys Endpoint Protection:
C:\Program Files\Qualys\QualysEPP\EPUpdateService.exe
C:\Program Files\Qualys\QualysEPP\downloader.exe
C:\Program Files\Qualys\QualysEPP\EPSecurityService.exe
C:\ProgramFiles\Qualys\QualysEPP\ephost.integrity.legacy.exe
C:\Program Files\Qualys\QualysEPP\EPConsole.exe
C:\ProgramFiles\Qualys\QualysEPP\EPIntegrationService.exe
C:\ProgramFiles\Qualys\QualysEPP\EPProtectedService.exeC:\Program Files\Qualys\QualysEPP\bdredline.exe - Enable the Allowed IPs toggle. Enter the IP Address or Subnet Mask and click Add.
- Enable Quarantine Asset Notification toggle and mention the notification description and Admin Details.
- Click Apply.
The following screenshot is an example of the Quarantine Assets:
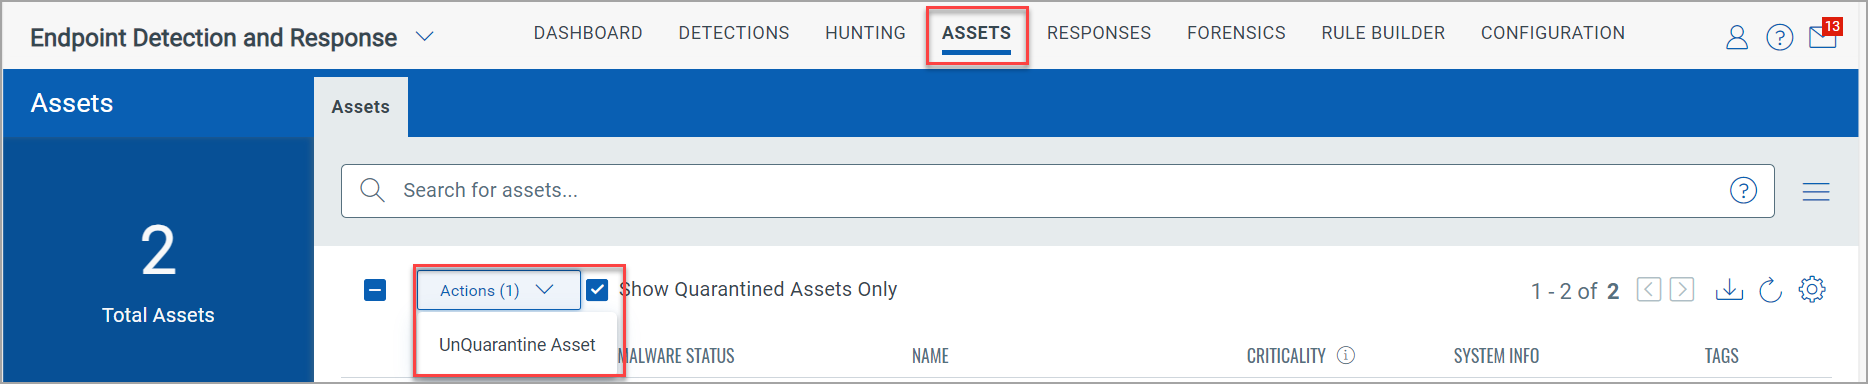
Show Quarantined Assets Only
To view the list of the Quarantined Assets from the Assets tab, select the Show Quarantined Assets Only checkbox. The following screenshot is an example of the option that lists the quarantined assets:

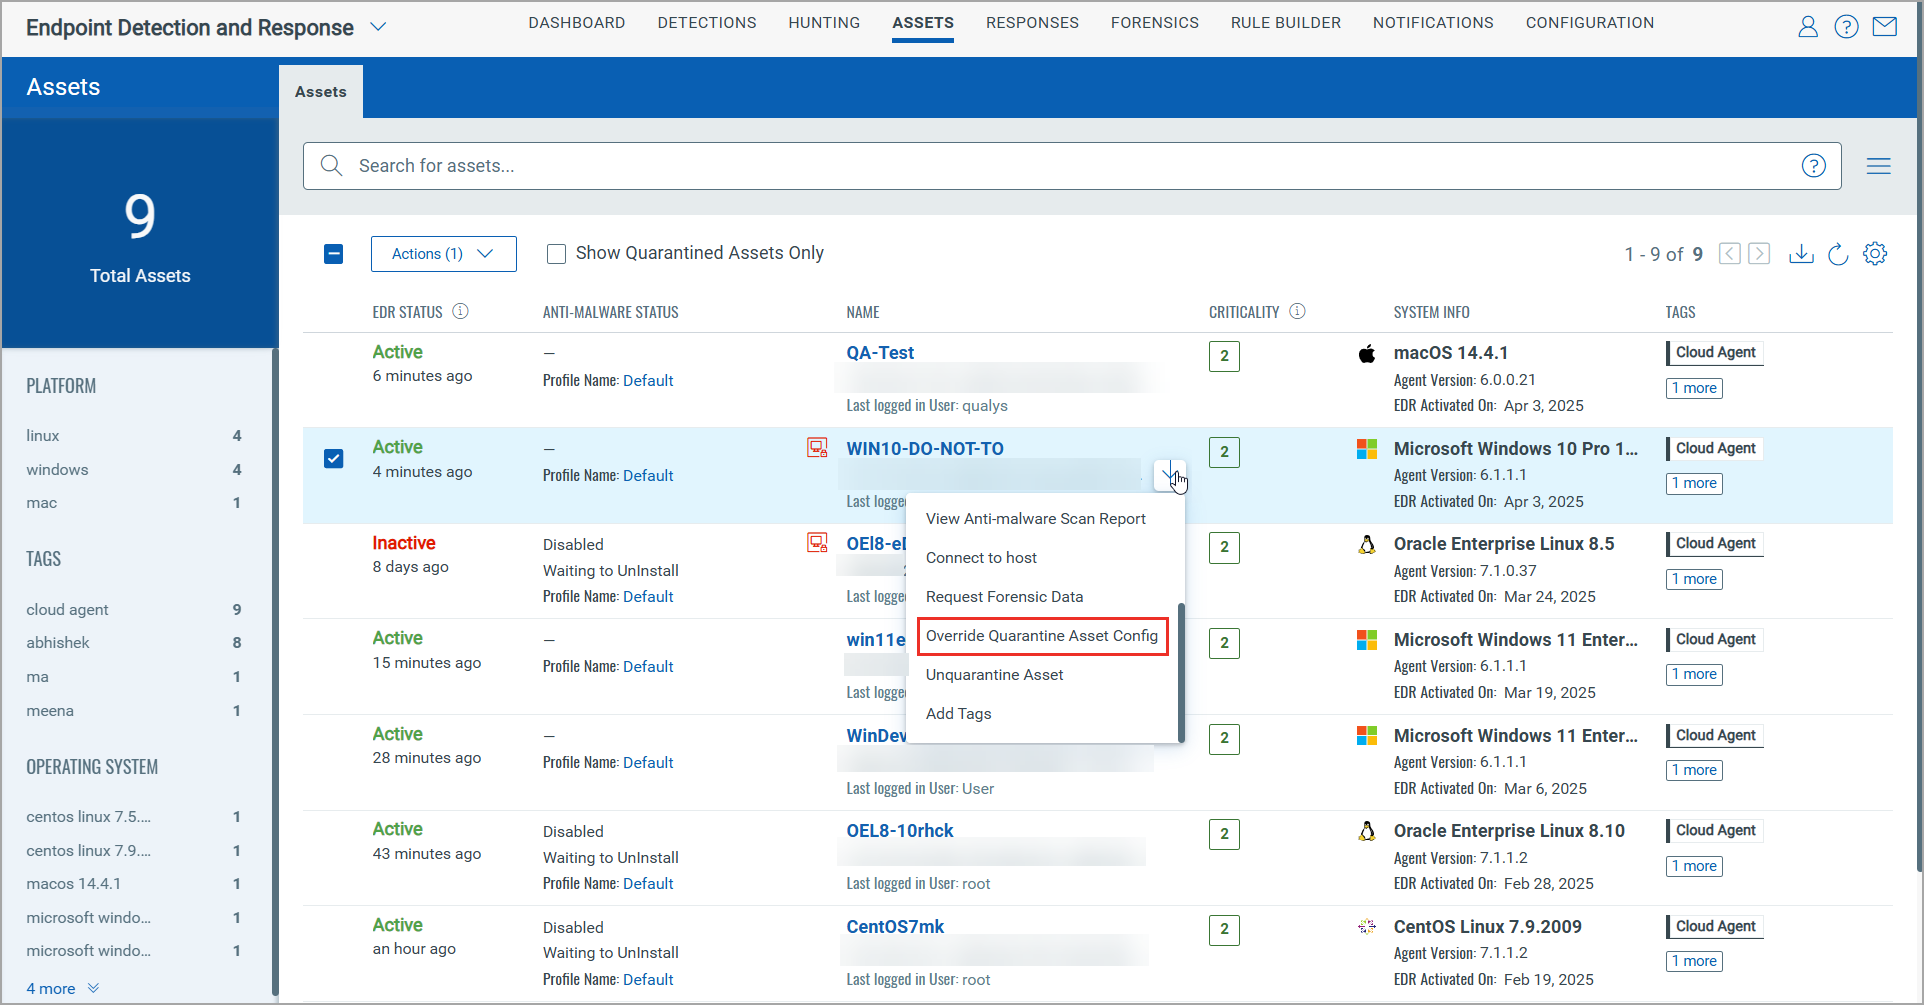
Override Quarantined Host Configurations
Override Quarantined Host Configuration refers to a security setting that allows you to bypass or modify restrictions placed on a quarantined host. This action streamlines the process by enabling direct modifications to the Allowed list without the need to unquarantine and re-quarantine the asset.
When you modify the Allowed list, the existing configurations are replaced, not appended. As a result, previously allowed configurations will be blocked again.
This enhancement is supported only on Windows Agents 6.1.1 and higher, and Linux Agents 7.1.1.
Perform the following steps to override quarantined host configuration:
- In the Assets tab, hover the mouse on any of the assets to view the Quick Actions menu.
- Click Override Quarantine Asset Config.
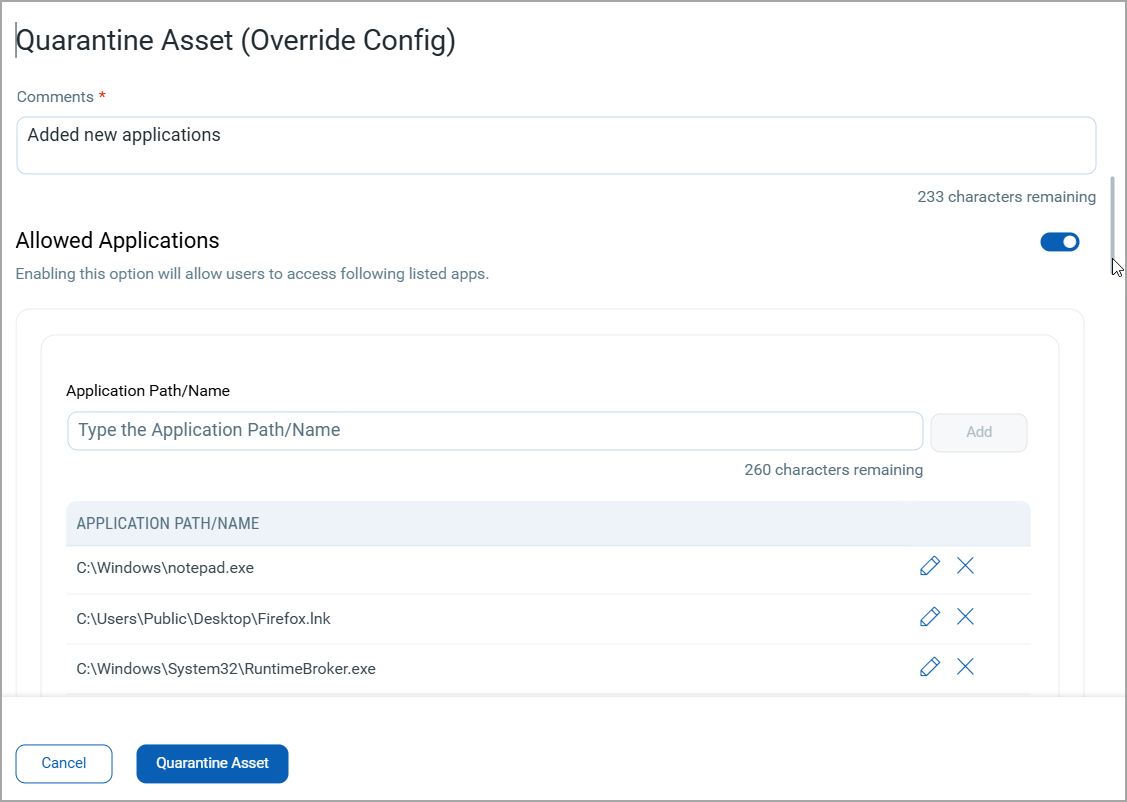
- In the Quarantine Asset (Override Config) window, make changes where needed, add your comments, and then click Quarantine Asset.
Unquarantine an Asset from the Assets tab
To unquarantine an asset, perform the following steps:
- In the Assets tab, select the quarantined asset. From the Actions drop-down menu, select Unquarantine Asset .
- In the Unquarantine Asset window, add your comments.
- Click Unquarantine Asset.
A notification Unquarantine Asset request sent successfully. View Request Status is generated.
- Click the View Request Status to follow the asset status.
Unquarantine an Asset from the Incidents page
To release a quarantined asset, perform the following steps in the Incidents page of the Detections tab:
- In the Incidents page, select the required incident description of a quarantined asset.
- In the Summary tab, click Unquarantine Asset.
- In the Unquarantine Asset window add your comments.
- Click Unquarantine Asset.
A notification Unquarantine Asset request sent successfully. View Request Status is generated.
- Click the View Request Status to follow the unquarantine asset status.

Assets Statuses
A Quarantine or an Unquarantine asset can have the following statuses in the Remediation tab:
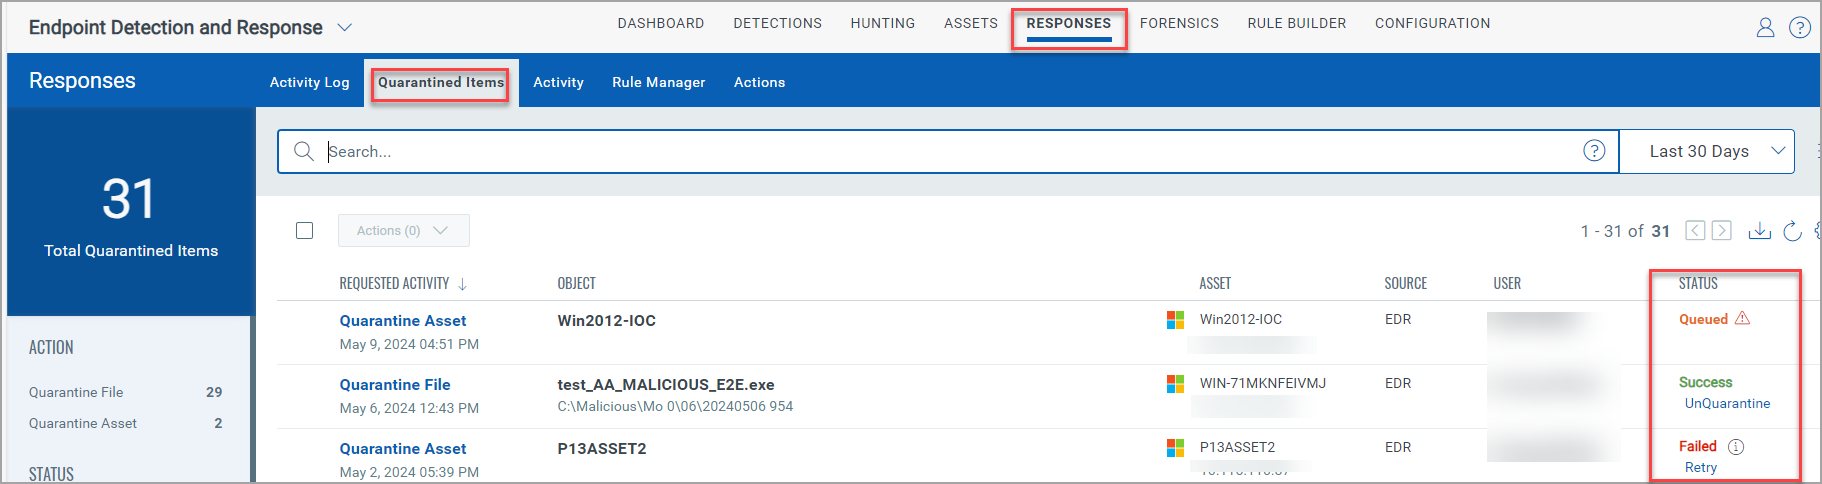
- Queued: The Queued status is the initial status of the asset. An asset is in Queued status when you select the Quarantine or Unquarantine action. The warning icon
 indicates the delay in the asset being quarantined or unquarantined.
 - Success: If successfully quarantined or unquarantined, the asset will display the Success status.
- Failed: If the action was unsuccessful due to technical reasons, the asset status is Failed.
The following screenshot highlights the statuses of different quarantined assets:
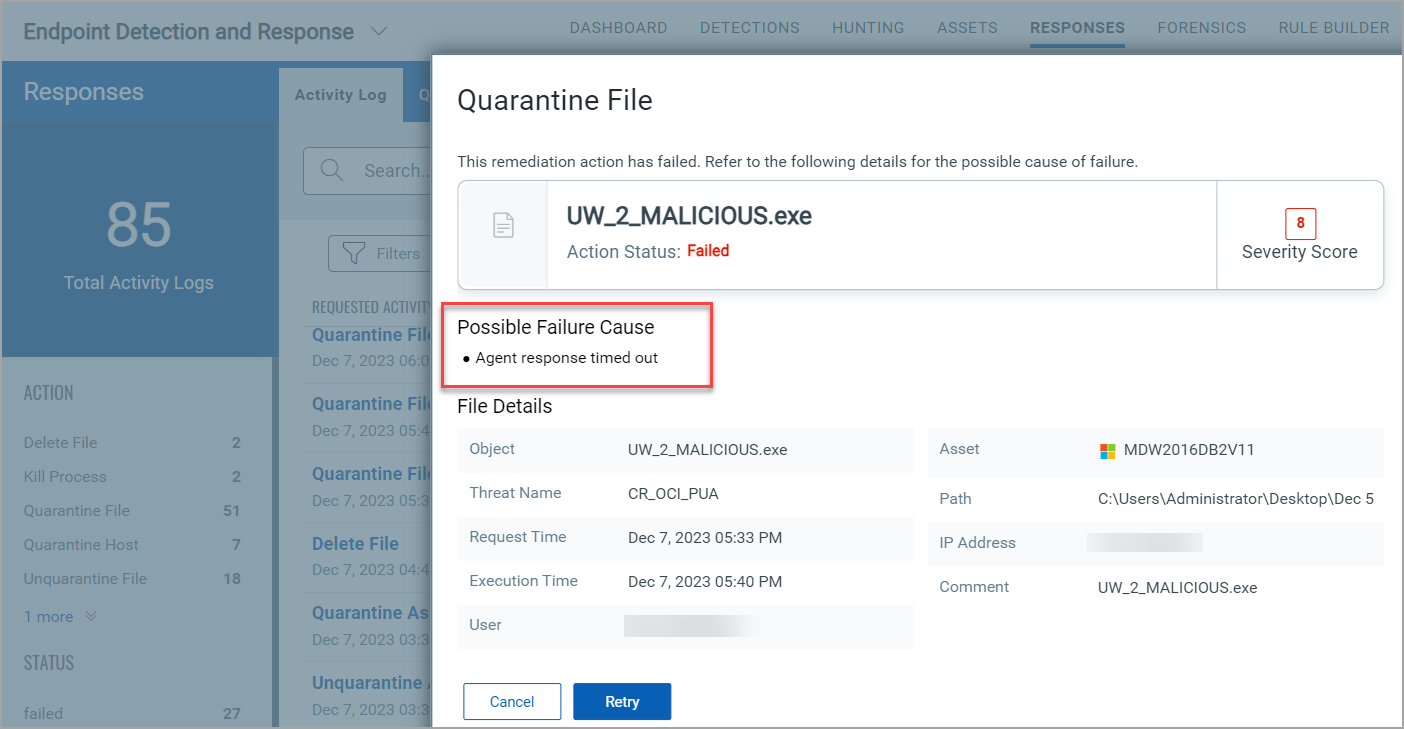
Failed Status Messages
The Status column in the Responses tab lists the assets with the status as Failed. Click on asset, and the Quarantine File window displays the possible failure cause. To resolve the issue, click Retry to successfully quarantine the asset.
Following are some of the remediation request failure causes:
- Input File is already deleted: The input file does not exist on the endpoint
- Agent Response Timed Out: If the Quarantine Asset request has been running (In Progress status) for more than 10 minutes, the Status column displays the instance as Agent response timed out. You can perform the action again after the timeout. The event remediation timeout is 5 minutes.
- Error: Unable to quarantine the file: The file or file path is restricted or protected for any delete or move operation.
- Error: Process does not exist: This error message occurs when the remediated process is not running anymore on the endpoint or is in the terminated state.
- Quarantine a file does not exist: The requested file is unavailable at the endpoint.
The following screenshot is an example of the Agent Deactivation: