Remote File Collection and Sandbox Analysis
The Remote File Collection fetches a file from the endpoint for investigation and analysis.
Remote File collection allows you to gather files only for Windows Agent 5.4.0-8 and above.
Collect Remote File from Hunting Events
Perform the following steps in the Hunting tab to collect files for analysis:
- Hover the mouse over an Object to view the Quick Actions menu.
- Click Event Details.
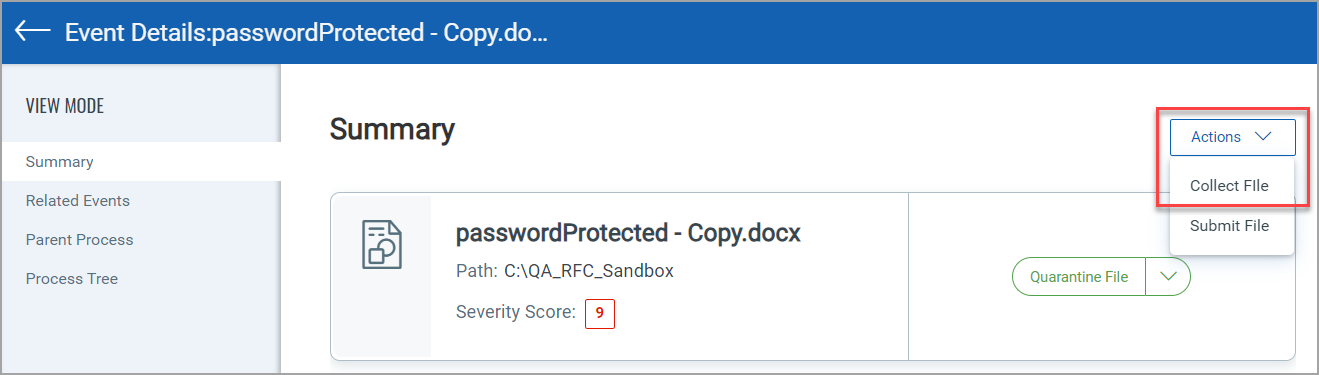
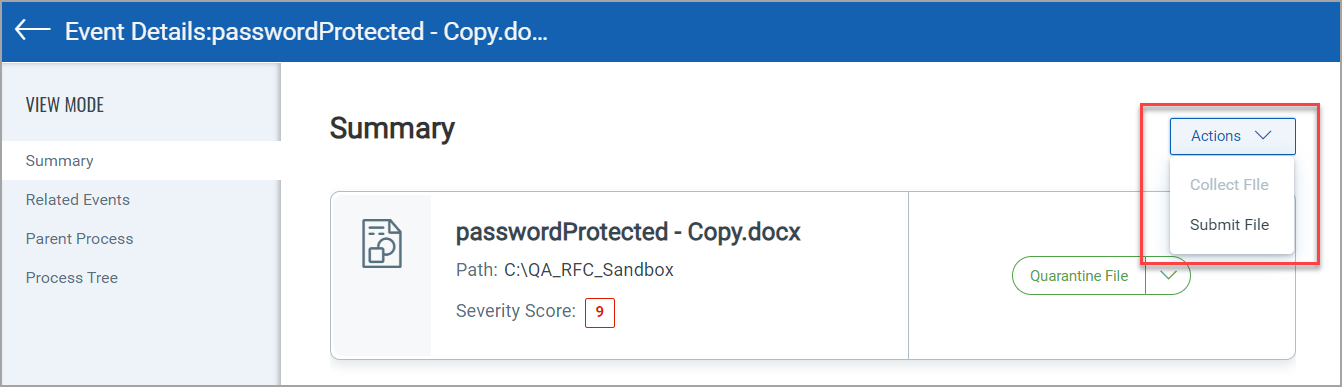
- On the Summary page, click Collect File from the Actions drop-down menu.
The following screenshot displays the Collect File option from the Actions drop-down:
- On the Confirmation window, click Yes to collect file for remote collection.
You will be notified once the request is successfully submitted.
View Remote File Collection Status
After you perform the steps to collect the remote file, you can view the status by performing the following steps in the Hunting tab or Response tab:
Hunting
- Hover the mouse over an Object to view the Quick Actions menu.
- Click Event Details.
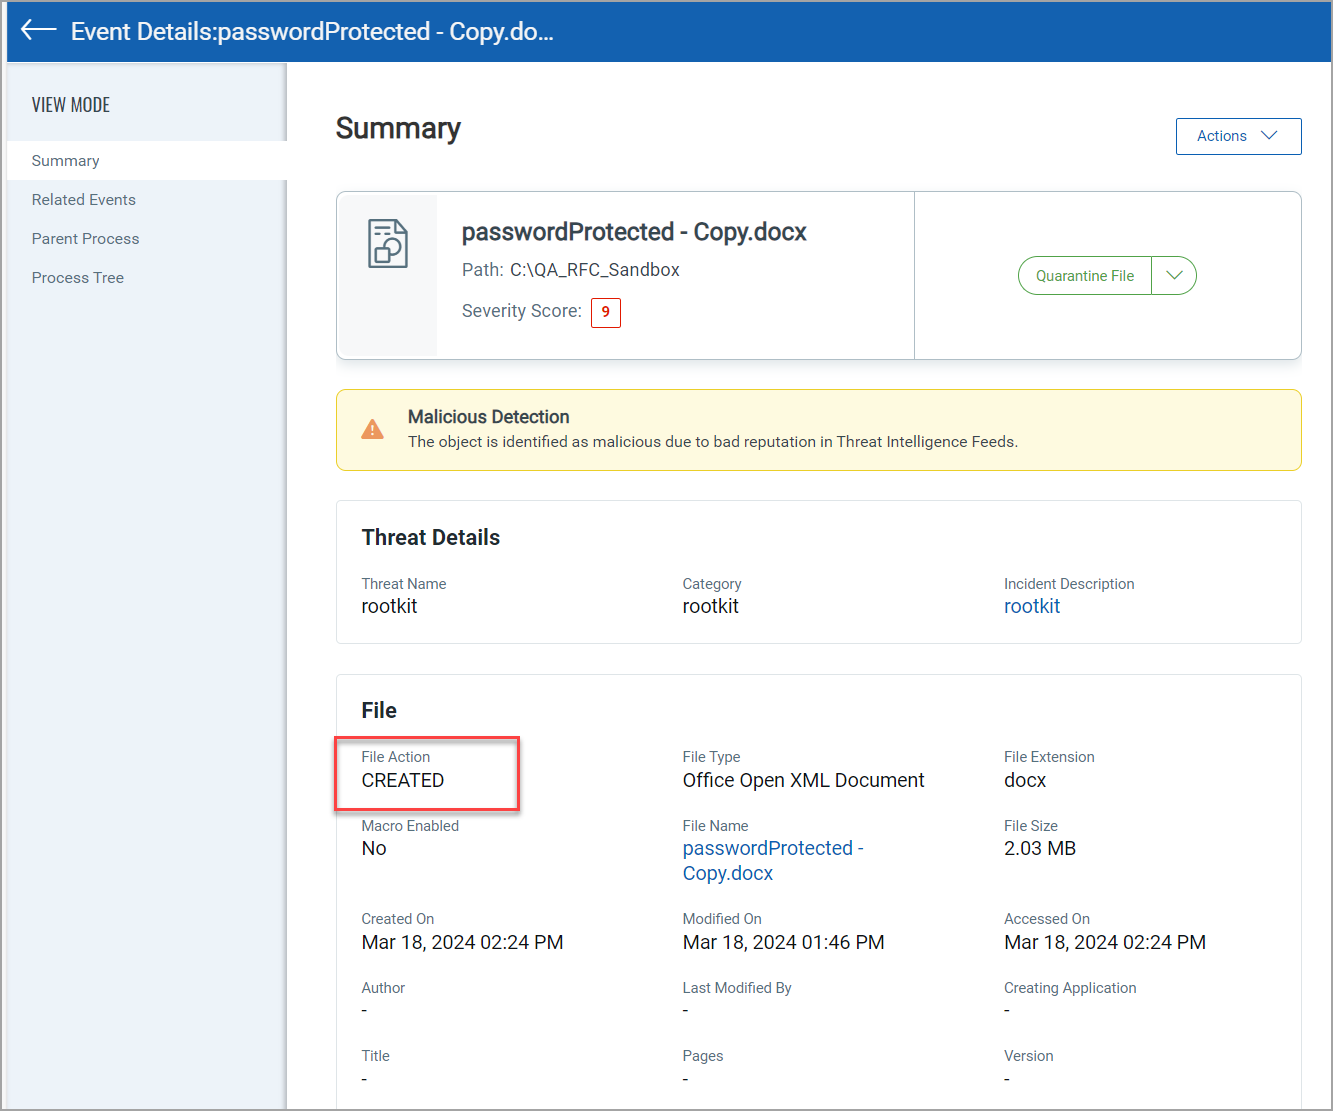
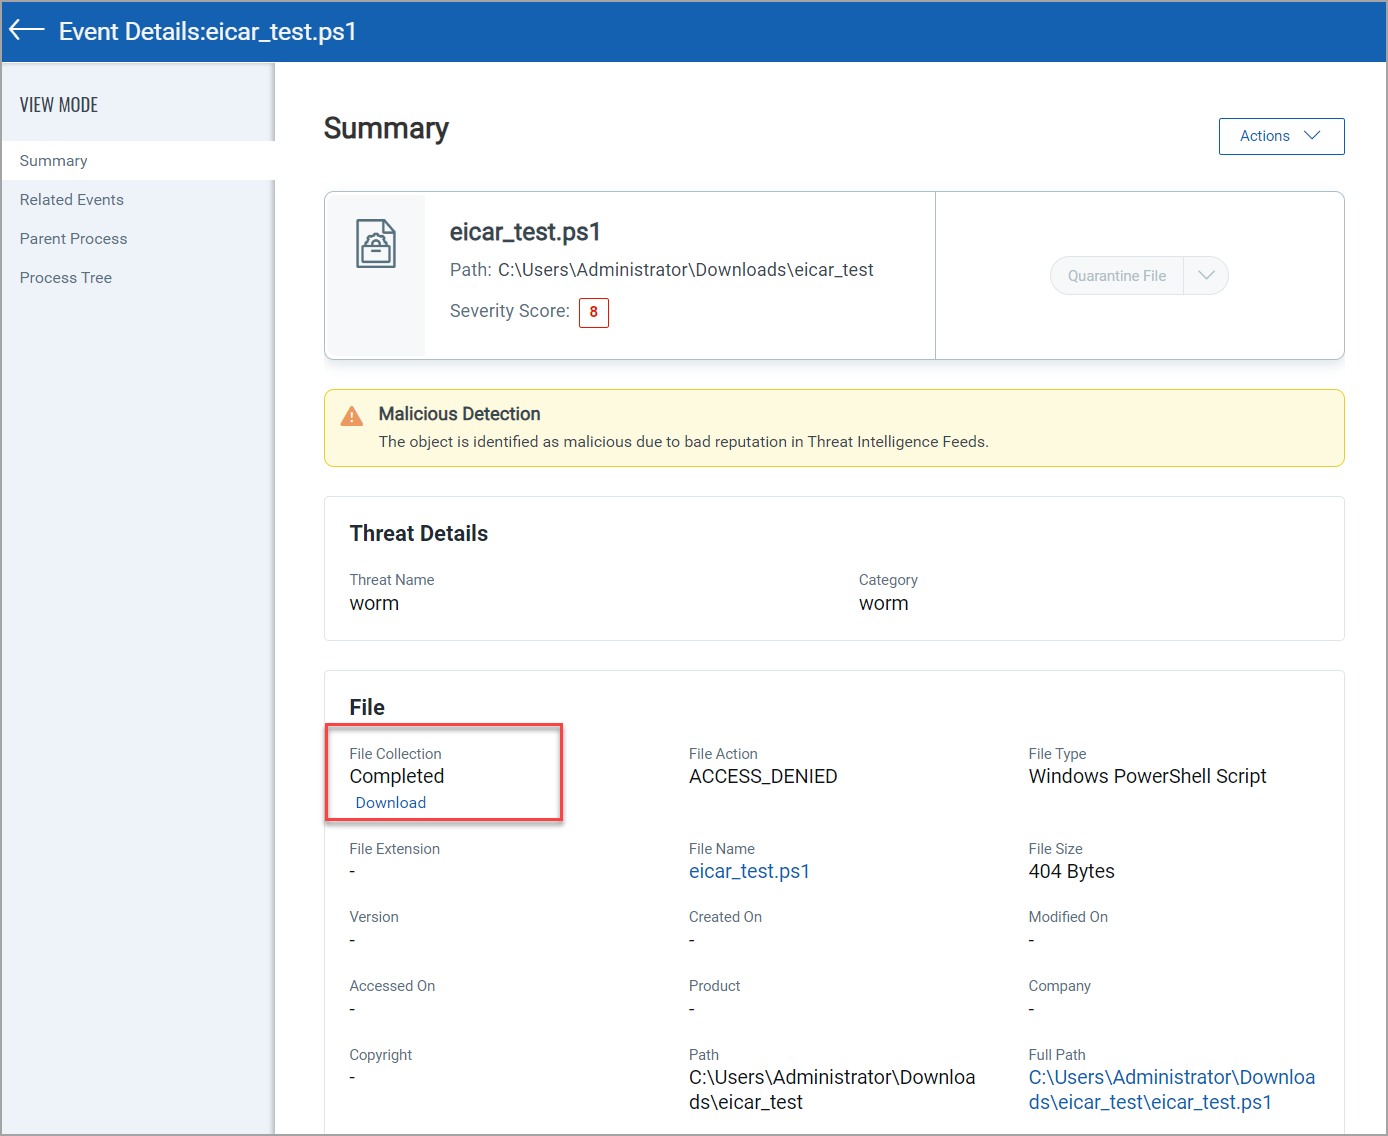
- On the Summary page, the File section displays the status in the File Collection field.
The following screenshot represents the File Collection status:
Responses
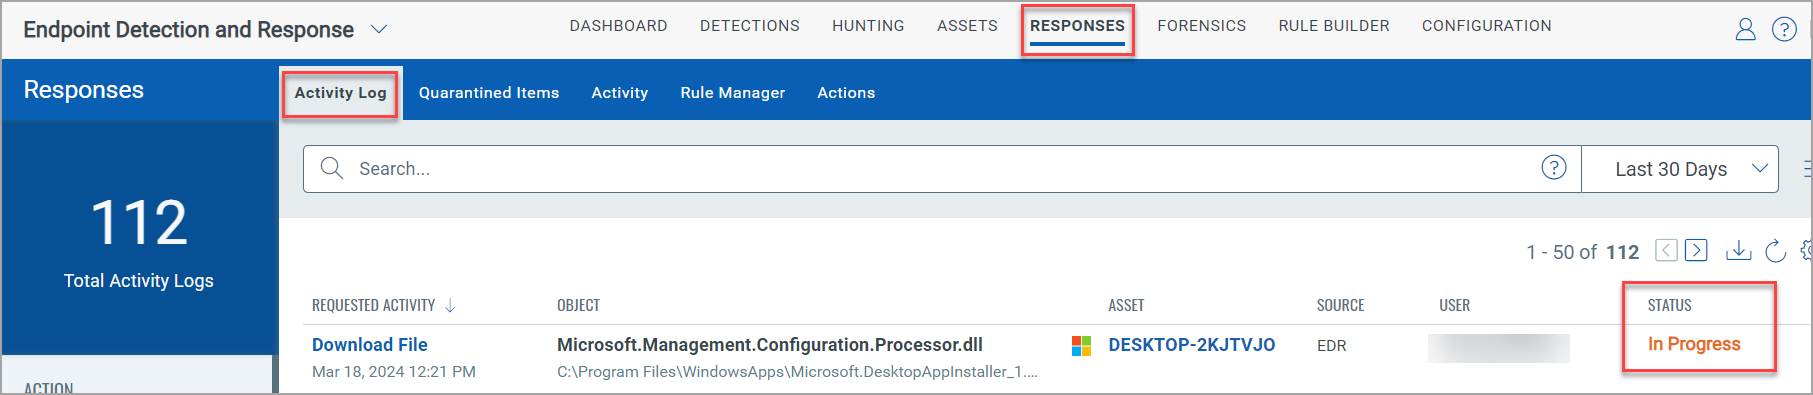
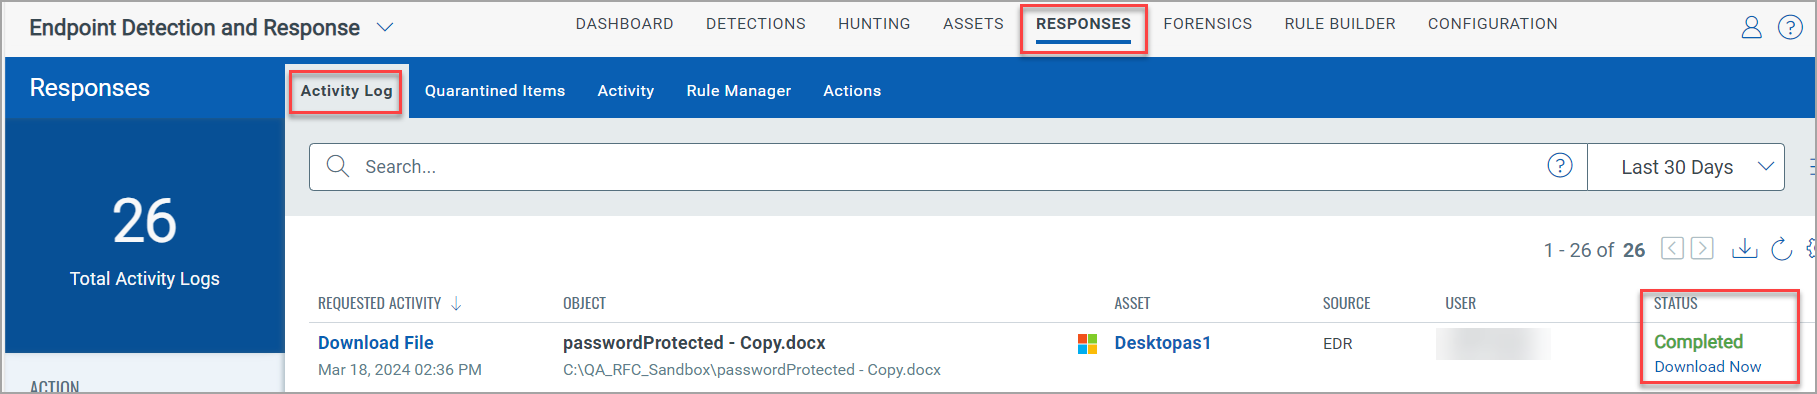
- From the Responses tab, go to Activity Log. The Requested Activity column shows the activity as a Download File, and the Status column displays the status of the file collection.
The following screenshot is an example of the In Progress status listed in the Status column:
Download the Remote Collection File
Hunting
- Hover the mouse over an Object to view the Quick Actions menu.
- Click Event Details.
- On the Summary page, the File section displays the status in the File Collection status as Completed. This signifies you can click the Download label and download the remote collection file.
The following screenshot represents the Download label after the File Collection status is Completed:
- A Confirmation window is displayed. Click Yes if you agree with the terms.
The file is downloaded to your local system. The downloaded file can now be used for Sandbox Analysis.
Responses
You can download the file from the Responses tab of the Activity Log. Perform the following steps:
- When the status displays Completed, click the Download Now button from the Status column.
- A Confirmation window is displayed. Click Yes if you agree with the terms.
The file is downloaded to your local system. The downloaded file can now be used for Sandbox Analysis.
Sandbox Analysis
You can submit the downloaded remote collection file for sandbox analysis, or you can upload a zip file (up to 5 MB). The file collected during Remote Collection can be submitted for Sandbox Analysis from the Event Details Summary page of the Hunting tab or the Sandbox Analyzer page of the Forensics tab.
Submit File for Sandbox Analysis
Perform the following steps in the Hunting and Forensics tab to submit files for analysis:
Hunting
- Hover the mouse over an Object to view the Quick Actions menu.
- Click Event Details.
- On the Summary page, click Submit File from the Actions drop-down menu.
The following screenshot displays the Submit File option from the Actions drop-down:
-
On the Confirmation window, click Yes to submit the file for remote collection.
You will be notified once the request is successfully submitted.
Forensics
- From the Forensics tab, go to Sandbox Analyzer.
- Click Submit Sample.
- In the Submit New: Sample window, from the Sample Type option, choose the type as File or URL. For the File type option, the maximum file size is 5 MB.
The following screenshot displays the URL Sample Type for analysis:

- Click Submit.
You will be notified once the request is successfully submitted.
Auto Submit to Sandbox
The Auto Submit to Sandbox option automatically submits the files based on the configuration settings. The following list of file formats can be added for auto-submission:
- .bat .dll, .docb, .docm, .doc, .docx, .exe, .js, .msi, .net, .pdf, .pptm, .ppt, .pptb, .ps, .pptx, .rtf, .url, .vbs, .xls, .xslm, .xlsb
Perform the following steps to Auto Submit Files to Sandbox:
- From the Forensics tab, go to Sandbox Analyzer.
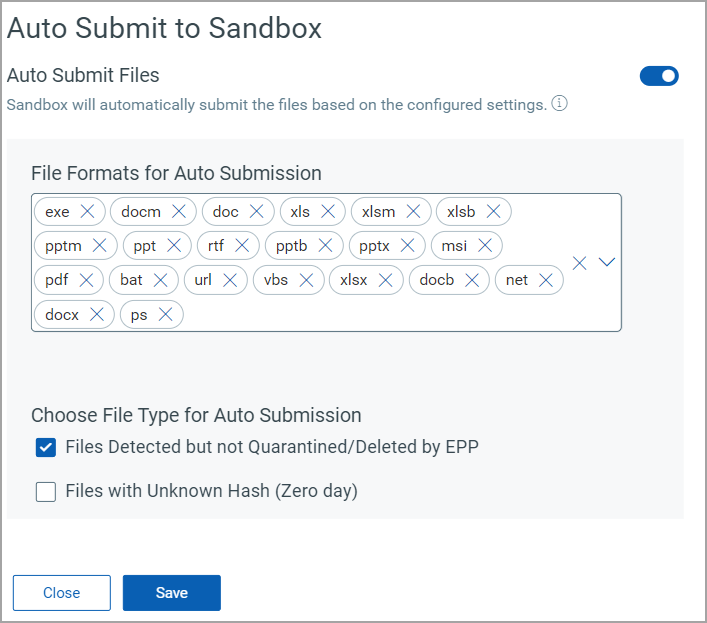
- Click Auto Submit to Sandbox.
- In the Auto Submit to Sandbox window, the Auto Submit Files toggle is enabled by default.
- (Optional) As the file type for auto-submission, select Files Detected but not Quarantined/Deleted by EPP or Files with Unknown Hash(Zero day)
- Click Save.
The following screenshot is an example of the Auto Submit to Sandbox window:
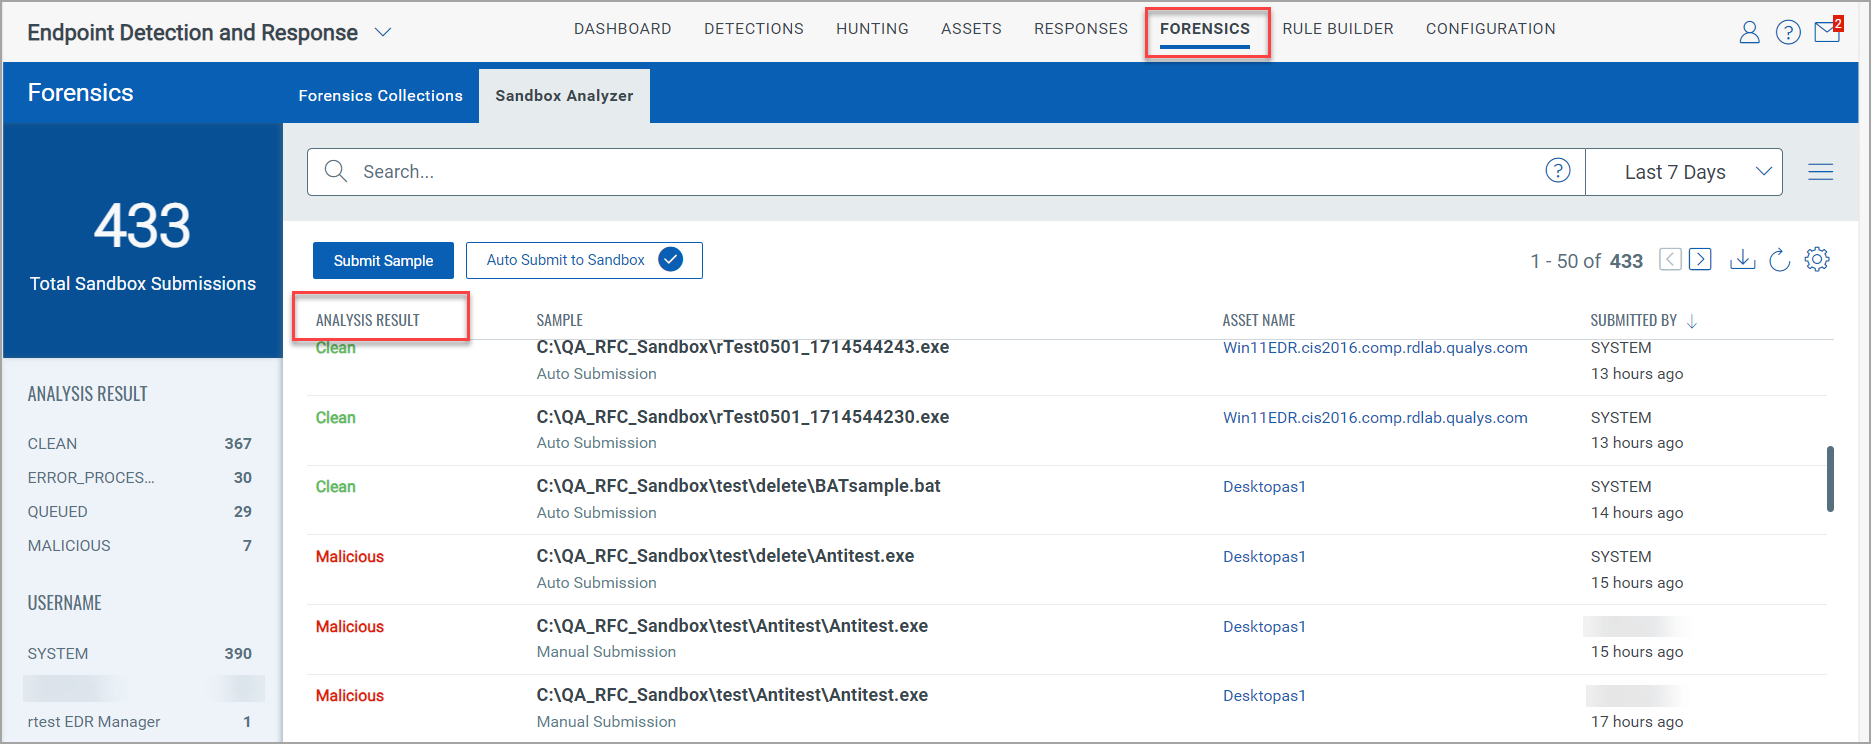
View Analysis Report
After you submit the sample, you can view the analysis report from the Sandbox Analyzer page under the Forensics tab. The Analysis Result column displays the status as Clean if no issues are found in the submitted file. The column displays the status as Malicious if a file is not clean. The following screenshot is an example of the Analysis Result as Clean and Malicious for submitted reports: