Anti-malware Setup and Third-Party Anti-malware Removal Tool
The Anti-malware Setup allows you to download a copy of the anti-malware to reduce the network bandwidth. The setup has the option for online or offline installation.
The Anti-malware Setup option is available for Windows Cloud Agent 5.5 and above.
Install and Configure Anti-Malware
This process has two steps. First, you'll install Anti-malware using Installer Mode. Then, you'll configure the Enable Malware Protection for this Profile setting in the Cloud Agent Configuration Profile.
Step 1: How to Install Anti-malware using an Installer Mode
After clicking the Anti-malware Setup button from the Configuration tab, perform the following steps on the Anti-malware Setup page:
- From the Anti-malware installer mode, select Cloud Installer or On-Premise Installer.
- Cloud Installer mode: This is the default installer mode. Select this mode to use the online version of the Anti-malware.
- On-Premise mode: Select this mode for offline installation of the anti-malware. You can download the installer file to your local environment and place it in any shared location for offline installation.
- For the On-Premise Installer, select the Windows Architecture option between x86 and x64.
- Click Download.
- Provide the Installer Location. The location can be your local system path or server http(s).
If you provide a location path, ensure it is accessible to the asset. For the local disk path, once the installation is completed, the installer will be auto-deleted.
Refer to the following On-Premise Installer screenshot for reference:
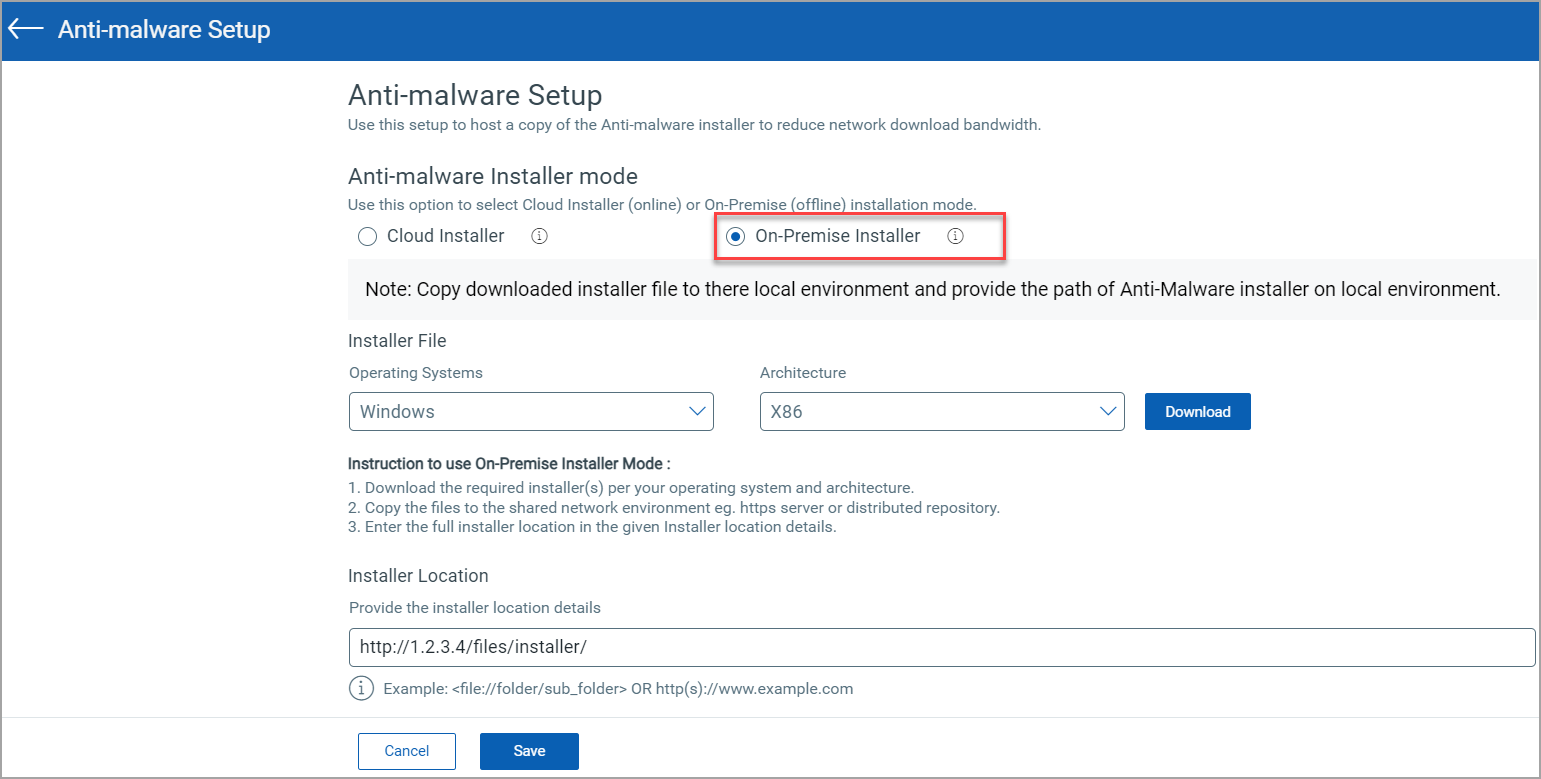
- Click Save.
Step 2: How to Enable Malware Protection in the Cloud Agent Profile
Perform the following steps in the Cloud Agent application.
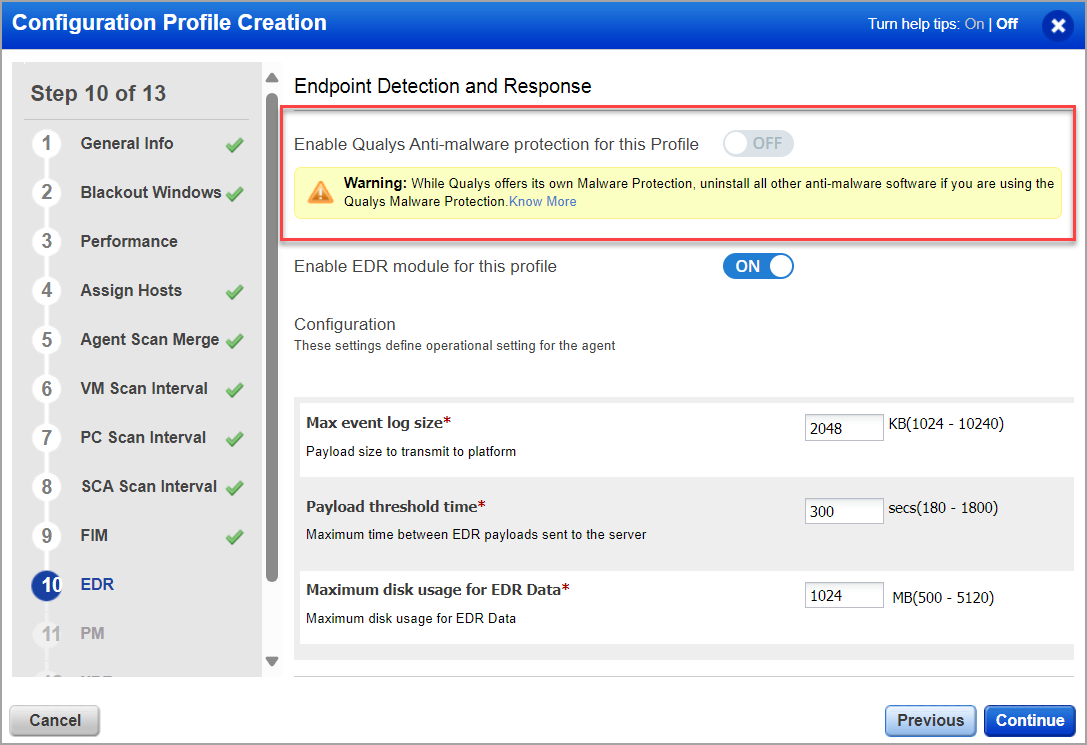
- From the Cloud Agent application, click Configuration Profiles.
- Click New Profile. On Step 10 of the wizard, ensure Enable Qualys Anti-Malware Protection for this Profile option is disabled. After saving the profile, assign it to assets where offline installation needs to be attempted.
It is recommended not to make changes to the existing Configuration Profiles.
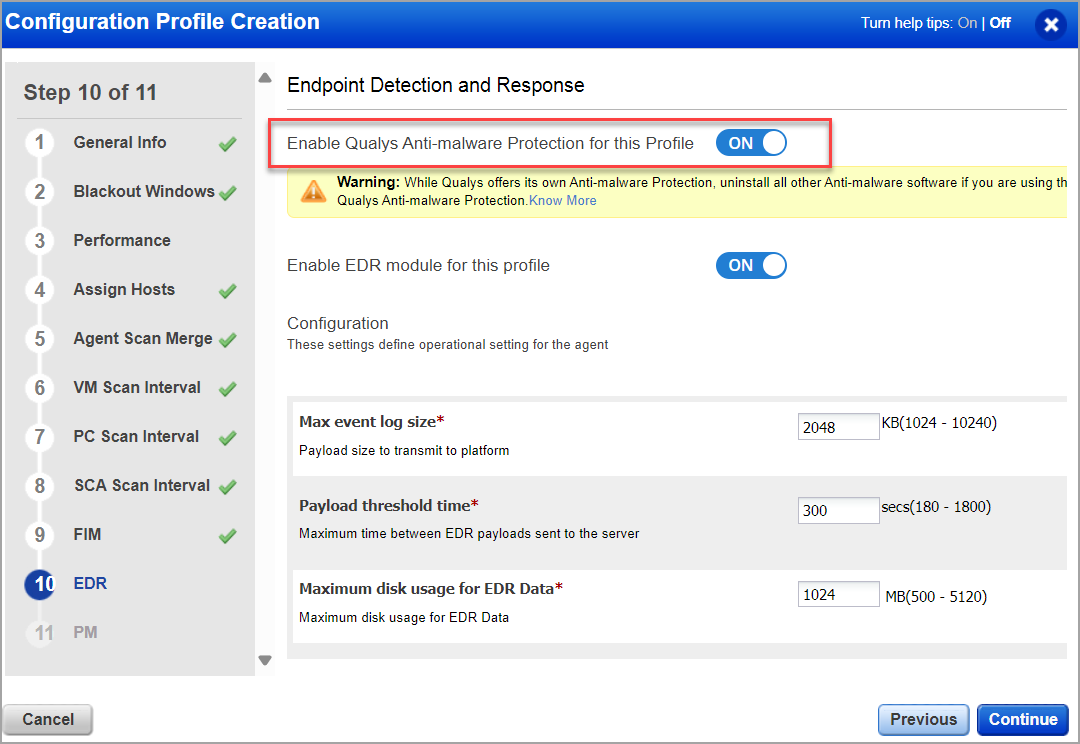
- After assigning the profile to the assets, edit the profile again, enable the Anti-Malware Protection for this Profile option, and then click Continue.
-
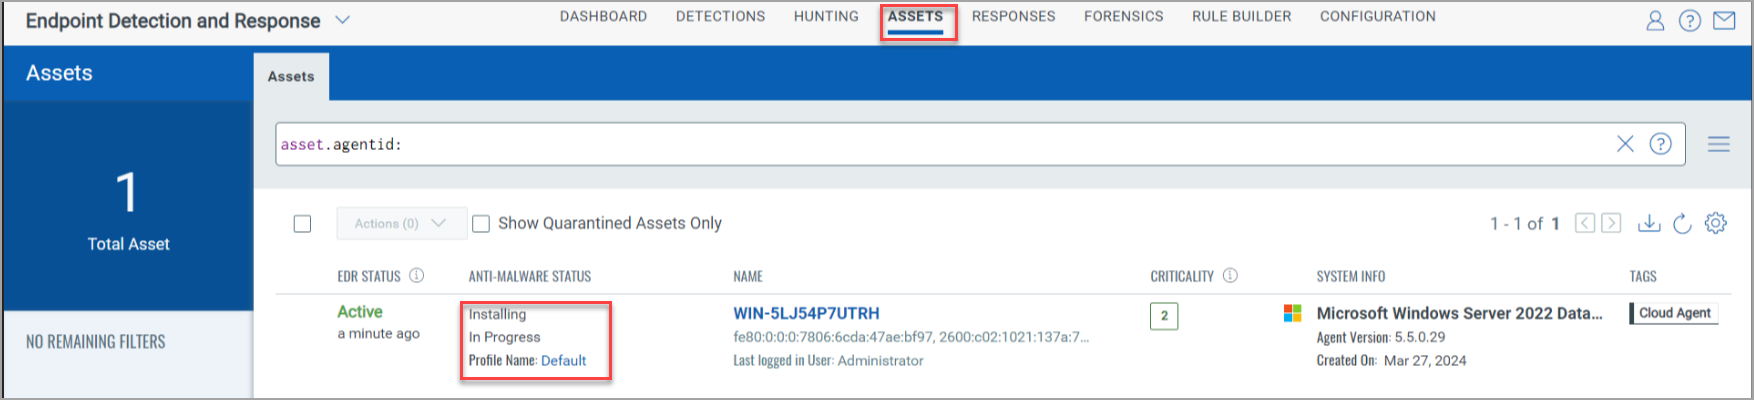
You can check the installation status under the Anti-malware Status column in the Assets tab. The following screenshot is an example of the installation status:
Third-Party Anti-malware Removal Tool
The Anti-malware setup can be proceeded with enabling the Third-Party Anti-malware Removal Tool. However, enabling the Third-Party Anti-malware Removal Tool removes the third-party products and their traces from the applications. The tool detects the presence of any third-party application on the system and in case of a failed installation, an error message is displayed with the name of the application that caused the EPP installation to fail.
Using the Add Exclusions field, you can add the list of applications that should be excluded during the removal process. The Third-Party Anti-malware Removal Tool can fail to uninstall the third-party application in any of the following scenarios:
- Third-party Anti-malware is not supported
- Third-party Anti-malware is password-protected
- Stale entry of an old Anti-malware
Prerequisites to Enable Third-Party Anti-malware Removal tool
The minimum requirement for the Agent version is 5.1.0.18 to enable the Third-Party Anti-malware Removal Tool.
If your agent version is lower than 5.7.0, follow the steps below to enable the Third-Party Anti-malware Removal tool. For agent versions 5.7.0 or higher, follow the steps in the Application Configuration section of the Qualys Cloud Agent Online Help, as additional steps are needed.
OPSWAT-supported application. Go to the OPSWAT web page and click the Show Uninstall Supported Only button on the top-right corner to view the list of supported anti-virus.
Enabling the Third-Party Anti-malware Removal tool
After clicking the Anti-malware Setup button from the Configuration tab perform the following steps on the Anti-malware Setup page.
- Enable the Third-Party Anti-malware Removal Tool.
- (Optional) In the Add Exclusions field list the application(s) that will be excluded during the uninstallation process.
You can provide the application name in the Add Exclusion field, even though the Third-Party Anti-malware Removal tool is disabled.
- Qualys Agent can also identify the application that caused the anti-malware installation failure. In such scenarios, an error message is displayed in the Anti-malware Status column of the Assets tab. Copy the application name and paste it in the Add Exclusion field.
- Click Save.
A notification message confirms the Third-Party Anti-malware Removal Tool has been enabled.