ETM Identity Onboarding
ETM Identity provides deep visibility into your Active Directory environment by identifying risky configurations, permissions, and potential attack paths. This onboarding guide walks you through licensing, agent setup, and deployment best practices, enabling you to quickly and confidently uncover identity-related risks.
Prerequisites
Verify that the following requirement is met. ETM Identity is activated for your subscription. If it is not enabled, contact your Technical Account Manager (TAM) or the Qualys Support Team to activate the license.
Prerequisites Checklist for Cloud Agent Installation
Before starting the installation process, ensure you have:
- Administrative privileges on the target Windows system
- CA module access for activation
- VMDR and PA application enabled
Step 1: Download and Install Cloud Agent v6.4.0
Follow these steps to download and install the Cloud Agent:
- Access the Qualys Enterprise TruRisk™platform.
- Select Cloud Agent from the app picker.
- Create an activation key.
This allows you to group agents and bind them to your account. - Download the Cloud Agent v 6.4.0 (for ETM Identity support) to your local machine.
- Save the Installer.
Do NOT save at the following location:
- Agent Installation DirectoryC:\Program Files\Qualys\QualysAgent\Agent
- Agent Configuration DirectoryC:\ProgramData\Qualys\QualysAgent\Recommended save locations:
- Desktop
- Downloads folder
- Temporary directory (for example,
C:\Temp\) - Any custom folder outside the Qualys directories
- Run the installer with administrative privileges.
- Complete the standard installation process.
- Verify Installation:
- Check
C:\Program Files\Qualys\QualysAgent\exists - Confirm agent service is running
- Check
Step 2: Activate ETM Identity
Perform the following steps to activate ETM Identity:
- Access the Qualys Enterprise TruRisk™ platform.
- Navigate to the Cloud Agent (CA) application > Agent Management > Agent.
- Select activate ETM Identity from the Quick Actions menu of the Agent.
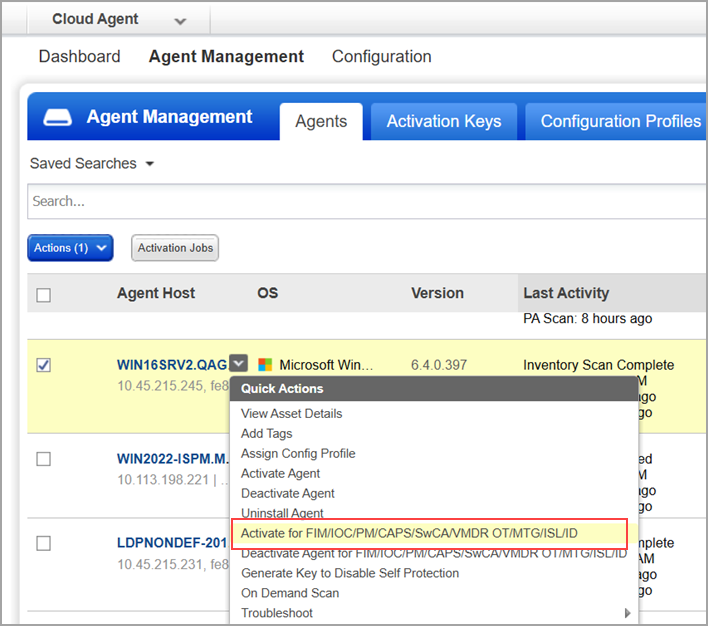
The Active Agent window is displayed
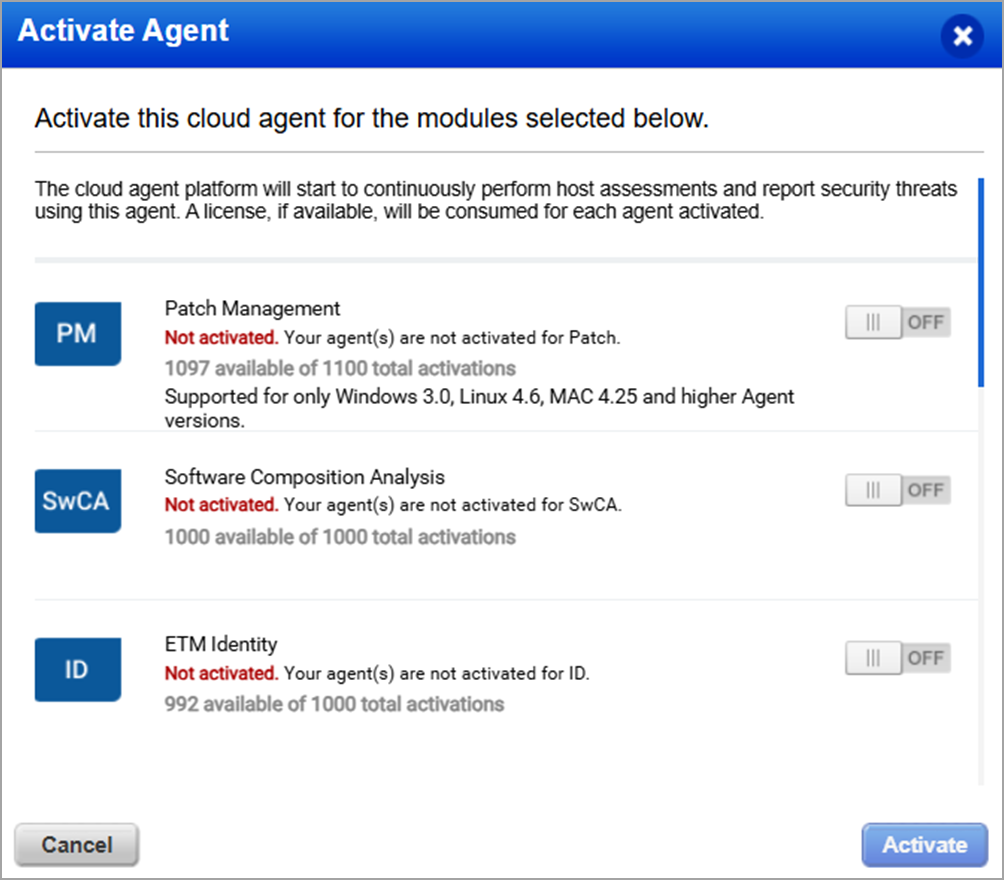
-
Switch the the ETM Identity toggle to ON to Activate Agent.
Step 3: Validate Module Status
Confirm the following modules are enabled:
- ETM Identity
- Vulnerability Management Detection and Response
- Policy Audit
Allow time for the initial data load after ETM Identity is enabled on an agent for a Domain Controller. Based on initial internal benchmarks, data loading takes approximately 30 minutes for a small domain with around 1,000 objects and 10,000 relationships. The process scales roughly linearly, so a larger domain with 4,000 objects and 40,000 relationships may take up to 2 hours.
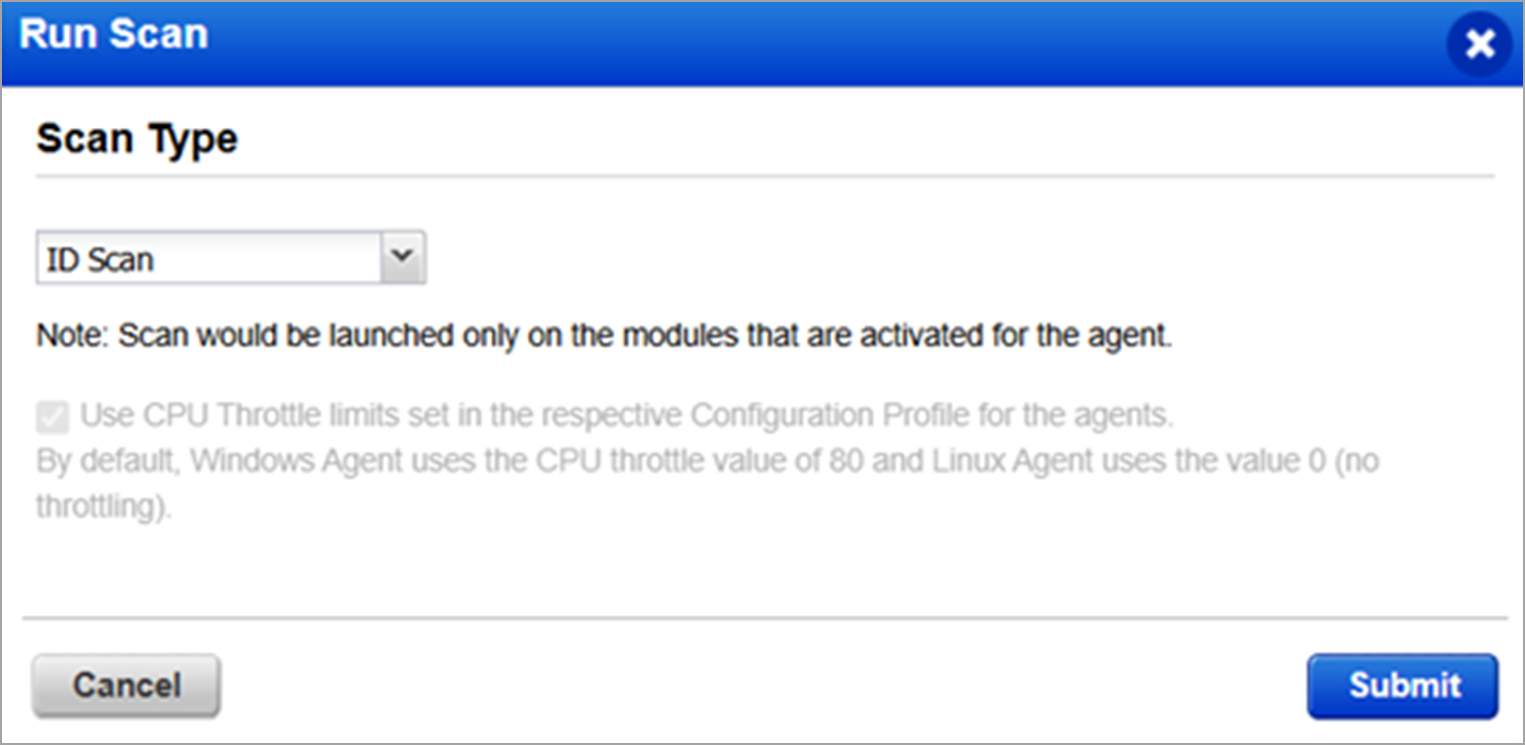
After the initial scan, delta scans run automatically every 24 hours. You can also trigger an on-demand scan from the Cloud Agent application.
The ID Scan option is available in the agent’s Quick Actions menu under the on-demand section.
Troubleshooting
Here are some common issues and solutions:
| Issue | Possible Cause | Solution |
|---|---|---|
| Access Denied error | Not running as administrator | Re-open Command Prompt with admin rights |
| Installer not found | Wrong directory path | Verify file location and use the correct path |
| Installation fails | Base agent not installed | Complete Step 3 first |
| ETM view not available | Insufficient permissions | Contact your Qualys administrator |
Verification Commands
Check via Programs and Features:
- Open Control Panel > Programs and Features.
- Find Qualys Cloud Agent in the list.
- The version column will show the installed version.
Check agent service status:
sc query QualysAgent