Claude Security SAST Generic CSV Import Connector
The Claude Security SAST connector integrates static application security testing findings from Anthropic Claude Security into Qualys Enterprise TruRisk Management (ETM) through a file-based CSV import. This addresses the challenge of fragmented security visibility by consolidating code repository assets and their associated vulnerabilities into a centralized, unified risk view alongside host, cloud, container, and identity findings.
Claude Security reasons about source code at a depth that traditional SAST cannot reach, surfacing logic flaws, broken authentication patterns, hardcoded secrets, and complex injection paths that pattern-based scanners routinely miss. By importing these findings into Qualys ETM, security teams can eliminate manual data aggregation, attribute findings to typed code repository assets, and drive risk to closure through the same TruRisk scoring, Risk Workbench, and MITRE ATT&CK matrix used for every other asset class.
Connector Details
The following table provides a high-level overview of the Claude Security SAST - Generic CSV Import Connector.
| Vendor | Anthropic |
| Product Name | Claude Security |
| Category | Application Security |
| Findings Support | Supported |
| Supported Assets | Code Repository |
| Version | 1.0.0 |
| Integration Type | File-based Import (CSV) |
| Direction | Unidirectional (Claude Security to Qualys ETM) |
| Delta Support | Not Supported |
Configure the Connector
The Generic CSV Import connector setup wizard for Claude Security SAST includes of six steps: Basic Details, Data Mode, Transform Maps, Profile, Scoring, and Review and Confirm. Complete each step in sequence.
Before You Begin - AuthenticationBefore You Begin - Authentication
Complete the following prerequisites before configuring the connector in Qualys ETM.
- Ensure you have access to Claude Security (
claude.ai/security) and permissions to run scans on the target repository. - Run a scan in Claude Security and export the findings as a CSV file. (see Exporting Findings from Claude Security below).
Running a Scan in Claude Security
Claude Security operates on a code repository. To generate findings for import:
- Go to
claude.ai/securityand sign in. - Select or create a project and point it at the target repository.
- Select the branch to scan, and choose a model and effort level.
- Start the scan. The scan generates findings that include severity, location, weakness category, description, and, when available, a CWE mapping.
Findings stored only in a code-scanning tool create an additional data silo. Import it into Qualys ETM to attribute it to a real asset with a real owner, deduplicate it against what the platform already knows, and drive it to closure through the unified TruRisk workflow.
Exporting Findings from Claude Security
After the scan completes, export the findings as a CSV file:
- In Claude Security, open the scan results for your project.
- Click Export or Download findings.
- Select CSV as the export format.
- Save the file to a location accessible from your workstation.
Do not modify the CSV column headers or column order. The Generic CSV Import connector expects the exact format described in the CSV File Format section below.
CSV File Format
The Claude Security export produces a CSV file with the following columns. Fields can be left empty when they do not apply.
| Column | Required | Description |
|---|---|---|
| Severity | Yes | Finding severity level. Accepted values: HIGH, MEDIUM, LOW. |
| Status | Yes | Finding status. Accepted values: Open, Dismissed. |
| Discovery | Yes | Whether the finding is new or recurring. Values: New, Existing. |
| Date created | Yes | Date the finding was identified. Format: YYYY-MM-DD. |
| Category | Yes | Security weakness category (for example: SQL injection, XSS, Weak crypto). |
| Repository | Yes |
Full repository name, including the organization (for example: |
| Branch | Yes | The branch that was scanned (for example: master, main). |
| Name | Yes | Short title of the finding. |
| Description | Yes | Detailed explanation of the security weakness, its location, and its exploitability. |
| File path | Yes | Path to the source file containing the weakness (for example: lib/insecurity.ts). |
| Line | Yes | Line number in the source file where the weakness was detected. |
| Confidence | No | Confidence level of the detection (for example: High, Medium). |
| CWE | No | CWE identifier for the weakness type, if applicable (for example: CWE-89). |
| Finding URL | No | Direct link to the finding in the Claude Security interface. |
| Dismissal reason | No | Reason for dismissal, populated when Status is Dismissed. |
| Dismissal note | No | Additional notes on the dismissal decision, if applicable. |
Fill Basic Connection DetailsFill Basic Connection Details
The Basic Details step defines the connector identity and the Qualys data model to which Claude Security findings will be mapped.
To navigate to the connector setup:
- Sign in to Qualys ETM and go to Connectors > Integration.
- Locate the Generic CSV Import connector in the Connector Marketplace and select Add. You only need to complete this step once.
If the connector is already added, navigate to My Connectors, search for the Generic CSV Import connector, and click Manage Connections.
- Select Proceed to Setup, and then select Create New Connection. (or select an existing connection to edit).
In the Connection Details section, complete the following fields:
| Field | Value / Description |
|---|---|
| Name | A unique display name for this connector instance. Example: Claude-SAST-Import |
| Description | Optional. A brief description of the connector's purpose (up to 164 characters). |
| Qualys Data Model | Select Vulnerability. |
| Qualys Data Model Type | Select Application SAST. |
| Supported Format | Select Claude Security. |
| Preserve Findings Missing in Latest Sync | Check this field to retain findings in ETM that are not present in the most recently uploaded CSV file. |
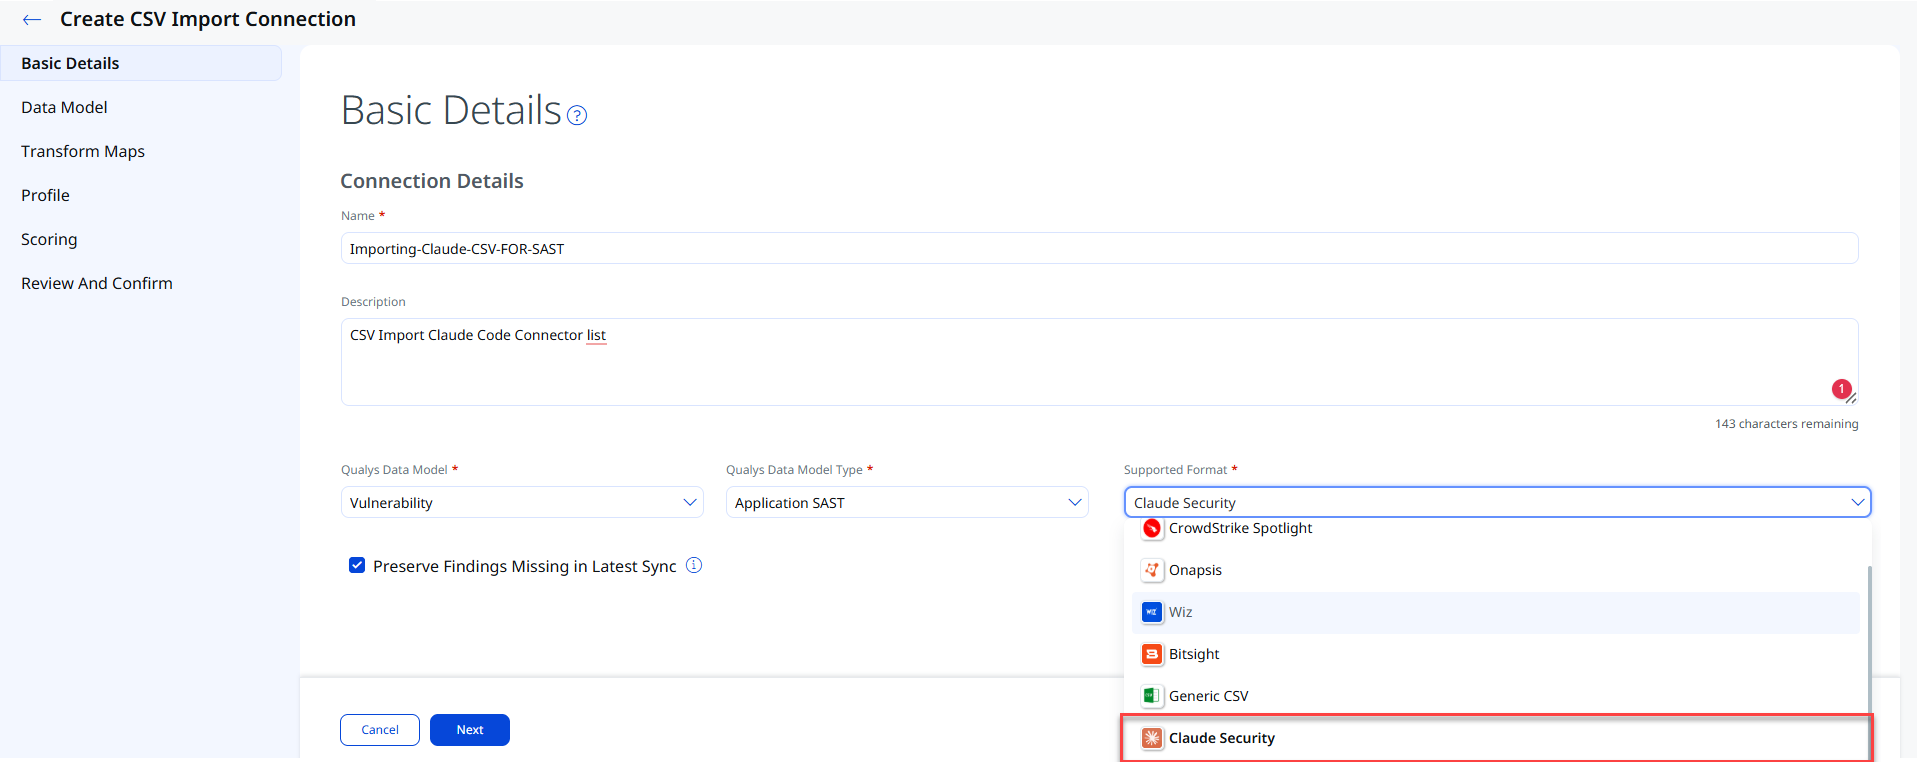
Click Next to proceed.
Create or Choose a Data ModelCreate or Choose a Data Model
The Data Model step determines which data types are imported during each connector run. Confirm that both Assets (Code Repositories) and Vulnerabilities (SAST Findings) are selected to ensure full ingestion.
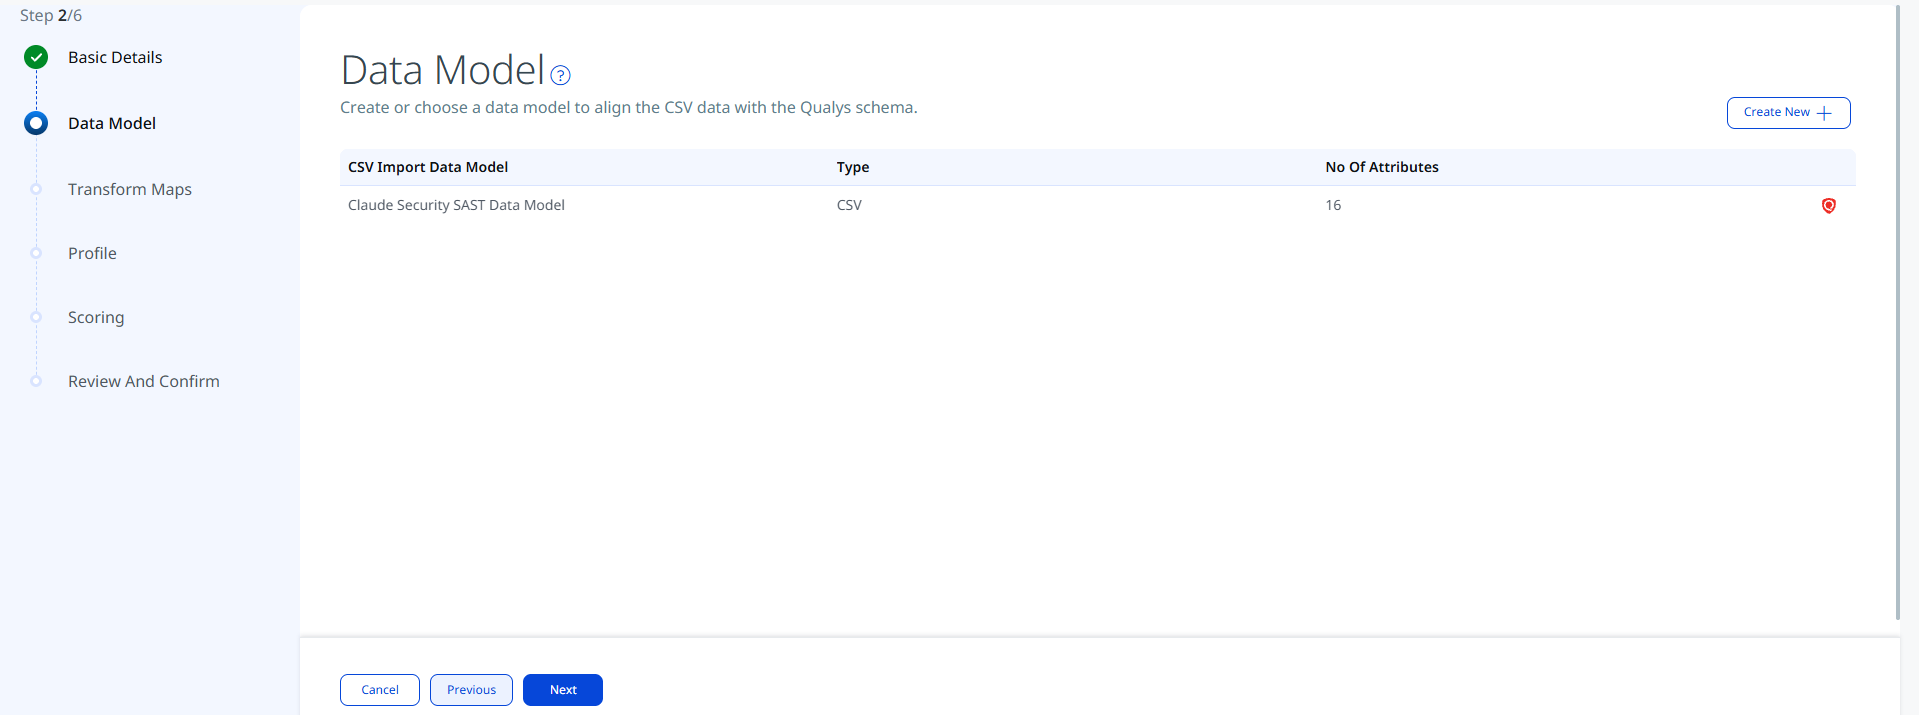
Click Next to proceed.
The Transform Maps step shows the field mapping between the Claude Security CSV columns and the Qualys ETM schema. The default transformation map (Claude Security - Default) is pre-configured and does not require changes for standard imports. For the mapping, refer to Transformation Maps.
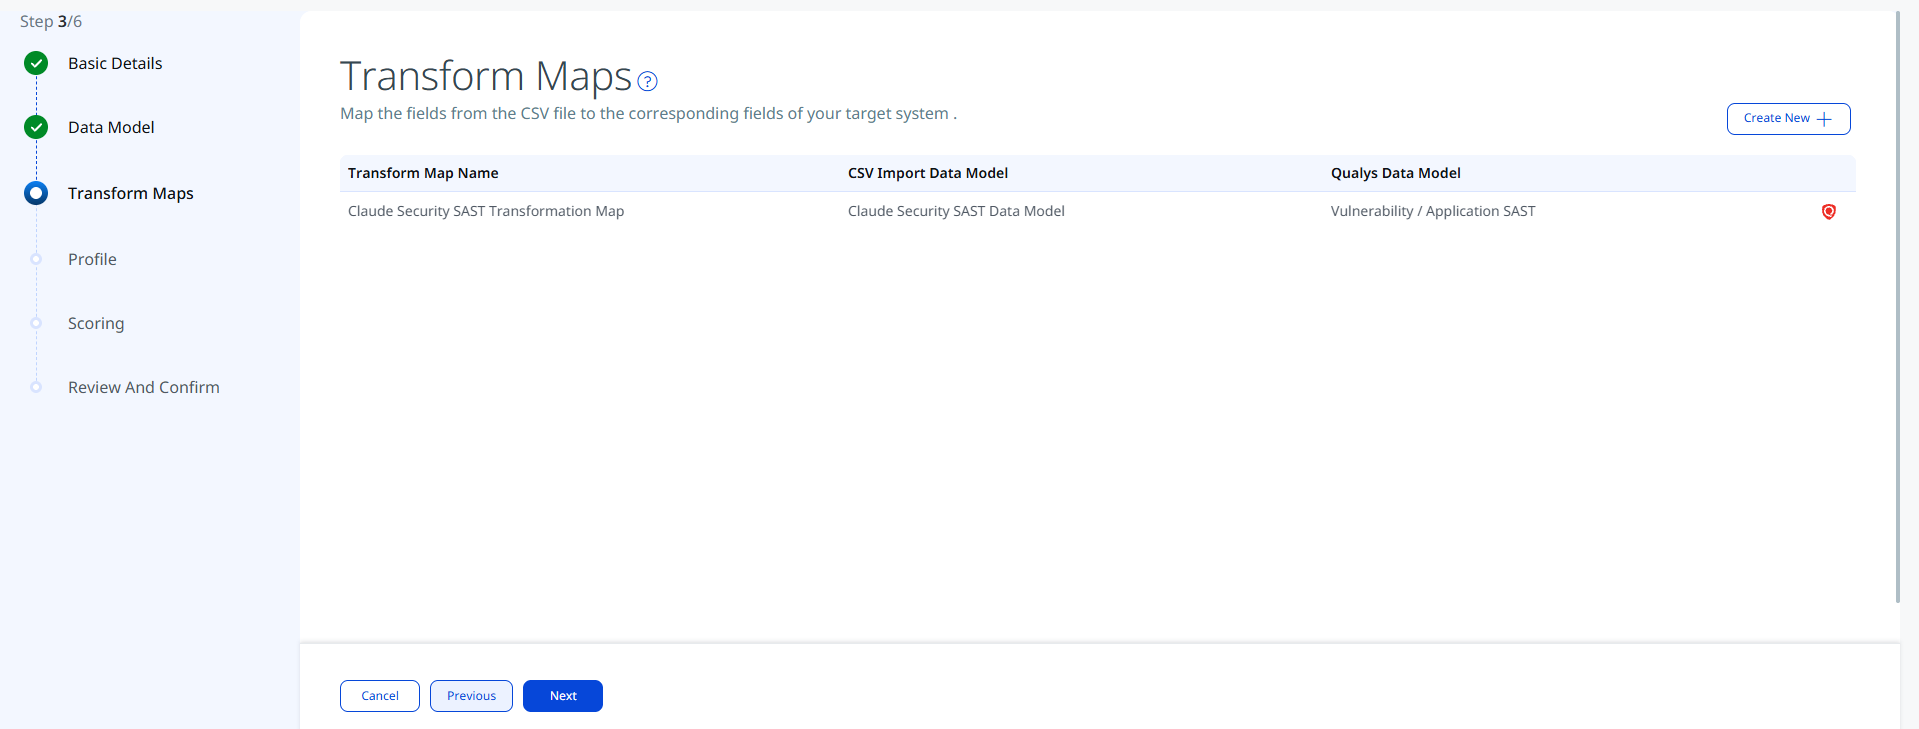
Click Next to proceed.
Configure the Connection ProfileConfigure the Connection Profile
The Profile step allows you to associate the connector with a specific Qualys business unit or asset group for scoping and reporting purposes. Select the appropriate profile or leave it as the default.
| Field | Value / Description |
|---|---|
| Name | A unique display name for the Connection profile. |
| Description | (Optional) A brief description for the profile. |
| Transform Map | Select the required transform map from the list. |
| Status | Select Active or Inactive. |
| Create assets that don't exist in Qualys | If selected, the connector creates and imports assets that do not already exist in Qualys. |
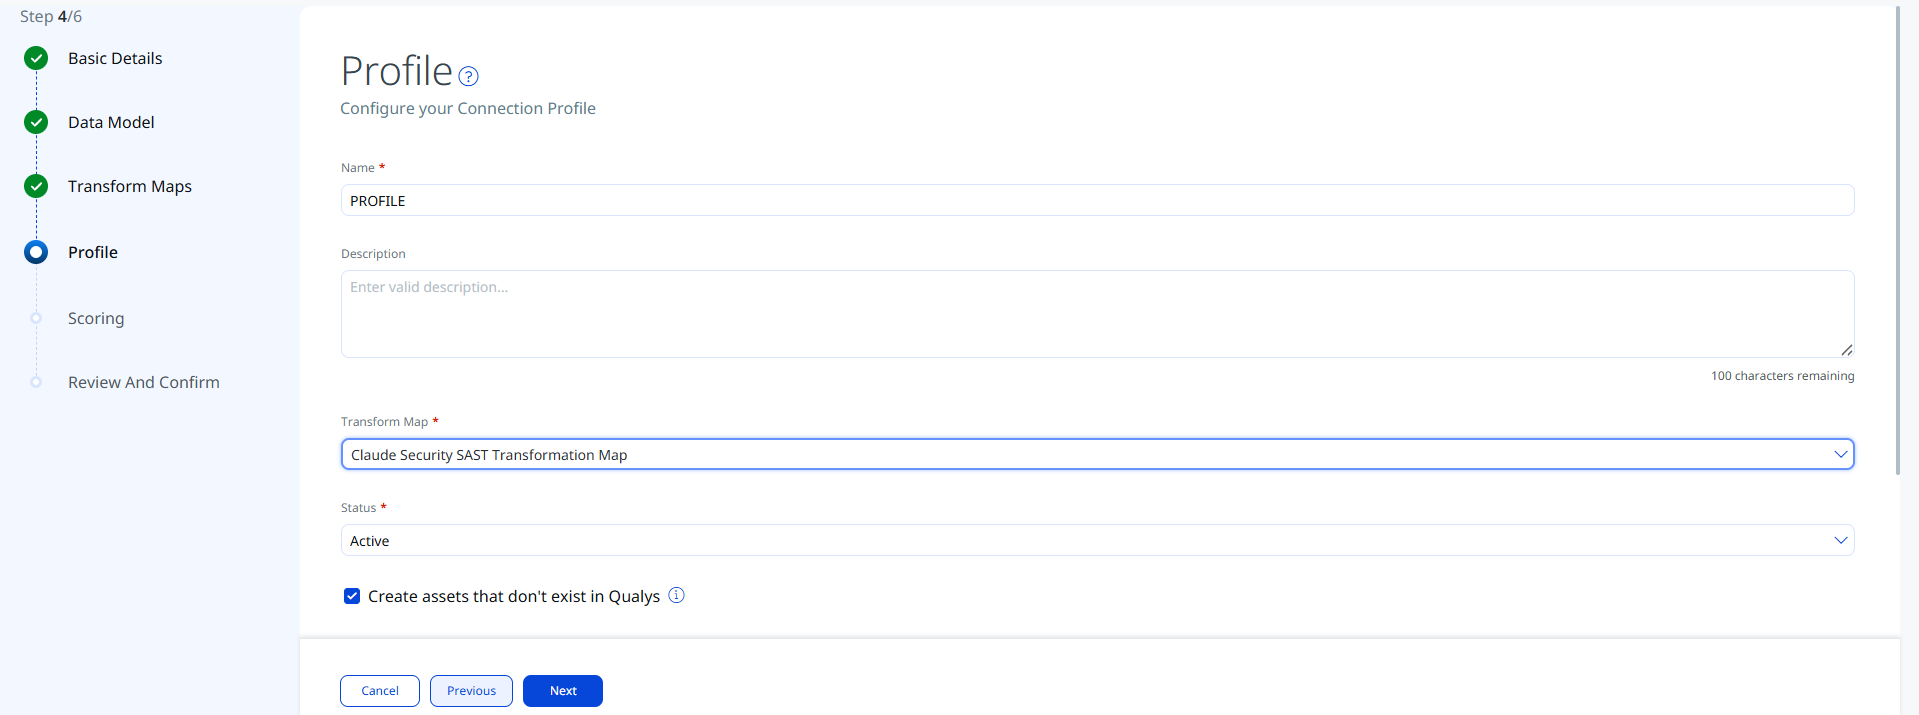
Click Next to proceed.
The Scoring step configures how TruRisk calculates scores for imported findings. The default QVSS-based scoring model applies to all Application SAST findings. Adjust scoring overrides here if your organization uses custom risk weights.

| Expected Source Value | Severity | QDS Score (Range 1–10) |
|---|---|---|
| 1 | 1 | 2 |
| 2 | 2 | 4 |
| 3 | 3 | 6 |
| 4 | 4 | 8 |
| 5 | 5 | 10 |
The default severity is 3. This value is used when a finding does not include a severity value.
Click Next to proceed to Step 6.
Review and Confirm the ConnectionReview and Confirm the Connection
Review the connection, then click the Create button.

Upload the CSV FileUpload the CSV File
After the connector is created, import your Claude Security CSV export:
- Navigate to Connectors > Integration and locate your Claude-SAST-Import connector.
- Click Run Now from the Quick Actions menu and Upload File.
- Select the CSV file exported from Claude Security.
- Click Upload. The connector begins processing the file after the upload completes.
Each upload performs a full import. If Preserve Findings Missing in Latest Sync is enabled, findings from previous uploads that are absent in the new file are retained in ETM with their existing status. If it is disabled, those findings are closed.
How the Connection Works
When the connector processes a Claude Security CSV file, it goes through the following stages in Qualys ETM:
Connector States
A successfully configured connector transitions through the following states:
- Registered — The connector is successfully created and registered.
- Scheduled — The connector is queued and waiting for a file upload or scheduled run.
- Processing — The connector is actively parsing the CSV and ingesting asset and findings data.
- Processed — The connector has successfully imported assets. Findings might still be importing.
The initial synchronization process, including both asset and findings import, may take up to 2 hours to complete after the connector first reaches the Processed state.
Viewing Assets and Findings in ETM
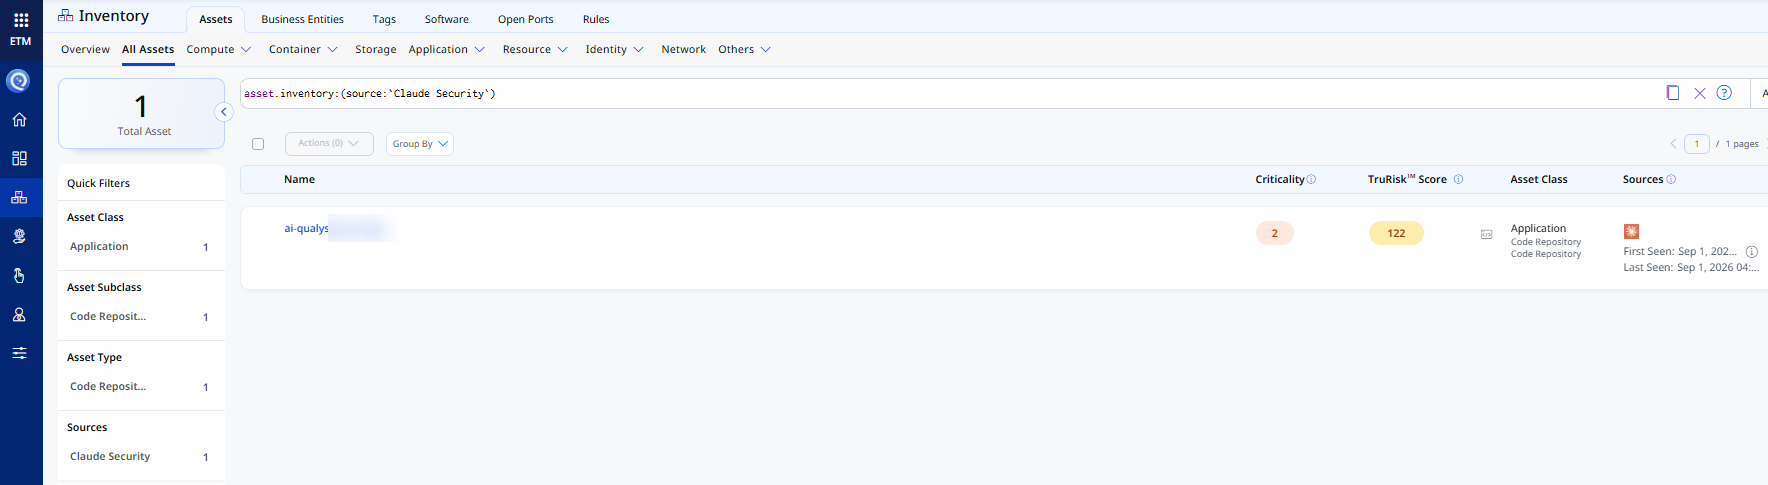
- Assets: Navigate to Enterprise TruRisk Management > Inventory > Assets > Application > Other Applications to view imported Claude Security code repository assets.
Use the following inventory filter to view only Claude Security assets:inventory:(source:"Claude Security").
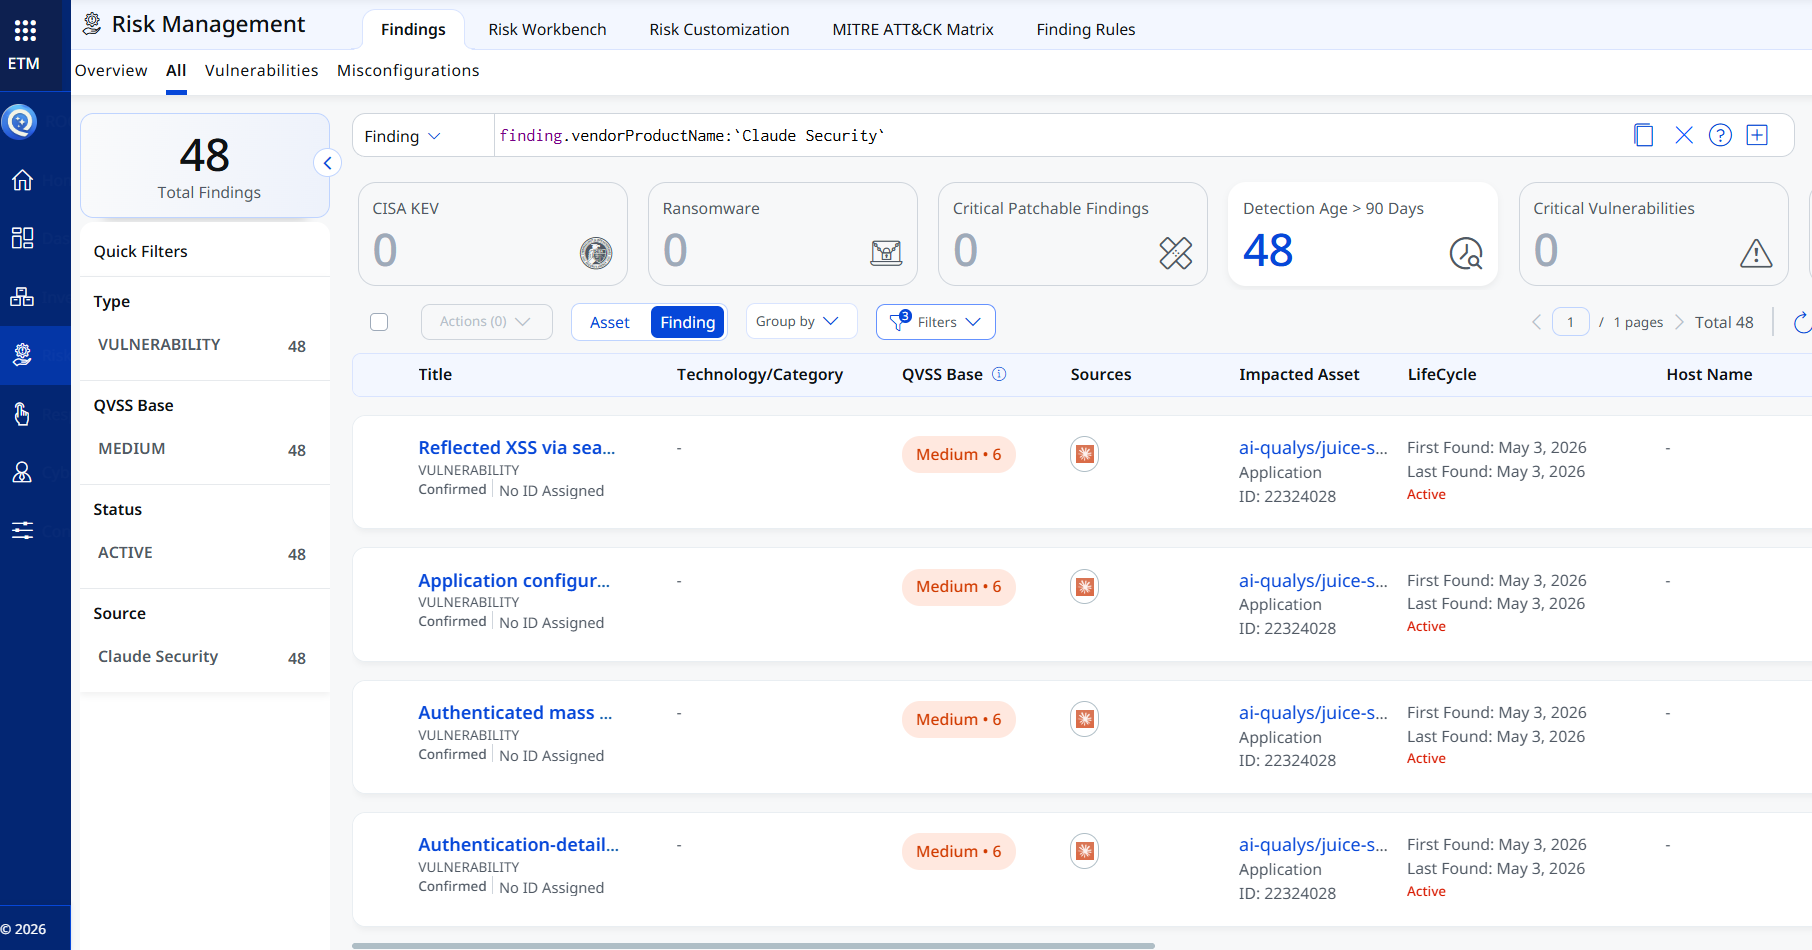
- Findings: Navigate to Risk Management > Findings > Vulnerability to view imported SAST findings.
Use the following filter to view only Claude Security findings:findings.vendorProductname:"Claude Security".
Troubleshooting
Use the following table to diagnose and resolve common issues.
| Issue | Resolution |
|---|---|
| CSV upload fails with format error | Verify that the CSV column headers match exactly the format exported by Claude Security. Do not rename, reorder, or remove columns. Ensure the file is UTF-8 encoded and saved as .csv. |
| No assets appear in ETM after upload | Check that the Repository column is populated for every row. This column is used to create the Code Repository asset. If the column is empty, no asset can be created and no findings will be imported. Wait up to 2 hours after upload before checking again. |
| No findings imported after first run | The connector transitions through Registered, Scheduled, Processing, and Processed states. The full import process may take up to 2 hours. The Processed state confirms assets have been fetched, but findings may continue importing in the background. |
| Findings from previous uploads disappeared | Verify that Preserve Findings Missing in Latest Sync is enabled on the connector. If this option is disabled, findings absent from the most recent CSV are closed automatically. |
| Connector not visible in the Integrations list | The Generic CSV Import connector requires activation on your Qualys account. Contact your TAM or Qualys Support to activate it for your subscription. |
| Severity or status values not mapped correctly | Confirm that Severity values in the CSV are exactly HIGH, MEDIUM, or LOW (uppercase) and that Status values are Open or Dismissed. Other values may not map to the ETM schema correctly. |
Transformation Maps
Claude Security SAST Transformation MapsClaude Security SAST Transformation Maps
| CSV Column (Source Field) | ETM Schema (Target Field) |
|---|---|
Repository |
externalAssetId / assetDetail.name |
Name |
findings[].name |
Severity |
findingGroup.findings[].severity |
Status |
findingGroup.findings[].findingStatus |
Date created |
findingGroup.findings[].firstFoundOn / lastFoundOn |
CWE |
findings[].finding_details.cwe.id |
Category |
findings[].finding_details.category |
File path |
findings[].finding_details.file_path |
Line |
findings[].finding_details.line_number |
Description |
findings[].description |
Branch |
assetDetail.branch |