Creating a role
You can create a role and assign the related permissions to grant access to the required application. You can assign the role to the required user on the Role Management tab.
There are pre-defined roles with default permissions that provide access to applications such as WAS, AV, CSAM, PM, and so on.
For more information on default roles and related permissions for each application, see Default Roles and Permissions.
Create a role
1. Go to Users > Role Management tab and click New Role. The Role Creation window is displayed.
2. On the Role Details tab, enter the Name and Description for the role.
3. On the Permissions tab, perform the following:
a. Select the UI Access and API Access checkboxes per your requirements.
b. Select the application from the list you want this role to access.
c. For the application added, click Change and expand the list of permission groups.
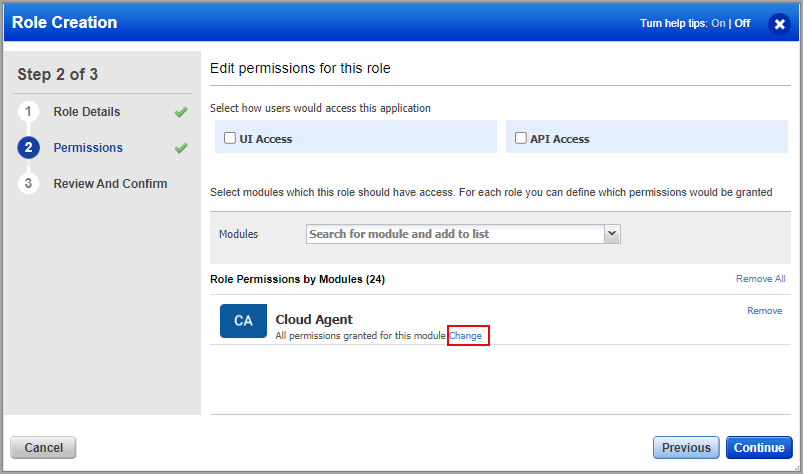
d. Select the checkboxes for the required permissions and click Continue.
4. Review the selected permissions and click Finish.
A success message is displayed about the role creation. The created role can be viewed under the Roles > Role Management dashboard.
You can edit, add, and remove permissions for the role. For more information, see Managing Roles and Permissions.