Risk Acceptance Rules in ETM
A Risk Acceptance Rule allows you to acknowledge certain vulnerability risks without immediately remediating them. This may be due to effective mitigation controls or an internal agreement classifying the vulnerabilities as accepted risks or false positives.
Prerequisite
This feature is available on request; contact support to activate this feature.
Create Exception Rule
You can create this rule from the Responses tab.
- Go to the Responses tab > Risk Acceptance Rules > Create Exception.
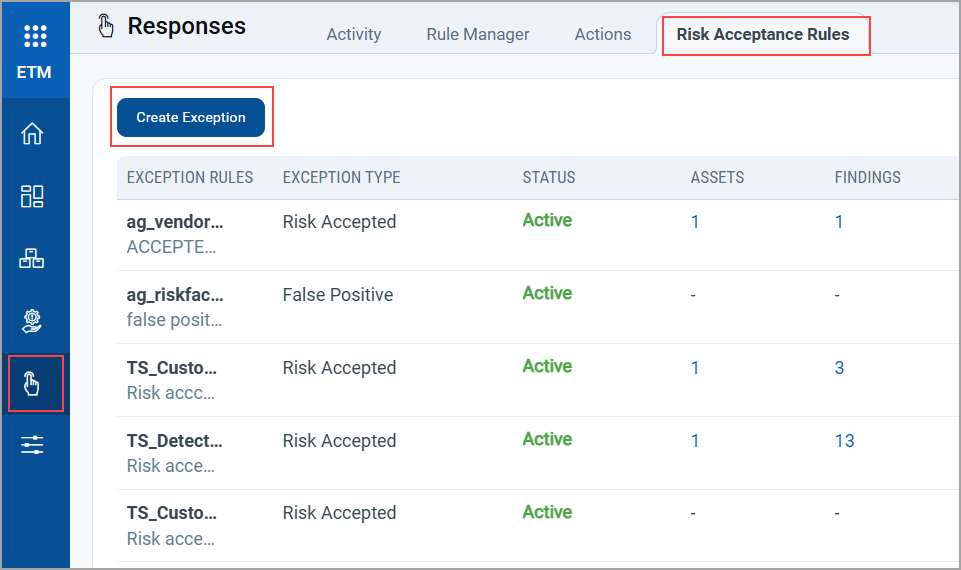
A Create New : Risk Acceptance Rules window is displayed.
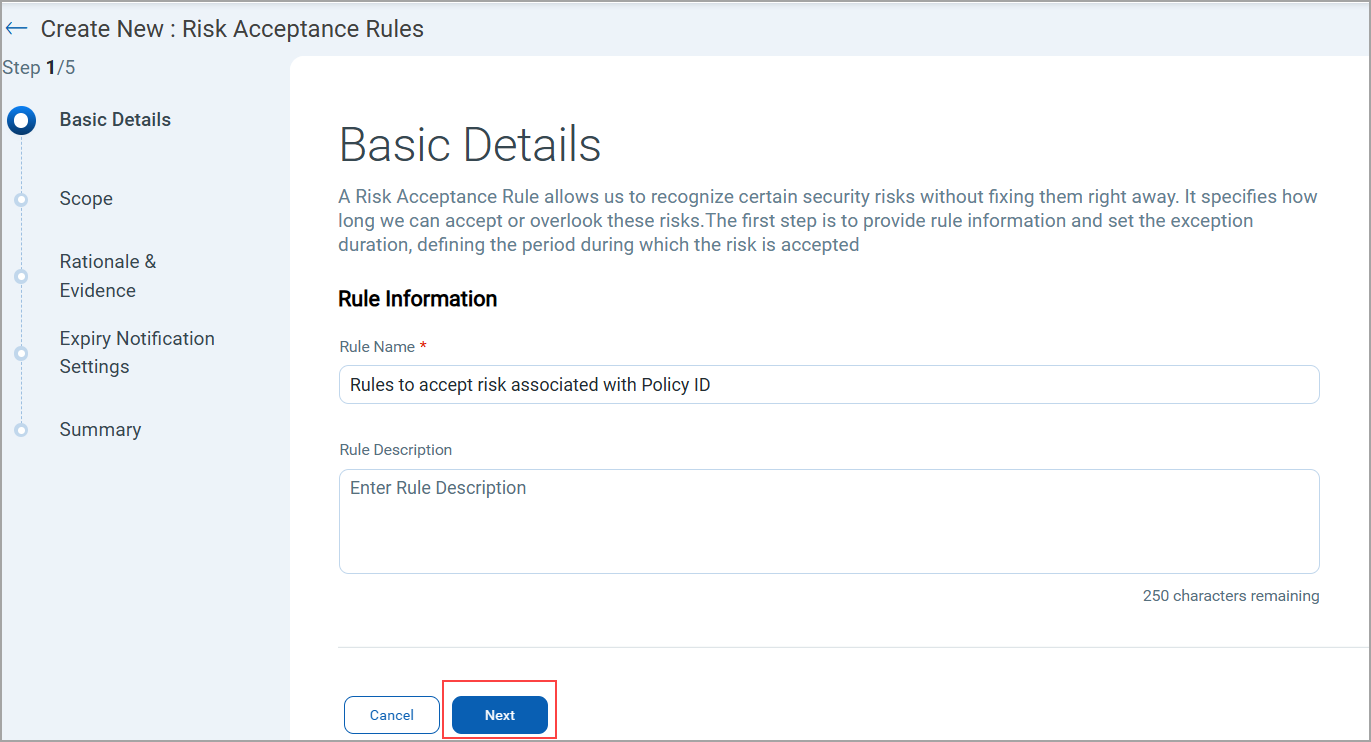
- In the Basic Details page, enter the Rule Information, such as the Rule Name and Rule Description, and click Next.
- In the Scope Page, enter QQL queries to define the scope of the acceptance rule and validate your query.
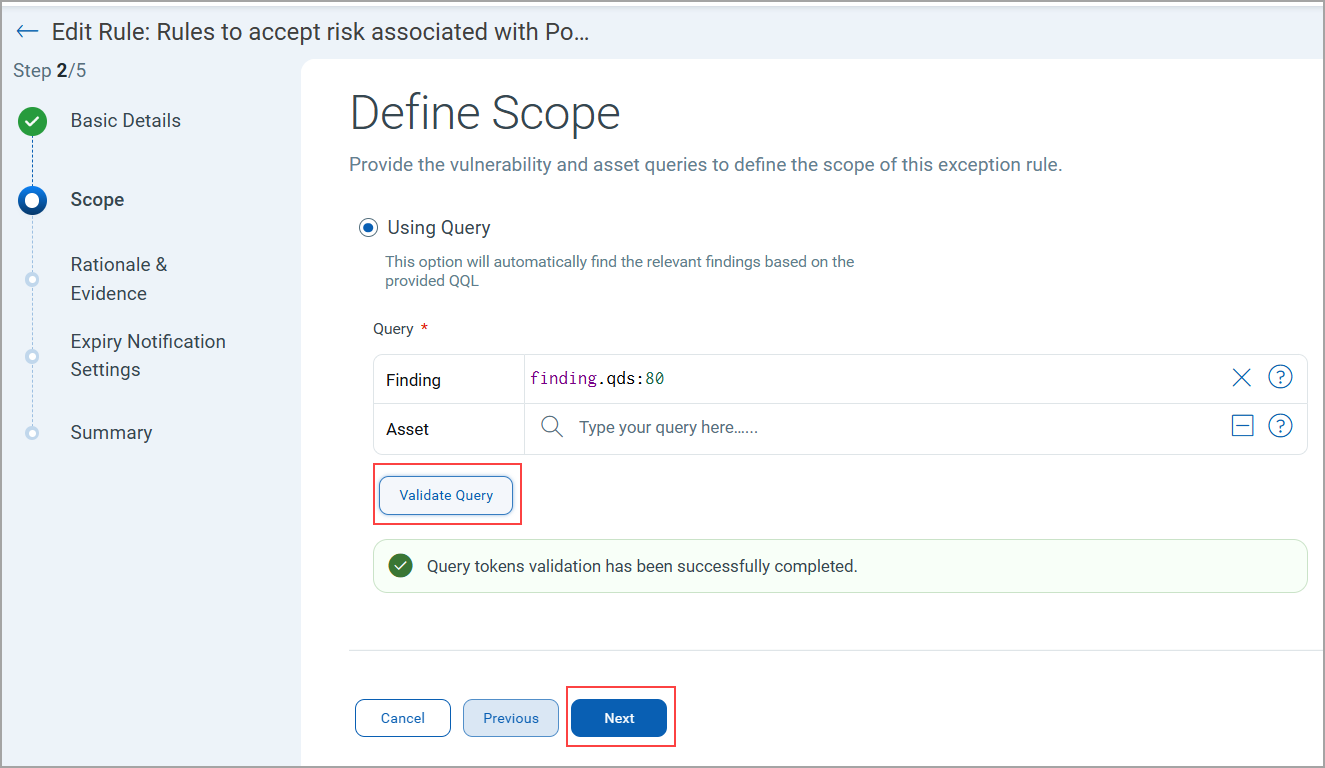
Vulnerability queries are mandatory.
Queries for Defining Scope
You can use the following tokens for defining the scope. To know more about these tokens refer to Search Tokens for Findings
Findings Assets finding.idfinding.titlefinding.descriptionfinding.qdsfinding.typefinding.subTypefinding.severityfinding.statusfinding.vendorNamefinding.reopenedDatefinding.portfinding.protocolfinding.vendorProductNamefinding.firstFoundDatefinding.isDisabledfinding.isIgnoredfinding.sourceIdfinding.cveIdfinding.riskFactor.exploitCodeMaturityfinding.riskFactor.threatActorNamefinding.riskFactor.isCisaKnownExploitfinding.riskFactor.malwareNamefinding.riskFactor.rtifinding.cvss2BaseScorefinding.cvss2TemporalScorefinding.cvss3BaseScorefinding.cvss3TemporalScorefinding.connectionNamefinding.connectionUuidfinding.ingestedDatefinding.detectionAgefinding.typeDetectedfinding.lastFoundDatefinding.customNumber1finding.customNumber2finding.customNumber3finding.customNumber4finding.customNumber5finding.epssScorefinding.cweIdfinding.owaspTopTenNamefinding.mitre.attack.technique.namefinding.mitre.attack.technique.idfinding.mitre.attack.tactic.namefinding.mitre.attack.subTechnique.idfinding.mitre.attack.subTechnique.namefinding.externalFindingIdfinding.isPatchAvailablefinding.isQualysPatchablefinding.policyIdfinding.product.vendorIdfinding.product.versionfinding.isExploitAvailablefinding.detectionMethodfinding.mitre.attack.tactic.idfinding.ruleNamefinding.technologyCategoryfinding.technologyNamefinding.ttrfinding.ttdfinding.product.vendor
asset.idasset.nameasset.operatingSystemasset.truRiskasset.criticalityScoreasset.tag.nameasset.typeoperatingSystem.versionoperatingSystem.architectureoperatingSystem.category1operatingSystem.category2
- Once you define your queries, click Next
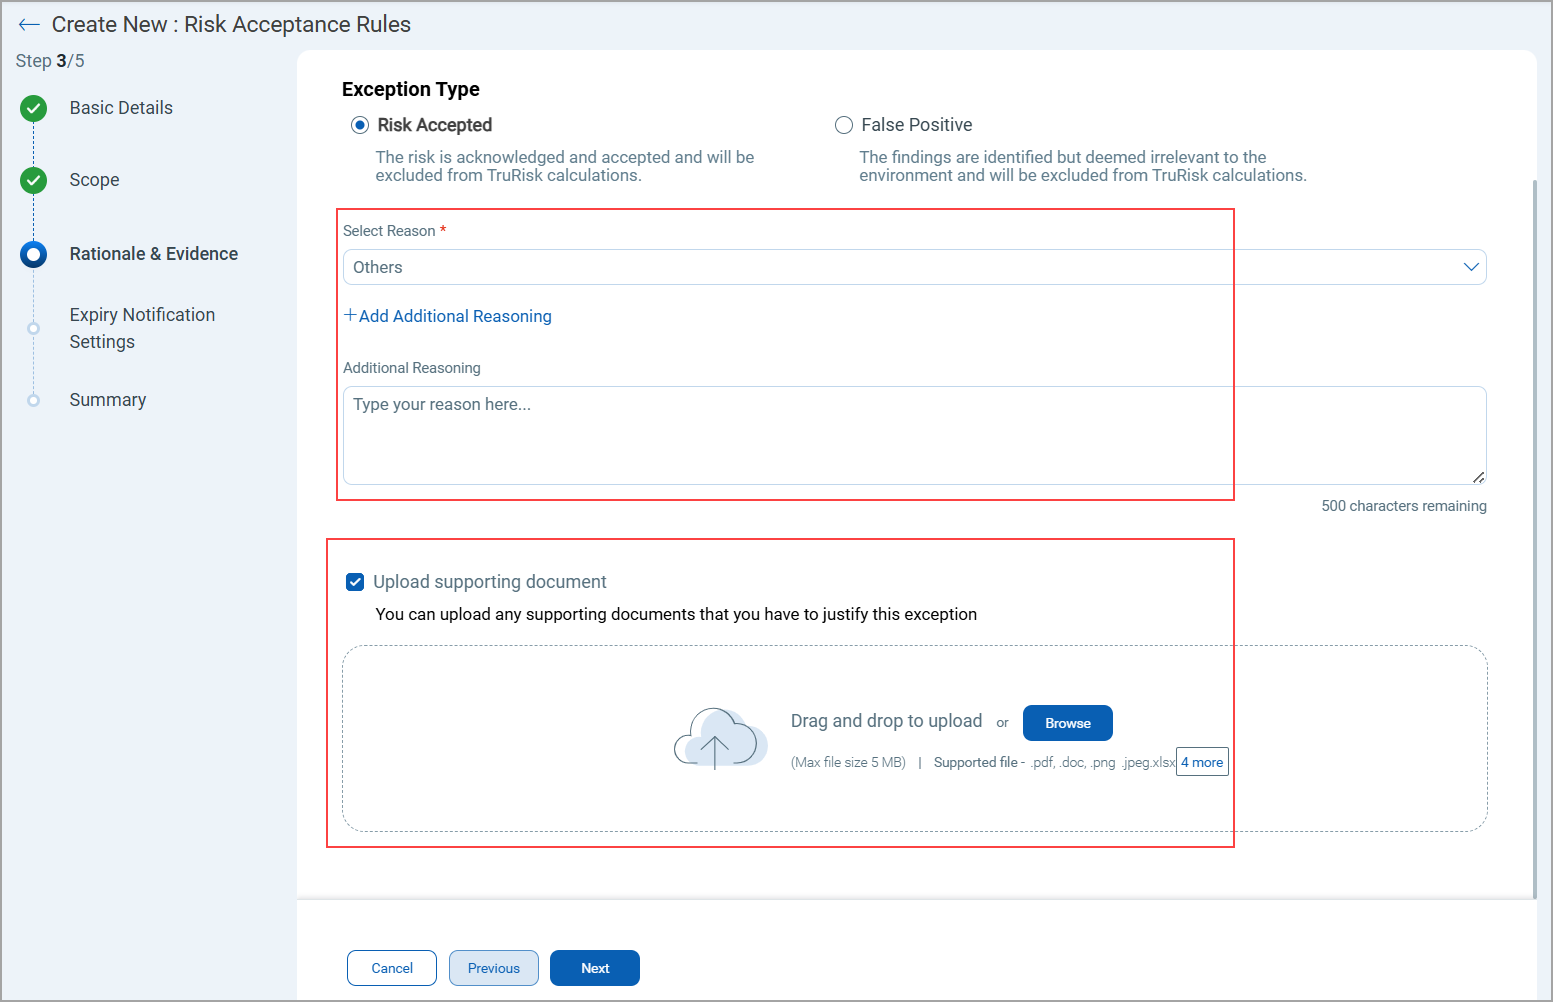
- On the Rational & Evidence page, select the Exception Type as Risk Accepted or False Positive and click Next.
Explain why this risk is accepted or does not apply to your environment.
If you choose Risk Accepted, you are acknowledging and accepting the risk, and it will be excluded from TruRisk™ calculations.
If you choose False Positive, it means that although findings will be identified, they will be deemed irrelevant to the environment and excluded from TruRisk™ calculations.There are now two options:
- System-Defined Reasons
Select from a predefined list of system-generated reasons for accepting a risk.
Examples: Legacy system dependency, Patch not available, and so on.
- Additional Custom Reason
Optionally, provide your own detailed explanation in addition to the predefined reason.
You can now upload supporting evidence to justify their risk acceptance decisions.
- Supported file types: PDF, TXT, xlsx or image formats (jpeg)
- Maximum file size: 5 MB
- System-Defined Reasons
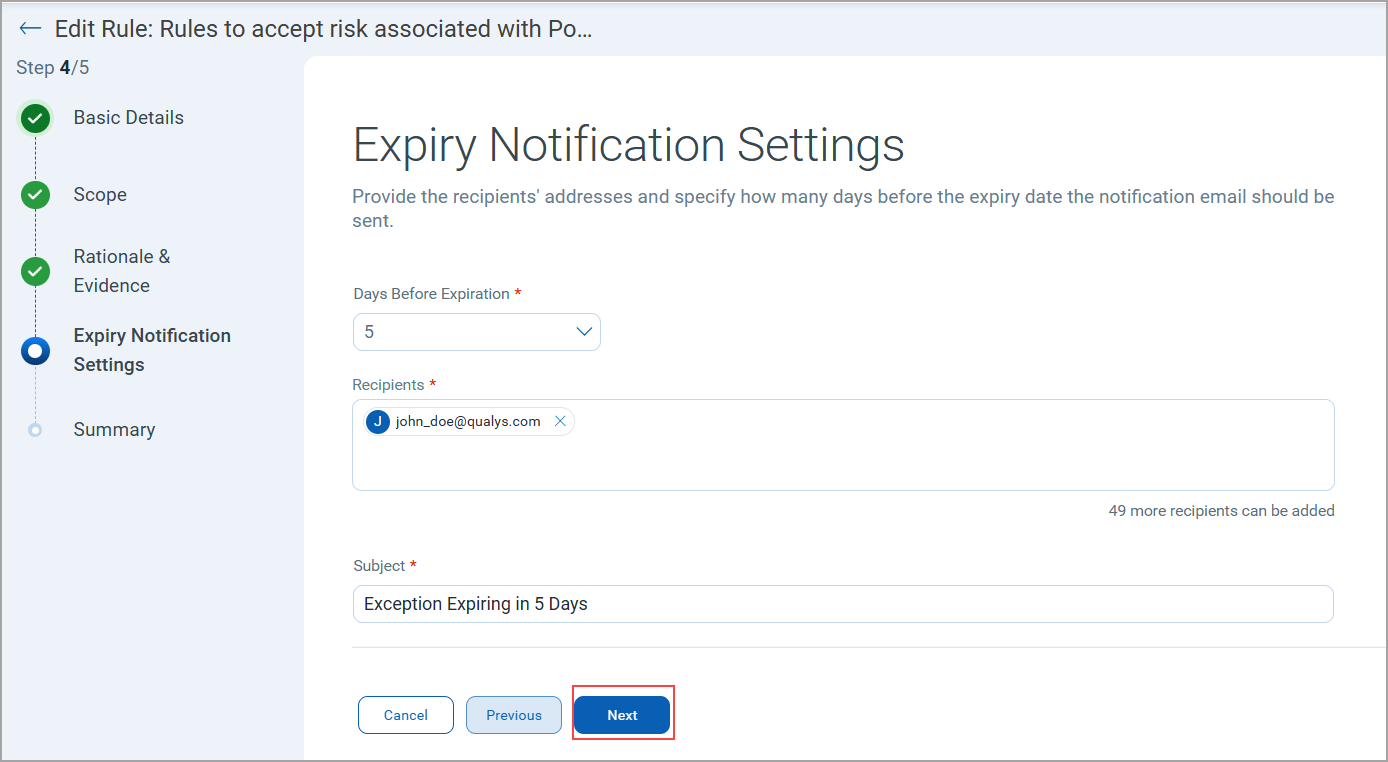
- Define Expiry Notification Settings.
Configure when and to whom expiry notifications should be sent.
Recipients: Provide the email addresses of recipients who should receive the notification.
Days Before Exception: Specify the number of days before expiry when the notification email should be sent.Subject: Provide the subject to notify about the mail
- On the Summary page, review all the information provided and confirm your configuration, and click Save.
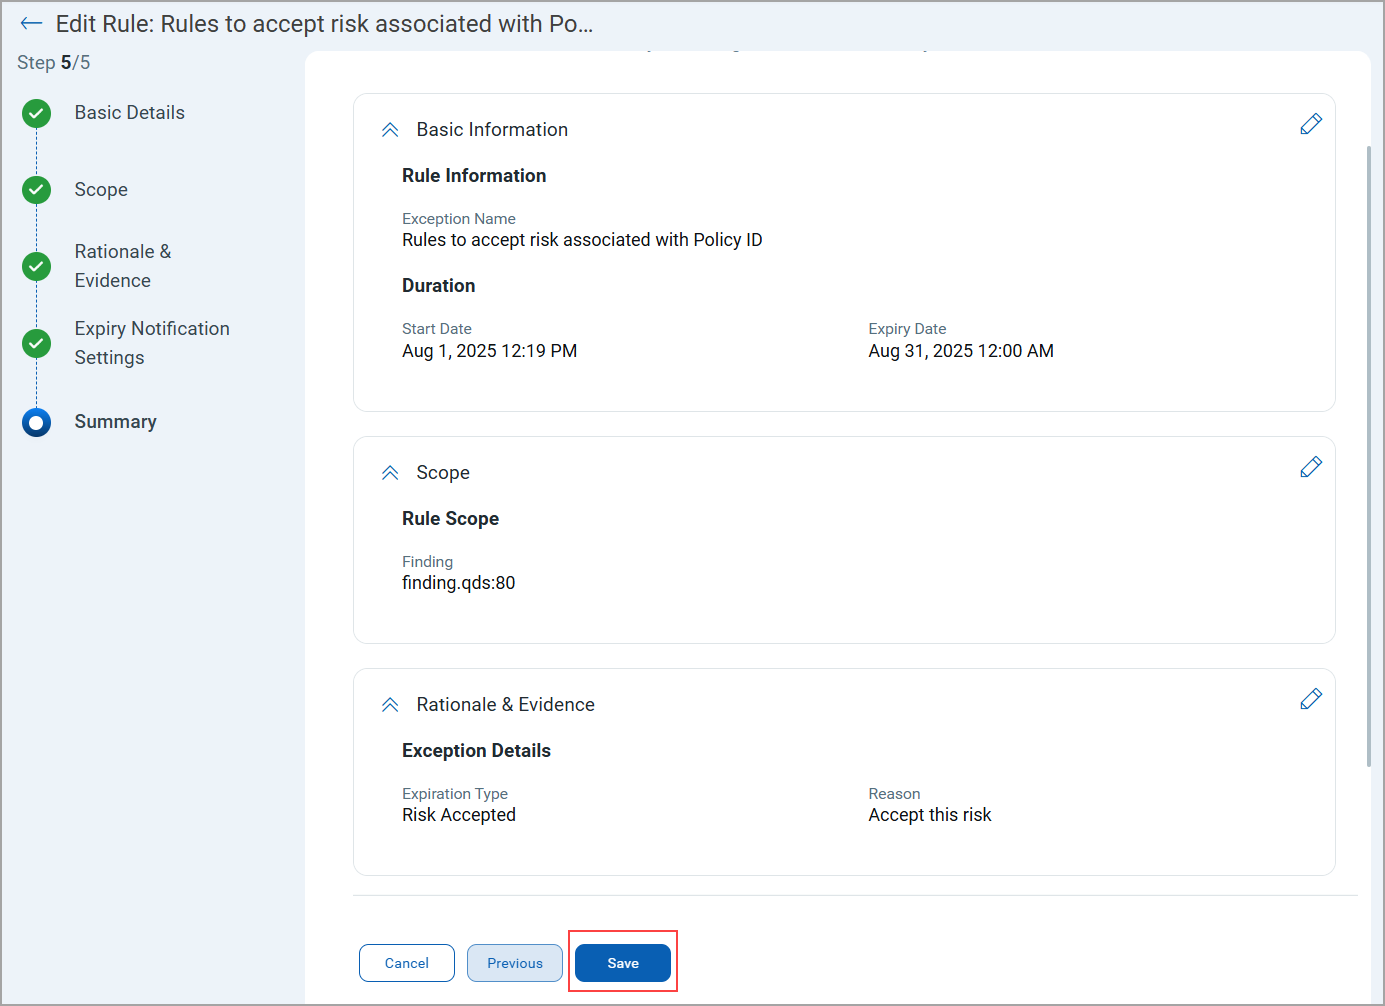
Once created, the exception rule is listed on the Risk Acceptance Rule page.
A risk acceptance rule is applied only after a scan runs; it is not enforced immediately upon creation.
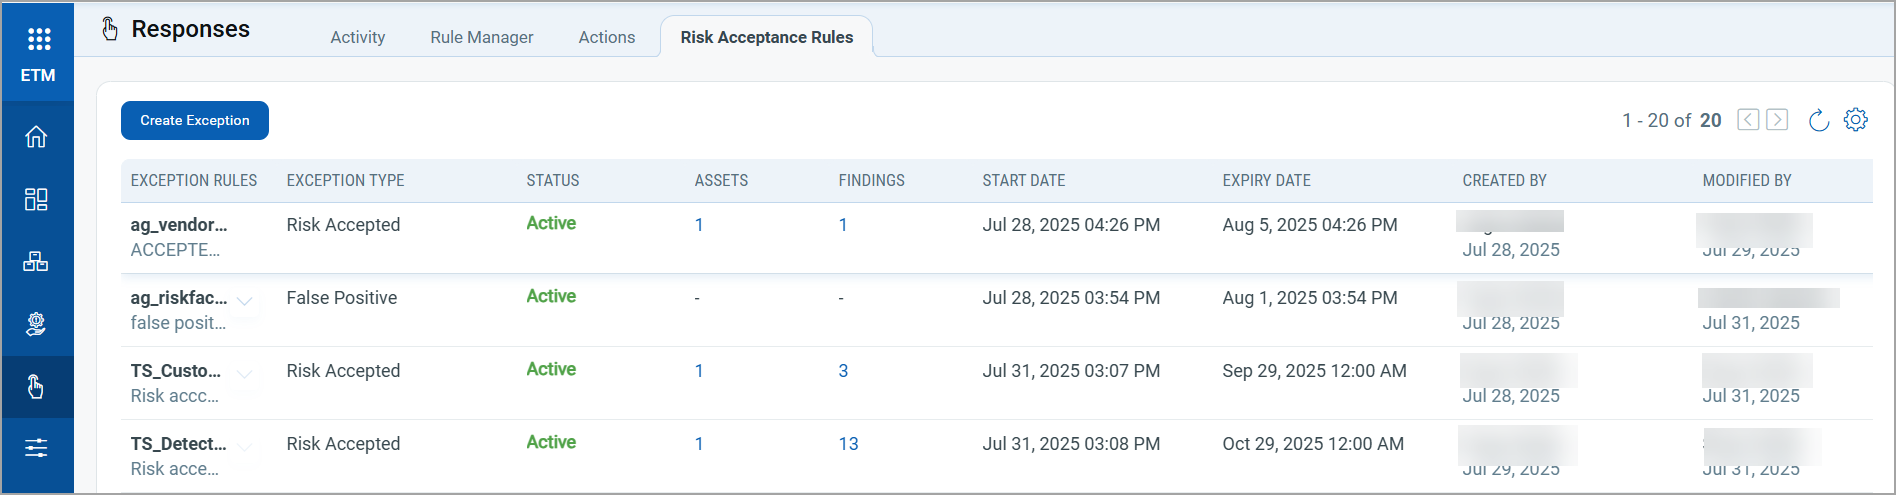
Status of the Acceptance rule is Active, Pending or Expired.
Approval Workflow for Sub-Users
A new Approval Flow is introduced to manage rules created by Sub-Users.
How It Works
- When a sub-user creates a new rule, it does not activate immediately.
- The rule first moves to a Pending Approval state.
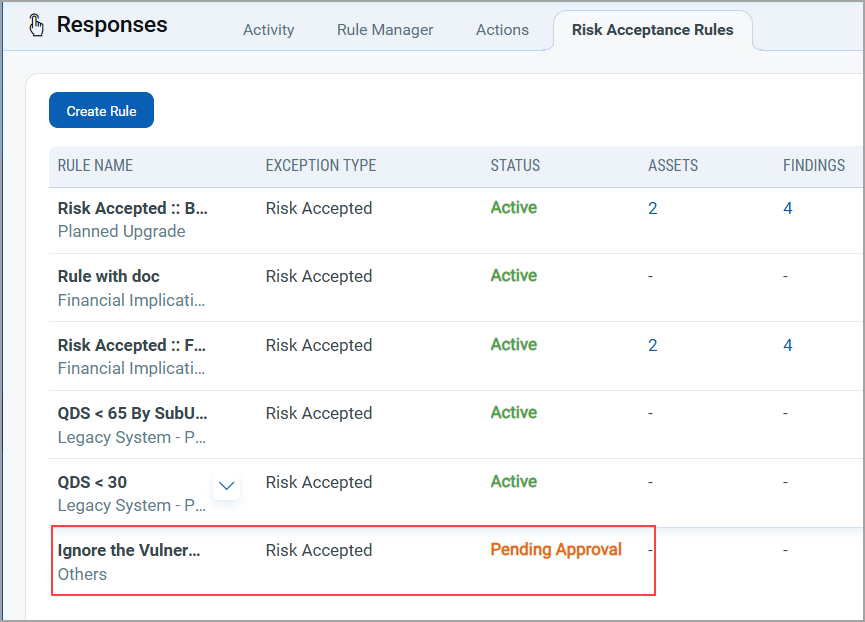
- The Manager can view the rule and choose to approve or reject the request.
Approval Actions
- Approve
The manager can view the rule created by sub user with Pending Approval Status and can approve a rule from Quick Actions menu. Once approved, the rule automatically moves to the Active state.
- Reject
When rejecting, the manager must provide a rejection reason.
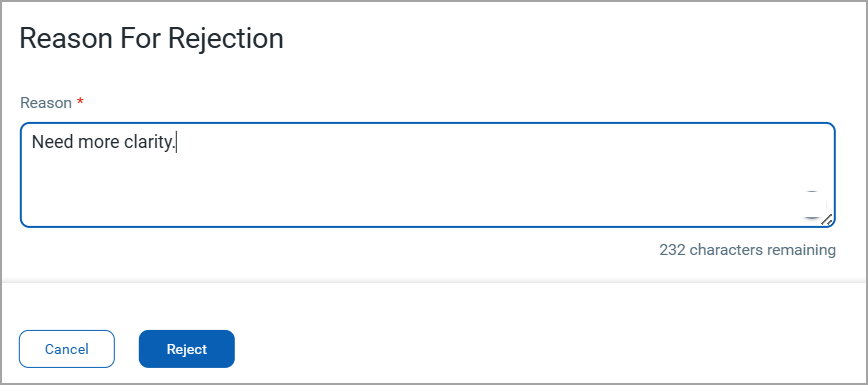
- The rejection reason is displayed as a tool tip or message in the rule list.

Permission Required for Creating Risk Acceptance Rules
The following permissions are updated for Manager Users and Sub-Users
- Manager Users can:
- Create and activate rules directly.
- Update, or delete exception rules
- Review, approve, or reject rules submitted by sub-users.
-
Sub-users must have the following specific Risk Acceptance permissions in VM application:
- Allow Exception Create/Update/Delete.
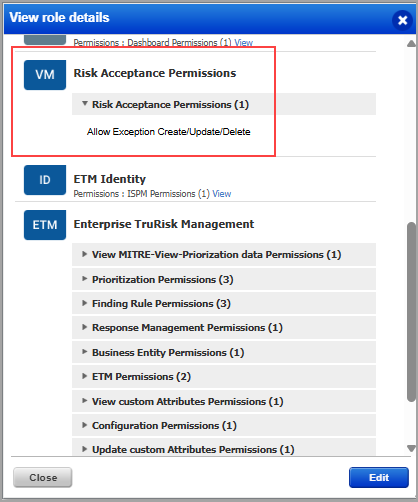
- If this permission is not assigned, the Risk Acceptance tab remains inaccessible.
- Allow Exception Create/Update/Delete.
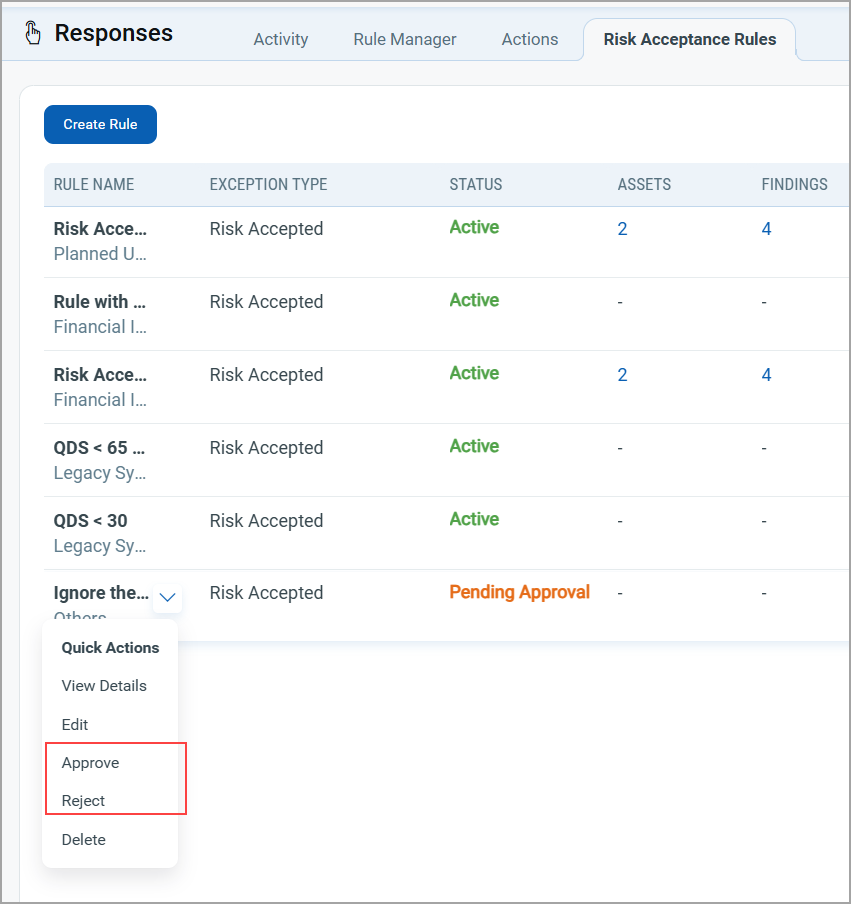
Quick Actions Menu
To perform various actions on your acceptance rule, you can use the Quick Actions menu of the acceptance rule. The following image illustrates a manager's Quick Actions menu.
- View Details: Access the details of the rule. This option is read-only.
- Edit the Rule: Modify the rule according to your needs.
- Approve: Approve the rule.
- Reject: Reject the rule if not suitable
- Delete: Remove any rule that is no longer needed.
- Changes to a risk acceptance rule take effect 12 hours after editing, regardless of when the last scan was run.
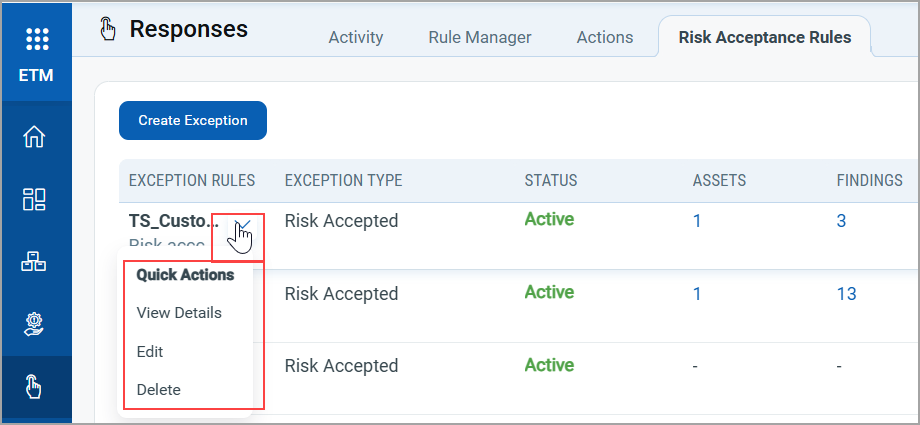
- The sub users have the options to view details, edit, and delete items in the Quick Actions menu.