Network Devices
Network Devices are the assets on which Qualys Agent can not be installed; however, they can be monitored remotely with Qualys Scanner.
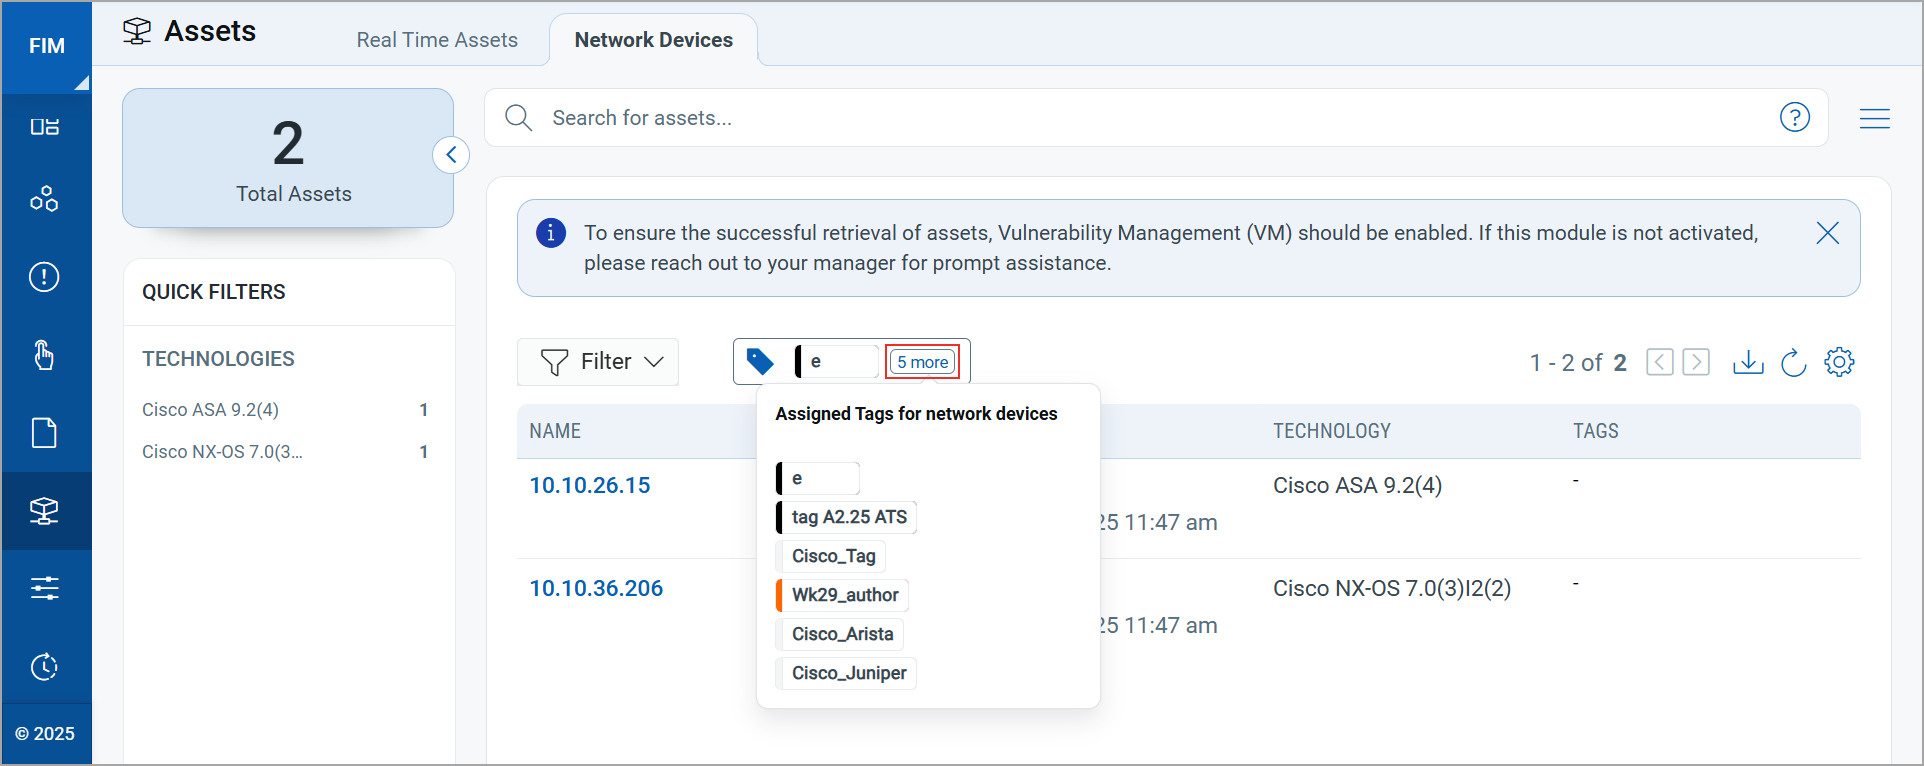
The Network Devices page displays the asset details such as Name, Last Scanned Date, Technology, and Tags. You can add network assets using tags. These tags are displayed from the CSAM/GAV module.
Vulnerability Management is an integral part of configuring network assets as these are monitored through VM Scans.
Prerequisites
- Account with Vulnerability Management and Global Asset View/CSAM along with the licensed or trial version of FIM.
If you can see assets in Asset View but not in Global Asset View/CSAM, contact your Technical Account Manager.
- The Minimum Vulnerability Signature required is VULNSIGS-2.6.103-2.
To monitor the network assets for any network configuration change, you need to begin with the configuration of network assets on FIM.
Configure the Network Assets on FIM
To configure the network assets, follow these steps
- Navigate to Assets > Network Devices.
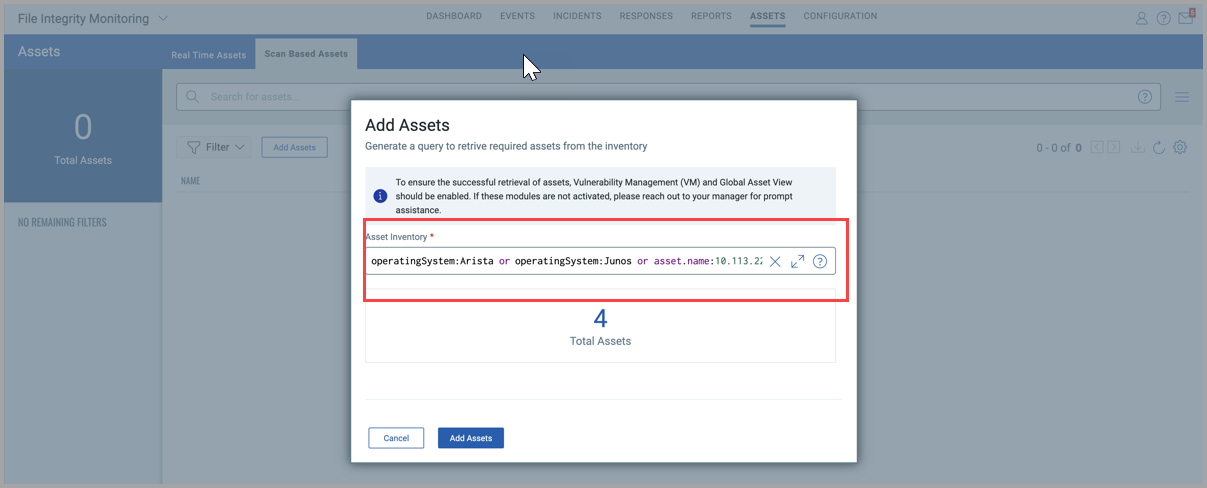
- Click Add Assets to add assets using tags.
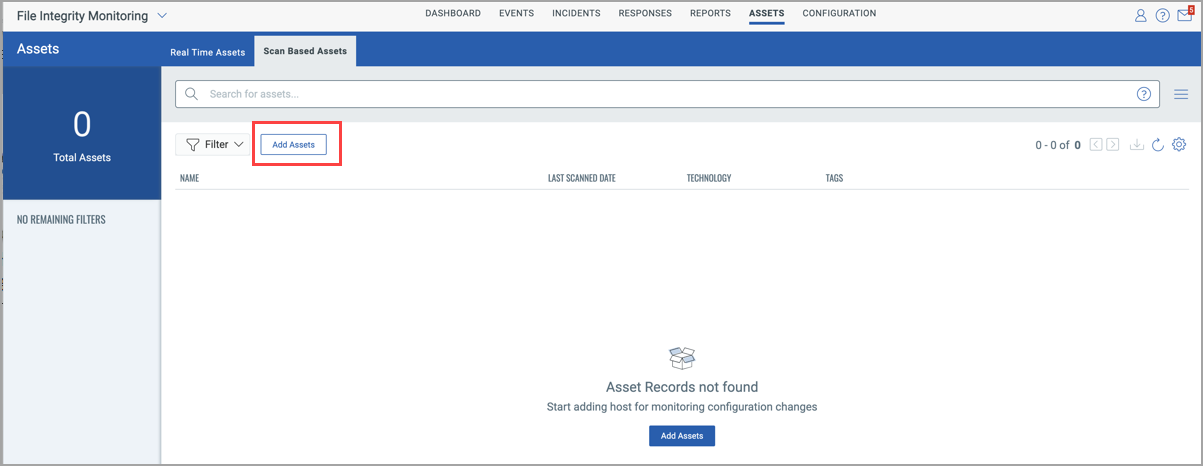
The Select Tags window is displayed.
- Select the required tags and click Add Tag.
The tags displayed for selection are based on the user's scope. You can add all tags that are in your scope.
The assets associated with the tags are added to the FIM inventory. You can view all the selected tags by clicking more on the Network Devices tab.
- Click
 to view the tags and their sync statuses.
The following are the various tag sync statuses:
- Draft: Tag sync is in queue.
- In Progress: Asset fetching is in progress.
- Completed: All associated assets are fetched.
- Failed: Failed to fetch all associated assets.
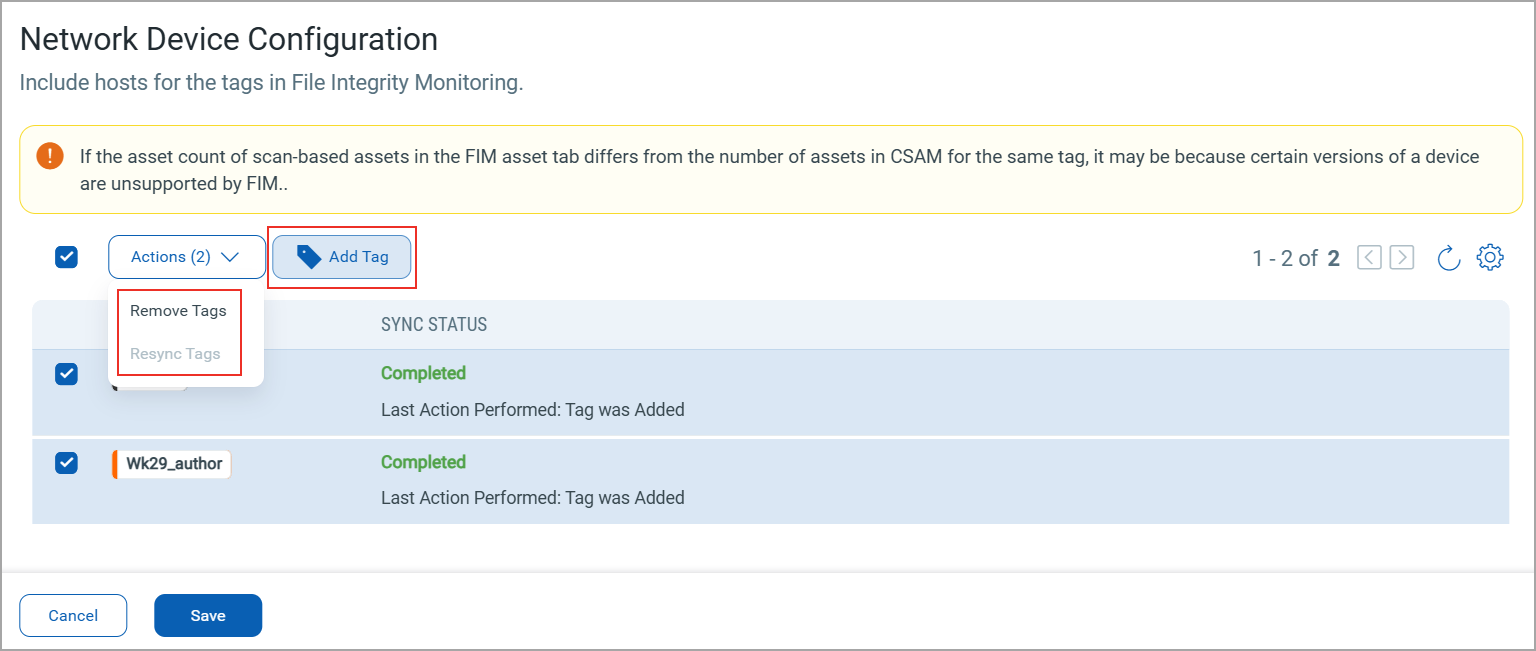
You can add more tags, remove unnecessary tags, or re-sync the tags which are in Failed status.
-
Click Save.
Next, go to Vulnerability Management application, create Search Lists, Option Profiles, and Configure a scheduled scan.
Create Search Lists
Follow these steps to create search lists.
- Go to VM/VMDR > KnowledgeBase > Search Lists > New > Static List.
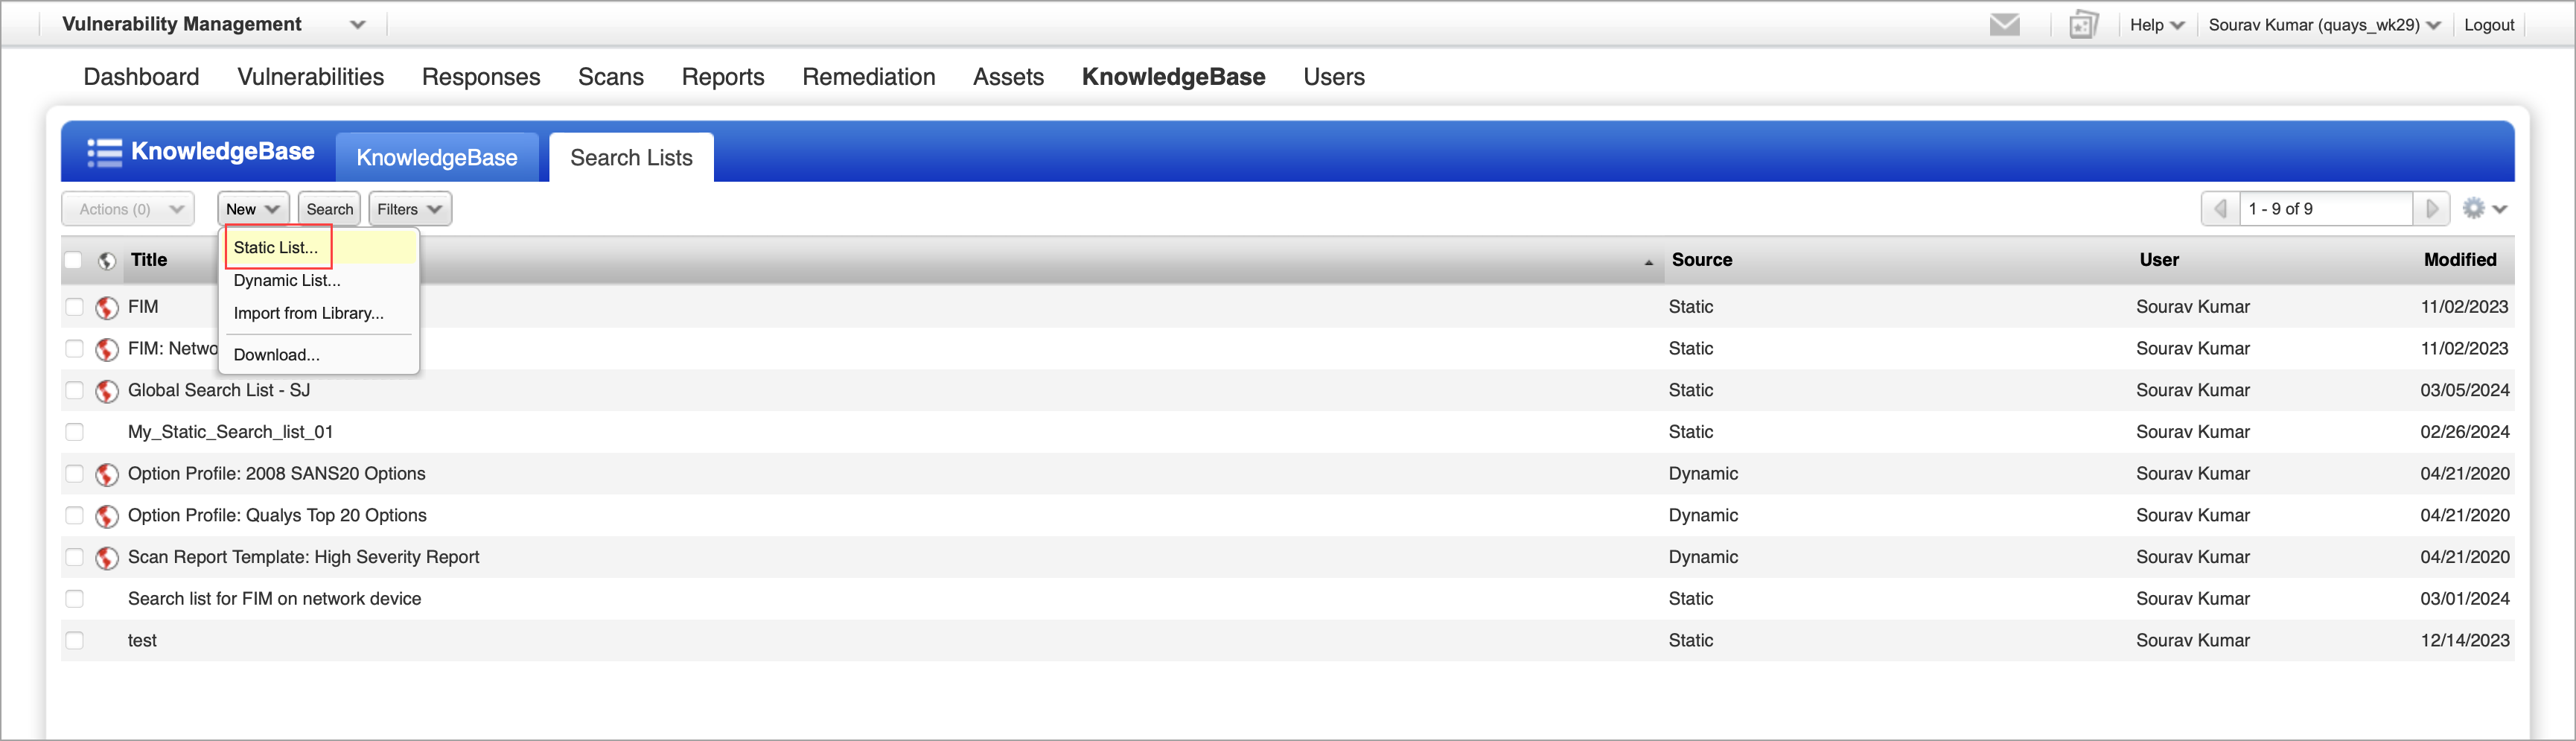
-
Provide the Title and Owner for your search list.
- Select QIDs from the list or provide custom QIDs manually.
For example, Arista Device Configurations Detected (45601), and Juniper Network Device Configurations Detected (45603).
You can check the complete list of devices on Platform Availability Matrix for Agent-less FIMWe recommend you add QIDs for the assets with matching technology.
- Click Save.
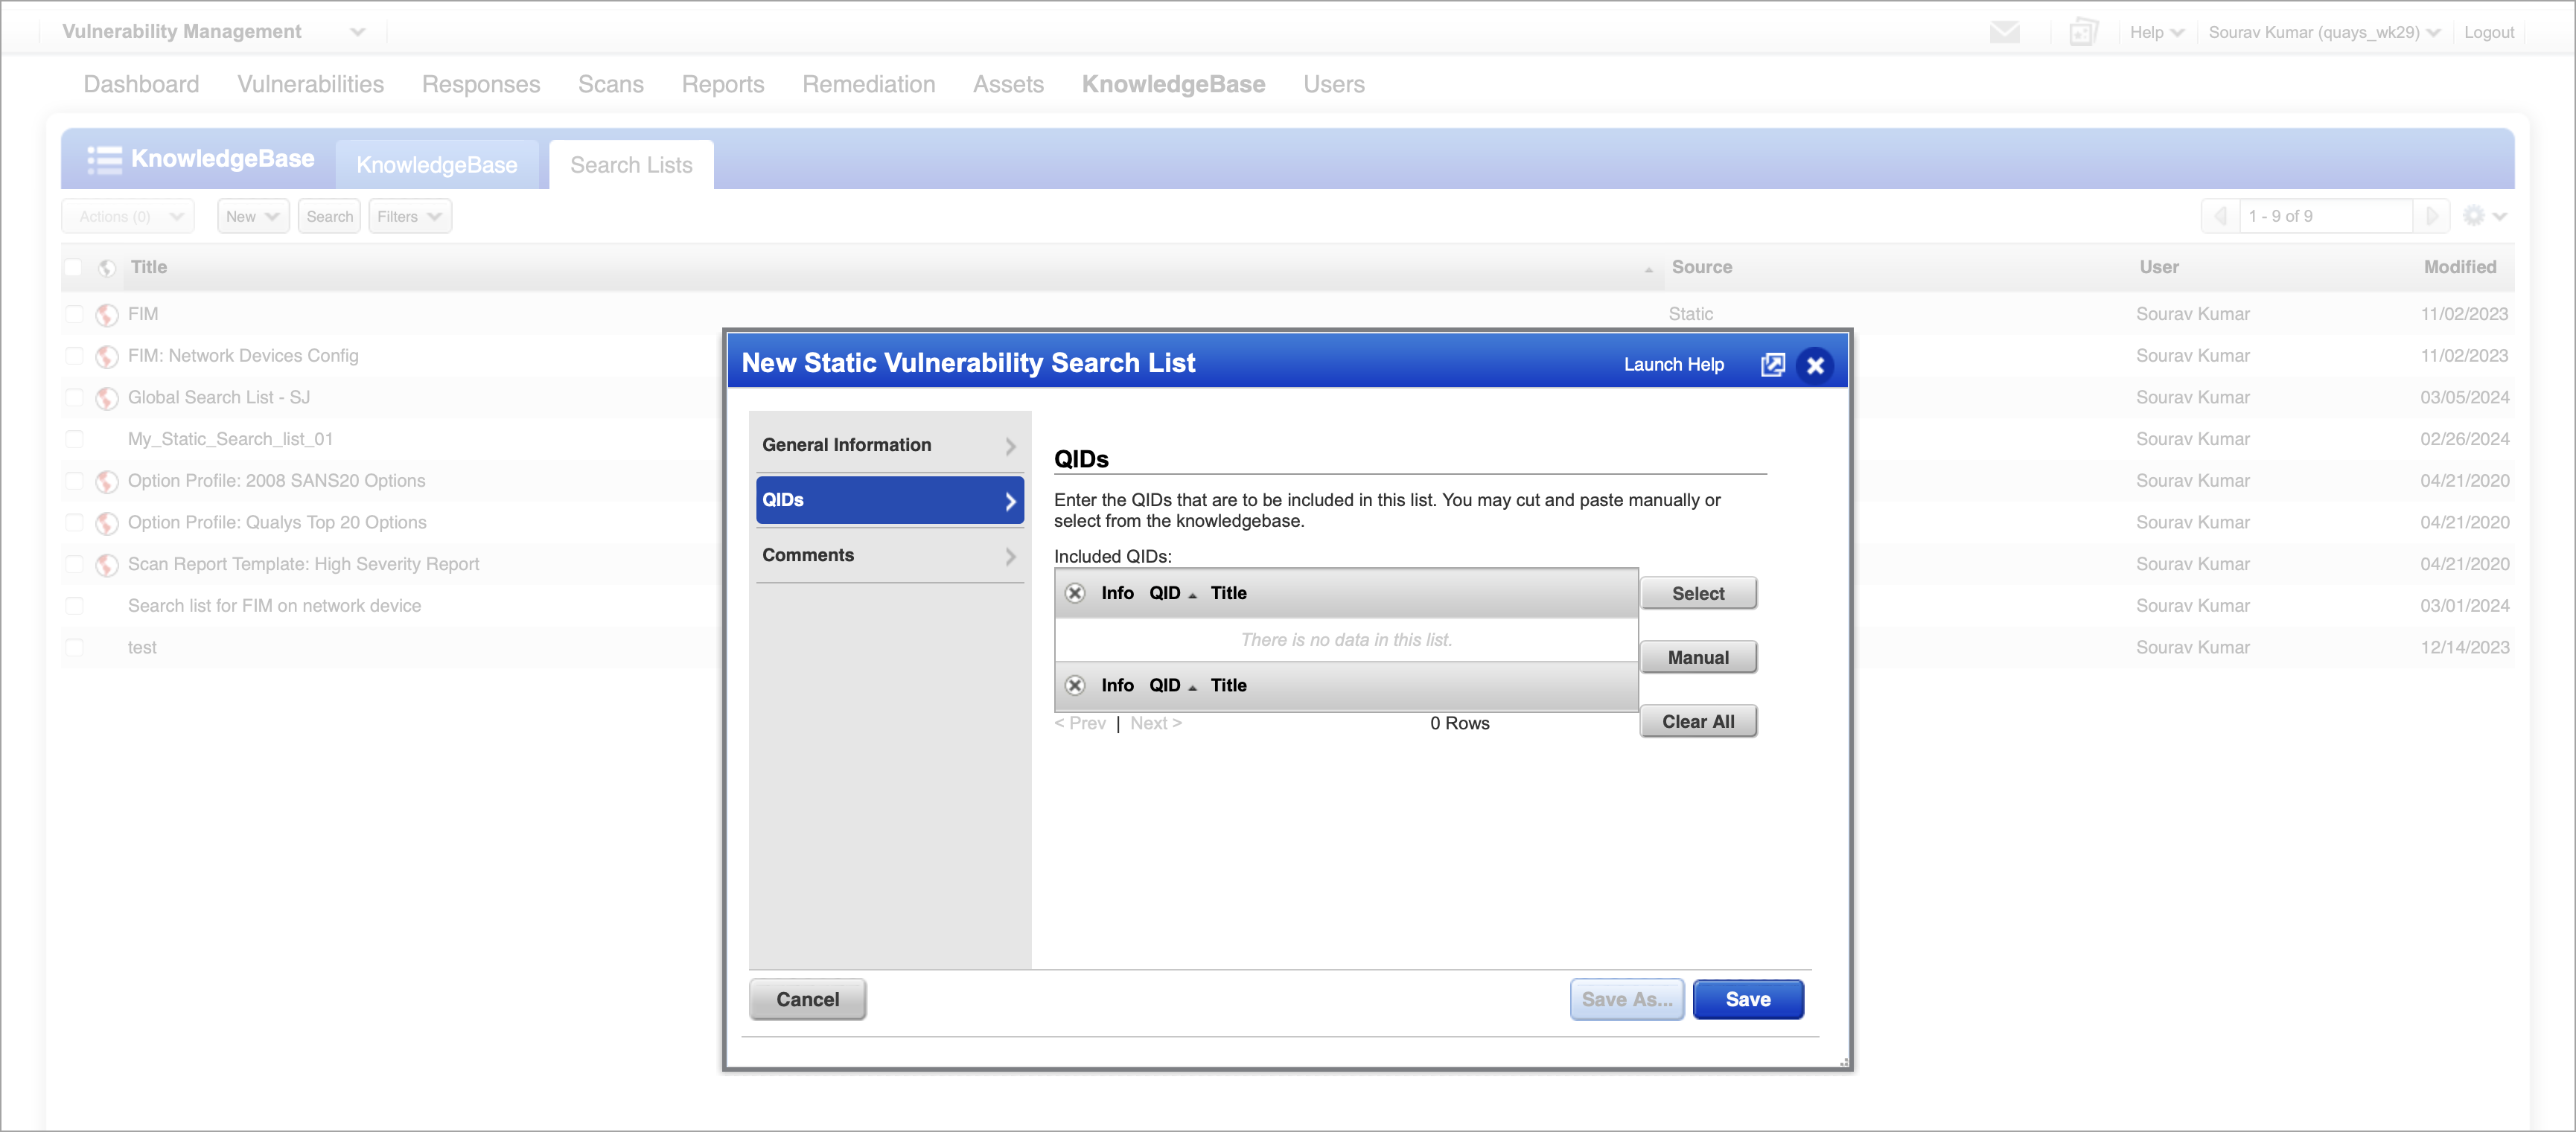
Your Search List is created.
Create an Option Profile
Proceed with the following steps to create option profile.
- Go to VM/VMDR > Scans> Option Profiles > New > Option Profile.

A New Option Profile window is displayed. - Provide the details like Title and Owner.
- Click Save.
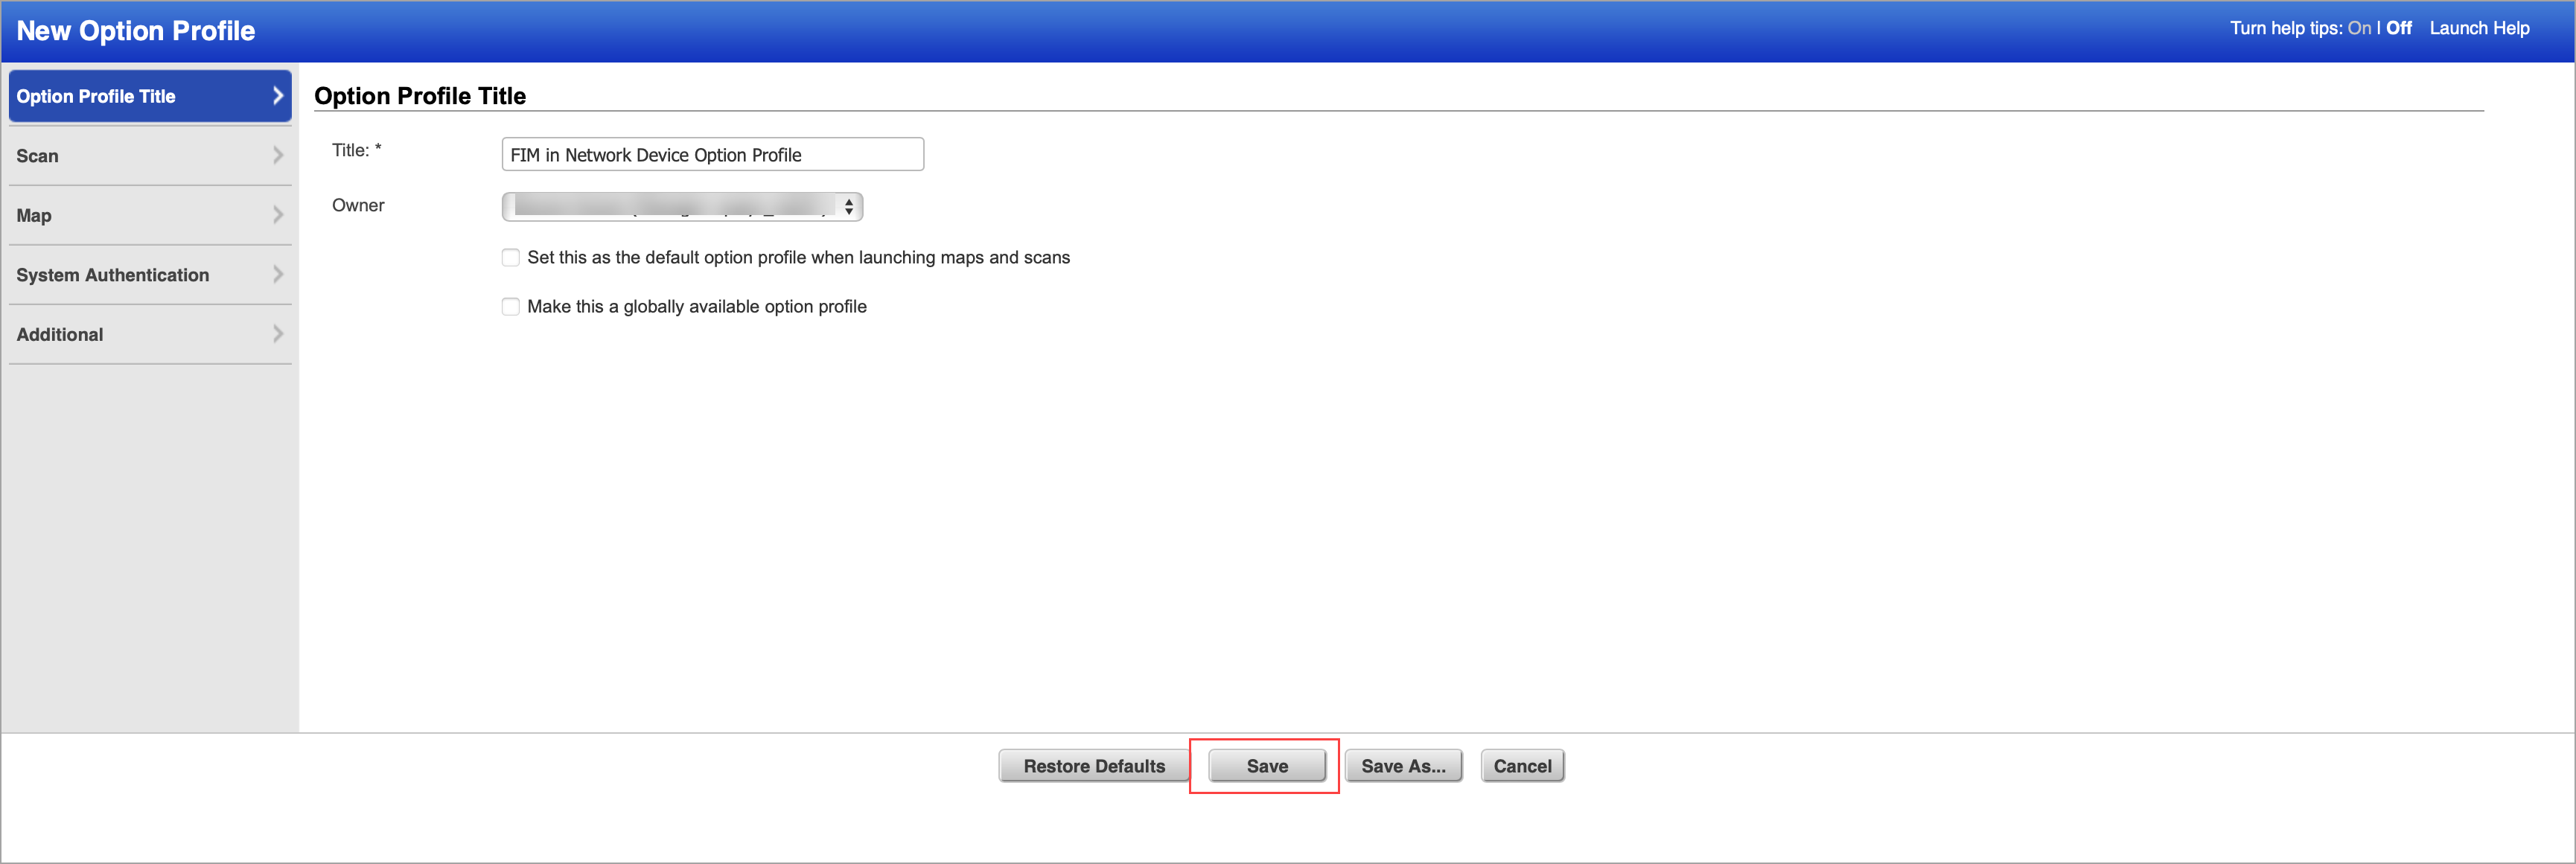
- Go to Scan from Option Profile Title.
- Select Custom under Vulnerability Detection and Add Lists.
You must add the search list created by you.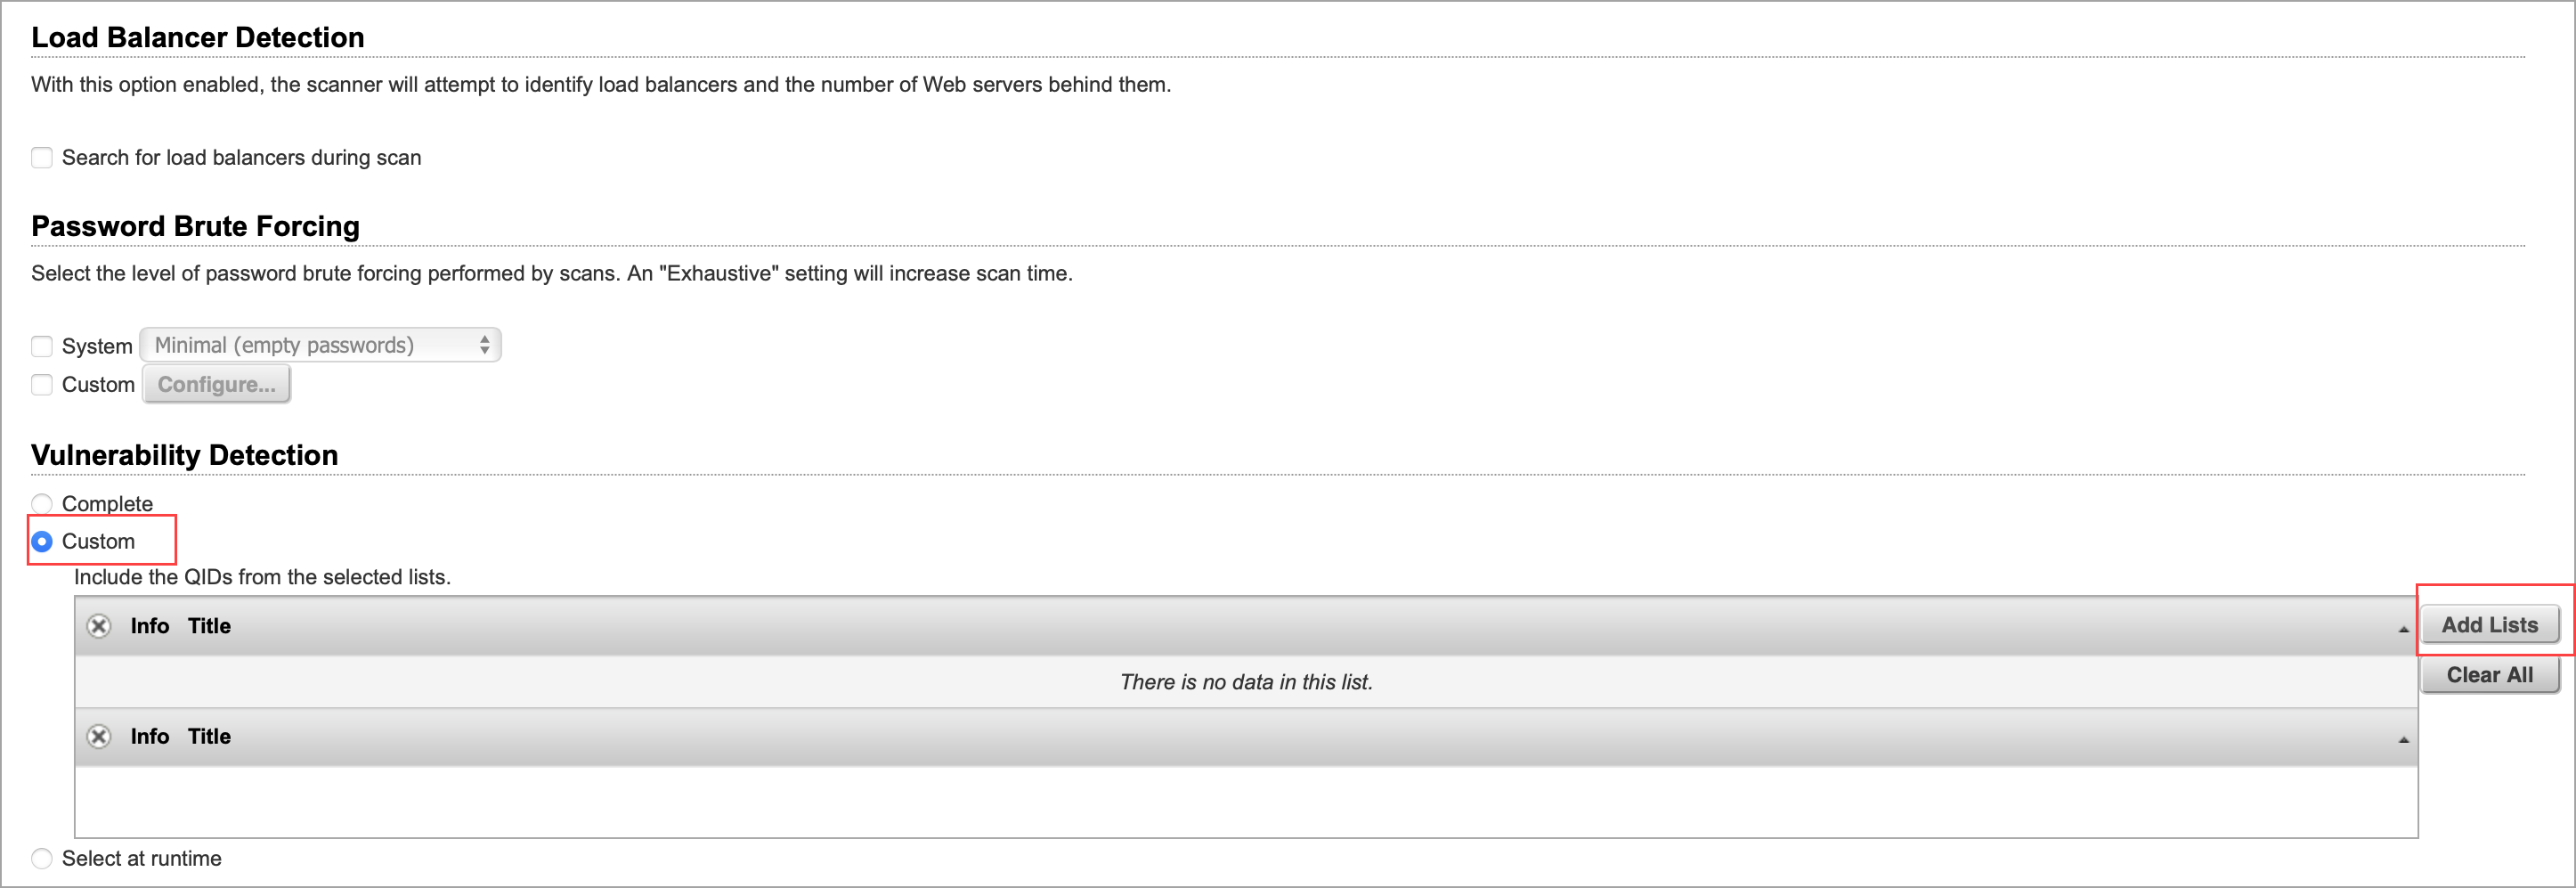
- Click Ok after adding the list.
- Next, Under Authentication check Unix/Cisco/Network SSH, Attempt least privilege for Unix.
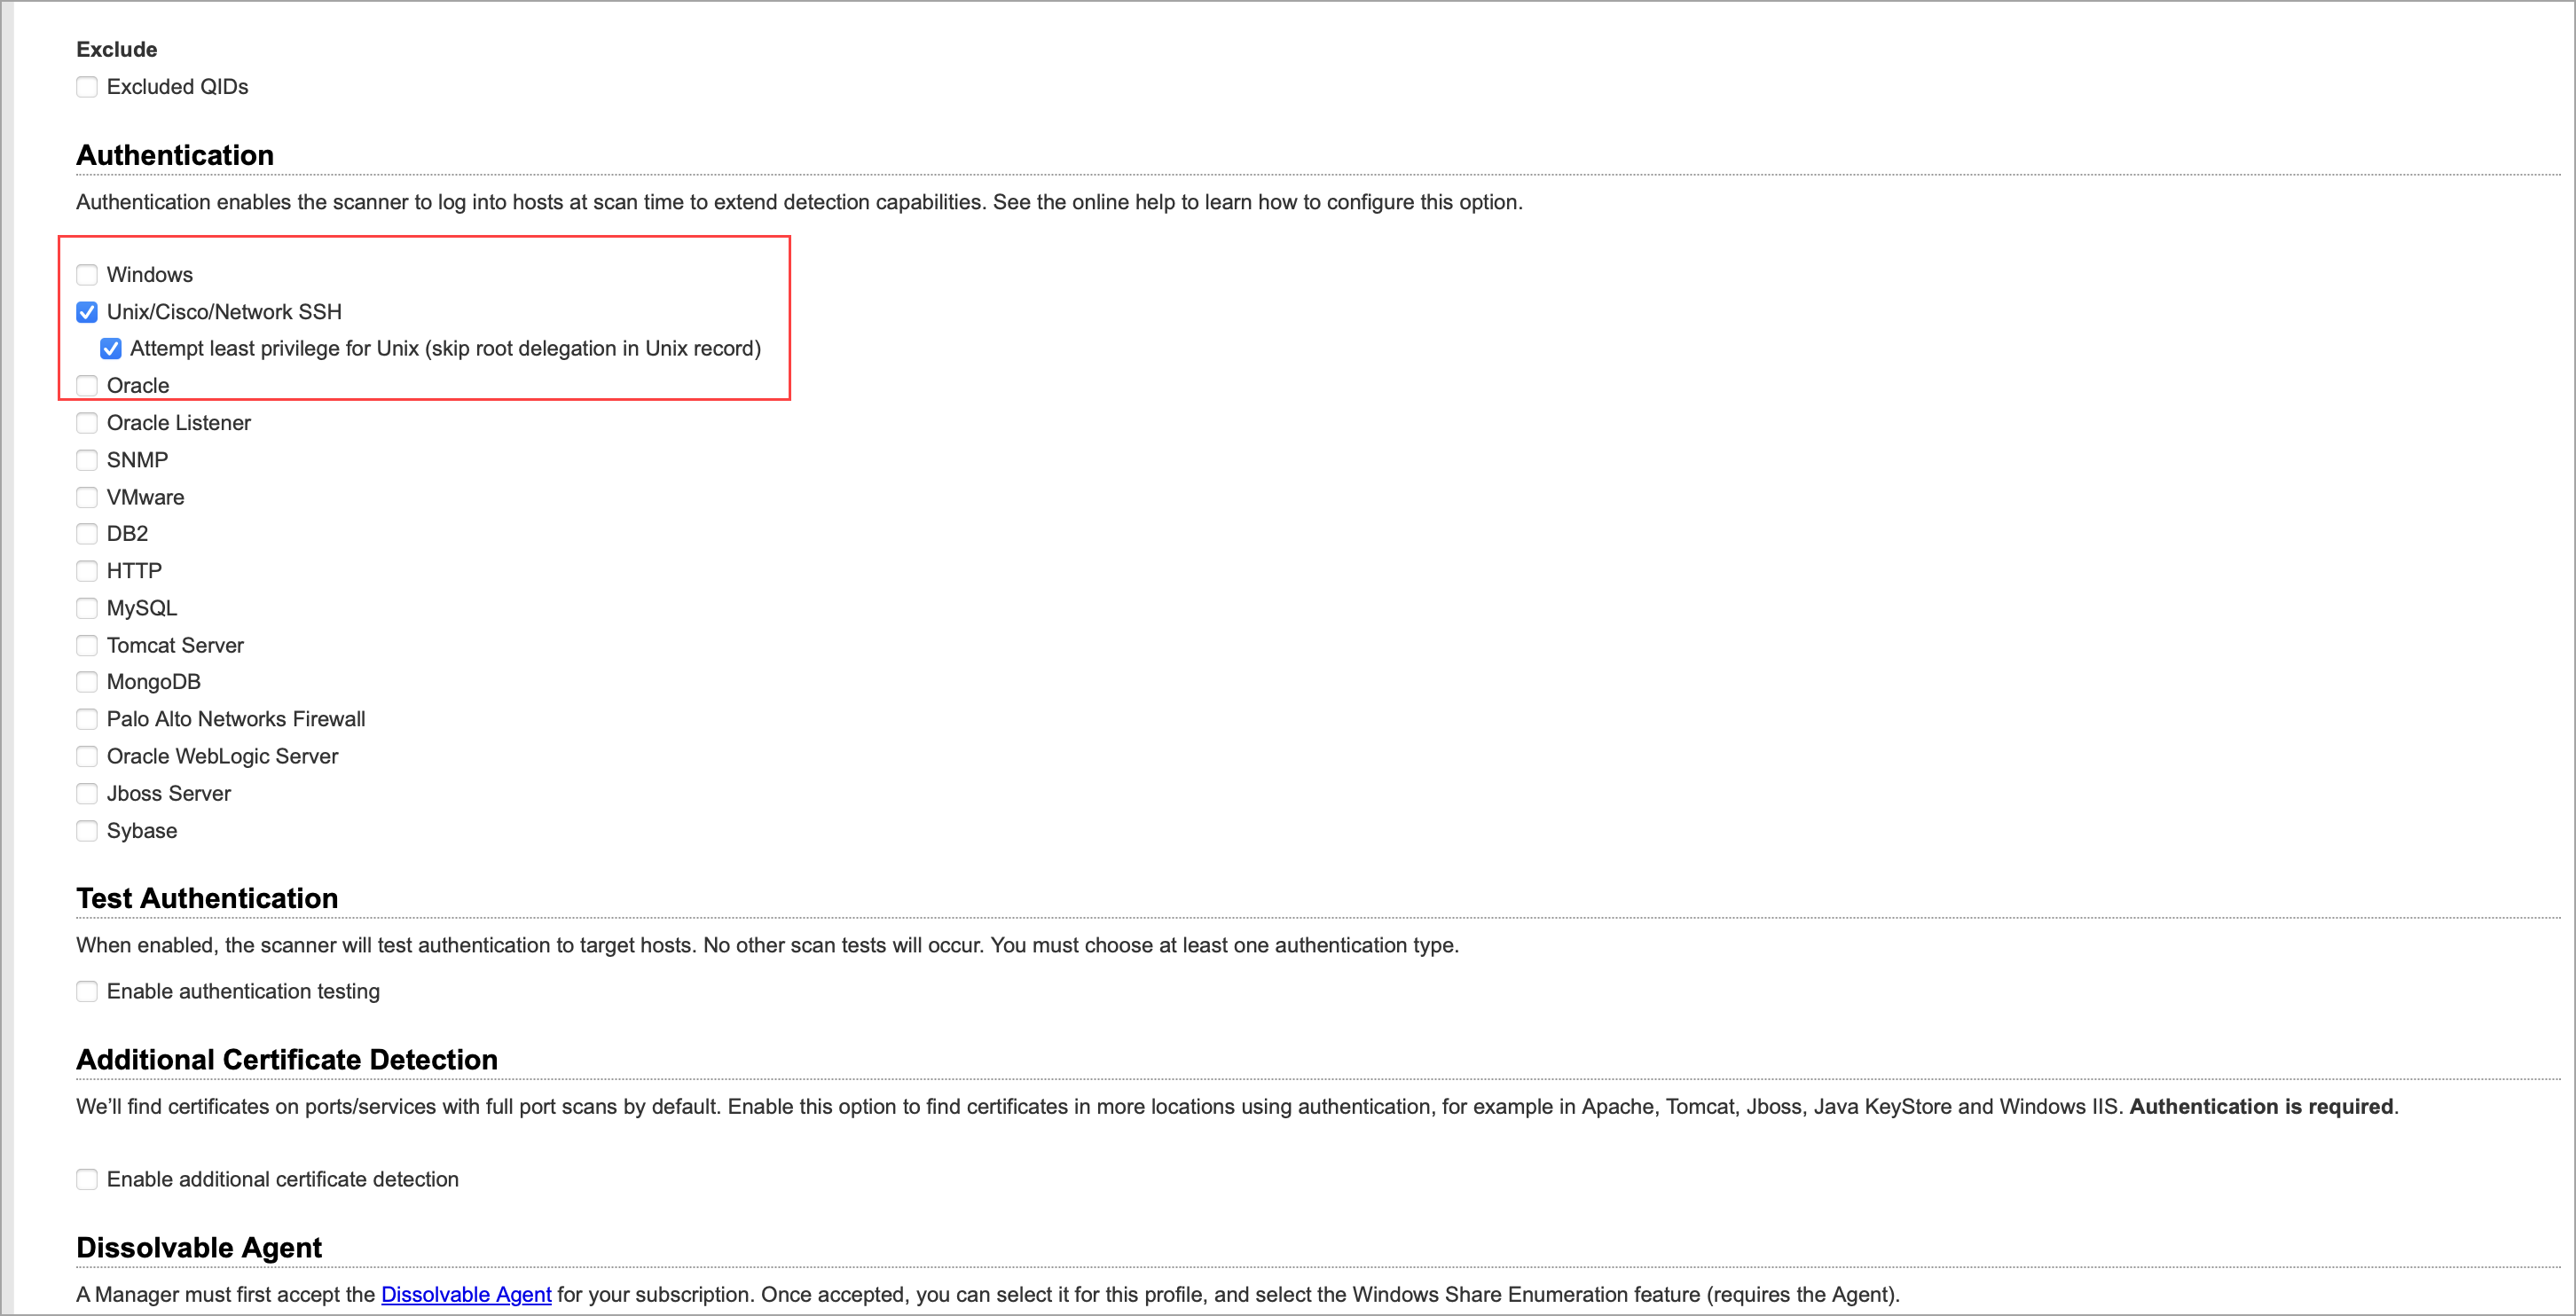
- Click Save.
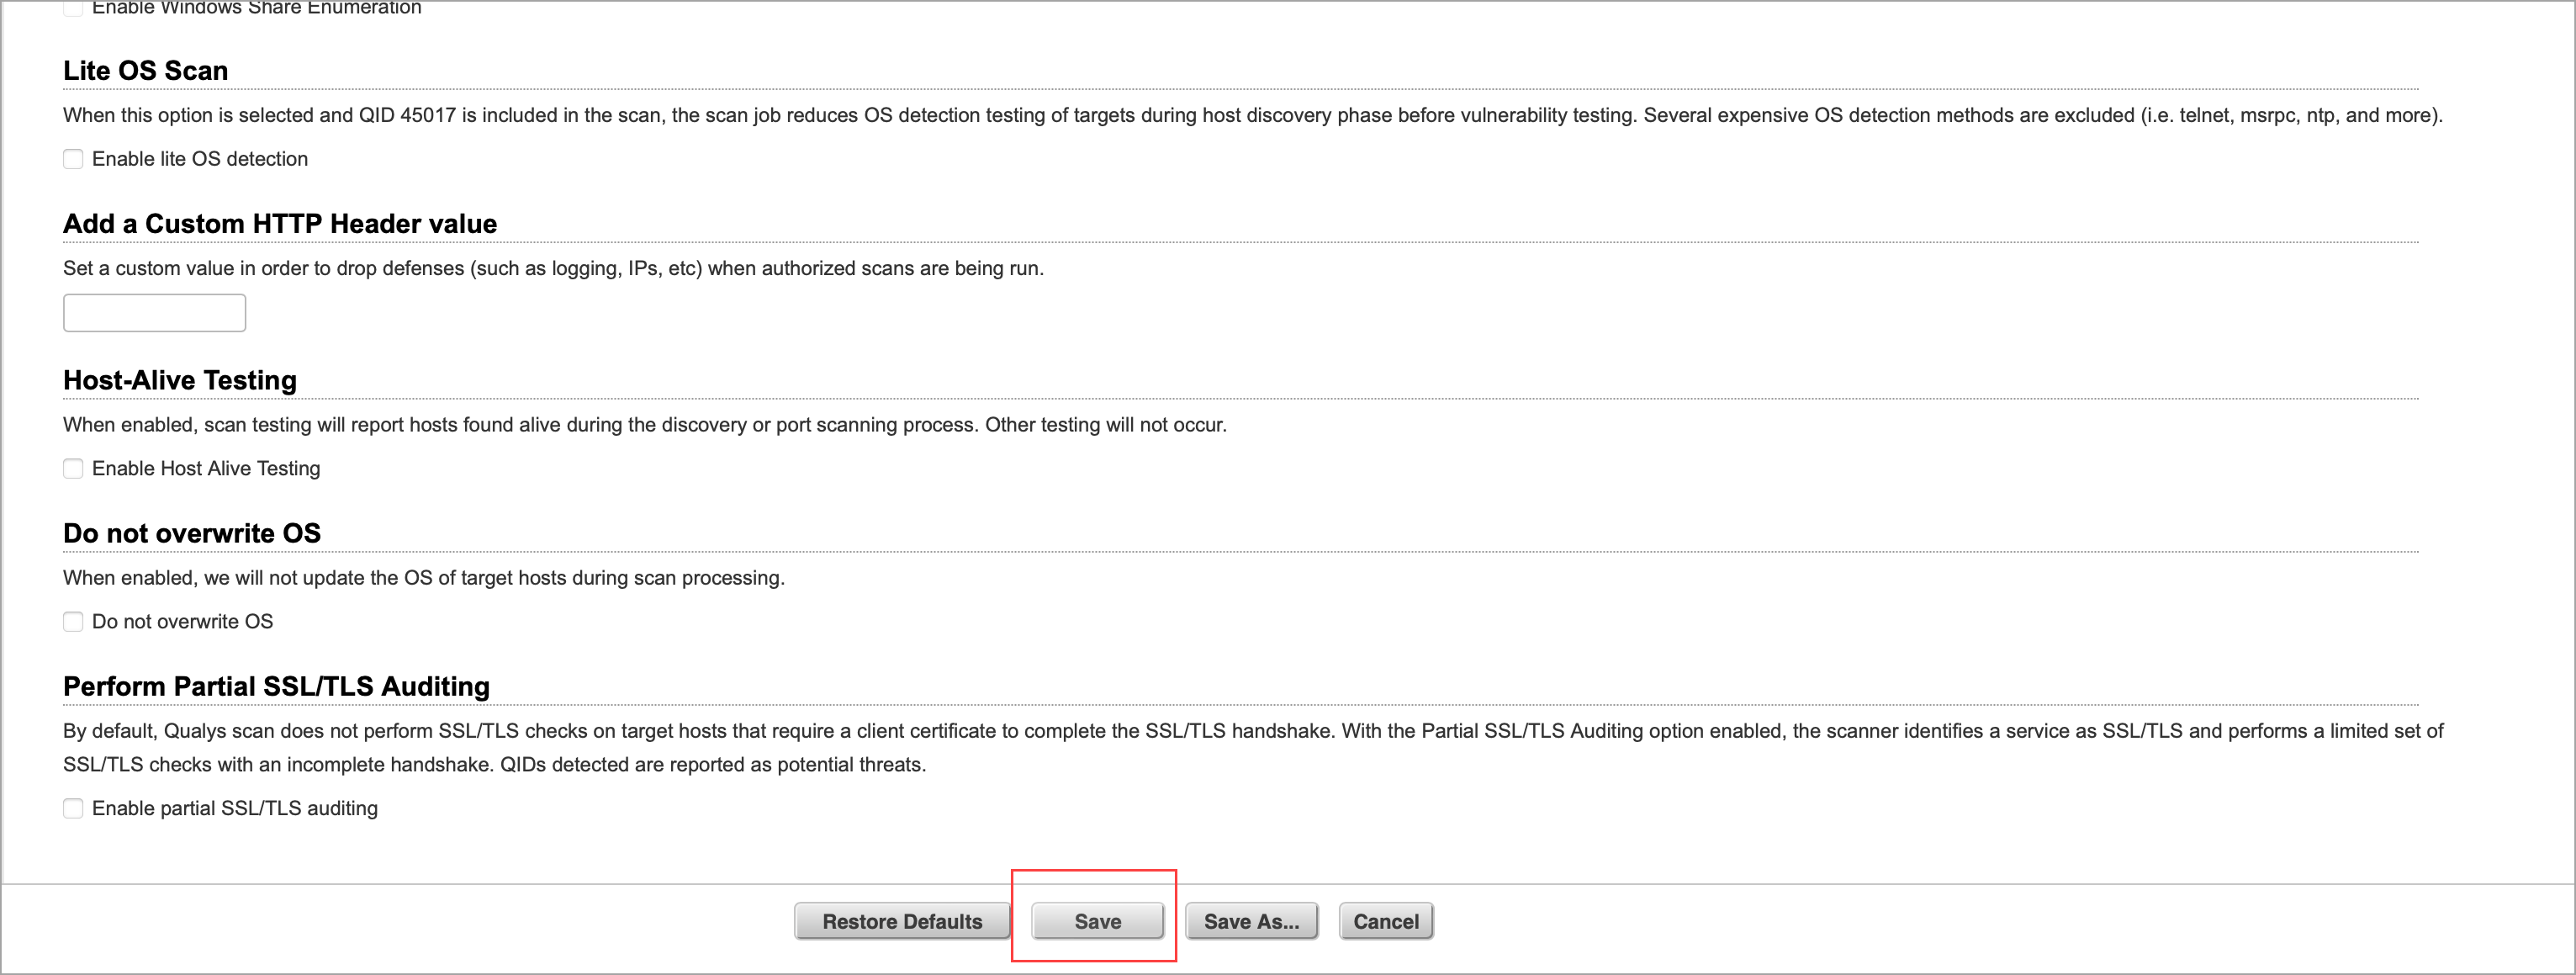
Your Option Profile is created.
Configure a Schedule Scan
You can schedule scans on the assets added to FIM inventory. You can configure a scheduled scan through the Vulnerability Management app.
Follow these steps to configure a scheduled scan:
- Go to VM/VMDR > Scan> New > Schedule Scan.
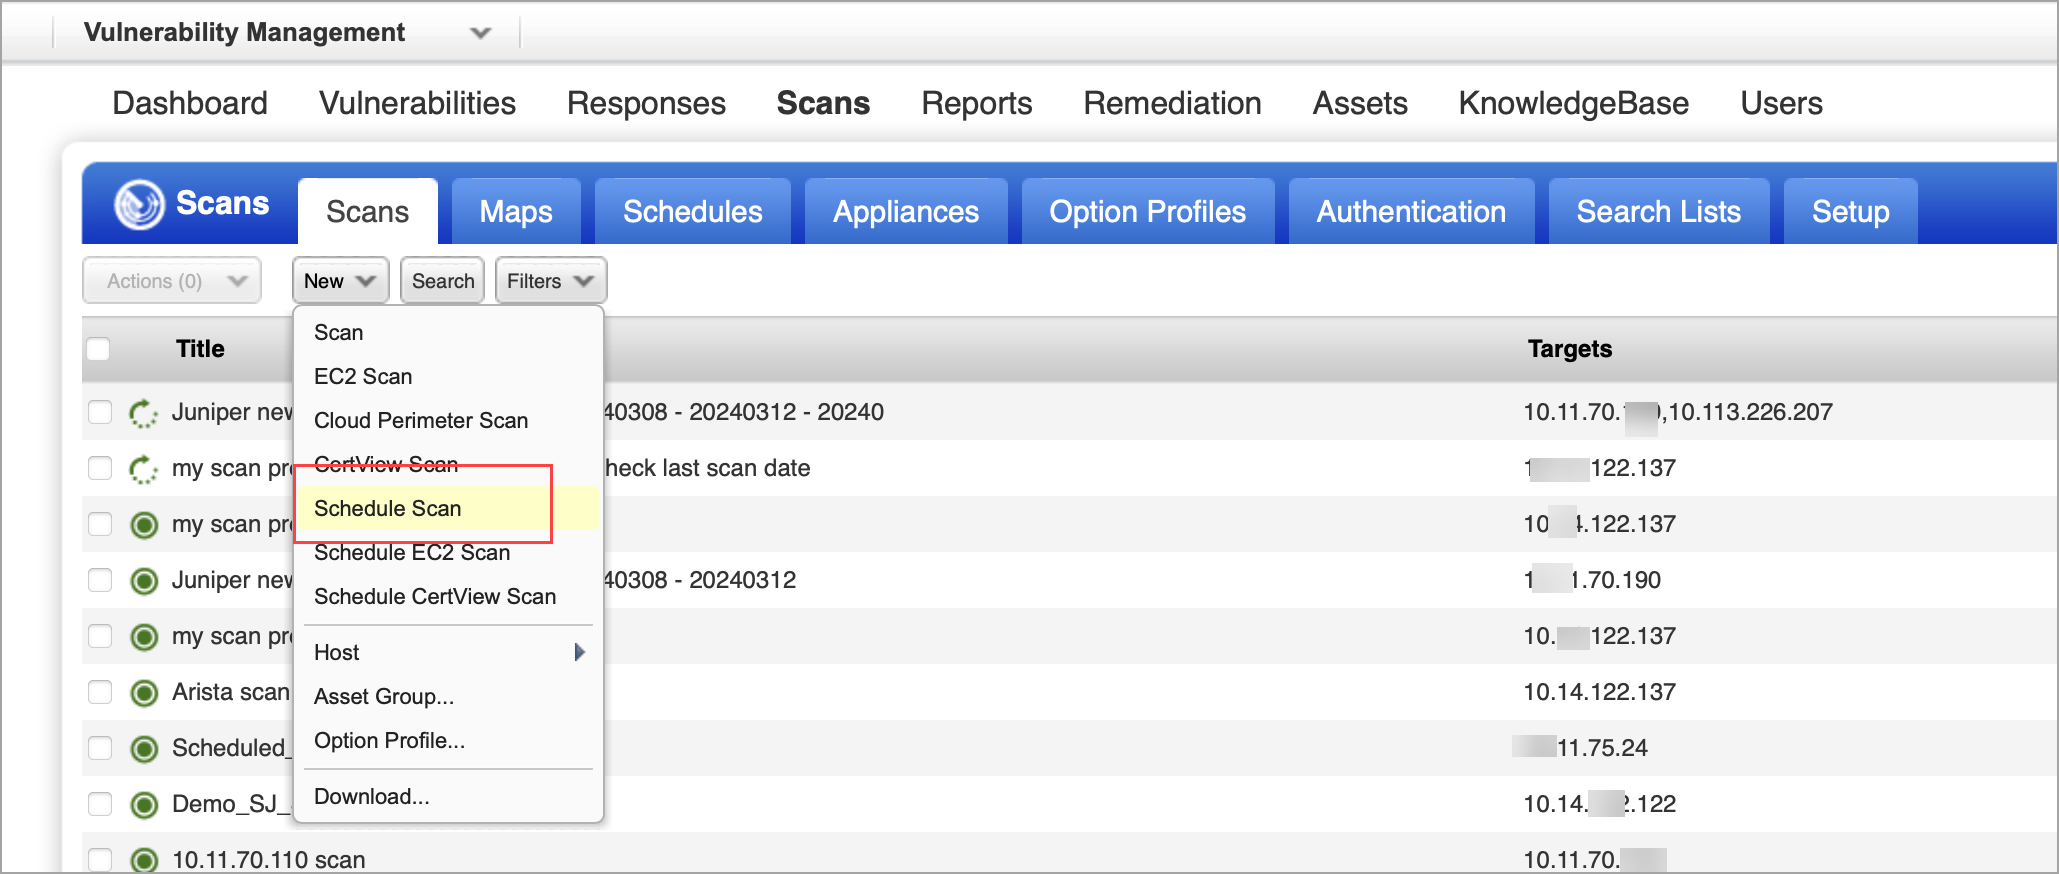
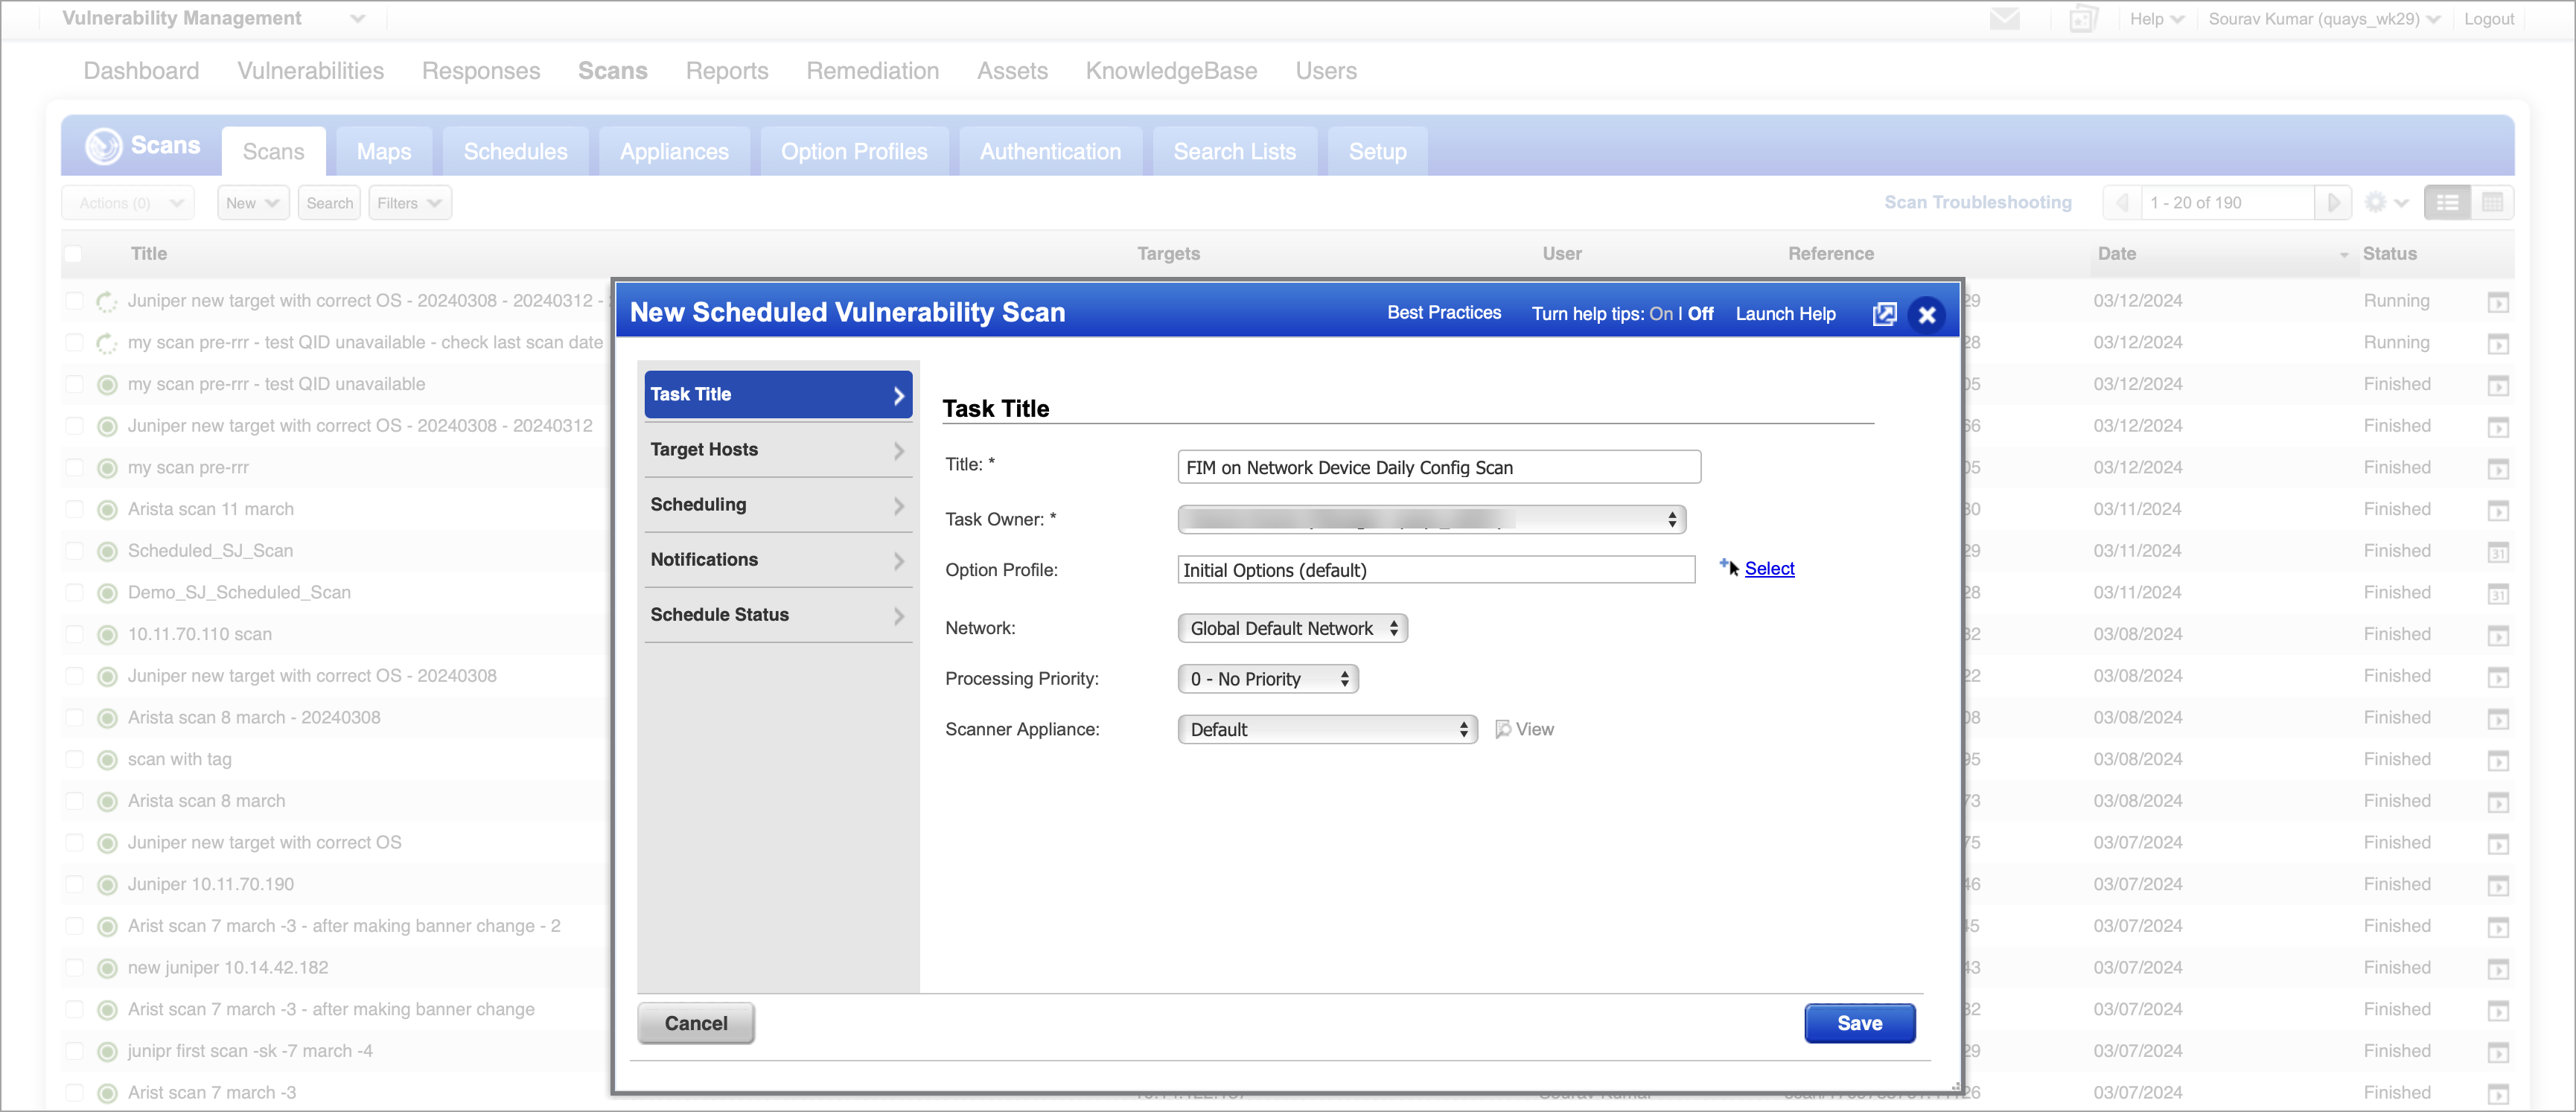
A New Schedule Vulnerability scan window is displayed - Provide General Information.
- In the New Schedule Vulnerability Scan window, you provide the scan a title and select basic scan details like which option profile to use, and which scanner to use. Each option is described below.
- Title : Give your scan a title to easily identify it later.
- Task Owner: Provide the name of the Task owner.
- Option Profile: Select an option profile for this scan job. The option profile has scan settings like which ports to scan, which QIDs to scan, and whether to use authentication. Pick the option profile you created from the list.
- Processing Priority - If you have an important scan that you want to be processed before other scans, then you can prioritize it. Choose from nine priority levels with the highest priority being "1 - Emergency" and the lowest priority being "9 - Low". Scans with no priority is processed after scans with priority. Get help choosing processing priority
- Network - (Visible only when the Network Support feature is enabled for your subscription.) Select the network you want to scan. The Global Default Network is selected by default but you can choose a user-created network from the list.
- Scanner Appliance - (Visible only when you have Scanner Appliances in your account.) If this option does not appear, then your scans use external scanners automatically.
- Click Save.
- Next, select Assets that you want to monitor for configuration changes.
You can choose target hosts from Assets (IPs, asset groups, FQDNs) or Tags.
Only assets that are added to FIM inventory can be added to scan.
- Choose Target Hosts from "Assets"
- Select the Assets on which the scan needs to run.
- Schedule the scans by defining the Start Time, Duration, Resume, and Occurs.
- Click Save.
You configured a scheduled scan successfully. Every time a scan runs you can see the entry under Scans. Once Scan execution completes and a difference is identified in the asset's configuration, a content event is generated and seen on FIM UI,
- To view the generated event, go to File Integrity Monitoring > Events > All Events and from the Quick Actions menu of the event, click Event Details.
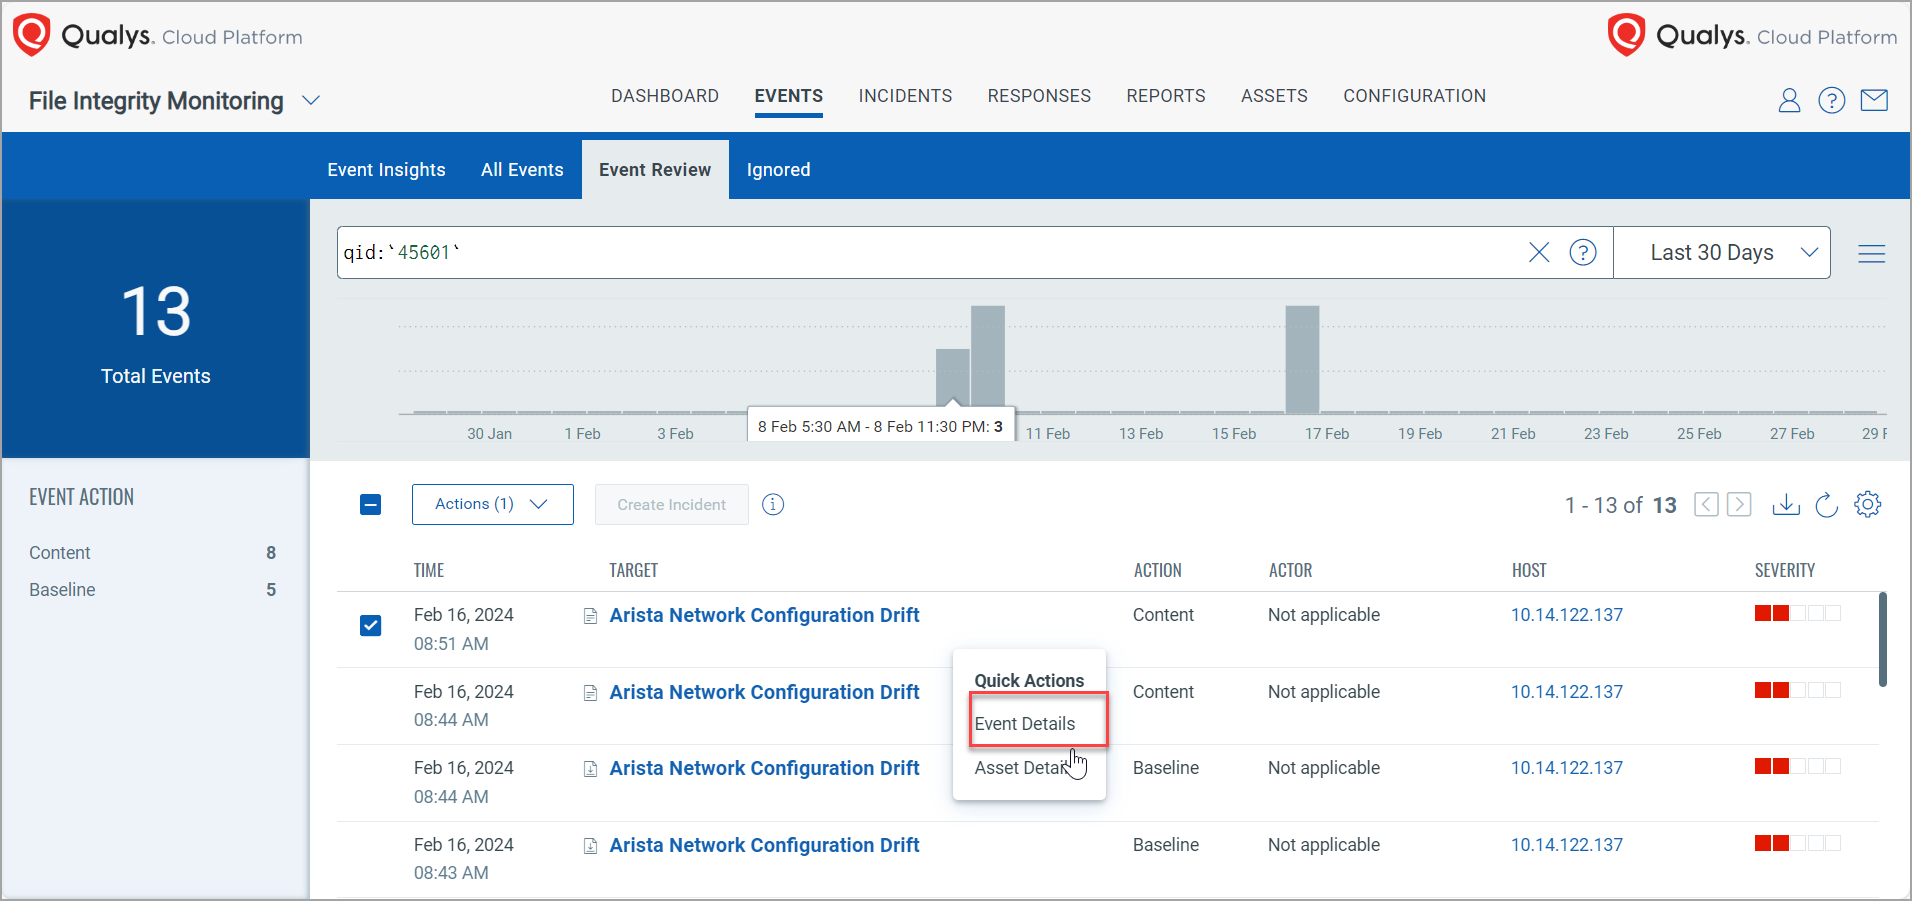
You can view the contents of baseline events.
Event Details page displays the details of the event.
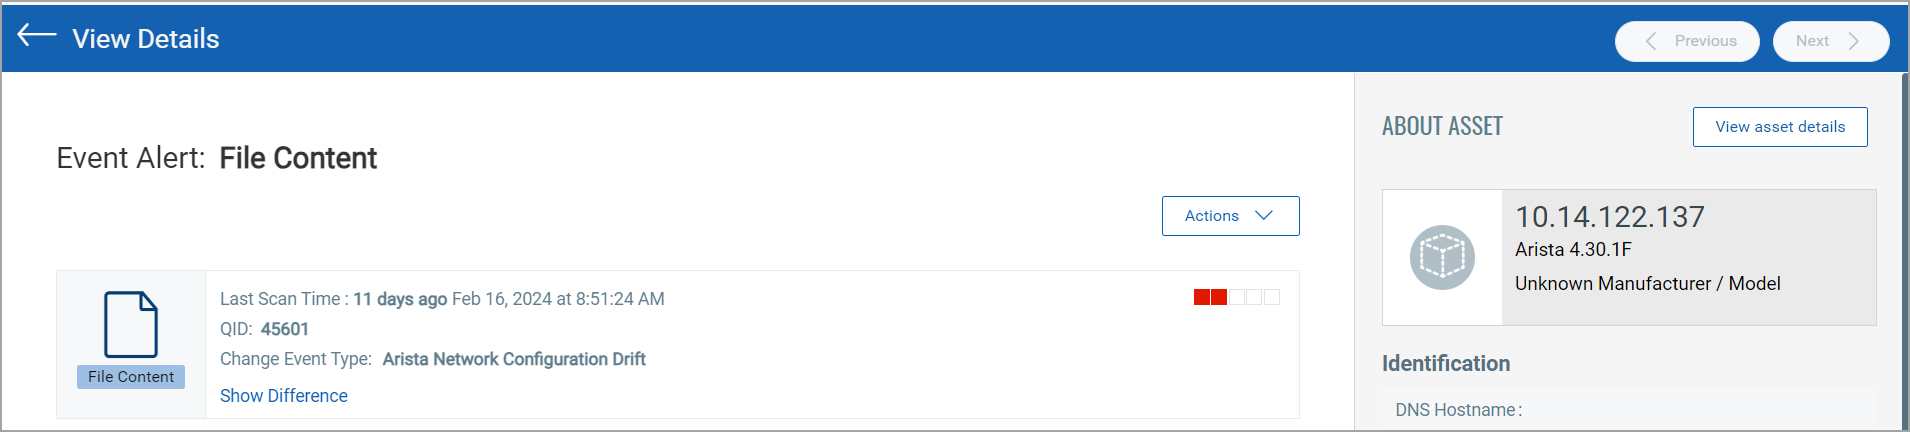
- To view the changes made in configuration devices click Show Difference.
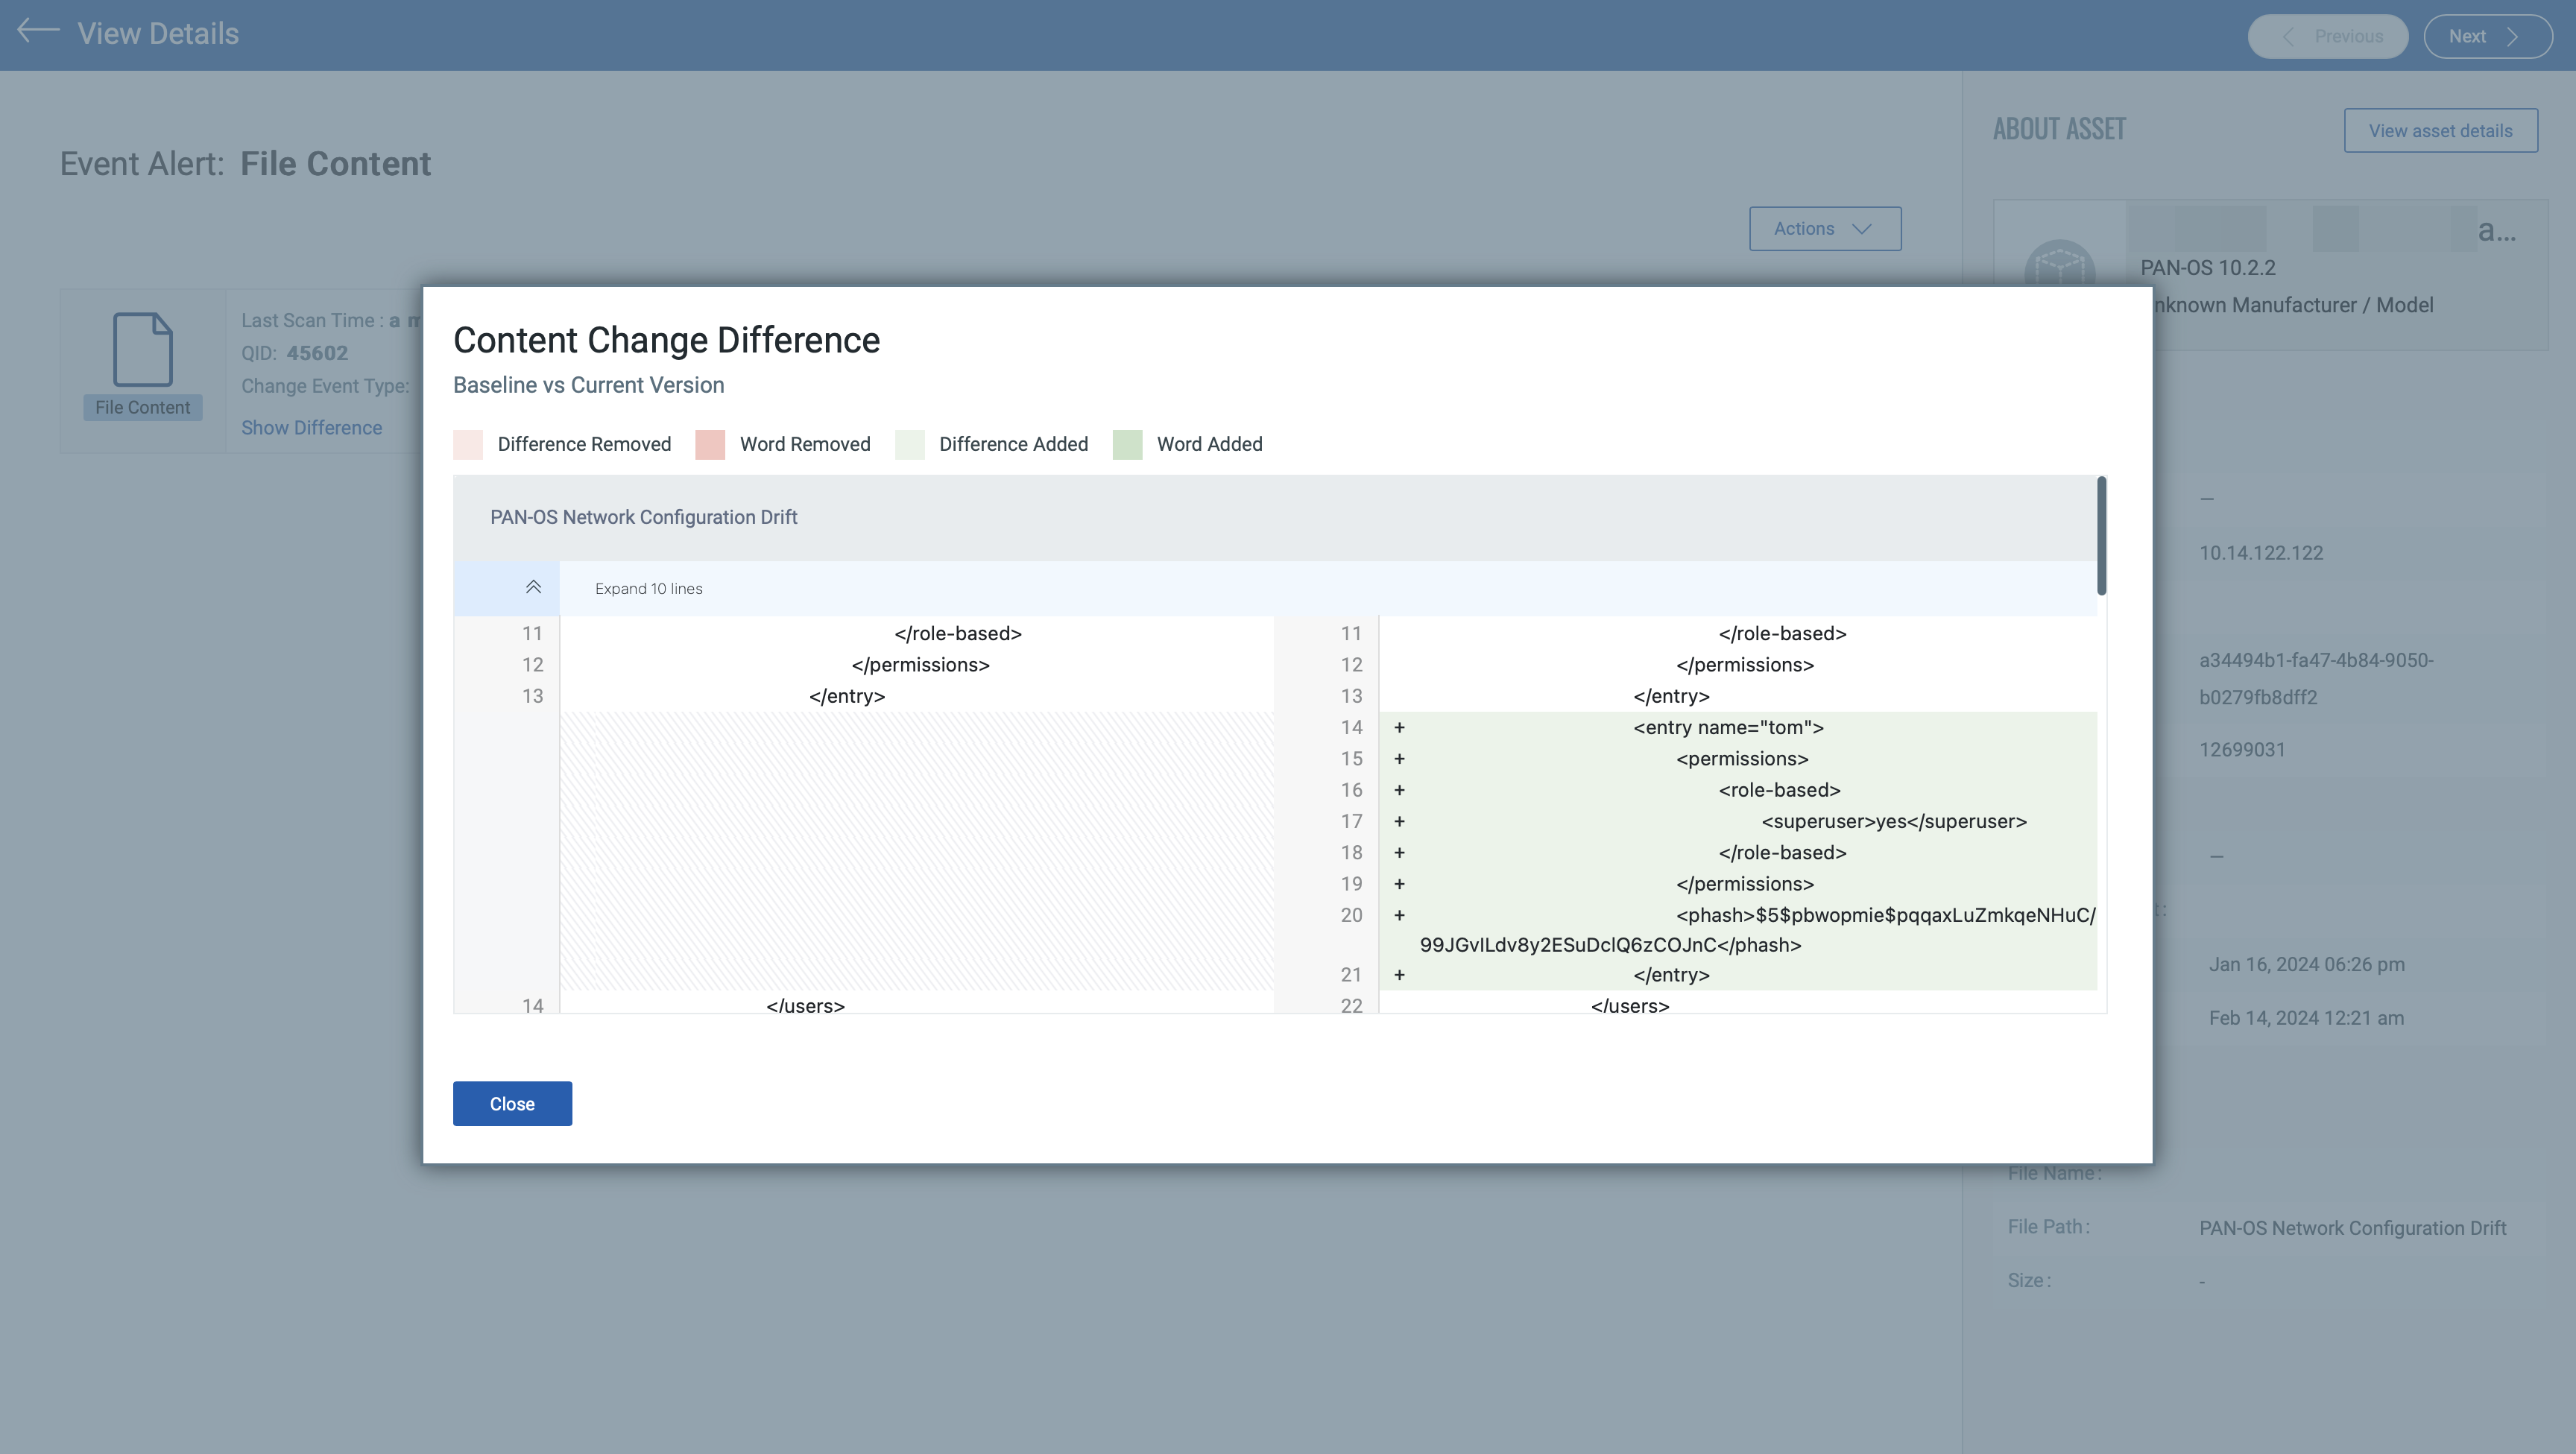
You can make the event a baseline event.
Related Topics