Home

Viewing Assets

In the Assets tab, you can view assets for which FIM is both activated and not activated in Cloud Agent.
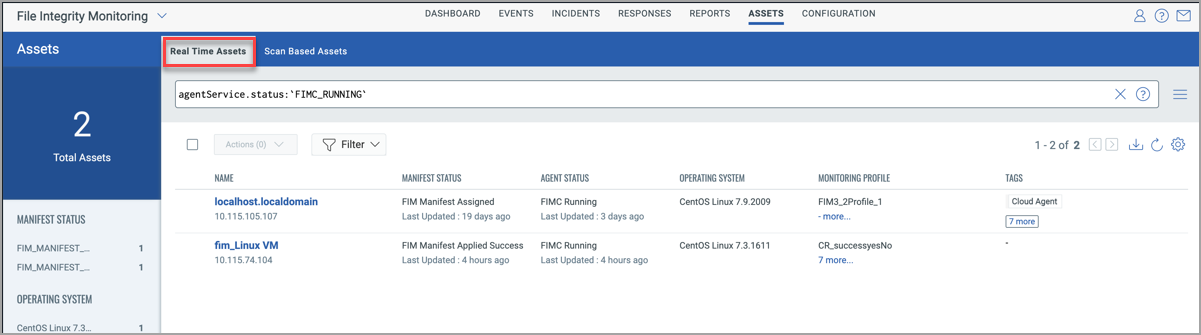
Real-Time Assets

You can assign a monitoring profile to the real-time asset by clicking on the Actions menu.


Filter Assets

You can find assets based on the Operating System, Manifest Status, and Agent Status using the filters in the left pane.  The Manifest Status, and Agent Status columns also display the time the status is updated.

Note: The QQL agentService.status: is not supported for FIM assets on AIX, hence no data is fetched for AIX assets if you use this QQL and the Agent Status column does not display any data.

Manifest Status

As part of agent-status-core, the user will get to know if the agent has downloaded the manifest.

Only after the Agent further applies the downloaded manifest, it come into effect.

After downloading the manifest, two additional manifest statuses are displayed for Windows Agent:

- FIM_MANIFEST_APPLIED_SUCCESS 

- FIM_MANIFEST_APPLICATION_FAILED  

Important: The following manifest statuses are not supported for AIX assets:

- FIM_MANIFEST_APPLICATION_FAILED :

- FIM_MANIFEST_APPLIED_SUCCESS

- FIM_MANIFEST_ASSIGNED : 

- FIM_MANIFEST_ASSIGNMENT_FAILED

Following are the meanings of manifest statuses:

- FIM_MANIFEST_APPLIED_SUCCESS: Depicts that the manifest is applied successfully at the agent.

- FIM_MANIFEST_APPLICATION_FAILED: Depicts that there was some failure at agent while applying the manifest.

- FIM_MANIFEST_ASSIGNED: Depicts that the manifest is downloaded at the agent.

- FIM_MANIFEST_ASSIGNMENT_FAILED: Depicts some failure at the agent during manifest download. 

- NO_FIM_MONITORING_PROFLIE_FOUND: After agent activation, this status depicts that the asset doesn't have any active FIM monitoring profiles assigned to it.

- FIM_ACTIVATION_REQUEST_REQUIRED: After activating the agent for FIM on CAUI, this status depicts that FIM server has received the request for activation.

- FIM_MANIFEST_PUBLISHED: Depicts that FIM manifest has been sent from FIM server.

- FIM_MANIFEST_Decommissioned: Depicts that Manifest gets decommissioned/removed from the agent in case the last profile for the asset is deactivated or removed.  
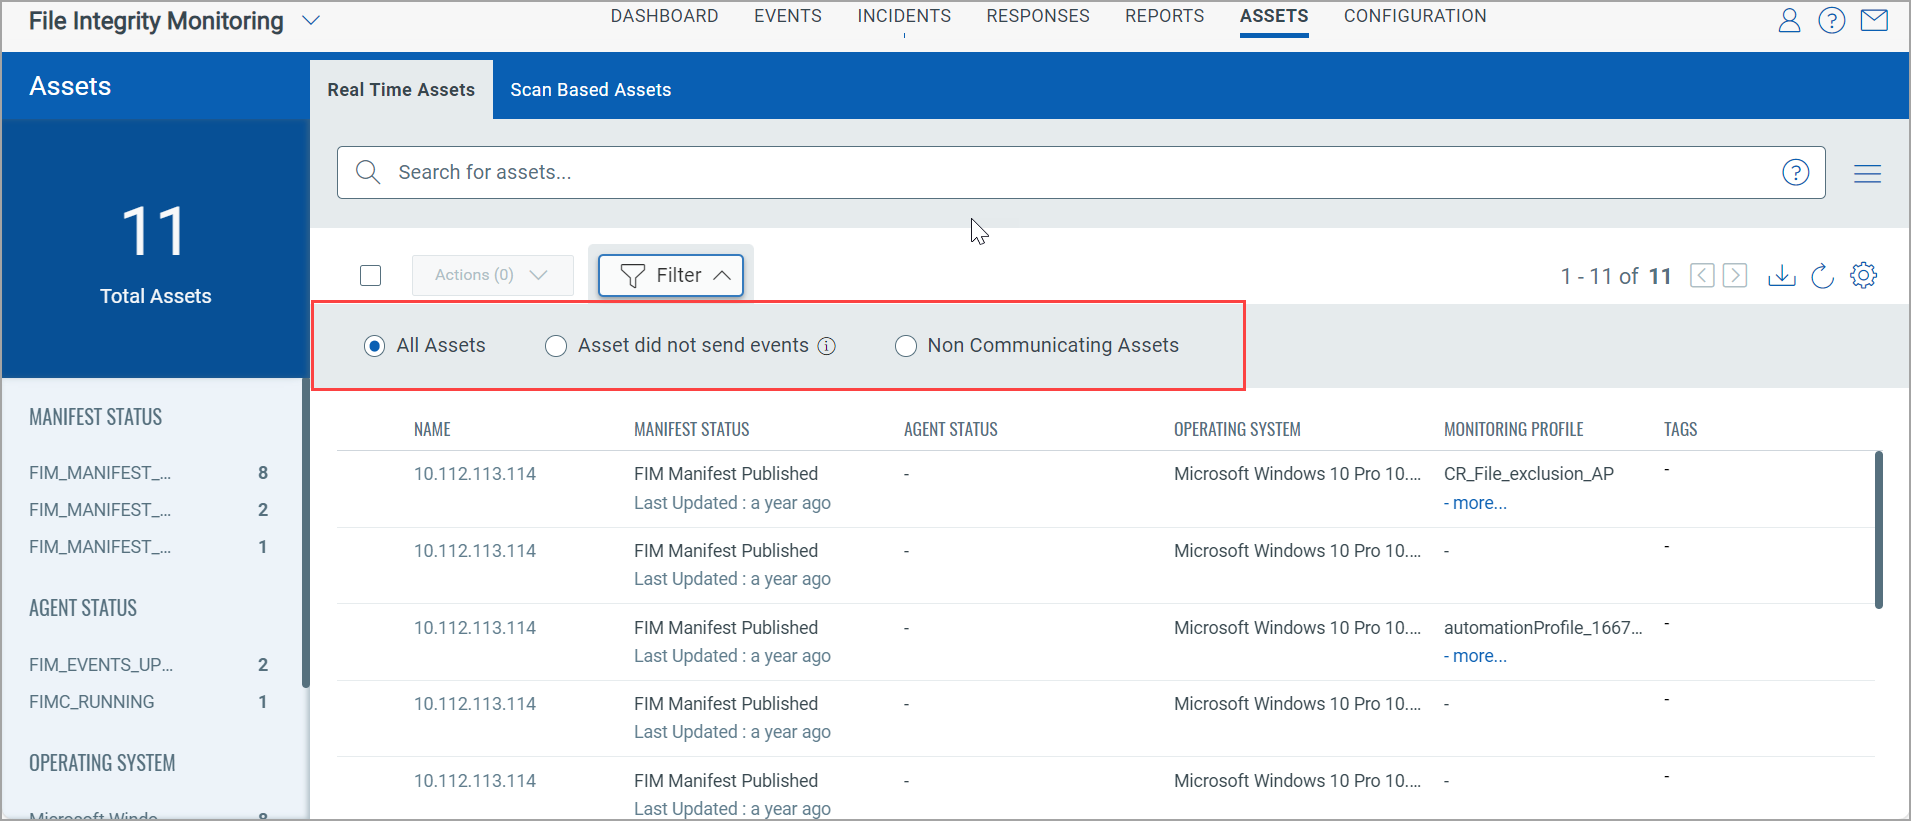
Filter

With Filter, you can filter out assets in three different categories. Following are the three filters.

Filter

Description

All Assets


All Assets shows the list of all assets. 

Assets that did not send Events


Select the Assets that did not send Events option and select the required duration in hours or days. You can enter theduration upto seven days or 168 hours.

You can also filter the assets using tokens. For more information on tokens, see Asset Tokens

Non-communicating Assets


The non-communicating assets enable you to view the list of assets that are non-responsive. These are the assets that have not communicated with the Qualys platform in seven days or more. These assets are highlighted with a tool-tip message and a warning icon. 

Note: We have an out-of-the-box dashboard widget template for non-communicating assets. You can customize the widget for non-communicating assets based on your requirements. You can add the widgets to the dashboard to get a unified look of the non-communicating assets.

See also:  Search Tutorial | Downloading Asset Details

Scan Based Assets

Scan Based Assets are the assets on which Qualys Agent can not be installed, however, they can be monitored remotely with Qualys Scanner.

The Scan Based Assets page displays the asset details such as Name, Last Scanned Date, Technology, and Tags. 

Vulnerability Management is an integral part of configuring the scan based assets as scan-based assets are monitored via VM Scans. 

Prerequisites:

• Enabled Vulnerability Management and Global Asset View along with the licensed or trial version of FIM. If you can see assets in Asset View but not in Global Asset View, contact your TAM.

• Configure the Scan Schedule with the Options Profile and the Target Assets.

• The Minimum Vulnerability Signature required is VULNSIGS-2.5.991-2.

To monitor the scan-based assets for any network configuration change, you need to begin with the configuration of Scan Based Assets on FIM.

Configure the Scan Based Assets on FIM

1. Go to Assets > Scan Based Assets

2. Click Add Assets.

You are navigated to Add Assets tab.

3. In Asset Inventory, provide the QQL that will encompass the assets in your environment. This QQL fetches the scan-based assets into the FIM Asset Inventory. 

4. Click Save. The assets will start coming in the FIM inventory.

Next, go to  Vulnerability Management, create Search Lists, Option Profiles, and Configure a scheduled scan.

Create Search Lists

1. Go to VM/VMDR > KnowledgeBase> Search Lists> New> Static List.

A tab pops up where you provide General Information like Title and Owner. 

2. In QIDs, below General Information, select the QIDs; Arista Device Configurations Detected (45601), and Juniper Network Device Configurations Detected (45603).  

We recommend you add QIDs for the assets with matching technology.

3. Click Save.

Your Search List is created.

Create an Option Profile

1. Go to VM/VMDR > Scans> Option Profiles> New> Option Profile

A New Option Profile tab pops up. Here provide the details like Title and Owner.

Click Save.

2. Go to Scan below Option Profile Title. Select Custom under Vulnerability Detection and Add Lists. You must add the search list created by you.

3. Click Ok after adding the list.

4. Next, Under Authentication check Unix/Cisco/Network SSH, Attempt least privilege for Unix.

5. Click Save.

Your Option Profile is created.

Configure a Schedule Scan

Let's Configure a Scheduled Scan,

1. Go to VM/VMDR  > Scan> Configure a Schedule Scan

2. Next click New Scan and then from the quick actions menu click Schedule Scan.

New Schedule Vulnerability scan window pops up. Provide General Information
In the New Schedule Vulnerability Scan window, you provide the scan a title and select basic scan details like which option profile to use, and which scanner to use. Each option is described below.  

Title : Give your scan a title to easily identify it later. 

Task Owner: Provide the name of the Task owner.

Option Profile: Select an option profile for this scan job. The option profile has scan settings like which ports to scan, which QIDs to scan, and whether to use authentication. Pick the option profile you created from the list.

Processing Priority - If you have an important scan that you want to be processed before other scans, then you can prioritize it. Choose from nine priority levels with the highest priority being "1 - Emergency" and the lowest priority being "9 - Low". Scans with no priority will be processed after scans with priority. Get help choosing processing priority

Network - (Visible only when the Network Support feature is enabled for your subscription.) Select the network you want to scan. The Global Default Network is selected by default but you can choose a user-created network from the list. 

Scanner Appliance - (Visible only when you have Scanner Appliances in your account.) If this option does not appear, then your scans will use external scanners automatically. 

3. Click Save.

4. Next, select Assets that you want to monitor for configuration changes.

You can choose target hosts from Assets (IPs, asset groups, FQDNs) or  Tags.  

5. Choose Target Hosts from "Assets"

Select the Assets on which the scan needs to run. 

6. Schedule the scans by defining the Start Time, Duration, Resume, and Occurs.

7. Click Save.

You configured a scheduled scan successfully.

Every time a scan runs you can see the entry under Scans.

Once Scan execution completes and a difference is identified in the asset's configuration, a content event is generated and seen on FIM UI,

To view the generated event,

Go to File Integrity Monitoring Events > All Events and from the Quick Actions menu of the event, click Event Details.

Event Details page displays the details of the event.

To view the changes made in configuration devices click Show Difference.

Note: You can view the contents of baseline events. 

You can make the event a baseline event.

Related Topics

Downloading Asset Details