Create Storage Account
You need to create a separate account on Azure Storage Blob console, and then create a storage account and a container. Once you create a container, you can use the container details during the integration.
Create Account
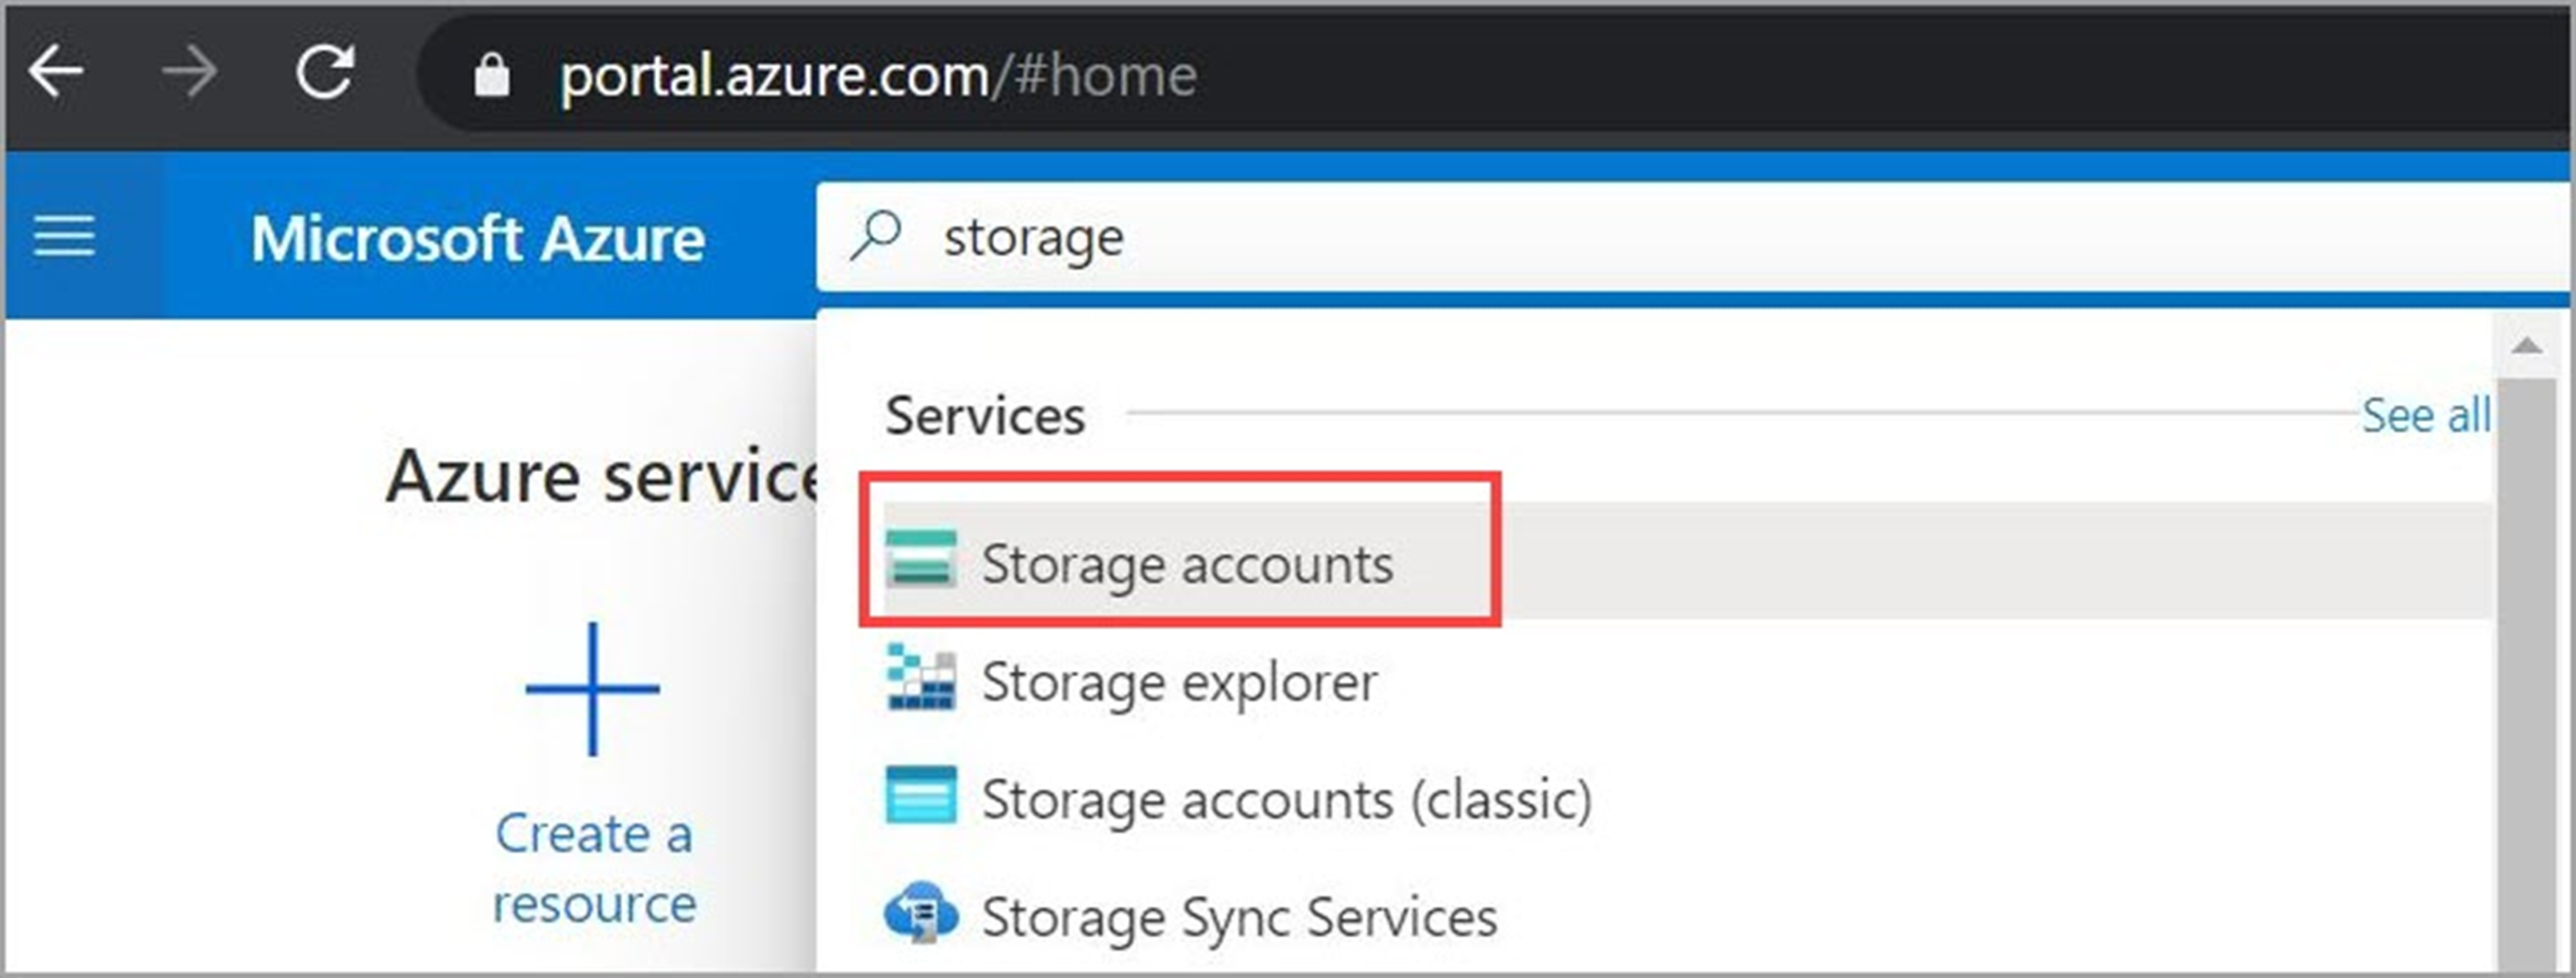
- Log in to Azure portal (https://portal.azure.com/) and search for Storage accounts in the search bar.
- Click Add and then create a storage account with a unique name.
From the Account kind drop-down, select BlobStorage.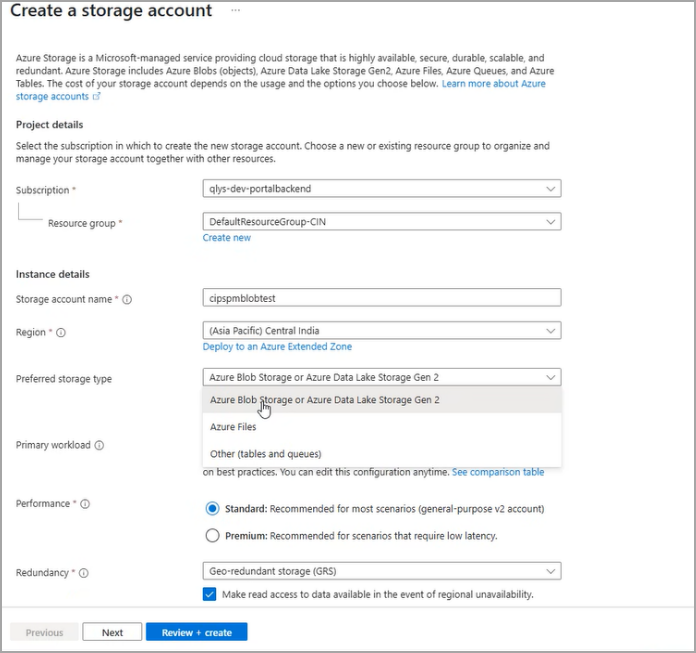
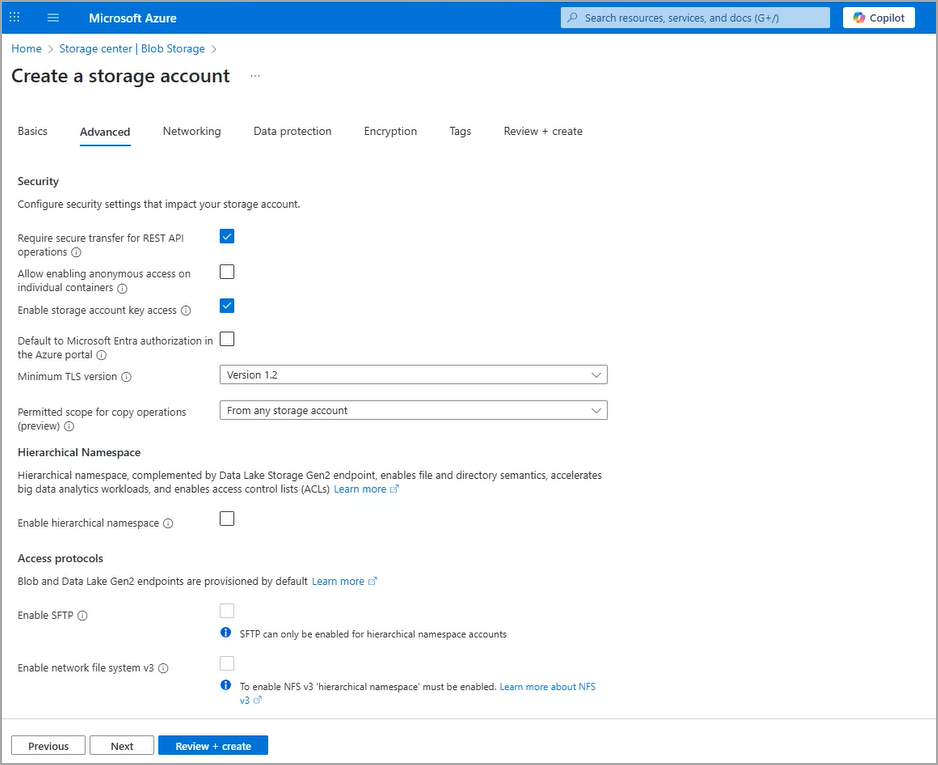
- Specify the following configuration and click Review + create to create the storage account:
- Secure transfer required: Enabled
- Allow Blob public access: Disabled
- Minimum TLS: 1.2
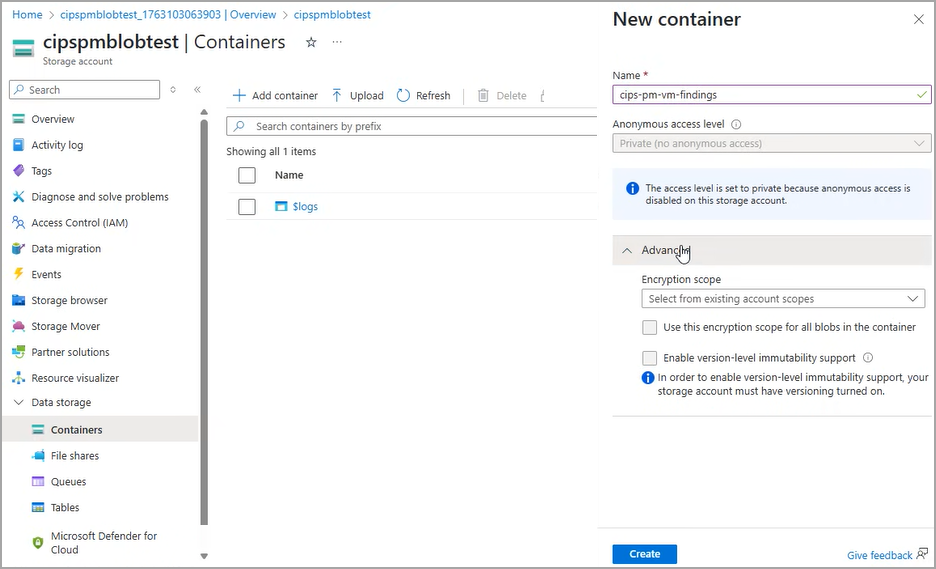
- Once you create a storage account, create a container with a suitable name, such as qualys-vm-findings.
Note down the container name. It is required during the integration process.
- Generate the connection string/shared access signature by specifying the relevant details.
- There are two methods to generate a connection string -
- Navigate to the Shared access signature tab under the "Security + Monitoring" section. This method gives more control by allowing you to customize the attributes before generating the string.
Provide the following values -- Allowed services: Blob
- Allowed resource type: Object
- Allowed permissions: Read, Write, and List
- Select start and expiry date and time as per your requirement
- Allowed protocol: Only HTTPS
- Once the values are configured, you can click Generate the SAS and Connection String to obtain the connection string.

Sample Connection StringSample Connection StringBlobEndpoint=https://rnairtest.blob.core.windows.net/;
QueueEndpoint=https://rnairtest.queue.core.windows.net/;
FileEndpoint=https://rnairtest.file.core.windows.net/;
TableEndpoint=https://rnairtest.table.core.windows.net/;
SharedAccessSignature=sv=2024-11-04&
ss=b&srt=o&sp=rwltfx&se=2025-11-13T17:36:08Z&st=2025-11-13T09:21:08Z&spr=
https&sig=p%2FS%2BOg9YcQ7Qh4nRbc09a9PQwT4eD0cCw2YzogS%2FoWs%3D - The second method is by navigating to the Access Keys tab under Security + Monitoring. Here, you do not need to customize attributes; you can view and copy the string directly.
Sample Connection String Sample Connection StringDefaultEndpointsProtocol=https;AccountName=
qualysvulnfindings;
AccountKey=gKBLzqiJoAcThsl7IJQ4ANfxs
R8KkD16vJuWBxG+/ULIqPzvEMGPcBnAzkPDJB7L
CyCCkcurog78+ASt1nhKXw==;EndpointSuffix=
core.windows.net
If the connection string expires, generate a new SAS and connection string, and update the same with Qualys. With expired SAS token, Qualys is not able to post the findings.
- Navigate to the Shared access signature tab under the "Security + Monitoring" section. This method gives more control by allowing you to customize the attributes before generating the string.
-
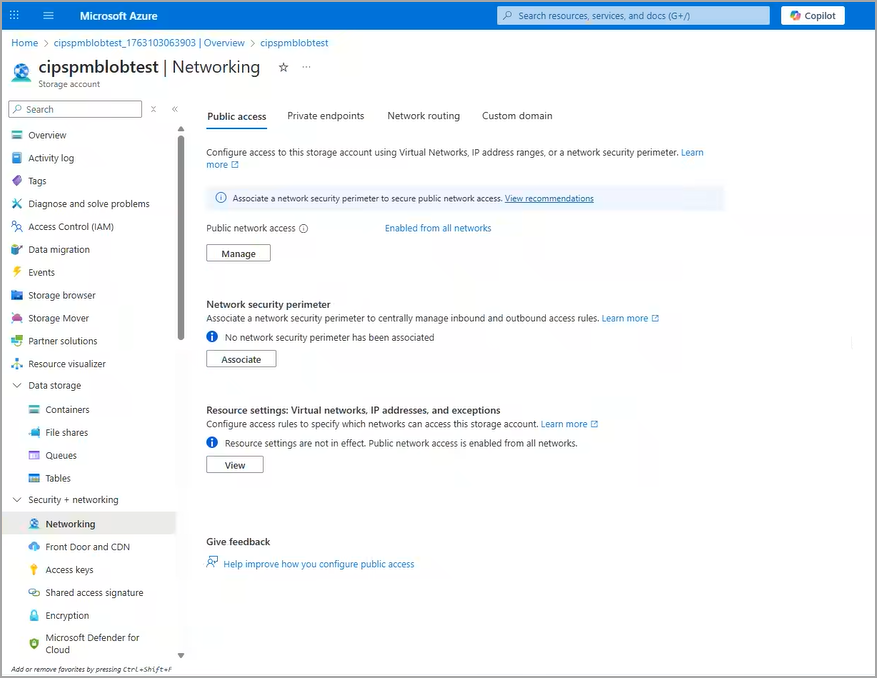
You can also modify Firewalls and virtual networks for enhanced security to allow only Qualys source IP to access the storage account.
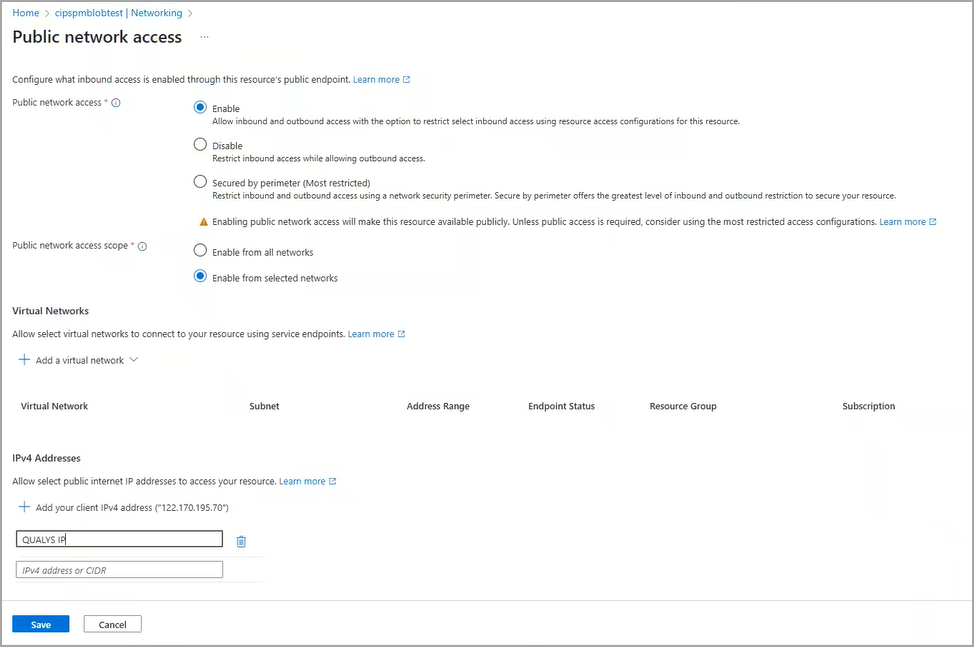
The Qualys source IP addresses that you could allow access to the Storage account are listed in the following table:
Platform IP Address US POD 1 69.67.176.113 69.67.176.114 69.67.176.115 69.67.176.116 69.67.176.100/30 69.67.176.104/29 69.67.176.112/28 69.67.176.128/28 US POD 2 69.67.177.113 69.67.177.114 69.67.177.115 69.67.177.116 69.67.177.100/30 69.67.177.104/29 69.67.177.112/28 69.67.177.128/28 US POD 3 64.39.101.113 64.39.101.114 64.39.101.115 64.39.101.116 64.39.101.100/30 64.39.101.104/29 64.39.101.112/28 64.39.101.128/28 EU POD 1 64.39.100.20 64.39.100.102 64.39.100.71 64.39.100.72 64.39.100.73 64.39.100.74 64.39.100.75 64.39.100.76 64.39.100.77 64.39.100.78 64.39.100.79 64.39.100.80 64.39.100.81 64.39.100.82 64.39.100.141 64.39.100.142 64.39.100.143 64.39.100.144 64.39.100.145 64.39.100.146 64.39.100.147 64.39.100.148 64.39.100.149 64.39.100.150 64.39.100.151 64.39.100.152 EU POD 2 141.148.237.16 141.148.247.169 64.39.106.224 64.39.106.248 64.39.106.249 64.39.106.252 64.39.106.253 64.39.106.255 141.148.228.41 141.148.237.26 144.21.42.213 152.70.50.73 141.148.239.156 144.21.34.66 CA POD 1 64.39.97.25 64.39.97.26 IN POD 1 103.216.98.25 103.216.98.20 AU POD 1 152.69.166.50 192.9.168.216 AE POD 1 193.123.88.0 193.123.85.241 KSA POD 1 207.127.100.87 207.127.96.88 EU POD 3 129.152.9.0 129.152.13.93 UK POD 1 151.104.33.138 138.2.249.51