Attribute List for Tagging
Create and add the parent tag in the attribute list for the tagging section:

- Attribute - This field shows the attribute name and is similar to the parent tag name, for example, 'Department'.
- Active - Select the checkbox to activate the dynamic tag for the default selected attribute.
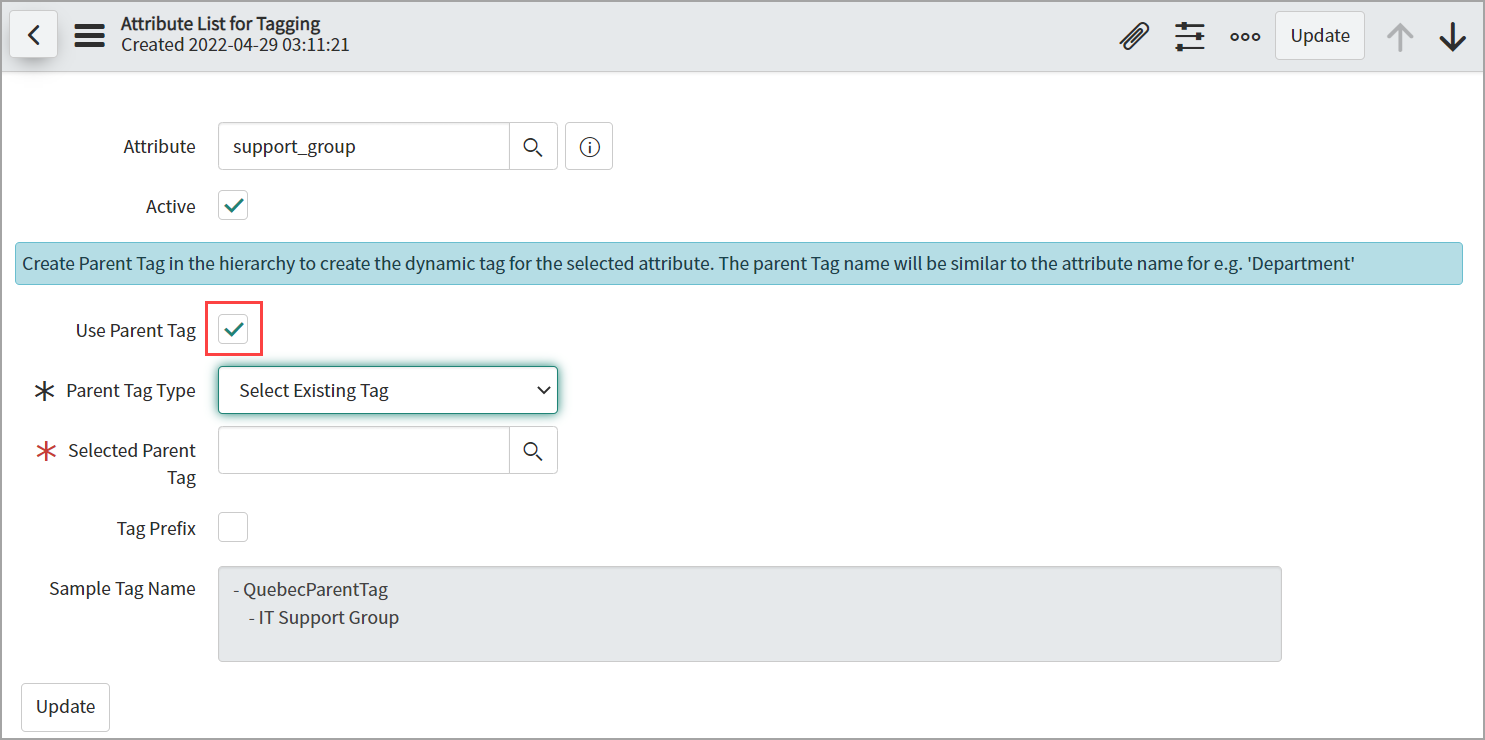
- Use Parent Tag - Select the checkbox to appear the new options on the page - It helps you to create a new tag or select any existing parent tag.
- Parent Tag type - Use this option to create a new tag or select any existing parent tag.
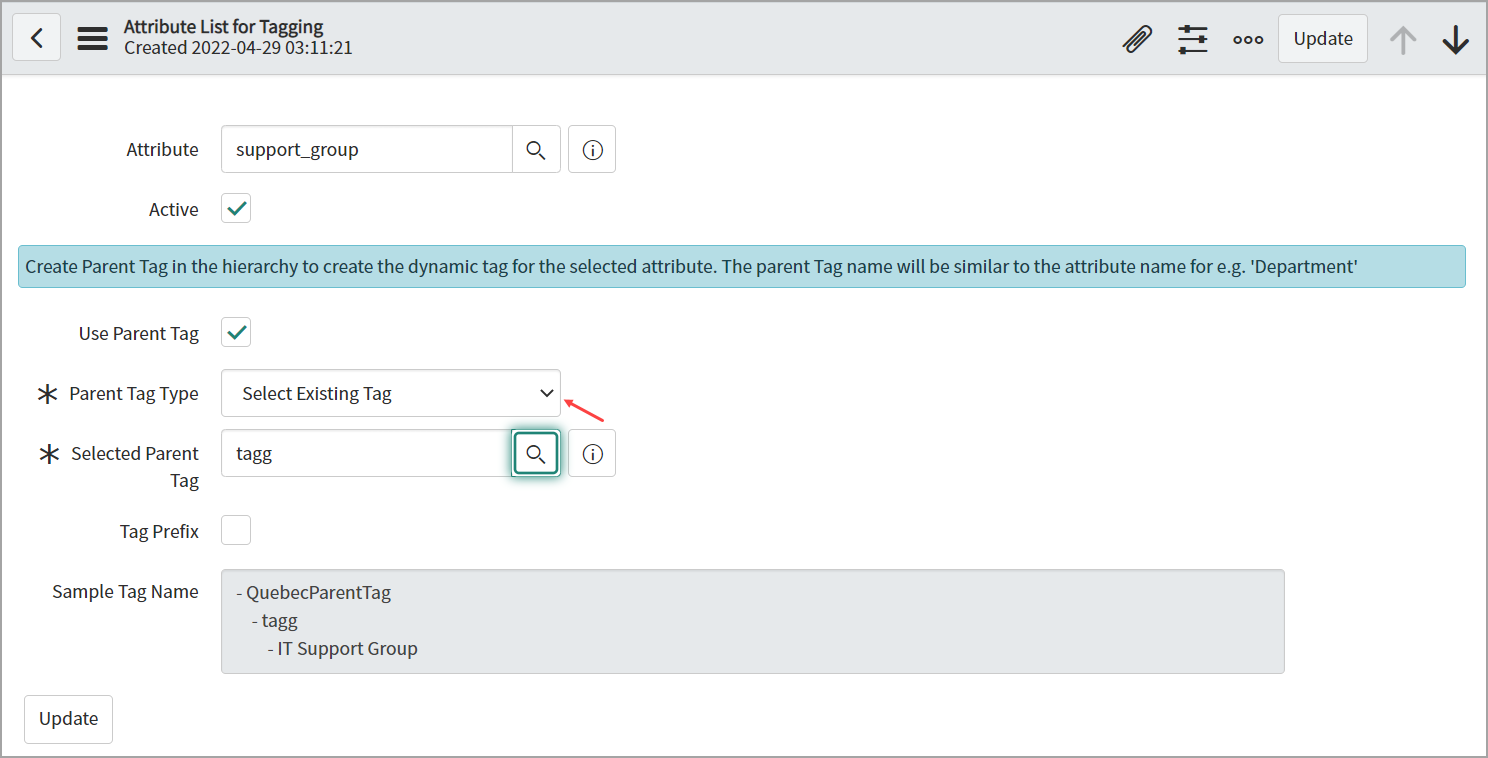
- Selected Parent Tag - Use this option to select any existing parent tag. Use the Search button to find and select any existing parent tag from the Asset Tag List.
The Parent Tag Name is available on the page if you select the Create New Tag option from the Parent Tag Type field. It is easier for you to give the appropriate name to your tag.
-
Parent Tag Name - Use this option to provide and set the name of your parent tag.
Once you enable Tag Prefix then Tag Prefix Value text-box appears on the page. -
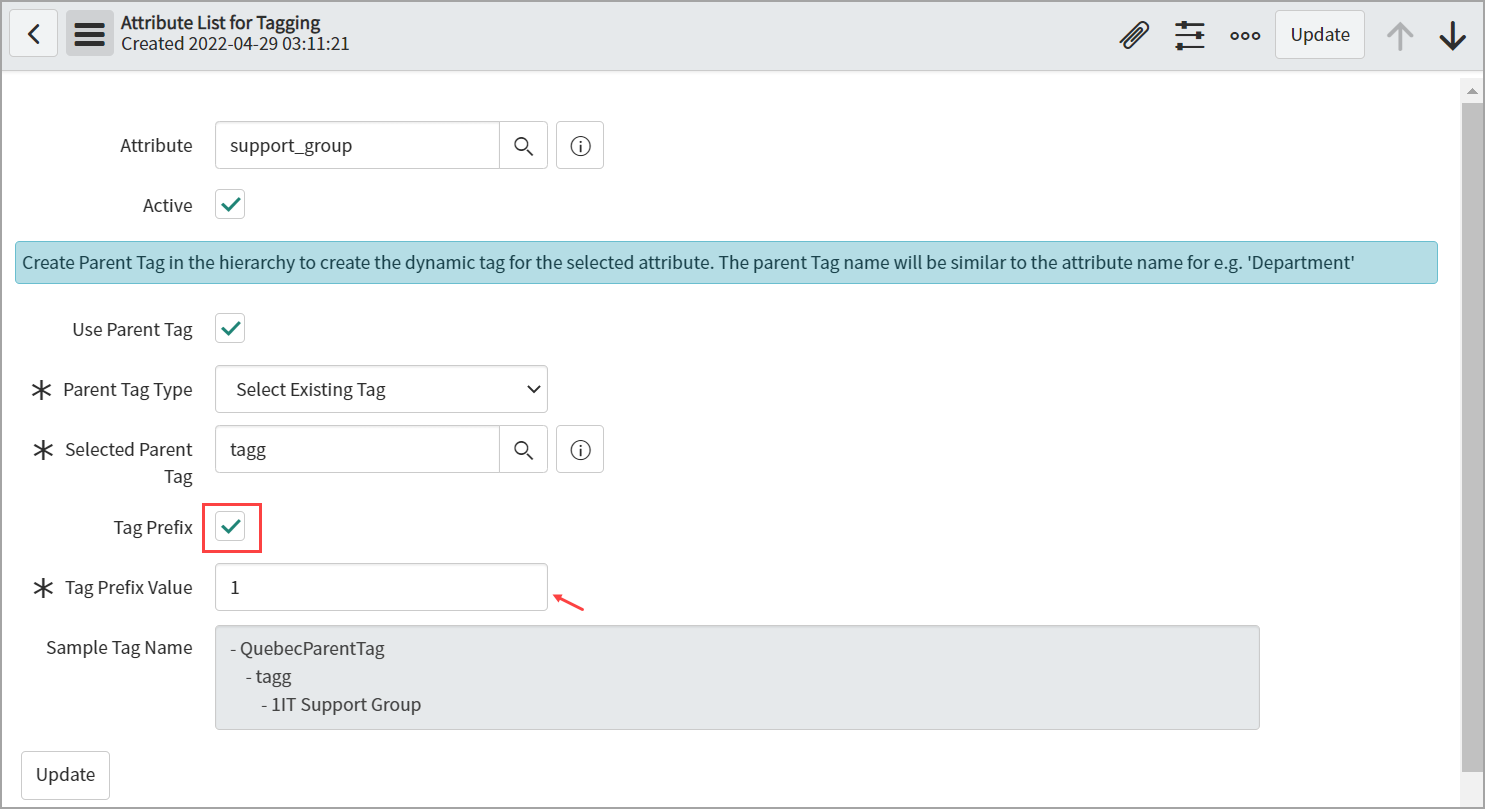
Tag Prefix - Select the checkbox and enable the tag prefix to add a prefix to your tag.
-
Tag Prefix Value - Use this field to enter your tag prefix value. The prefix is appended to that specific attribute tag once you enter it.
-
Sample Tag Name - This text box displays the details of your attribute tag.
-
Update - Click Update to update your newly created parent tag attribute configuration.
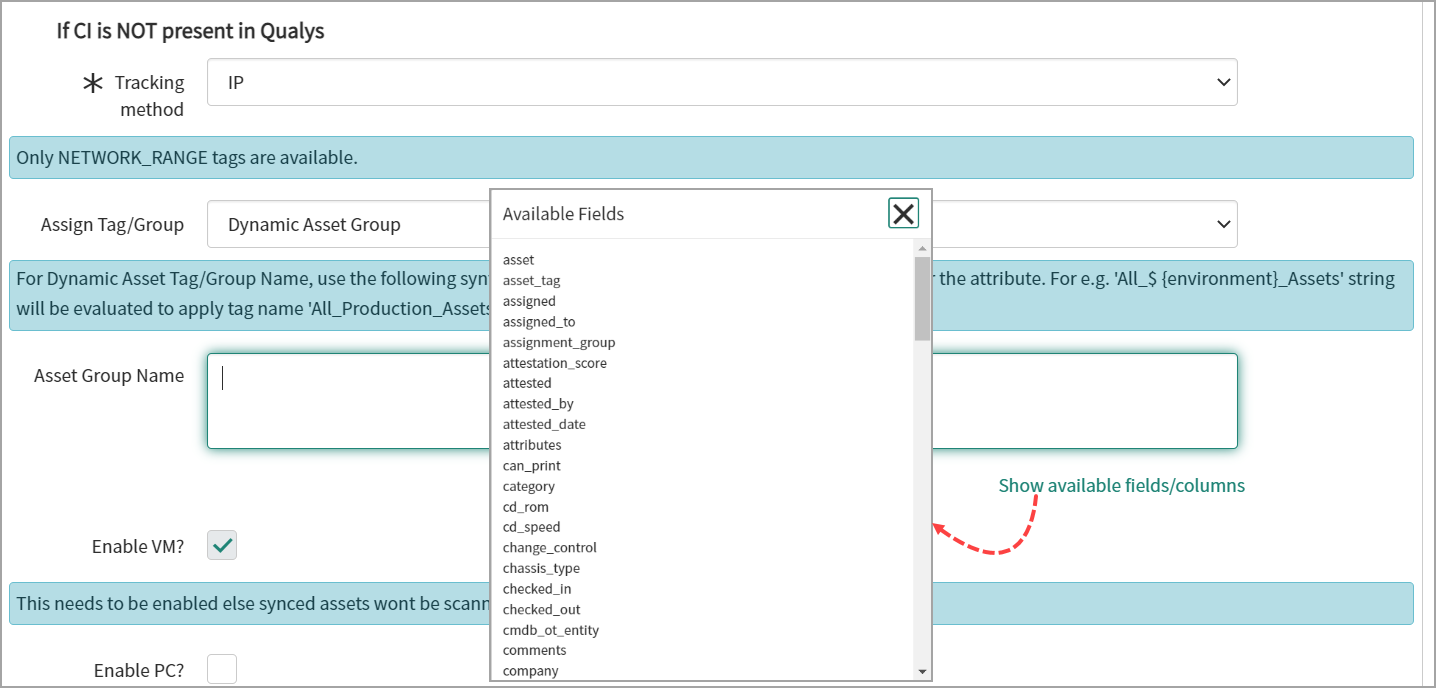
If CI is NOT Present in Qualys
If CI configuration does not exist in the Qualys configuration environment, you get only IPs from ServiceNow to Qualys.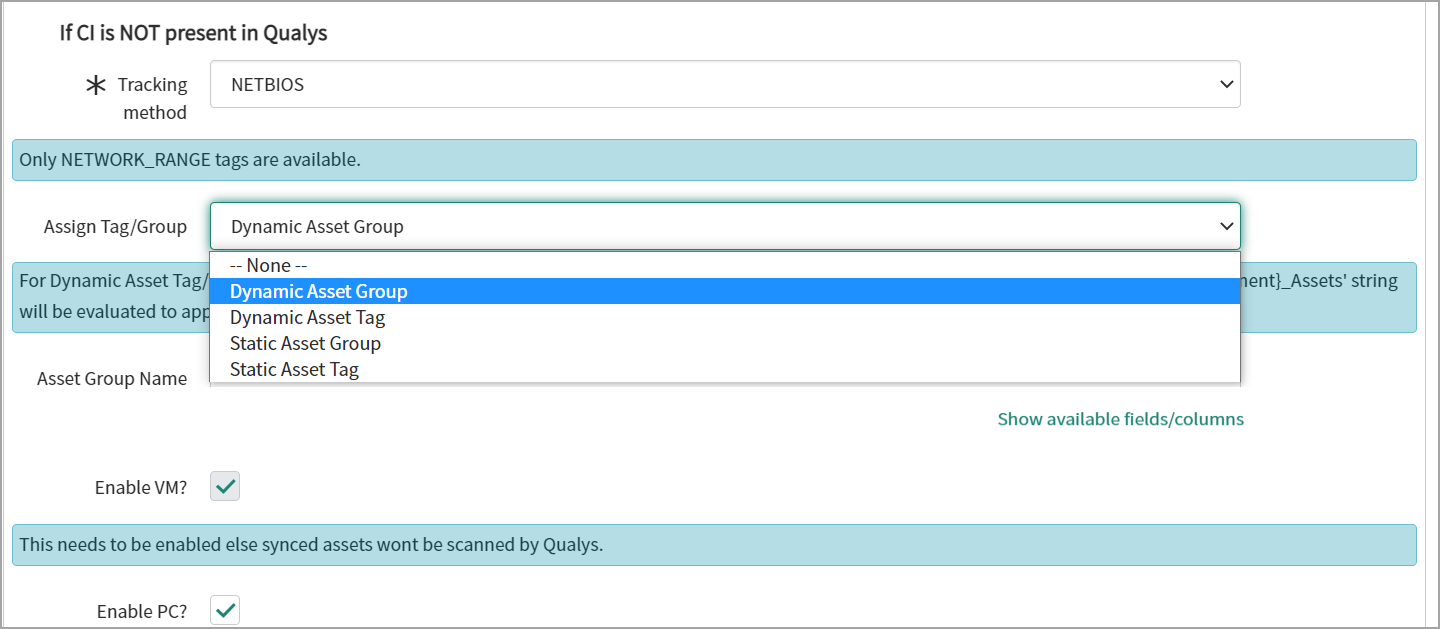
- Tracking Method - Choose the tracking method from IP, DNS, or NETBIOS for assets when syncing from ServiceNow to Qualys.
- Assign Tag/Group (Optional) - We modified this functionality by adding a dropdown that includes Dynamic Asset Group, Dynamic Asset Tag, Static Asset Group, and Static Asset Tag.
-
When you select Dynamic Asset Group, an empty text box appears. You can use this to create the asset group at runtime to sync the assets or CI with Qualys.
When you select the Dynamic Asset Tag, an empty text box appears. You can create a dynamic asset tag at runtime to sync the assets or CI with Qualys.
- A plain string and attribute name can create the dynamic asset group or tag name. The attribute name can be used in format ${attribute name} for example, ${environment}.
- You can use the Show available fields/columns option to add the attributes from the target table. It is a read-only list of available attributes from the target table, where you can copy the available attributes and paste them into the dynamic group or tag name field using the format ${attribute_name}.
- If the dynamic tag name or group name is already present in staging tables, for example, x_qual5_itam_nwapp_qualys_asset_groups or x_qual5_itam_nwapp_qualys_asset_tags - in that case, the Service graph connector does not initiate to create a call for another duplicate group or tag name. Instead, it fetchs and use the tag id or group id of the existing tag/group from staging tables.
When you select Static Asset Group, an empty text box appears, which you can use to search and enter the existing qualys asset group. Click Search to select the Qualys Asset Group from the list.
When you select Static Asset Tag, an empty text box appears, which you can use to search and enter the existing Qualys Asset Tag. Click the Search to select the Qualys Asset Tag from the list.
-
A Static Asset Tag or Static Asset Group. The 'Static Asset Tag' or 'Static Asset Group' box assigns a tag in Qualys Enterprise TruRisk™ Platform to any assets synced from ServiceNow.
- The Asset Tags that belong to only the NETWORK_RANGE type are populated. All other asset tags are ignored.
-
We recommend adding filter conditions (at minimum IP Address) to syncing assets. When selecting a TABLE, ensure the table has a column with the 'ip_address' name; otherwise, the ServiceNow > Qualys sync may not function.
VM (Vulnerability Management) is optional but can scan the assets you sync by default. We recommend that you do not disable this option. Enabling PC (Policy Compliance) is also optional.
If both VM and PC options are disabled, the Add IP flow does not work.
-
Once you have configured your selections, click Submit to create the schedule.
The Meta Info fields and few other blank fields such as Last Run Timestamp are populated with information only after the schedule is executed.