Configure API Request
If you are configuring multiple connections, then you must update this Application Access.
To configure the API request, perform the following steps:
-
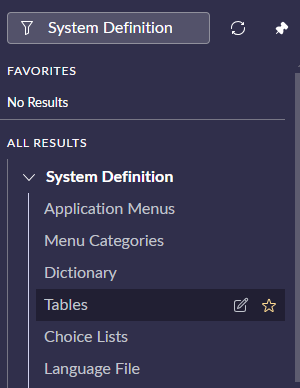
Navigate to the System Definition Application Menu and click Tables.
-
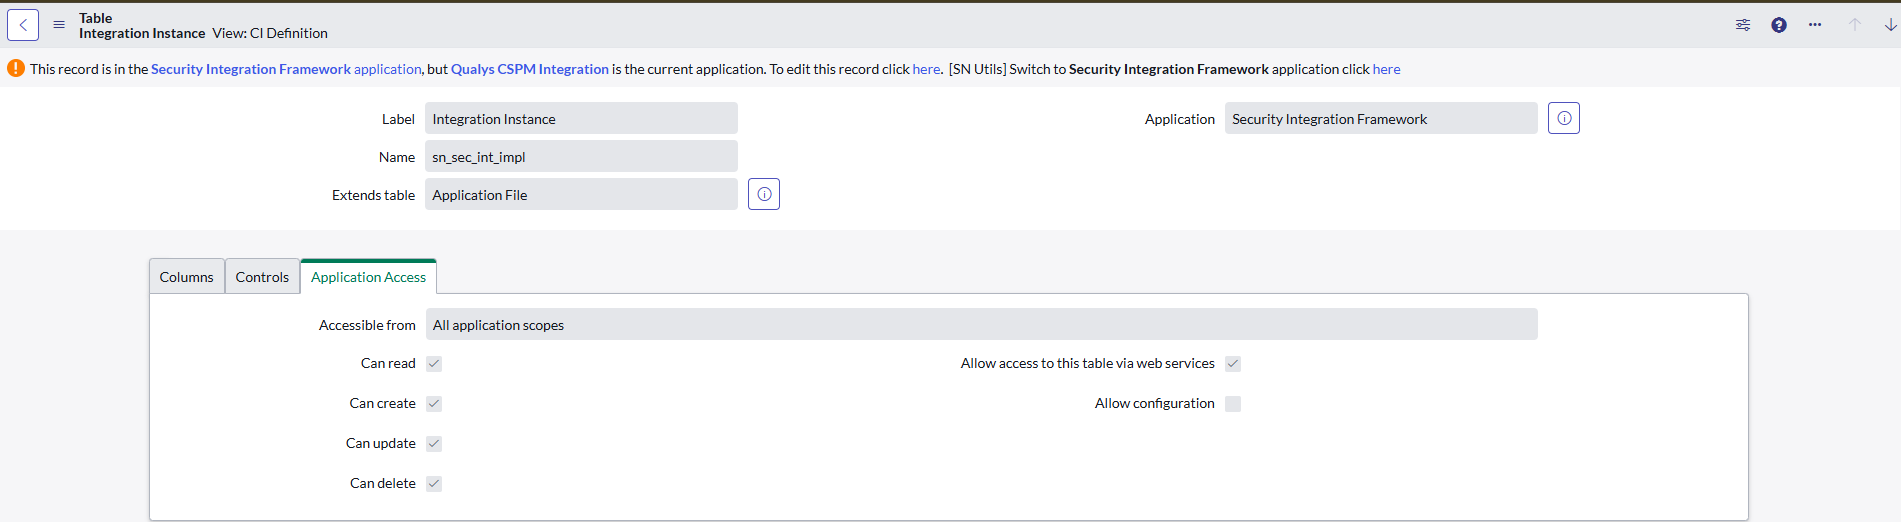
Search for Integration Instance table and open the record.

-
Switch to the Security Integration Framework application by clicking here to update the record. All four checkboxes, Can read, Can create, Can update, Can delete, must be selected.
-
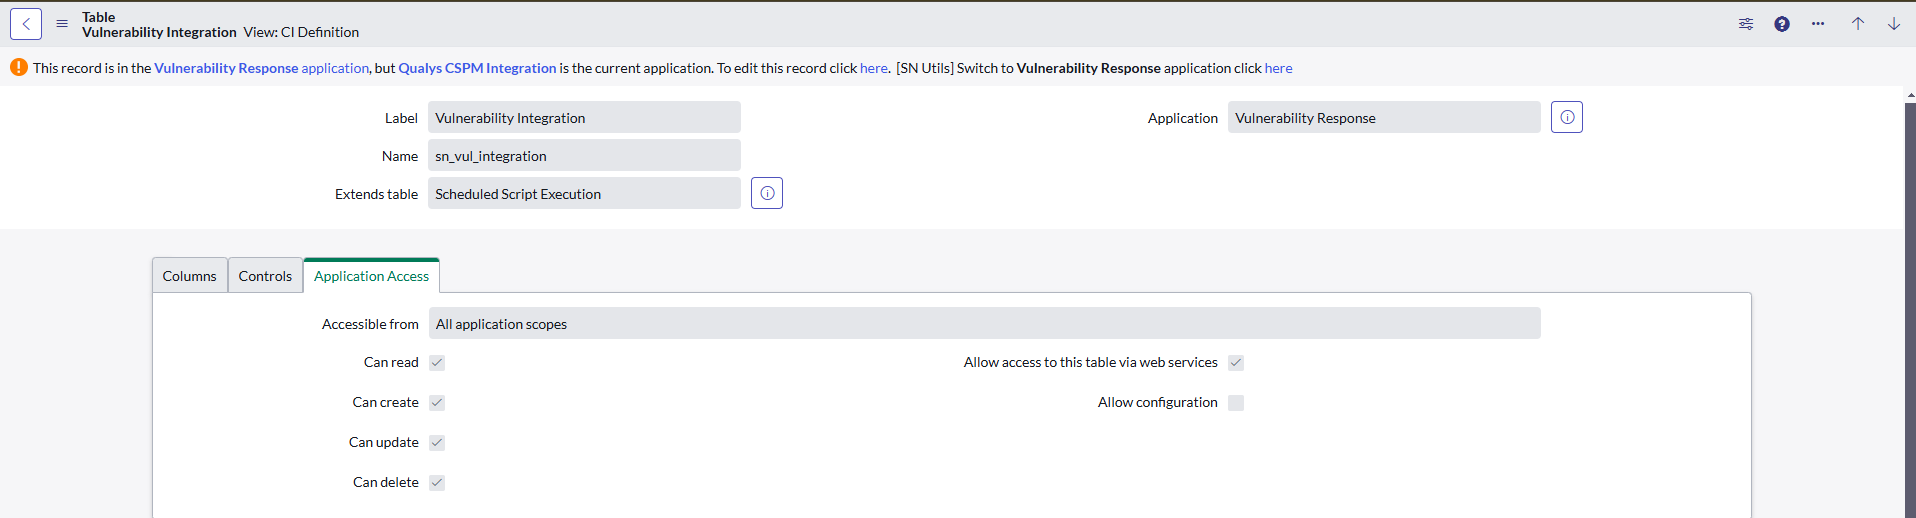
Search for the Vulnerability Integration table and open the record.

-
Switch to the Vulnerability Response application by clicking here to update the record. All four checkboxes, Can read, Can create, Can update, Can delete, must be selected.
This involves configuring the filters and providing basic authentication details, such as a username and password, to fetch data from the Qualys TotalCloud Platform.
How to Assign Permission to Access - x_qual5_conf_comp.qualys_cspm_admin Table
To assign permission, perform the following steps:
-
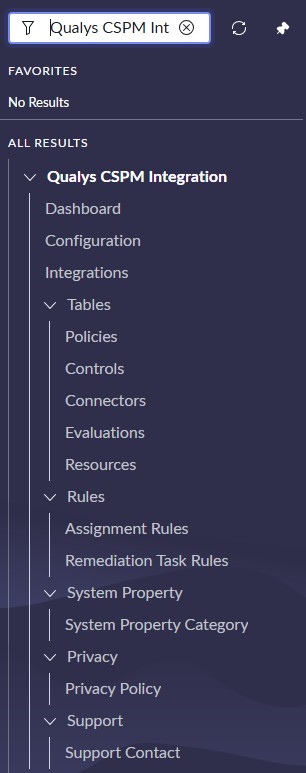
Navigate to the Qualys CSPM Integration Application Menu and then click Configurations. By default, there is one configuration record; to create multiple configurations, click New.
-
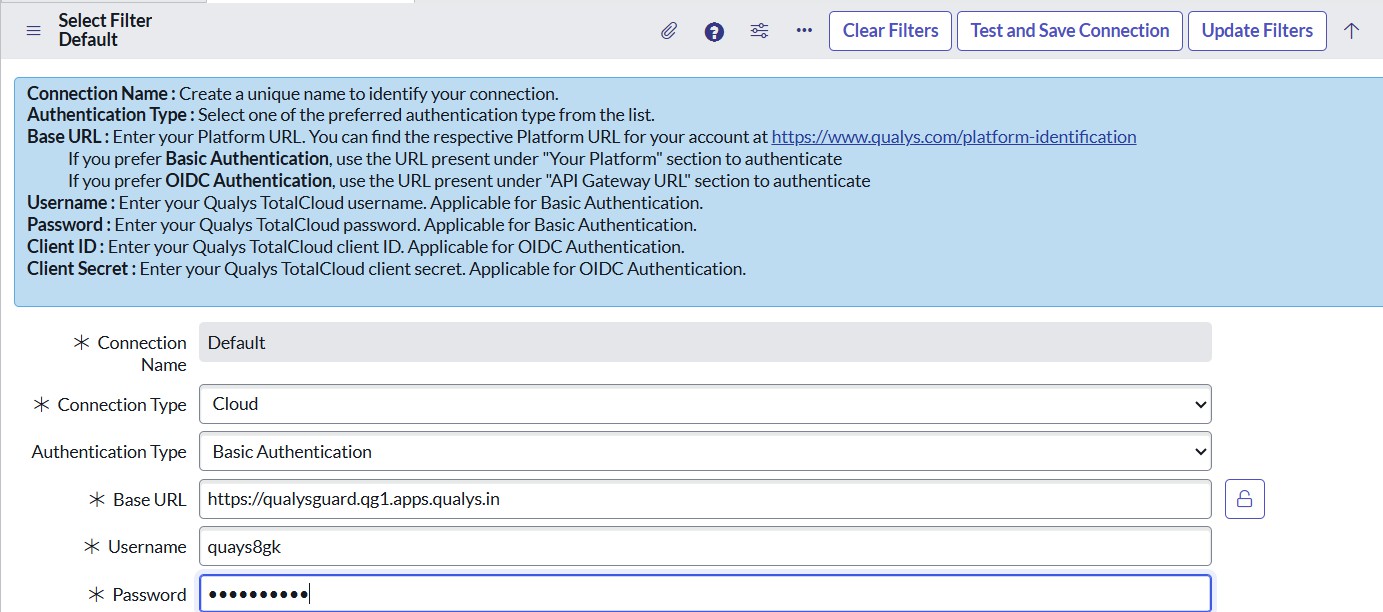
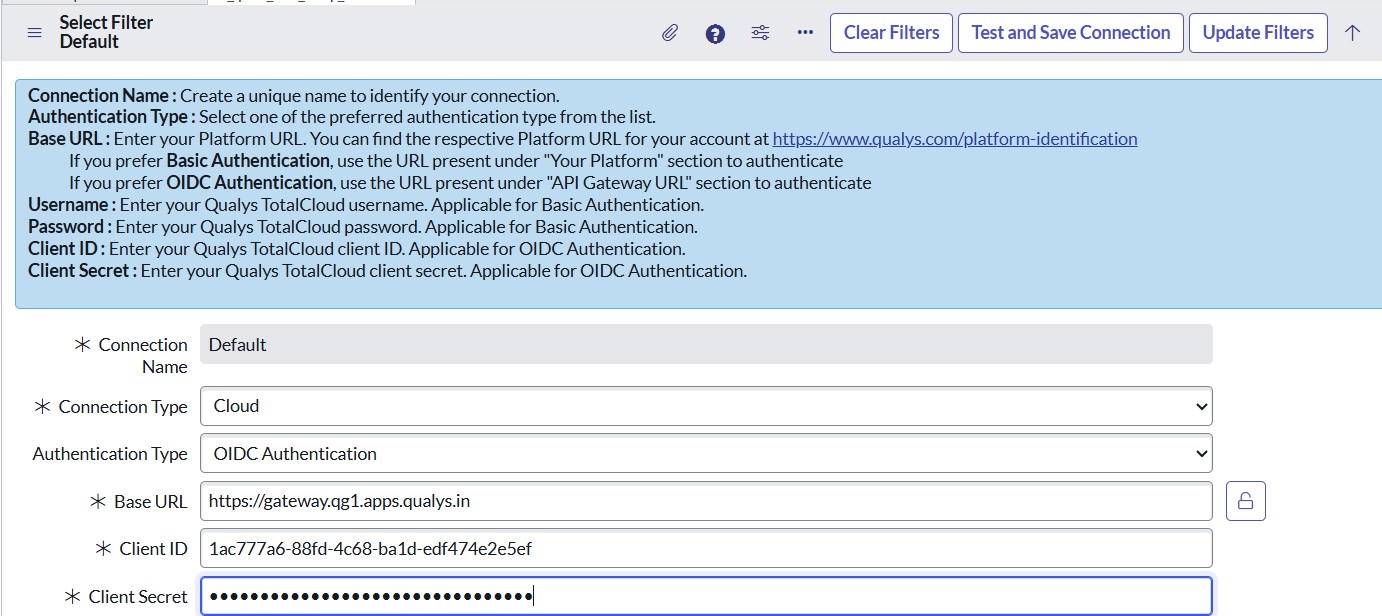
The list view displays Connection Name, Connection Type, Base URL, and authentication details. Depending on the selected Authentication Type, only the relevant fields are shown: Username and Password for Basic Authentication, and Client ID and Client Secret for OIDC Authentication. The user should click on Test and Save Connection. Once authentication is successful, an informational message will be displayed, and the integration instance field will get populated if a new configuration is being created.
-
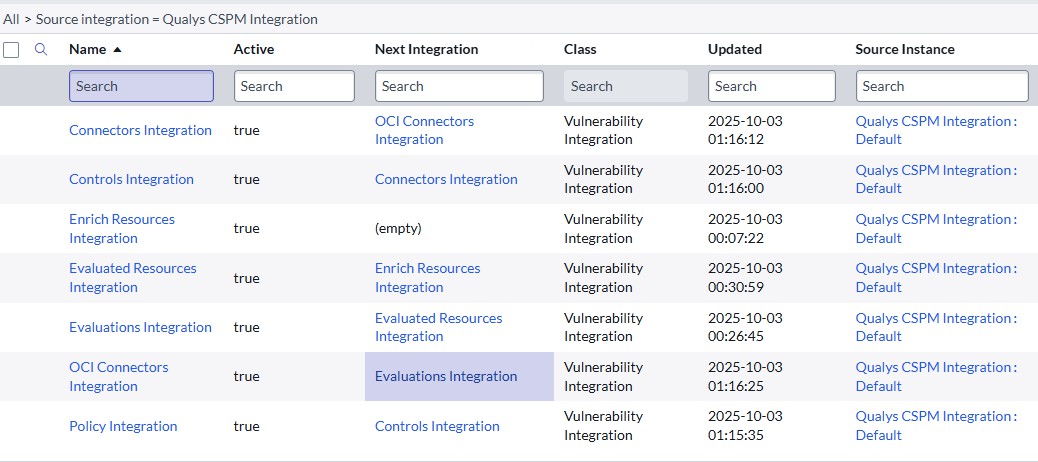
When creating a new configuration and selecting OIDC Authentication, the OCI configuration is unlinked automatically. For existing records, selecting OIDC Authentication requires manually unlinking the OCI configuration.
Perform the steps to unlink the OCI configuration as follows:-
Navigate to the Integration module of Qualys CSPM Integration.
-
Update Next Integration field value for Connectors Integration from OCI Connectors Integration to Evaluations Integration.
-
Same applies to when switching from OIDC to Basic, link the Next Integration as per the default flow as below:
-
-
If any updates are made to the filters, click Update Filters. Attempting to click on Test and Save Connection after updating the filters results in an error message.
Basic Authentication
OIDC Authentication
-
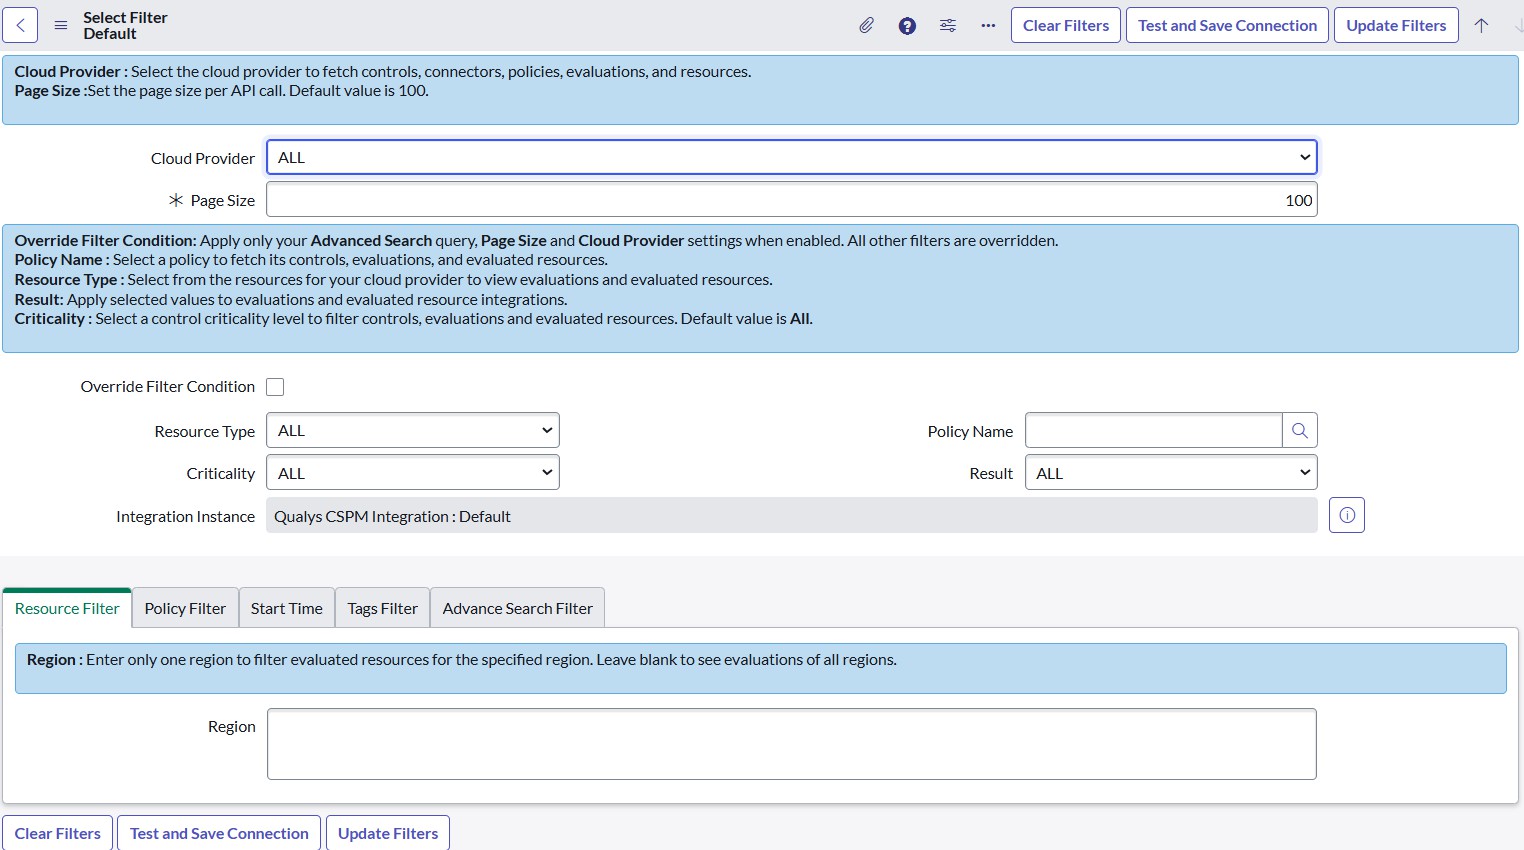
Below this, a list view of filters for policies, controls, connectors, evaluation, and resources is displayed.
-
The user can configure each filter value individually. If the Override Filter Condition checkbox is selected, then all filter values below are disabled. Only the values provided in the Advanced Search Filter is used to fetch data from the Qualys TotalCloud Platform.
Once the configuration record is created, it cannot be deleted. If you want to stop data ingestion, manually Inactive the integrations from the integration modules.