Support and Troubleshooting
For any query, you can navigate to the Qualys Support Page by providing the platform details
Support
You must have the x_qual5_conf_comp.qualys_cspm_admin role.
To contact Qualys Support, perform the following steps:
- Log in to the ServiceNow instance.
- Navigate to All, then select Qualys CSPM Integration.
- Click Support.
The Qualys support page is displayed. - Click here.
You get redirected to the Qualys Support Website.
Service Level Agreement Definition
Support Contact Details: https://success.qualys.com/customersupport/s/
Error logged at Information Level
The error occurs because we aren't populating the host lookup payload with the Name field, which is one of the required fields for IRE rules. This error can be neglected.

Error Logged at Warning Level
The error occurs because the integration was not executed in the predefined order. If you encounter this warning in a logged message, follow the instructions provided in that specific log message.
If the integration is not executed in the correct order, it can lead to data ingestion mismatches. If Control Integration runs first and ingests some data, and then Evaluation Integration runs afterward, any missing control data from the initial execution results in incomplete evaluation data.

To ensure that all the latest data is fetched for evaluation, You must configure the last run time of the Evaluation Integration as the start time for the next execution.
To avoid this warning message, follow this specific execution order for integration.
Policy integration > Controls integration > Connectors integration > OCI Connectors integration > Evaluations Integration > Evaluated Resources Integration > Enrich Resources Integration
API Behavior for Advanced Search Filter in Evaluations Ingestion
-
Issue
When passing the accountId in the filter parameter, the API returns the same set of data across different connectors specified in the endpoint.
-
Example API Endpoint
https://qualysguard.qg1.apps.qualys.in/cloudview-api/rest/v1/aws/evaluations/8 60454016470?pageSize=100&pageNo=0&filter=account.id:"951386378875
-
Cause
This is a legacy issue with the account.id passed in the filter parameter overrides the account ID for which the Evaluations API is called. As a result, the response data may not be restricted to the intended account, leading to inconsistent results. -
Resolution
- Avoid using the account.id filter when calling the Evaluations API for a specific account.
- Instead, rely on the account-specific API endpoint to ensure accurate data retrieval.
Limited Data Retrieval for Policy, Controls, Evaluations and Evaluated Resources
-
Description:
If filter values are provided in the advanced search filter but the ingested data for policies, controls, evaluations, evaluated resources, or enrich resources appears to be less, it may be due to the system fetching only the last 24 hours of data.
-
Resolution:
To retrieve all available data, ensure that the evaluatedOn parameter is included in the advanced search filter.
Dashboard is Not Visible
-
Description:
The dashboard is not visible, this occurs because the required role for viewing the dashboard is missing.
-
Resolution:
To access the dashboard, ensure that the role x_qual5_conf_comp.qualys_cspm_admin is assigned.
To make the Dashboard visible, perform the following steps:
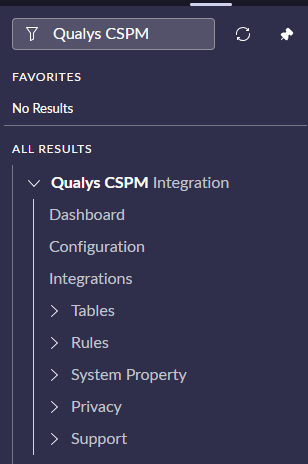
- Navigate to Qualys CSPM Integration and click Dashboard.
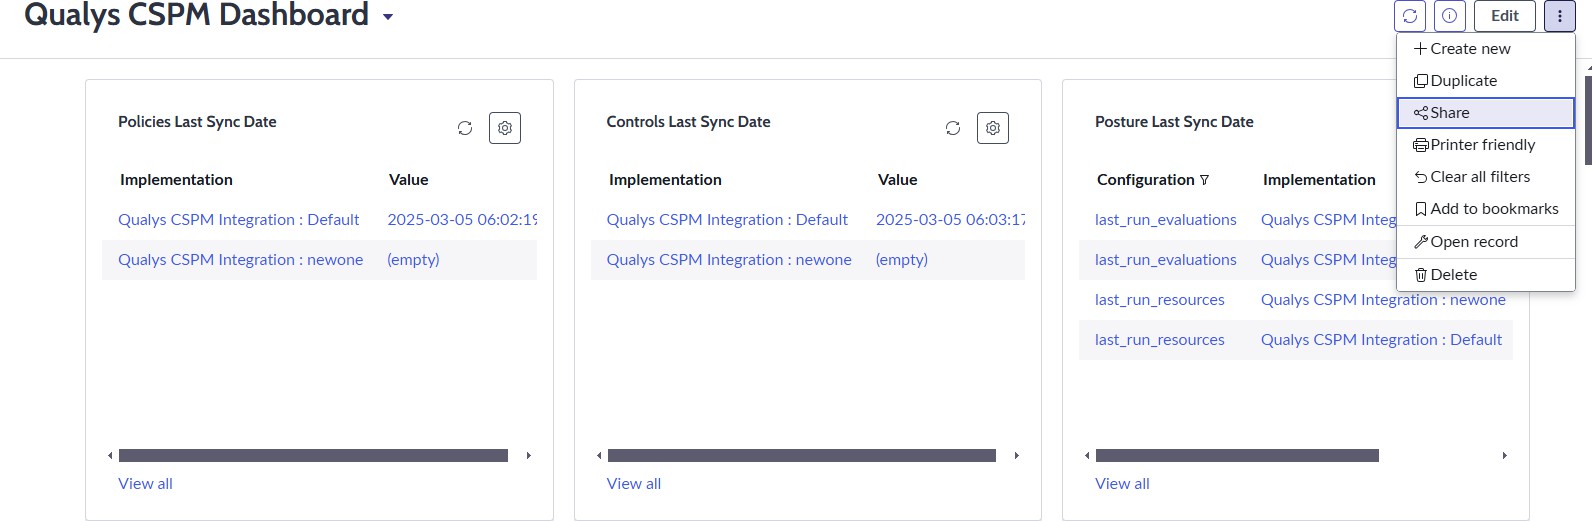
- Click three dots in the right corner and click on share.
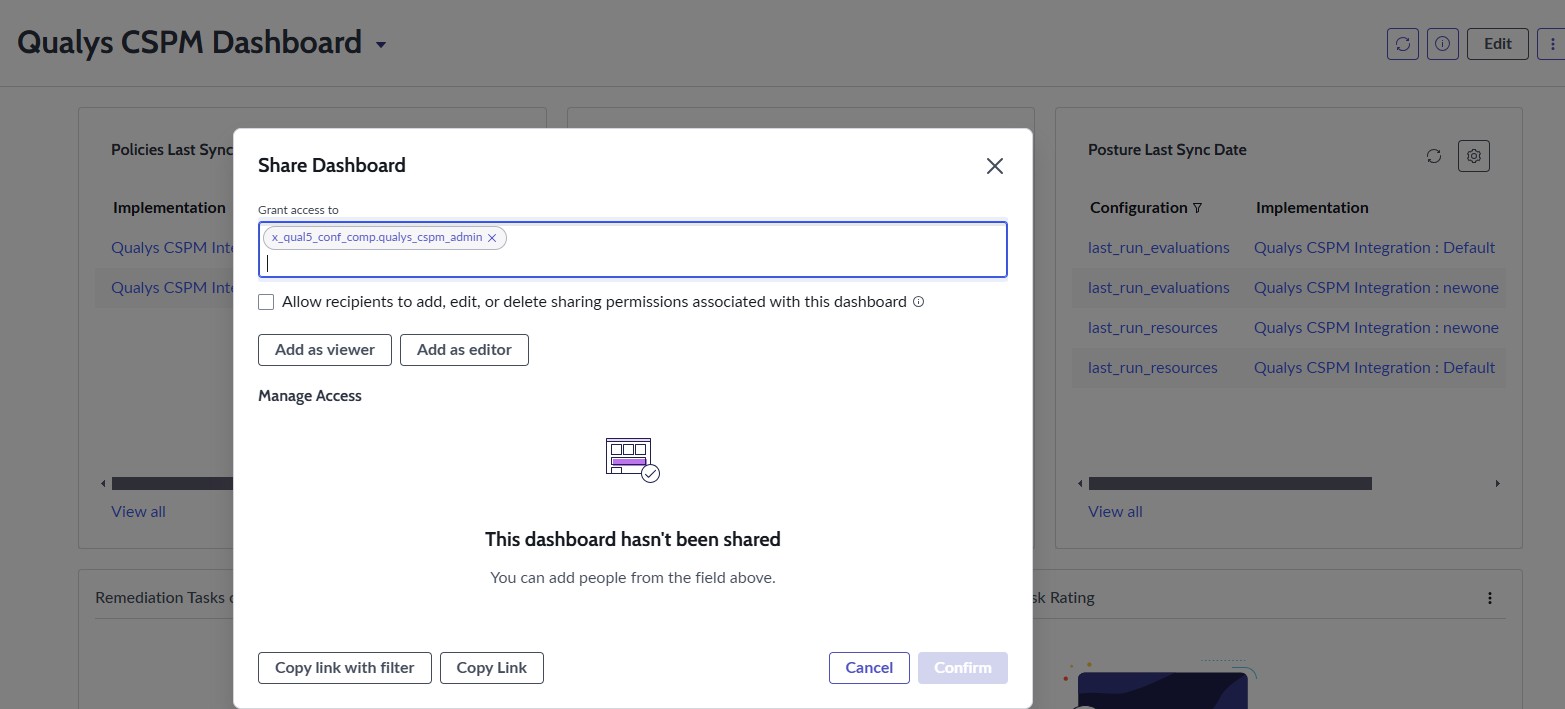
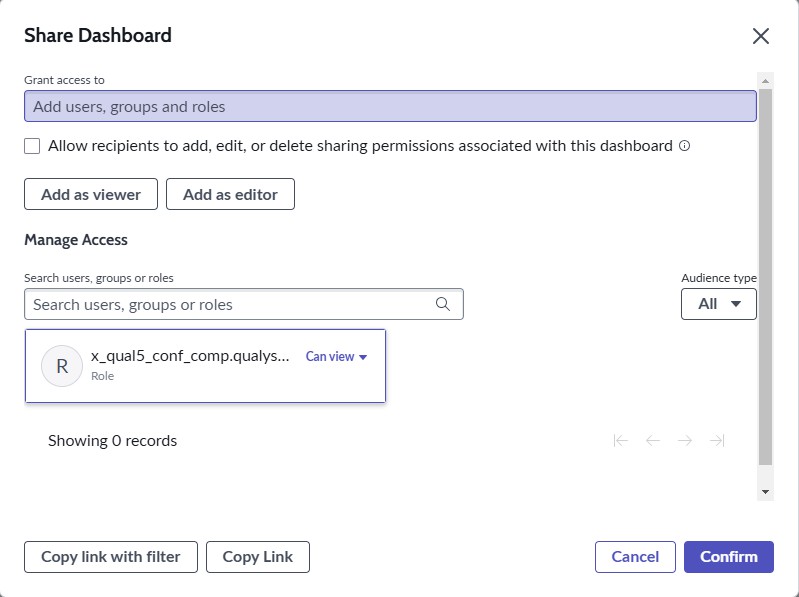
- Grant access to x_qual5_conf_comp.qualys_cspm_admin and click Add as viewer and then Confirm.
- Navigate to Qualys CSPM Integration and click Dashboard.
New Configuration is not Getting Created
Description
A new configuration is not being created, but Vulnerability Integration for the New Connection Name is Being Created in Integration Modules.

To access the Integrations, ensure that the role admin is assigned.
Procedure:
To make the Dashboard visible, perform the following steps:
- Navigate to Qualys CSPM Integration Application Menu and then click Integrations.
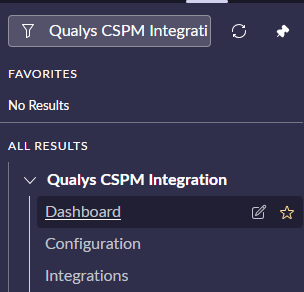
- If you face this particular error in configuration, then delete all the vulnerability integrations for that connection, like for test, as in the image, if it is created. Otherwise, you can proceed with the next step.
- Navigate to the sn_vul_integration table.
You can access it via searching under All as sn_vul_integration.list. - Click three dots on any column and navigate to Configure > Table.
Ensure you are in the Vulnerability Response scope. Else, you can switch to that scope from the application picker. - Navigate to Application Access and set Can create and Can update to true.
- Update the table.
- Navigate back to the configuration and configure the record.
Seeing Error Logs Related to Import Set Table Loaded with Errors
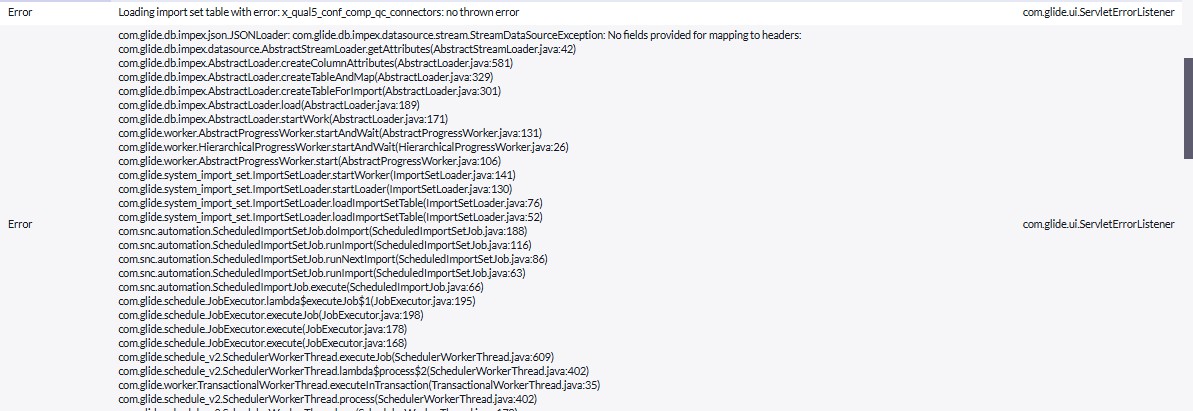
When navigating to the System Logs table, if you encounter logs such as those shown in the above image, you can safely ignore them. The probable root cause is that you have selected a specific cloud provider in the configuration, and an irrelevant integration is enabled and running. You can disable that Integration module.
For example, you have selected the OCI cloud provider in the configuration, provided your credentials, and saved the page. On save, the app would create integrations required to bring in data from the Qualys TotalCloud platform. In this example,
you can disable the integration containing the text Connectors Integration and update the next integration to OCI Connectors Integration for the integration containing the text Controls Integration. This way, the error would no longer be logged in the system. The Connectors Integration is responsible for bringing AWS, Azure, and GCP connectors; hence, if you have selected the Cloud Provider as OCI in the configuration, you can deactivate this Connectors Integration for your configured configuration.
Adding New Data Sources to Integrations to Speed up Processing for Integrations
If you wants to increase the processing speed, then you can add new data source to the integration by performing the following steps :
- Navigate to the Integration record for which data source needs to be added,
For example: Qualys CSPM Integration > Integrations > Evaluated Resources Integration.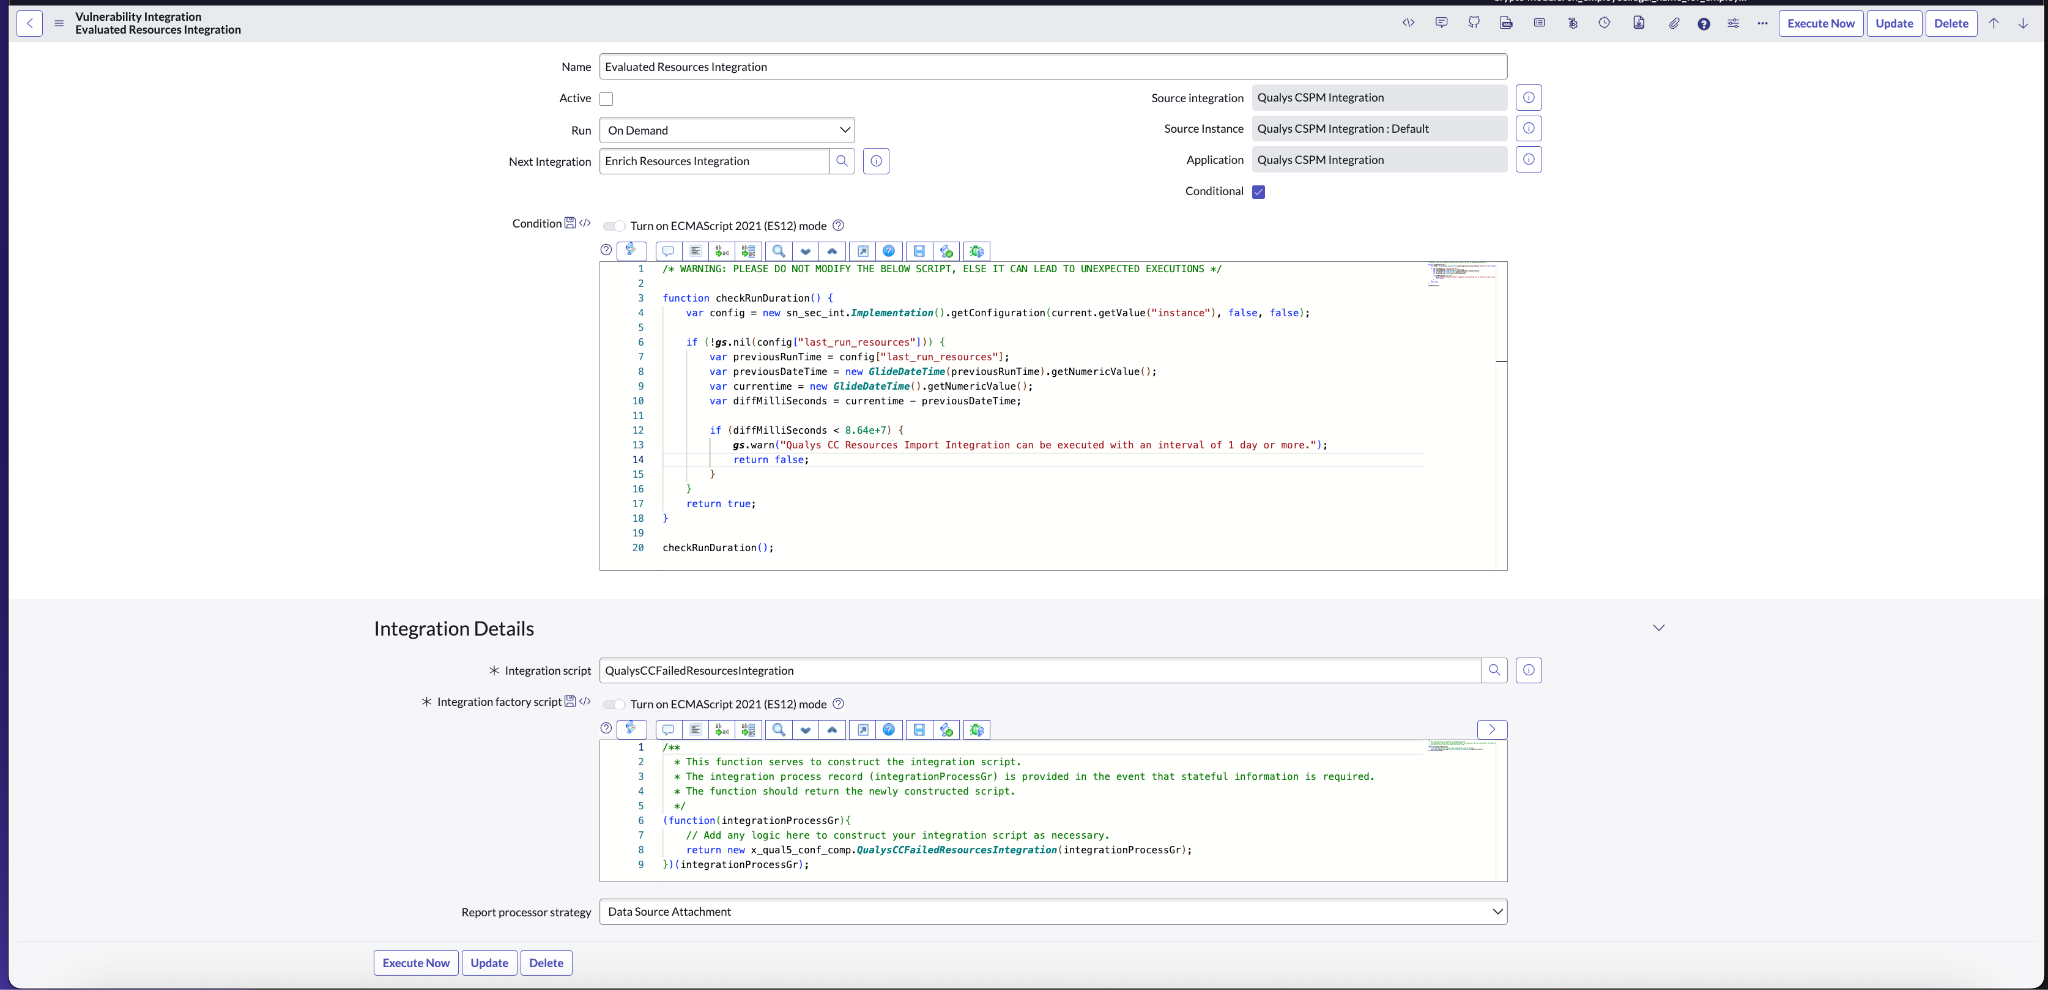
- Click Data Source tab.
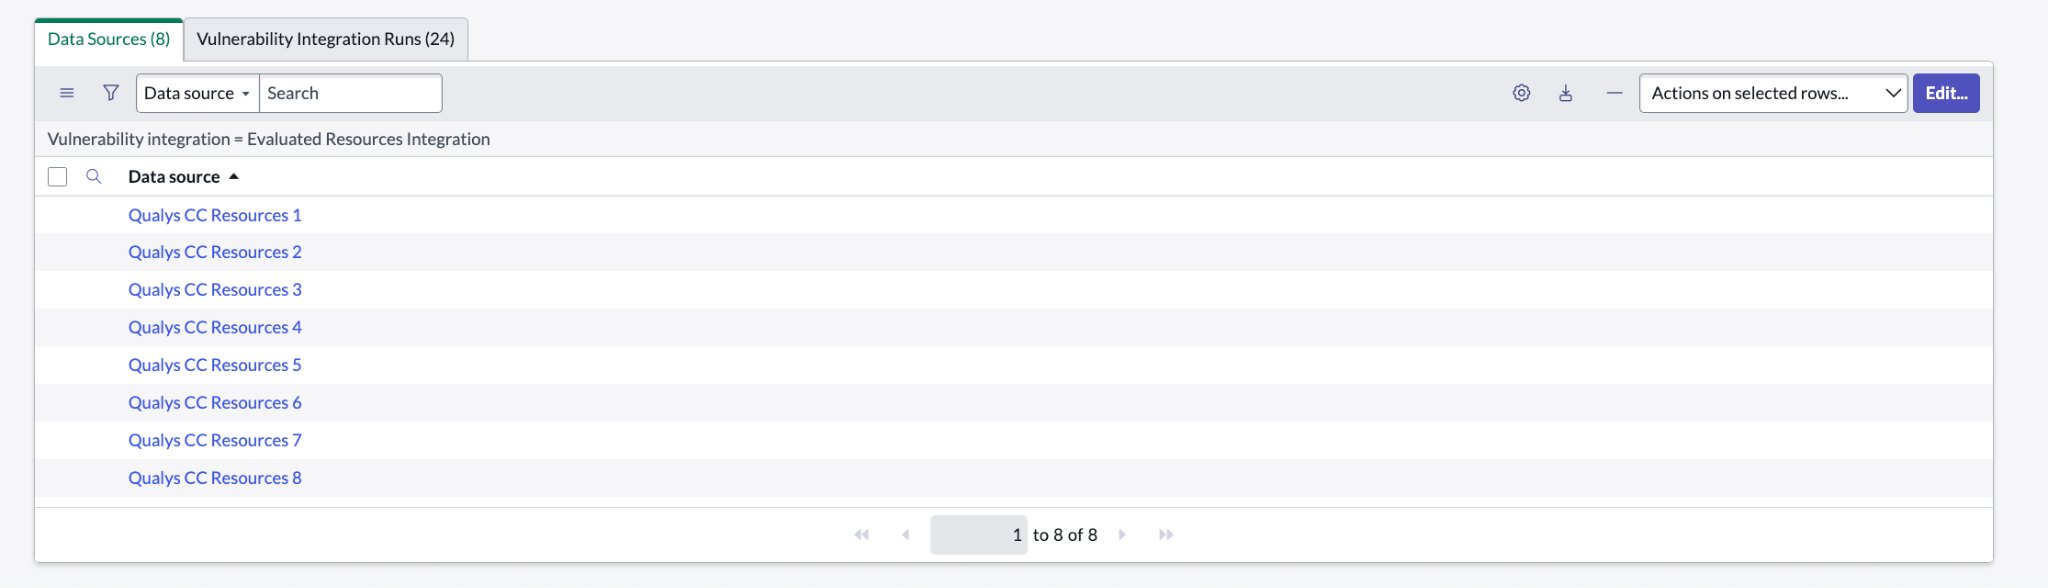
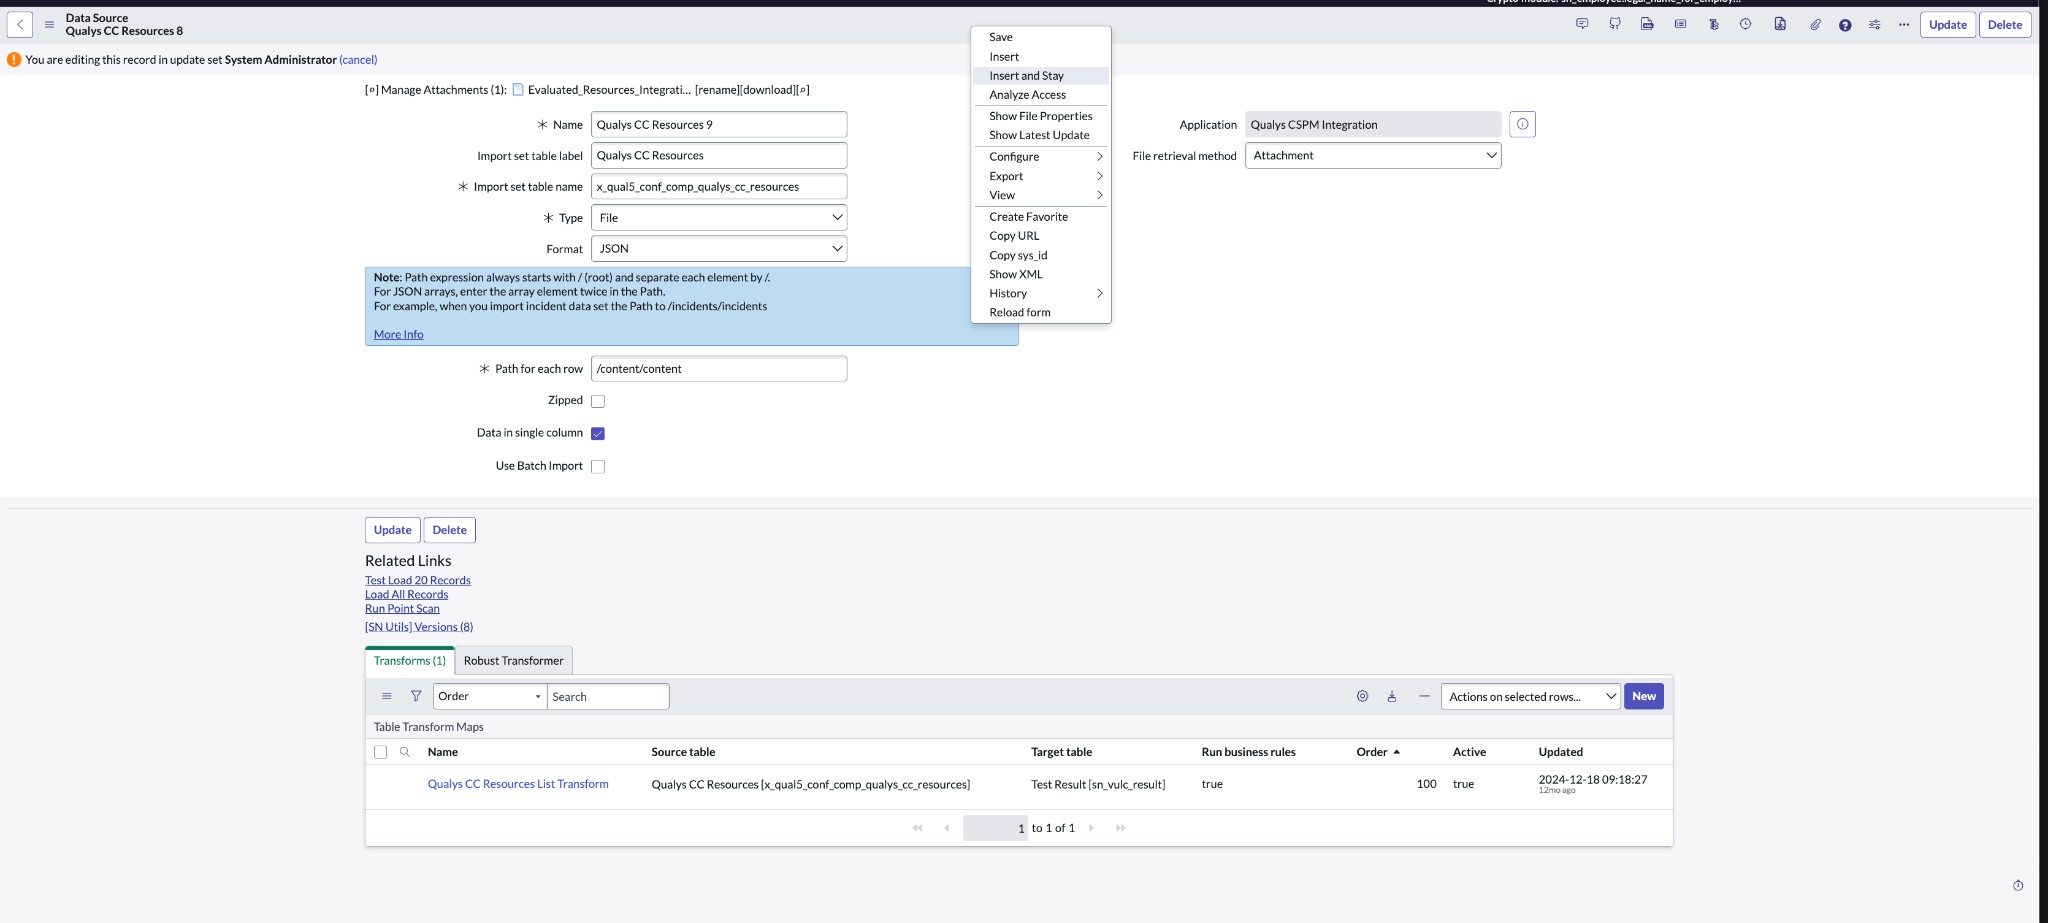
- Click on any one of the data sources, Qualys CC Resources 8, and open the form view of the data source, change the name of the data source to Qualys CC Resources 9, and right-click on the top header and click Insert and Stay.
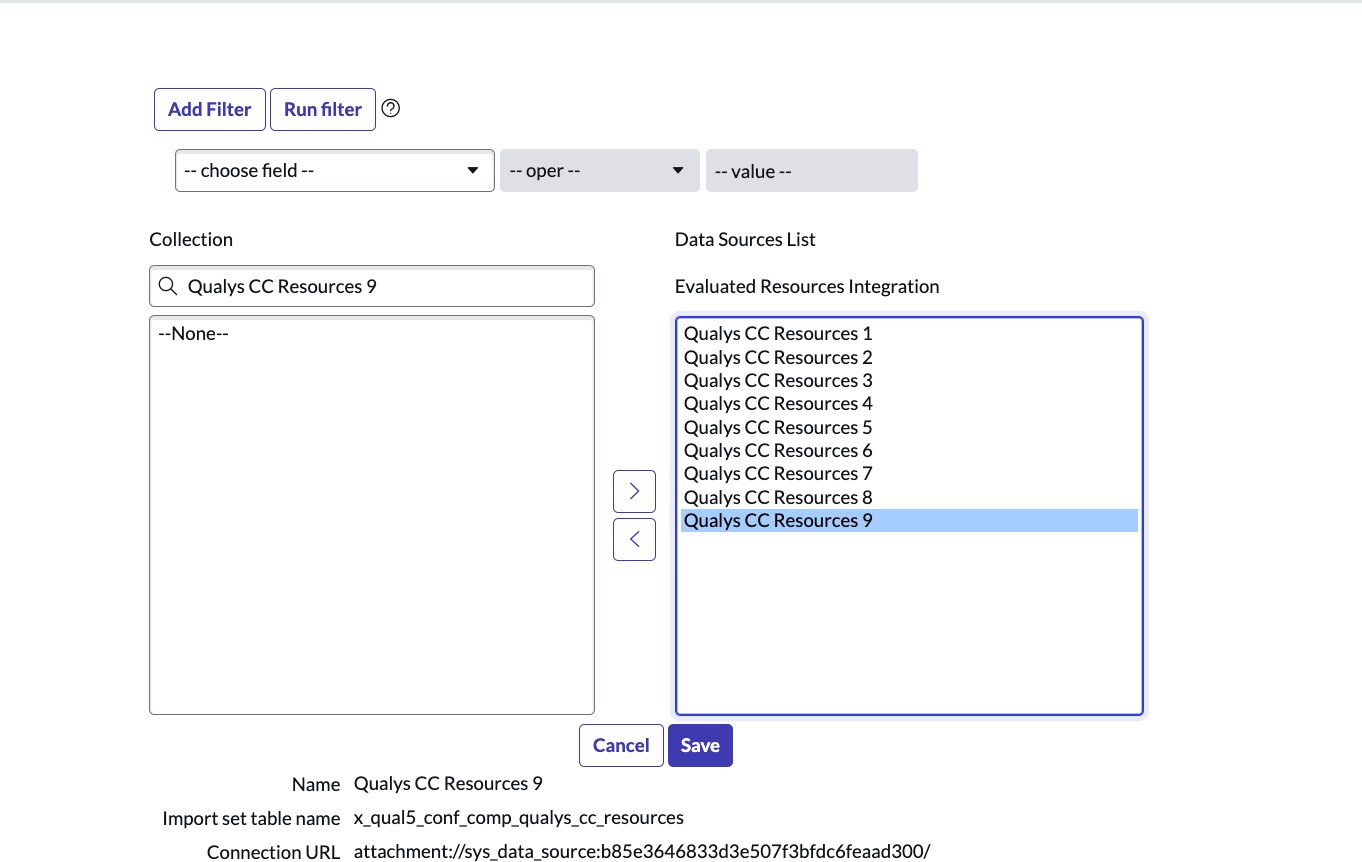
- Navigate again to the Evaluated Resources integration record and click Edit on the Data Sources tab, search for the newly created data source Qualys CC Resources 9, and move it to the right side, and click Save.
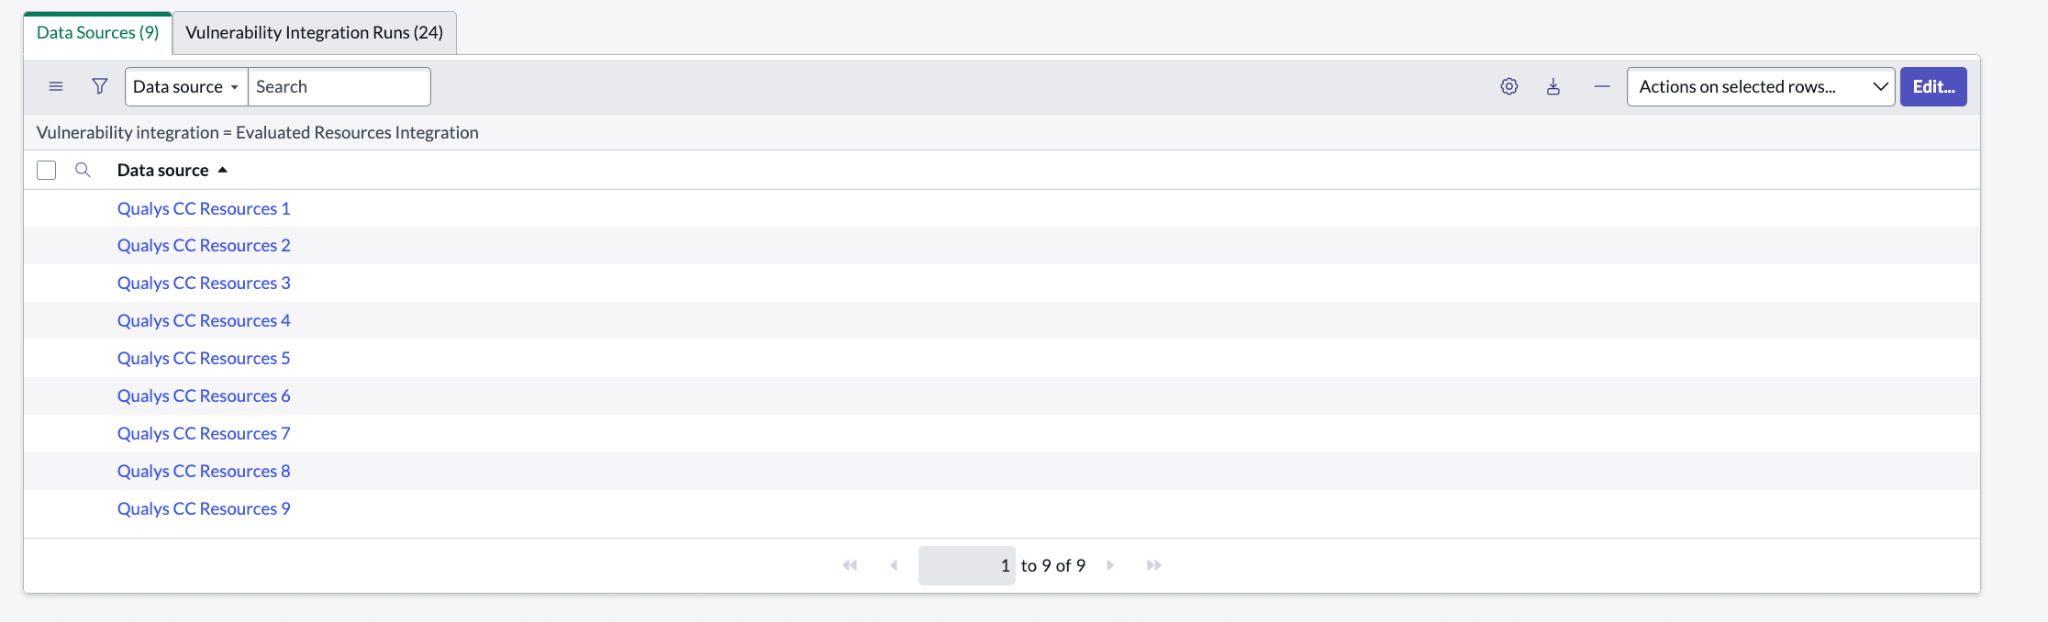
- Similarly you can create data sources for any other integration (Controls, Policies, Connectors, and similar).
Increasing the number of data sources can affect other jobs running in your ServiceNow instance. You can fine-tune the data sources used based on the nodes present in your ServiceNow instance.
System property to increase the maximum attachment size to an integration process.
By default, ServiceNow VR allows a maximum attachment size limit of 100MB per integration process, and the attachment size depends on the pageSize set in the configuration Page.
If you had a response size more than 100 MB per API call, then you need to perform the following steps to increase the attachment size limit for a particular integration process :
- Search for Import Export module in the navigator.
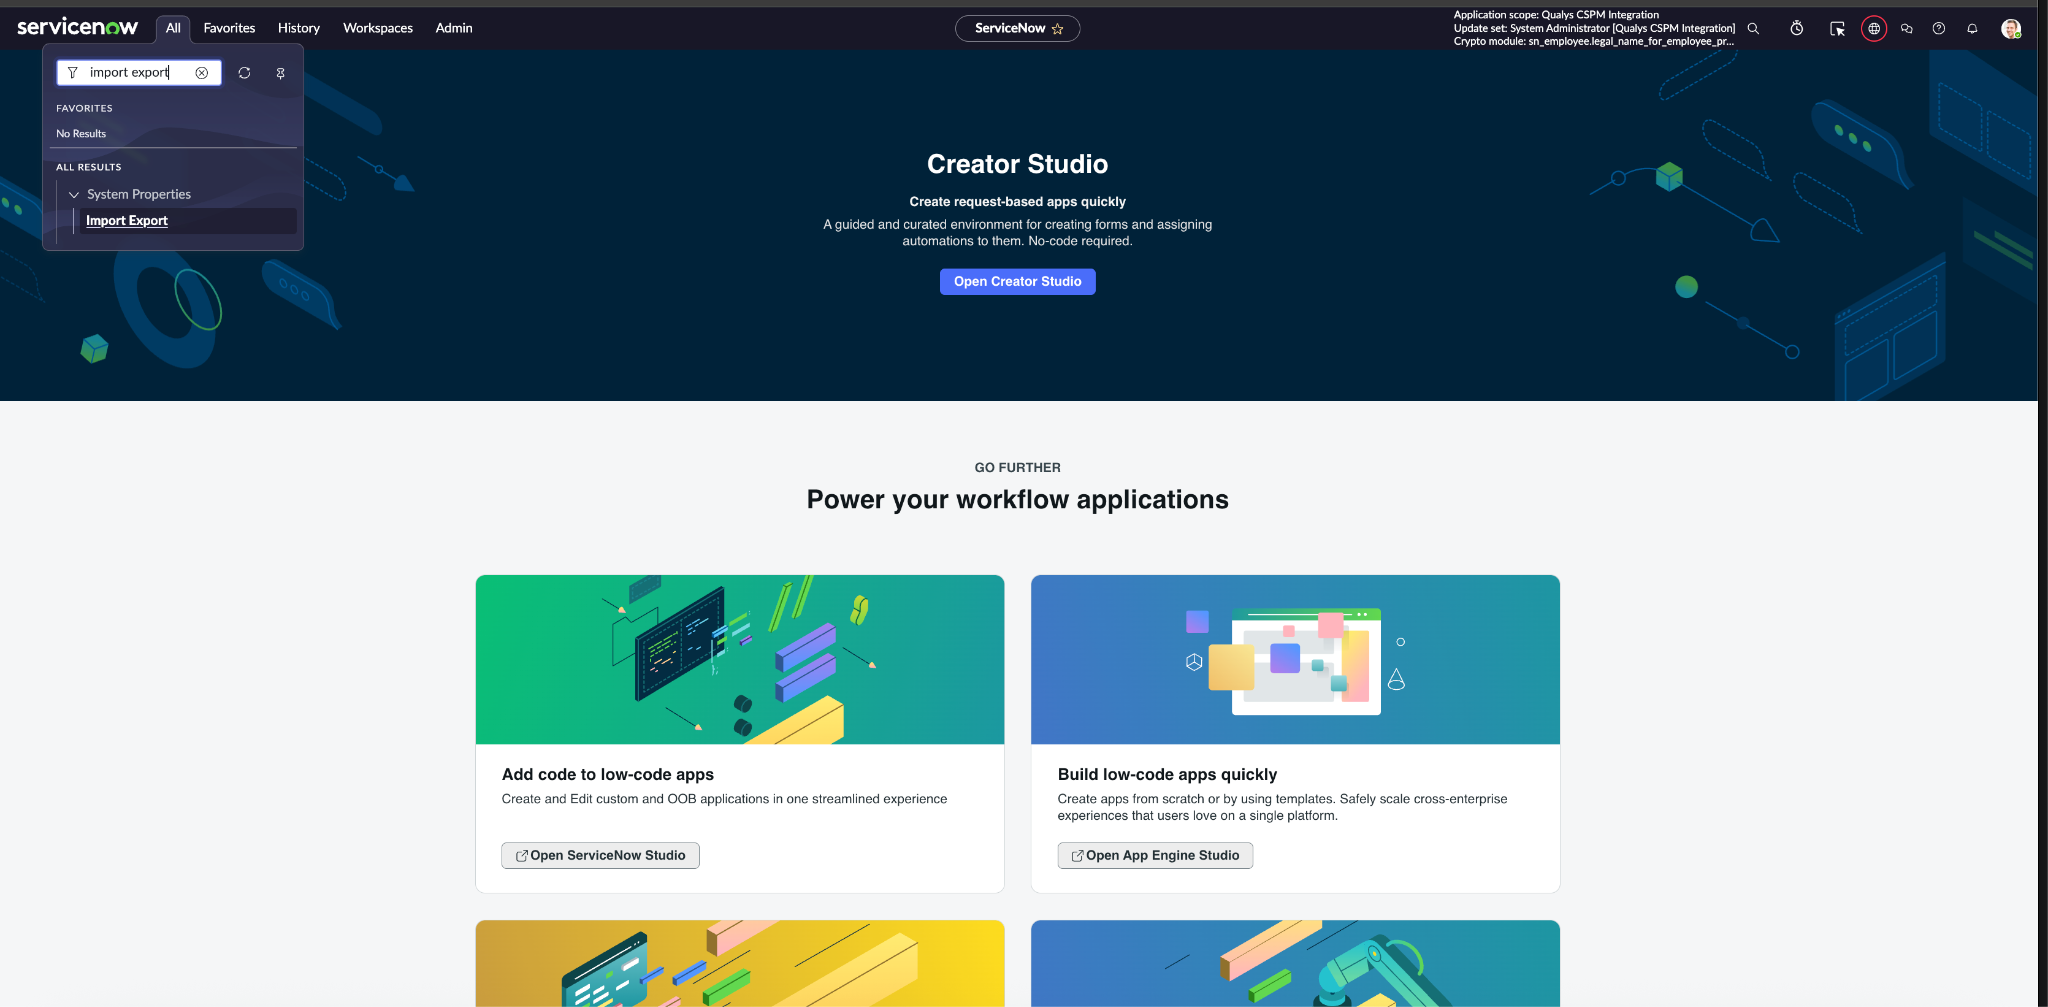
- Search for the JSON format at the bottom, and the user would see the following system property.

- Modify the system property value as per the requirement and save the value.
OCI Integration is Failing with Status Code 400 for pageSize Greater than 1000 in Configuration
If you had set pageSize to a value greater than 1000 in the configuration record, the OCI Connector Integration would fail due to an unsupported size. So it is recommended to keep the pageSize <=1000.
Mid Server Configuration Property to Increase the Mid Server Response Payload Size
In an on-premises configuration, a MID Server must be selected. By default, the MID Server enforces a limit on the response payload size. To increase this limit, the following property must be manually added to the MID Server’s config.xml file:
Property : <attribute name="mid.max.mime.size" value="52428800"/>
The value attribute is specified in bytes.
For example, 52428800 bytes corresponds to 50 MB.
System Property to Override ECC Timeout Issue
To avoid ECC queue timeout-related errors, kindly create the mentioned system properties in the global scope.
Steps to create system properties.
- You must be logged in as a system administrator.
- Change the scope to Global.
- Navigate to sys_properties.list through the navigation menu.
- Create or change below properties with the given value:
- glide.http.outbound.max_timeout.enabled = false
- Change the scope back to Qualys CSPM Integration.
As this is a global system property, it affects other network requests routed either via the MID Server or an async API call using RestMessageV2(), around the time it waits before closing the connection.
Retry Mechanism for Error Status Code
Retry interval for system retries (3 attempts): 1 minute, 2 minutes, and 4 minutes. Evaluated Resources Integration
- For any error status code other than 400, the system retries the request up to three times for a specific combination of control and account ID.
- If the request continues to fail after three retries, it is logged in Qualys API Requests, and processing moves on to the next control and account ID.
- If three consecutive failures occur (configurable through a system property - x_qual5_conf_comp.MAX_CONSECUTIVE_FAILURES, refer section 7.4 for more details), the Evaluated Resources integration is marked as failed.
- During the next execution of the Evaluated Resources integration, the system will first reattempt the failed requests from the previous run. After all previously failed requests have been retried once, the integration will proceed with normal processing for the current run.
- If a previously failed request continues to fail during subsequent runs, it will be retried again in future integration runs for a configurable number of attempts (Default: 3).
Other Integrations
(Policy, Controls, Connectors, OCI Connectors, Evaluations Integration, Enrich Resources)
- For any error status code other than 400, the system retries the API call up to 3 times.
- If the API call continues to fail after 3 retries, the integration is marked as failed.
Enrich Resources – Special Handling
- If an API call returns error code 400, the system skips the affected resource type and continues processing other resource types.
The Timestamp for Any of Evaluation, Evaluated Resources, Enrich Resources Integration Changes Even After User had Cancelled the Particular Integration Run for Any One of Integration Run.
To resolve the issue, perform the following steps:
- The integration would update the internal timestamps when the API calls were completed and the integration had moved from Running -> Wait Complete state, so when user clicks Cancel Run button when the integration had moved to Wait Complete State then it would skip fetching data from the previous Timelines for which current integration was executing it would fetch it based on the new timelines.
- In order to restart the integration from the previous timeline, the user has to go to the Configuration module and click on the Update Filters button with their desired value in the Start Time field.
- To get the timeline for previous integration run navigate to Application logs and search for the following message for each Integration.
- Evaluations Integration : [Qualys CSPM Integration][QualysCCEvaluationsIntegration]
Evaluation Integration
- Evaluated Resources Integration : [Qualys CSPM Integration][QualysCCFailedResourcesIntegration] Failed Resources Integration
- Enrich Resources Integration : [Qualys CSPM Integration][QualysCCEnrichResourcesIntegration] Enrich Resources Integration
- Evaluations Integration : [Qualys CSPM Integration][QualysCCEvaluationsIntegration]
It is recommended not to cancel any integration run once it has reached the Wait Complete state. Canceling at this stage may cause the next integration run to fetch data starting from new or updated timelines rather than from the timelines of the canceled run. If a run is canceled, the user must manually update the start time for the next run, if desired, from the previous canceled time; otherwise, the next run begins from the updated timelines by default.