Configure Connection to Qualys Applications
Once you install the Qualys Core app, you need to configure a connection with Qualys.
Perform the following steps to configure the connection to Qualys applications:
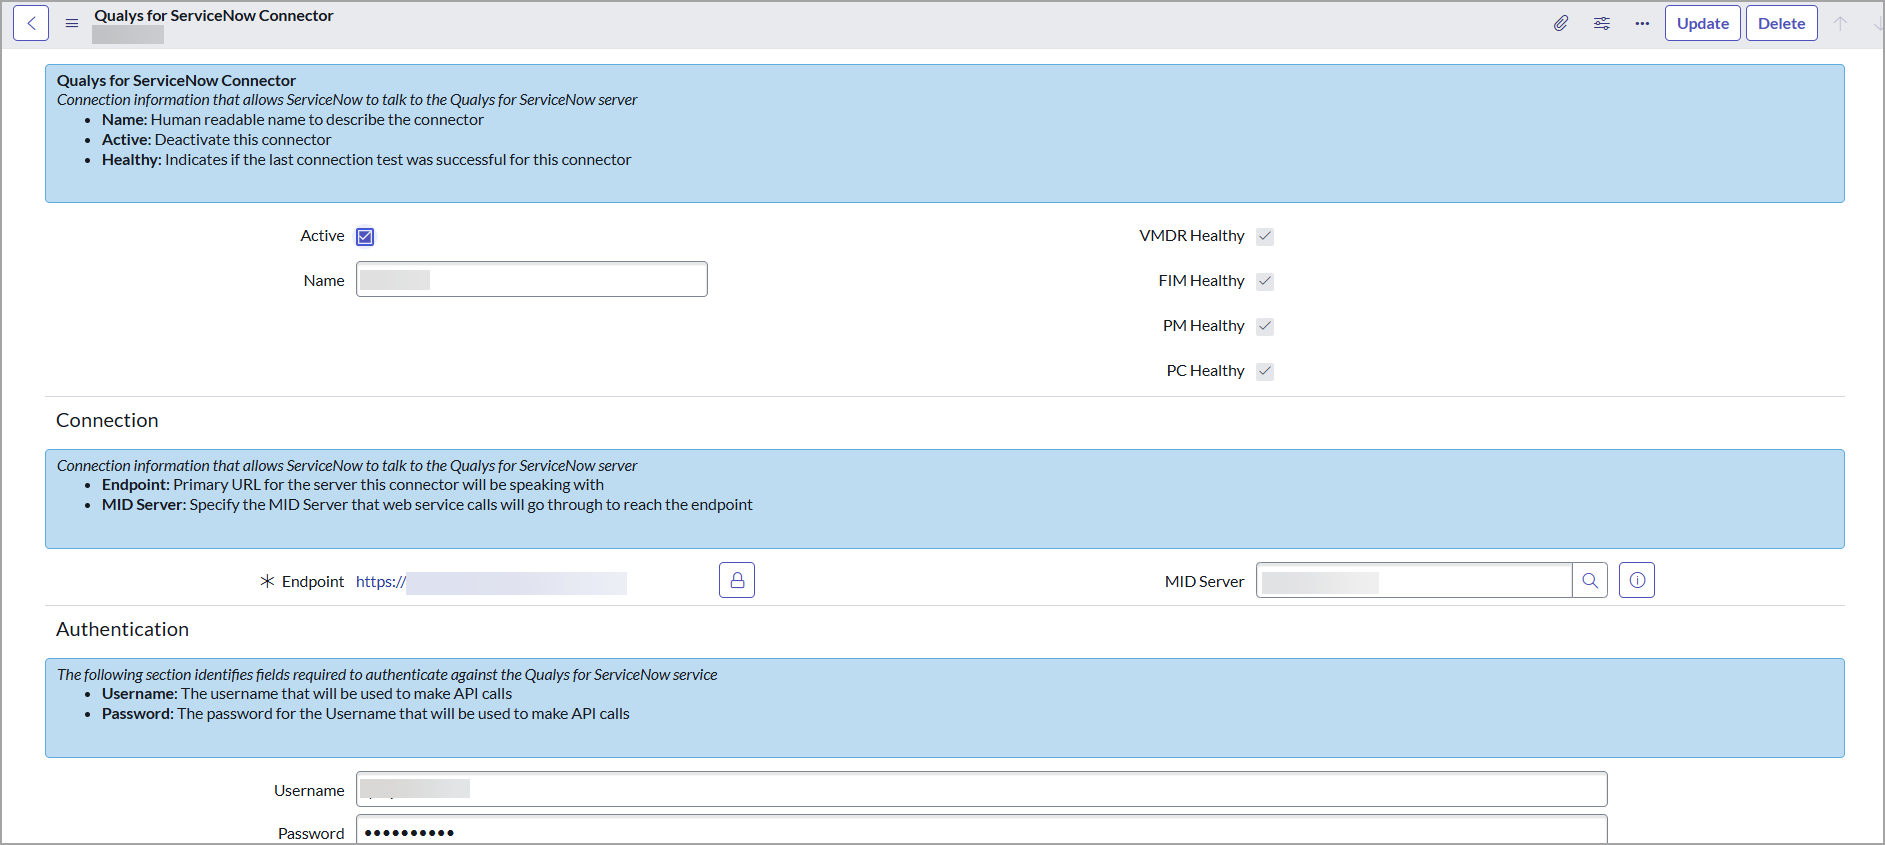
- Go to Qualys Core > Configuration > Connectors to add a new connector and click New.
-
Enter the required details to create the connector:
- Name - Provide a name for the connector.
- Active - Select this option to activate the connector that you create.
- Endpoint - Enter primary URL for the Qualys server that this connector connects to get data from Qualys.
To identify the endpoint URL, refer to the API URLs in https://www.qualys.com/platform-identification/. -
MID Server - Select a MID Server from the MID Servers list.
The MID Server acts as a proxy, facilitating communication between ServiceNow instances and Qualys APIs. This field is optional and can be utilized if ServiceNow instances have restricted accessibility, refer to MID Server. - VMDR Healthy, FIM Healthy, PM Healthy, and PC Healthy checkboxes indicate whether this connector's last test connection with respective applications was successful.
These check boxes are not available while configuring a new connector. Once create a connector and click Test the connector, the check boxes are selected based on the successful connection.
- Authentication

- Credentials - Select the appropriate credentials you have created for authentication. For details on how to create basic auth credentials.
- Click Submit to create the connector.
- After configuring and saving the connector, click the connector you have created from the Connectors list, and click Test the Connector from the Related Links.
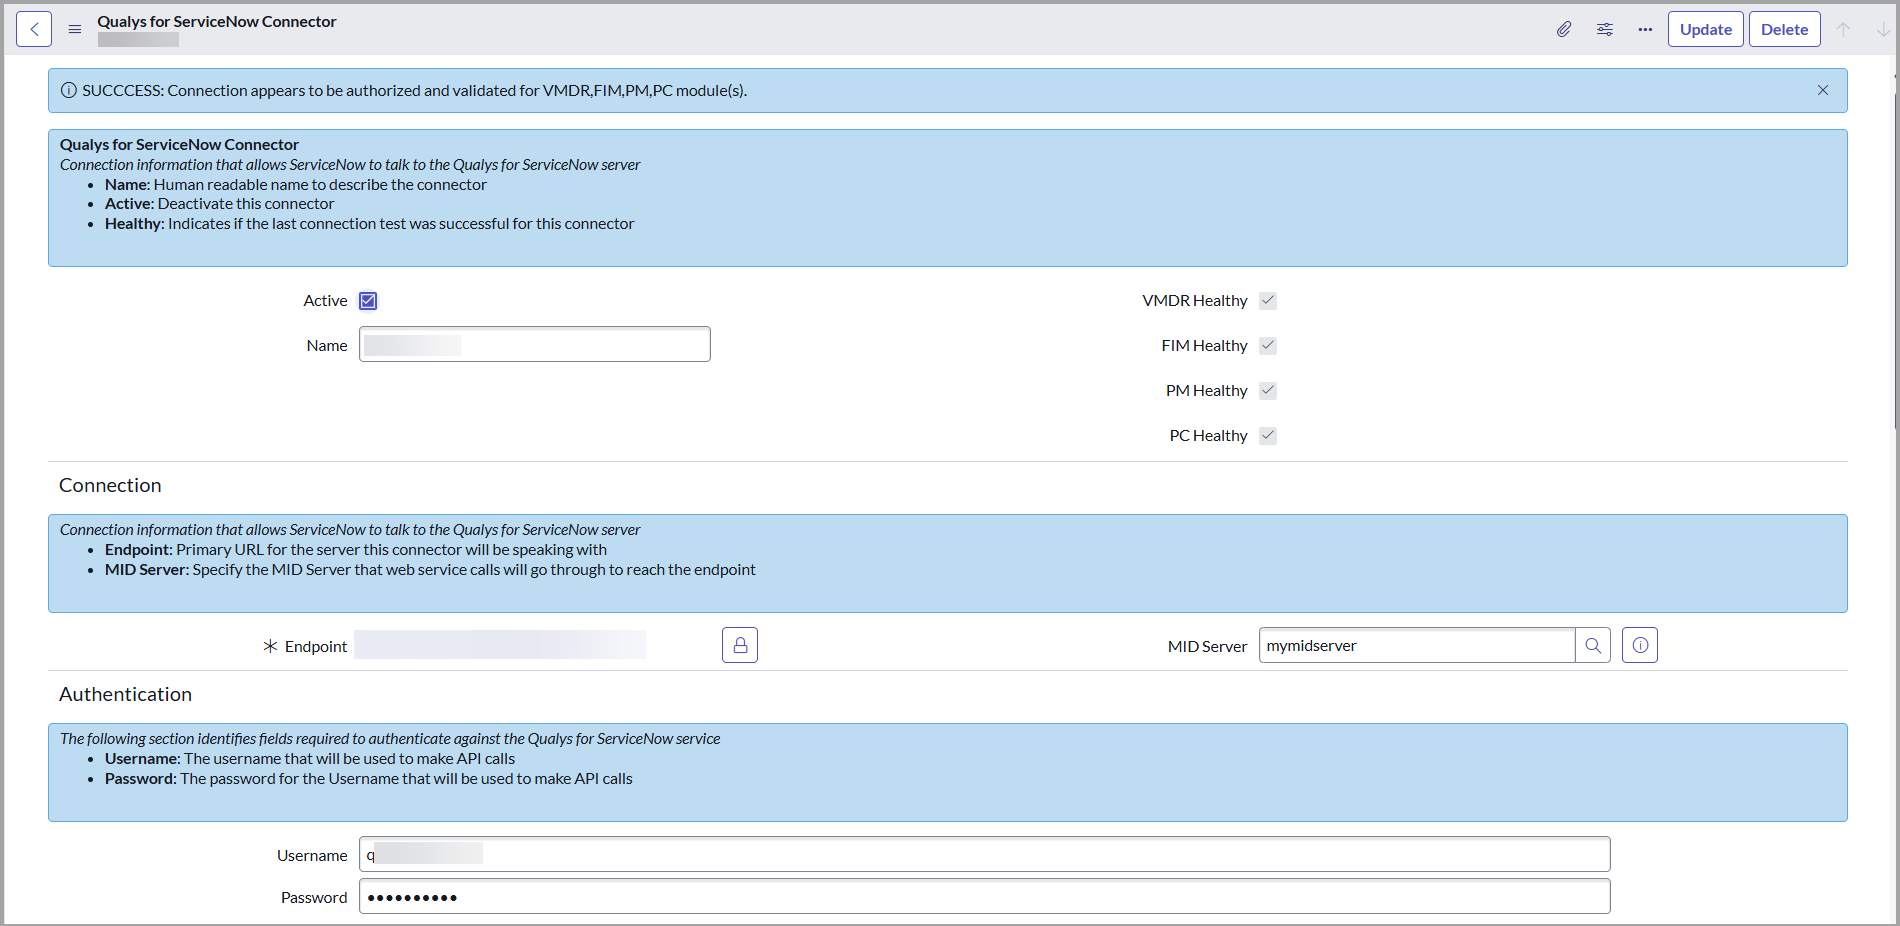
If the connection is healthy, proceed to import data. If not, use the error message and the system logs to resolve the error.