Create a Base Account
Before you create a new connector, create a base account for the same account type (region). You can still create a connector without a base account. If you plan to use base account for your connectors, there are certain pre-requisites and settings that need to be configured on the AWS console. The detailed steps and configuration required in the AWS console for setting up a base account are listed below.
Create IAM User and Associate Policy in AWS
- Navigate to AWS>IAM>Policies>Create Policy to create AssumeRolePolicy
-
Click JSON tab and paste the following policy.
Assume Role Policy
{
   "Version":"2012-10-17",
   "Statement":{
      "Effect":"Allow",
      "Action":"sts:AssumeRole",
      "Resource":"*"
   }
}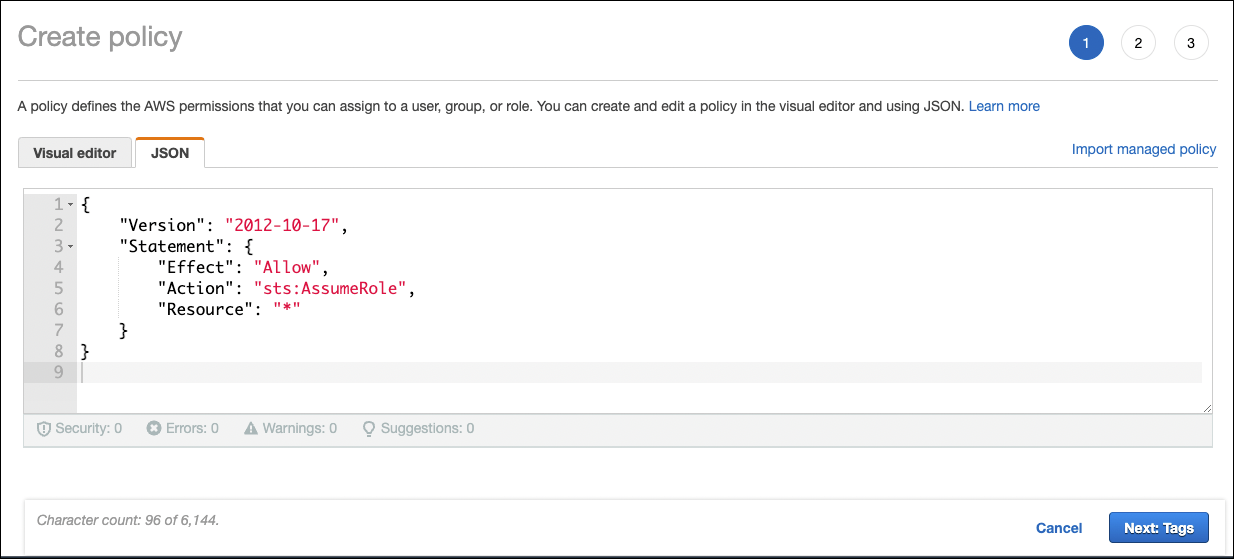
-
Click Next: Tags > Next: Review.
-
Add name and description for the policy and click Create Policy.
-
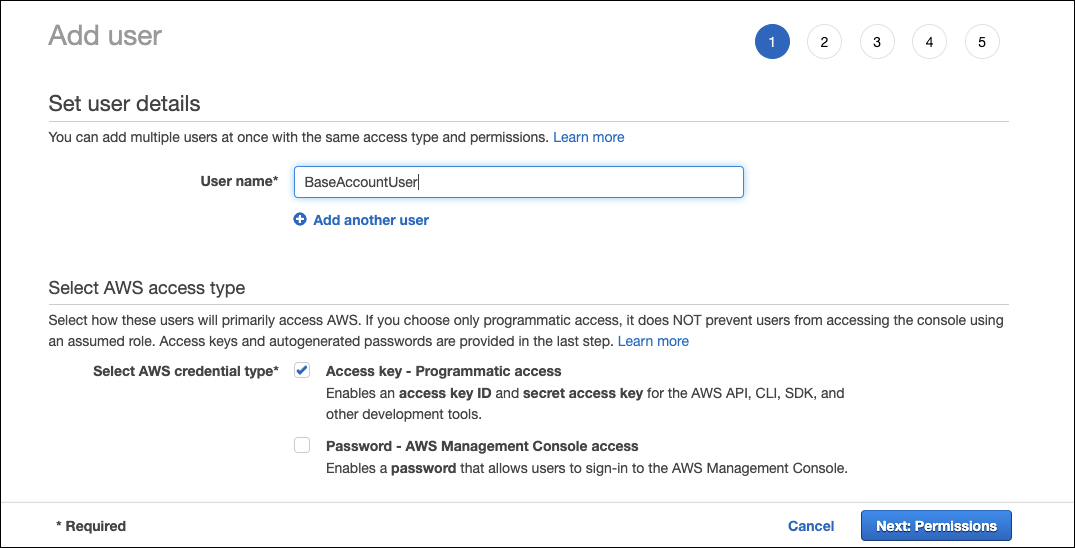
Create IAM User, navigate to AWS > IAM > Users and then click Add user.
-
Provide a user name and enable Programmatic access for the user. Click Next: Permissions.
-
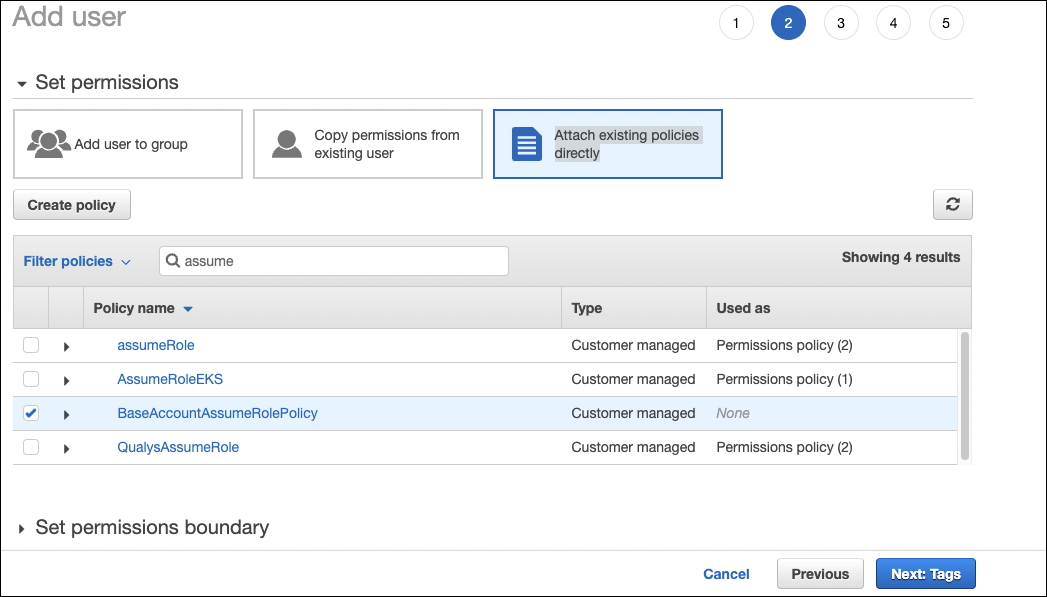
On Set Permissions, navigate to Attach existing policies directly.
-
Search for the policy name created in step 1-4.
-
Click Next:Tags > Next:Review > Create user.
-
Copy the Access Key Id and Secret access key for later use. Click Close.
Base Account Configuration at Connectors Application
- At the Qualys console, navigate to Connectors Application > Amazon Web Services Connectors > Base Account.
- Paste the Access Key Id and Secret access key for the user that was created as part of AWS configuration and click Save.

Using Custom Base Account to Existing Connectors
- To update the existing AWS connectors with cross-account roles to base account usage, you need to create a base account using the steps mentioned in Create Custom Base Account).
-
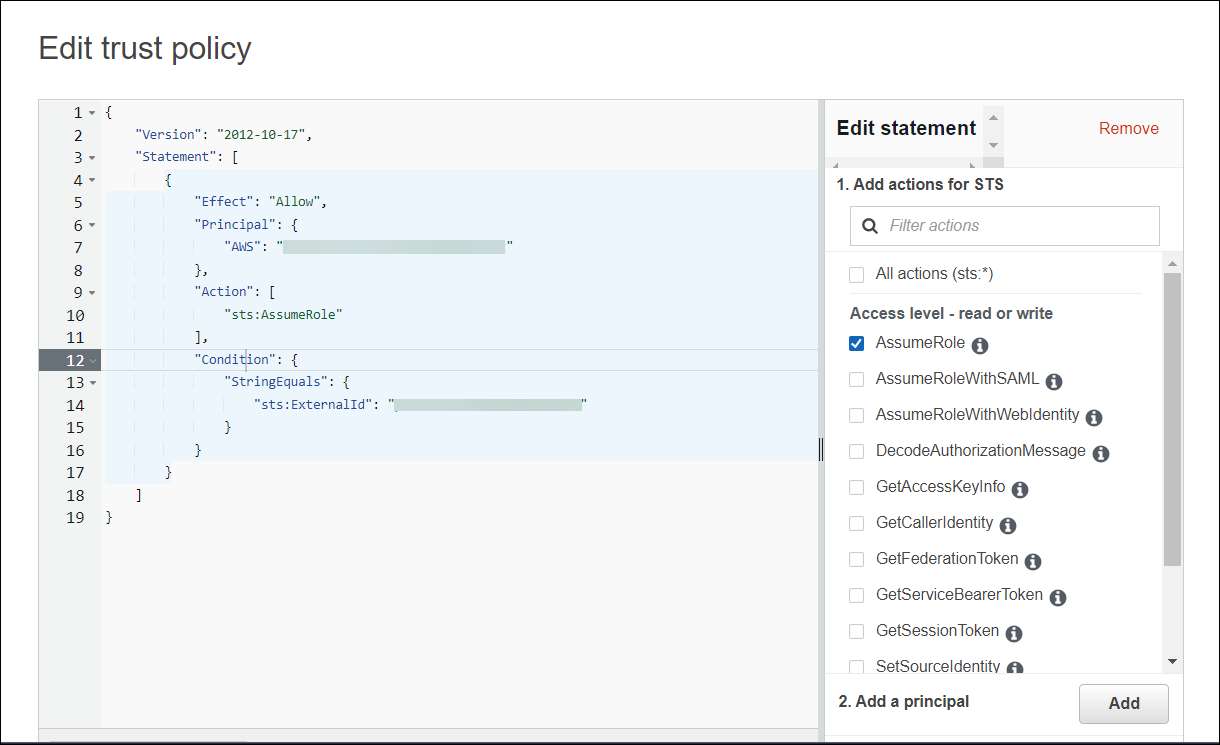
Navigate to AWS > IAM > Role > Select the Connector Role.
- On the summary page, select Trust relationships > Edit trust policy.

-
Update the principal to use the custom base account.
-
Click Update Policy.
The existing AWS connectors have been updated with cross-account roles to base account usage.