Perimeter Scanning using Qualys Scanners
Qualys Scanners (Internet Remote Scanners), located at the Qualys Enterprise TruRisk™ Platform, may be used for Perimeter Scanning of EC2 instances.
For subscriptions on Private Cloud Platforms, your account may be configured to allow internal scanners to be used.
These are DNS or IP-based scans launched using the public DNS or Public IP of the target EC2 instances. If both public DNS and public IP addresses exist for your EC2 assets, then launch a scan on public DNS.
Requirements
You get Cloud Perimeter Scanning when these features are enabled for your account:
- EC2 Scanning and
- Scan by Hostname.
Your account must have a Manager or Unit Manager role with the following permissions assigned to your account.
- Enable Cloud Perimeter Scans (to launch scans using external scanners).
- Enable Internal Scanners for Cloud Perimeter Scans (to launch scans using internal scanners).
EC2 connector is required. Configure this same EC2 connector in your TotalCloud account if you wish to include public load balancers from the connector in the scan. To create the connector, your account must have TotalCloud subscription and your platform has access to TotalCloud base URL qweb_cloud_view_base_url. See Configure Your AWS Connector in TotalCloud Online for help.
If you wish to include micro, nano, and small instance types in the scan, these instance types should be activated for your account.
Get Started
All cloud perimeter scans are scheduled - either for now (a one-time scan job) or recurring. Once saved, you can see the scan job on the Schedules list. When the scan job starts, it appears on your Scans list.
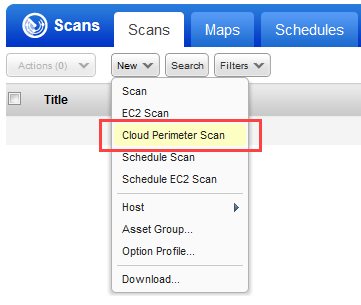
- Go to VM/VMDR for a vulnerability scan (or PC for a compliance scan) and choose New > Cloud Perimeter Scan. You can see this option on the Schedules tab.
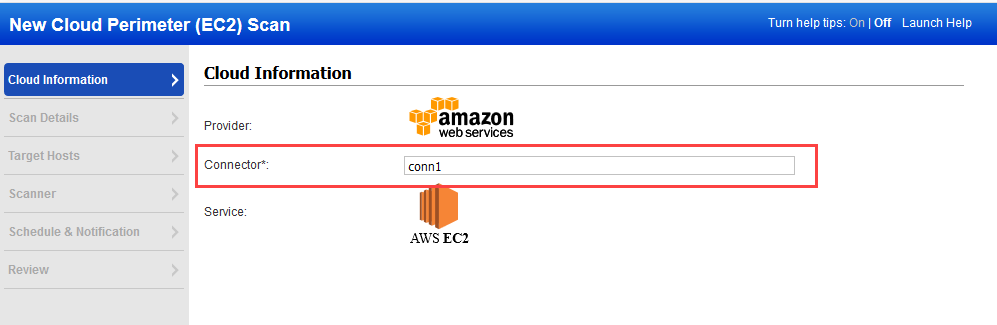
- Select the EC2 connector you have configured.
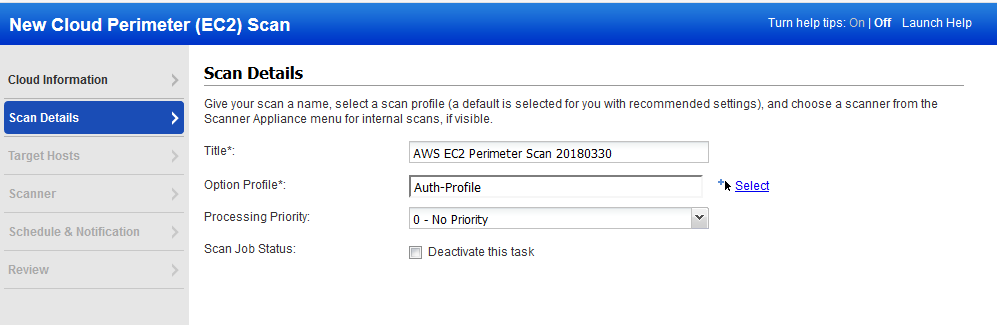
- Give your scan a title and select the option profile you configured with authentication. You can launch either unauthenticated or authenticated Cloud Perimeter scans.
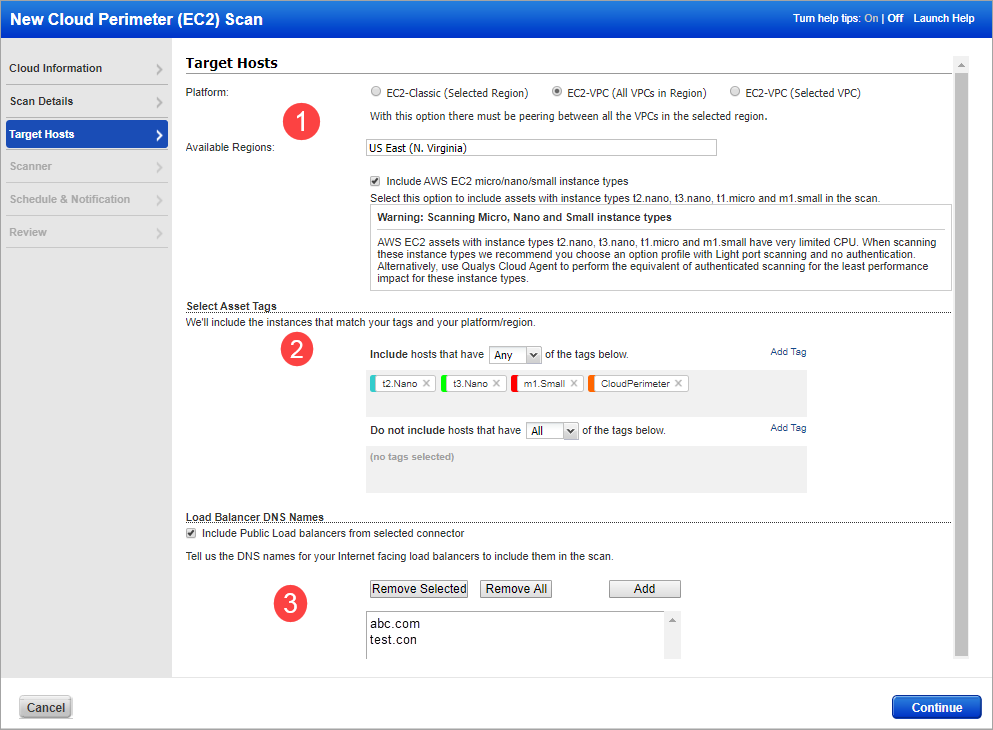
- Pick your target hosts. If you do not specify the platform, region code, vpc ID, asset tags, or load balancers DNS names, then launch a scan on the assets resolved from the connector.
- (Optional) Choose a platform option: EC2 Classic, EC2 VPC (All VPCs in the region), or EC2 VPC (Selected VPC). Based on your selection, you’ll select region(s). You also have the option to include assets with instance types t2.nano, t3.nano, t1.micro, and m1.small in the scan. When you select this option, it shows you a warning message recommending you perform no authentication or light port scanning for these instance types. Note that to include micro, nano, and small instance types in the scan, these instance types should be activated for your account.
- (Optional) Select asset tags - these are assets activated for your connector.
- (Optional) Select the public load balancer check box to include public load balancers from the selected connector. EC2 Classic platform does not support public load balancers.
You also have the option to enter DNS names for your load balancers to include them in the scan along with public load balancers. Click Add to enter the DNS names.
When you select the Include Public Load balancers from the selected connector, we fetch public load balancers from the AWS connector in TotalCloud with the same configuration as the selected connector. If you select this option, ensure that you have the connector created in your TotalCloud account with a configuration similar to that of the selected connector. If the connector in TotalCloud is not found, then selecting this option does not fetch any public load balancers. See Configure Your AWS Connector in TotalCloud Online help.
When resolving the assets and load balancers, the scan is launched on the load balancer DNS names if no assets or public load balancers are resolved from the connector and for the optional platform and asset tags selections. If no load balancer DNS names are specified, the scan fails and is terminated.
DNS-Based Scans
This feature needs to be turned ON for your subscription. Please contact Qualys Support if you would like to enable this feature.
How DNS-based scans work: Users submit scans on the DNS for ELB and the rest. The IPs are resolved in realtime and then scanned for.
By default cloud perimeter scans use Qualys External Scanners.
For Private Cloud Platforms - Your subscription may be configured to allow scanner appliances to be used for cloud perimeter scan jobs. In this case, choose one or more scanner appliances from the list (use the Build my list option).

Tell us when you want the scan to run - Now or Recurring.
When you choose Now, your scan may not start immediately. Check for new scan requests every few minutes. Launch the scan if a scanner is available and you have not reached your concurrent scan limit. If scanners are unavailable or you have reached your limit, the scan launched at the next opportunity.
When you choose Recurring, you also set scheduling and notification options. These are the same settings as other scan schedules, so they should look familiar.
Identify the assets to scan based on your settings.

You can see these asset counts:
Assets Identified or Synced - The number of assets you selected for this scan job discovered by the connector.
Assets Qualified for scan - The number of assets discovered by the connector that also match the selected platform, region, and asset tags. Remove the Terminated instances.
Assets Submitted to scan - The number of assets that we’ll submit in the scan job. We start with the qualified assets (previous count) and filter out assets that are not activated for VM (for vulnerability scan) or not activated for PC (for compliance scan).
When you are ready, click Submit Scan Job.
What Happens Next
Your new scan job appears on the Schedules list.

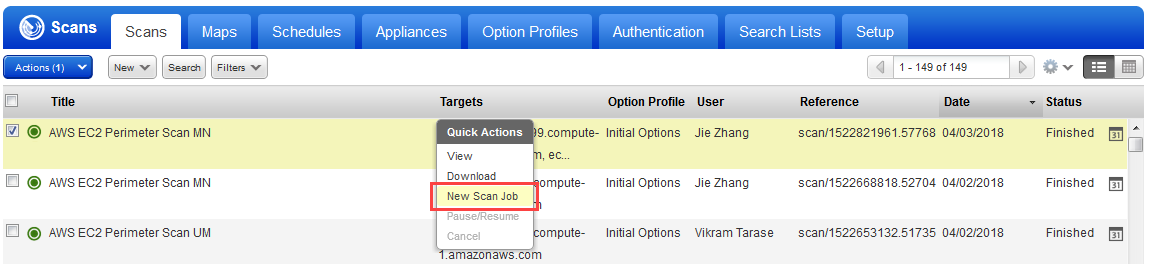
When your scan starts, it appear on the Scans list. Like with other scans, you can take actions like cancel or pause the scan, view the scan status, and download the results.
Want to run the scan again? Choose New Scan Job from the Quick Actions menu. Retain certain scan settings from the original scan job and schedule the scan to run Now.
 .
.