Set up Authentication Details
This section helps you to gather the parameters required to create Azure Connector.
Create an Application and get the Application ID, Directory ID
Create an application in Azure Active Directory, and you can then note the application ID.
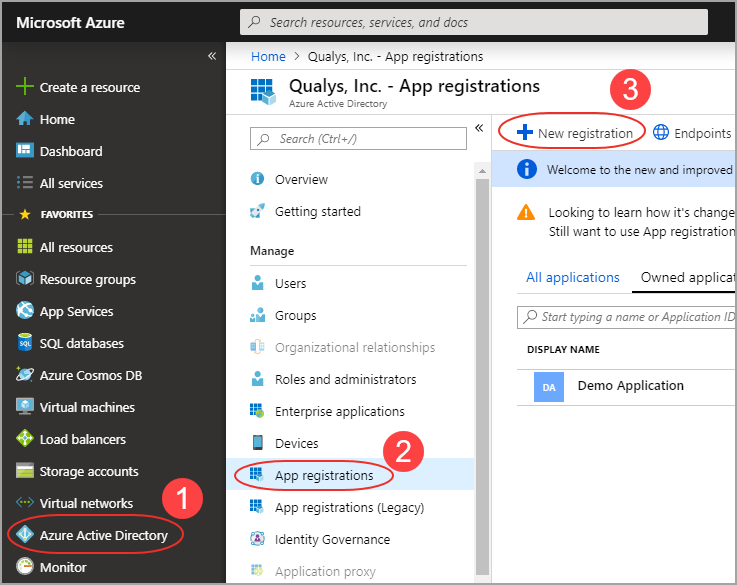
- Log on to the Microsoft Azure console and press Azure Active Directory in the left navigation pane.
- Click App Registrations > New Registrations.
- Provide the following details:
- Name: A name for the application (For example, My_Azure_Connector)
- Supported account types: Select Accounts in any organizational directory.
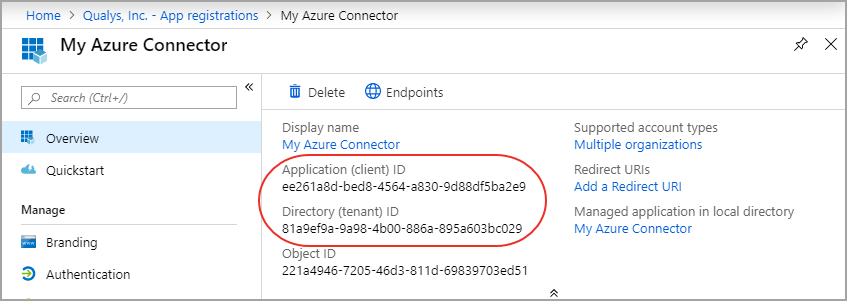
- Click Register. The newly created application is displayed with its properties. Copy the Application (client) ID and Directory (tenant) ID and paste it into the connector details.
Generate Authentication Key
Provide permission to the new application to access the Windows Azure Service Management API and create a secret key.
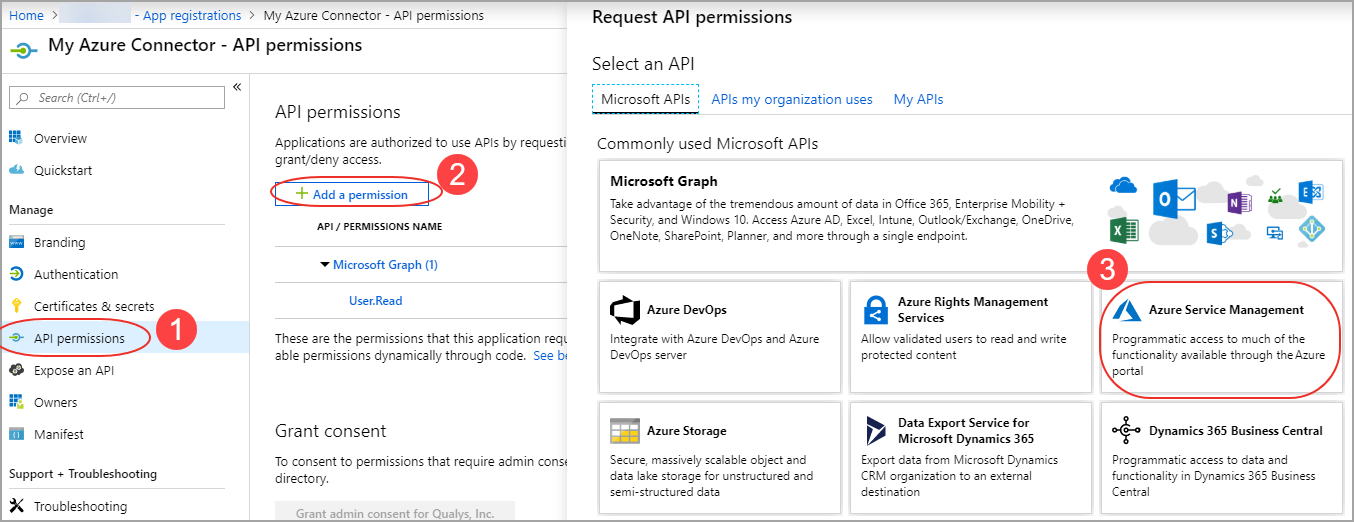
- Select your created application and click API permissions > Add a permission.
- Select Azure Service Management API in Microsoft APIs for Request API permissions.
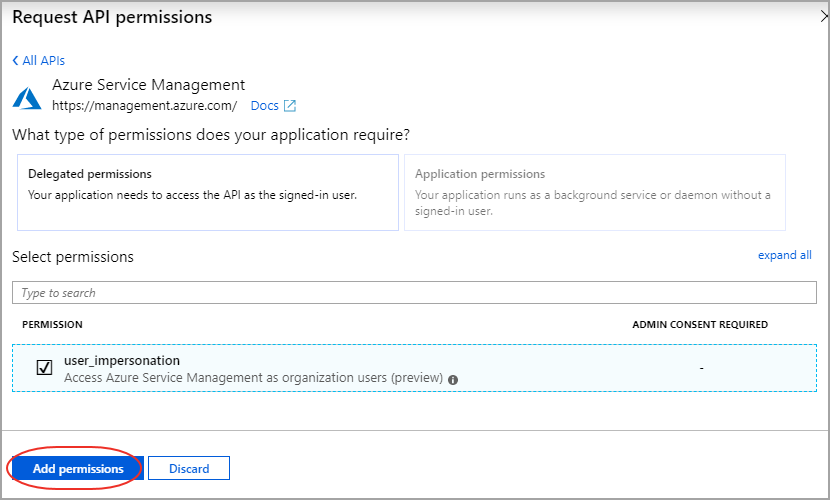
- Select user impersonation permission and click Add permissions.
-
Select your created application and go to Certificates and Secrets > New client secret.
-
Add a description and expiry duration for the secret key and click Add.
For security reasons, Microsoft limits the creation of client secrets longer than 24 months and strongly recommends that you set this to a value less than 12 months. Customers can rotate the Azure Connector AD App ID key by updating the connector configuration via API scripts or the UI.
.png)
-
The value of the key appears in the Value field.
Copy the key value at this time. You won’t be able to retrieve it later. Paste the key value as Authentication Key into the connector details. You need to provide the key value with the application ID to log on to the application. Store the key value where your application can retrieve it.
Acquiring Subscription ID
Grant permission for the application to access subscriptions. Assign a role to the new application. The role you assign defines the permissions for the new application to access subscriptions.
- On the Azure portal, navigate to Subscriptions.

-
Select the subscription for which you want to grant permission to the application and note the subscription ID. To grant permission to the application you created, choose Access Control (IAM).
-
Go to Add > Add a role assignment. Pick a Reader role. A Reader can view everything, but cannot make any changes to the resources of a subscription.
You need to assign the Reader role if the same application is used in the AssetView and CloudView modules. If the application usage is limited to only AssetView module (and not in CloudView module), you need to have at least following permissions on the built-in or custom role assigned to the subscription.
- "Microsoft.Compute/virtualMachines/read",
- "Microsoft.Resources/subscriptions/resourceGroups/read",
- "Microsoft.Network/networkInterfaces/read",
- "Microsoft.Network/publicIPAddresses/read",
- "Microsoft.Network/virtualNetworks/read",
- "Microsoft.Network/networkSecurityGroups/read"
- Select Azure AD user, group, or application in Assign Access to drop-down.
- Type the application name in Select drop-down and select the application you created.
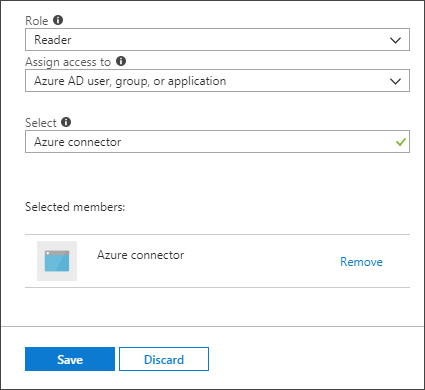
-
Click Save to finish assigning the role. You can see your application in the list of users assigned to a role for that scope.
-
Copy the subscription ID you noted and paste it into the connector details in the Qualys Azure Connector screen and then click Create Connector.