Deploying Qualys Cloud Agent from Google Cloud Console
Using this solution, you can configure the deployment of the Qualys Cloud Agent on specified compute instances on the Google Cloud Platform. Using the Cloud Agent, you can activate multiple applications on the Qualys Enterprise TruRisk™ Platform (for example, Vulnerability Management, Policy Compliance, and File Integrity Monitoring) as support for each operating system. Additionally, you can integrate these Qualys security findings (like Vulnerabilities) directly into GCP by leveraging the Qualys Integration with Google Cloud Security Command Center, which pushes these findings into Google Security Command Center.
Prerequisites for Deploying Cloud Agent from Google Cloud Console
The following prerequisites must be met for deploying Cloud Agent from Google Cloud Console:
- You must have an active Qualys subscription. To buy a subscription, contact Support or Sign up from the Qualys website.
- Ensure that you have the Cloud Agent module available and enabled in your subscription. The appropriate Customer ID and Activation ID are required to configure the installation.
- Application modules such as Vulnerability Management, Policy Compliance, and File Integrity Monitoring, among others, must be available and enabled.
- Enable the following APIs from the Google Cloud Platform:
-
For Google Marketplace, click Cloud OS Conf API to go to Google Cloud Console.
-
For API libraries, click Compute Engine API.
And then, install the OS Configuration agent on your virtual machine. To know more, check the documentation for Deploying Security Software Agents from Google Cloud Marketplace and Enabling an API. You can enable the OS Config and Compute APIs also by using gcloud commands through Google Cloud SDK shell.
-
-
Enable the OSConfig Agent in your project metadata. To enable this, use either of the following gcloud commands:
“gcloud compute project-info add-metadata --metadata=enable-osconfig=true''gcloud compute project-info add-metadata --metadata=enable-osconfig=true,enable-os-inventory=true,enable-guest-attributes=true,os-package-enabled=true,enable-os-config-debug=true,os-debug-enabled=true'.You can enable the OSConfig Agent also by using the Google Cloud console: Compute Engine Metadata through the GCP console. Setting metadata values enables OS inventory management, OS patch management, and OS Configuration management, which are prerequisites for this solution as this integration works on Google's OS configuration management feature.
-
Ensure that you have the following IAM permissions. If you do not, create a custom role including the following permissions. To know more, see Creating and managing custom roles.
- osconfig.guestPolicies.create
- osconfig.guestPolicies.delete
- osconfig.guestPolicies.get
- osconfig.guestPolicies.list
- storage.buckets.create
- storage.buckets.get
- storage.objects.create
- storage.objects.get
- storage.objects.delete
Make sure that all the VM instances that you include in the deployment process have outbound connectivity to reach Qualys Enterprise TruRisk™ Platform.
Getting Started with the Deployment
To start with, subscribe and configure Qualys Cloud Agent solution available on the GCP Marketplace to quickly deploy and install agents on multiple Google VM Instances with no software to maintain.
The configuration workflow follows a two-step process:
- Retrieving Customer ID, Activation ID, and Platform Information from Qualys Subscription
- Configuring Qualys Cloud Agent solution on GCP Console
Retrieving Customer ID, Activation ID and Platform Information from Qualys Subscription
The Qualys Customer ID, Activation Id, and platform information are the required fields for configuring a Qualys Cloud Agent solution available on Google Cloud Console.
Follow the steps to retrieve Qualys Customer ID and Activation ID:
- Log in to your Qualys subscription. Navigate to the 'Cloud Agent' application module from the module picker on the left, and then click the Activation Keys tab.

-
Click New Key and generate an activation key. Specify a unique name to identify the key (for example, GCP Cloud Agent) and select Vulnerability Management and/or other cloud-agent-supported modules depending on your licenses.
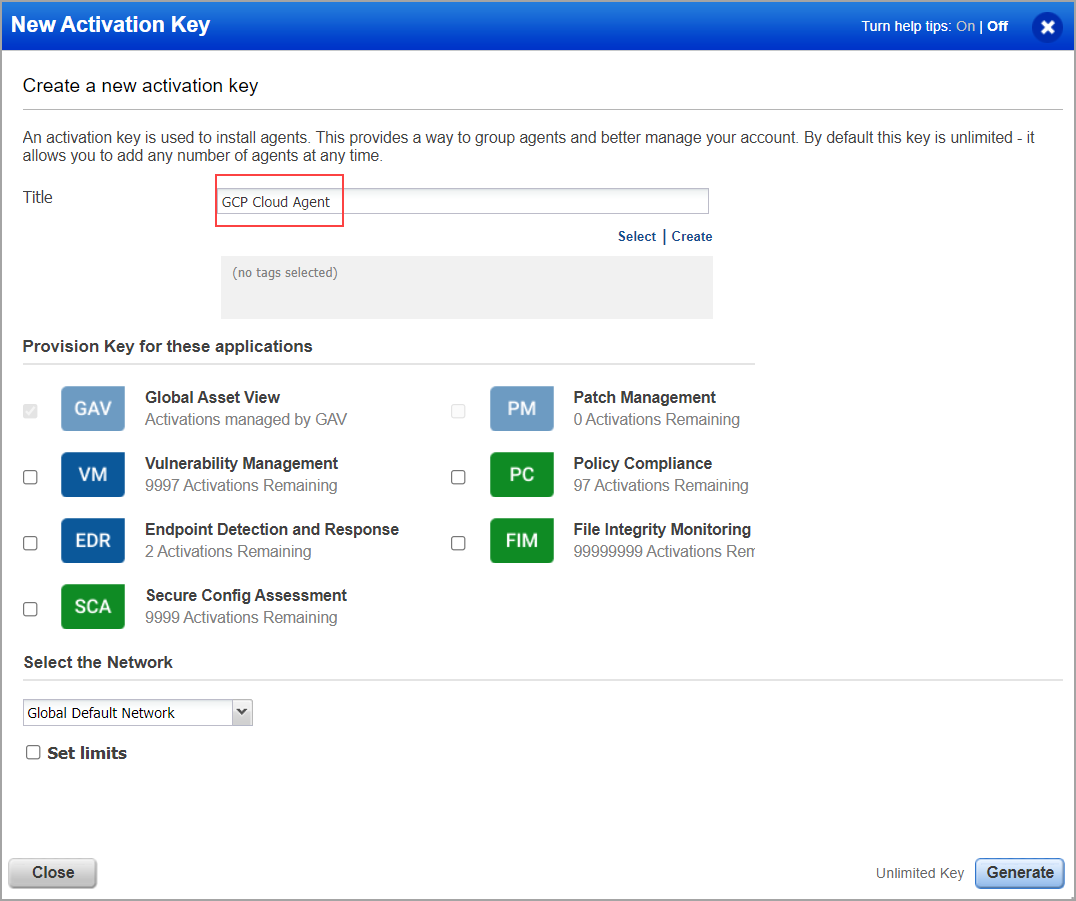
We recommend that you create a Tag for GCP key and use that tag to be dynamically associated with the assets identified via the key.
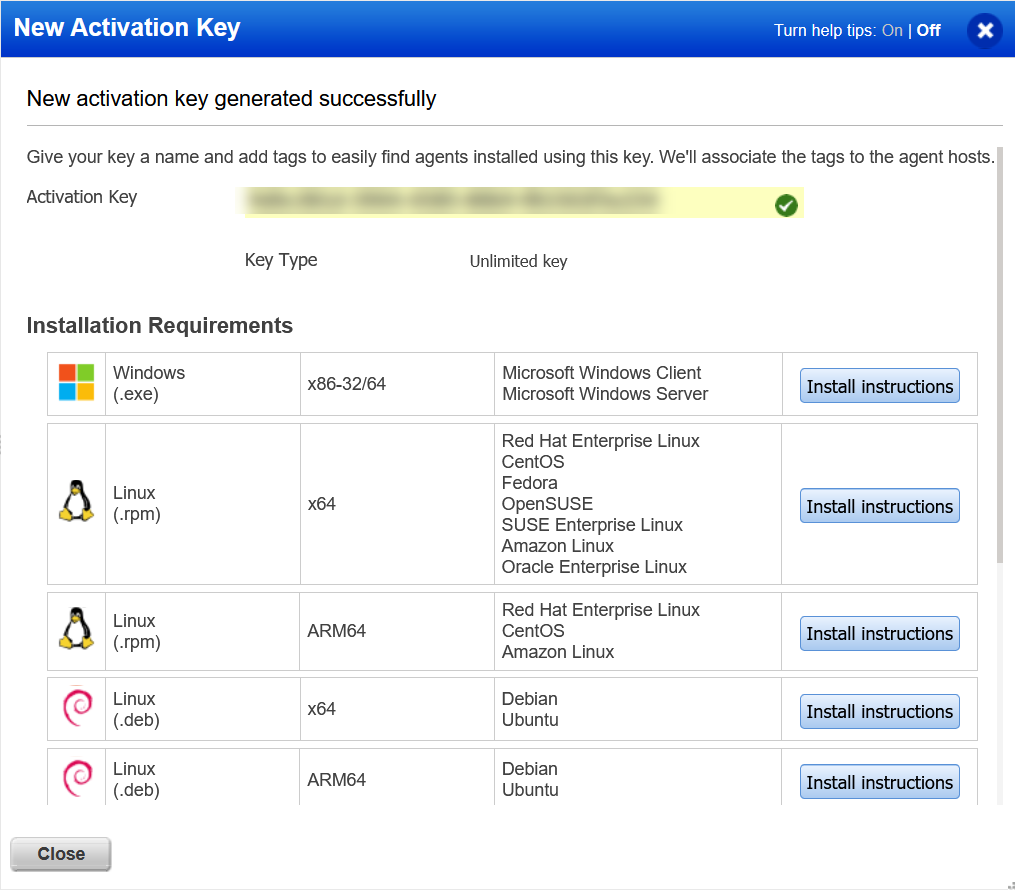
You get an acknowledgment as New activation key generated successfully with the Activation Key.
-
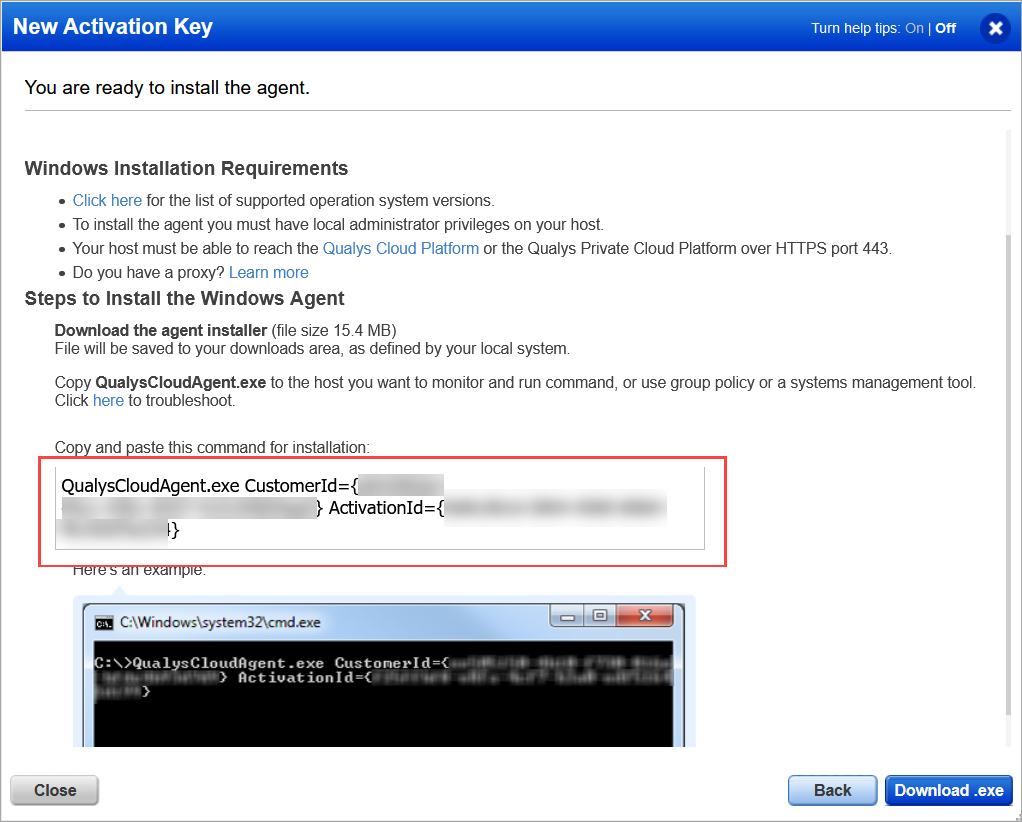
Currently, this integrated deployment supports only Windows and Linux agents . In the Installation Requirements section, click Install Instructions within Windows or Linux to retrieve your Customer ID and the Activation ID.
Configuring Qualys Cloud Agent solution on GCP Console
The Qualys-GCP integration leverages telemetry from the Qualys cloud agent and security findings from other Qualys apps, including Vulnerability Management, Policy Compliance, FIM, IOC, Patch Management, and Global Asset IT Inventory. To configure the Qualys Cloud Agent solution available in the GCP Marketplace, follow the process as mentioned below. Ensure you have completed the Prerequisites For Deploying Cloud Agent From Google Cloud Console before proceeding with the following process.
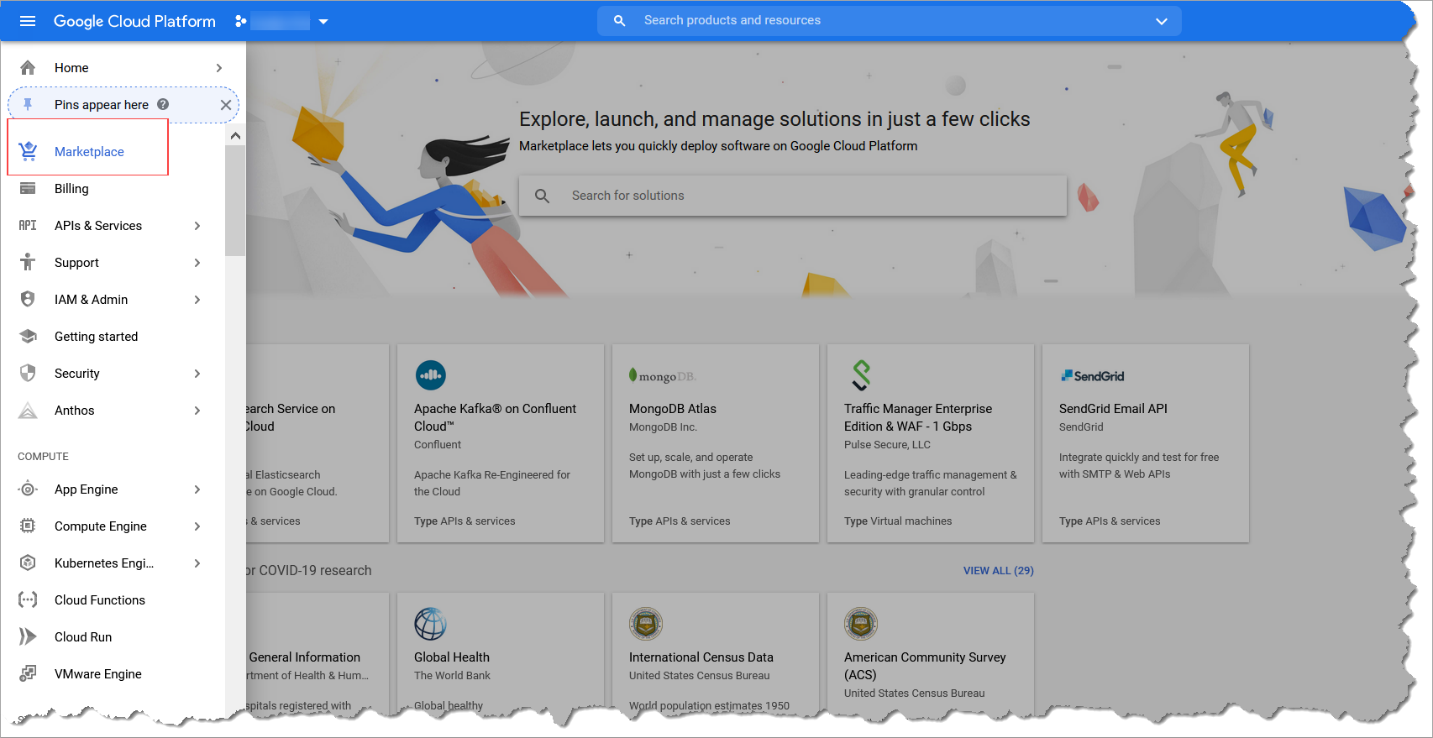
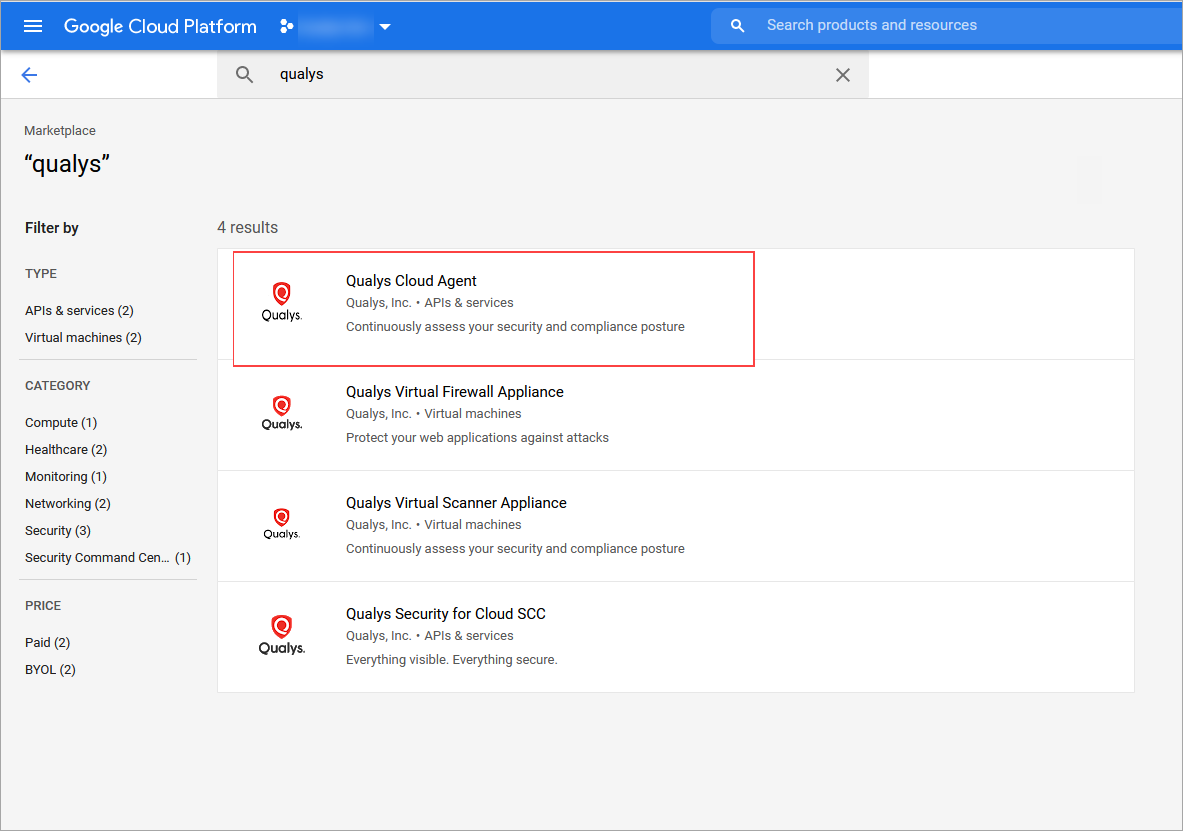
- Go to GCP Marketplace and search for Qualys.
-
Click Qualys Cloud Agent. Another sign-up page is displayed.
-
Click VISIT QUALYS, INC. SITE TO SIGN UP.
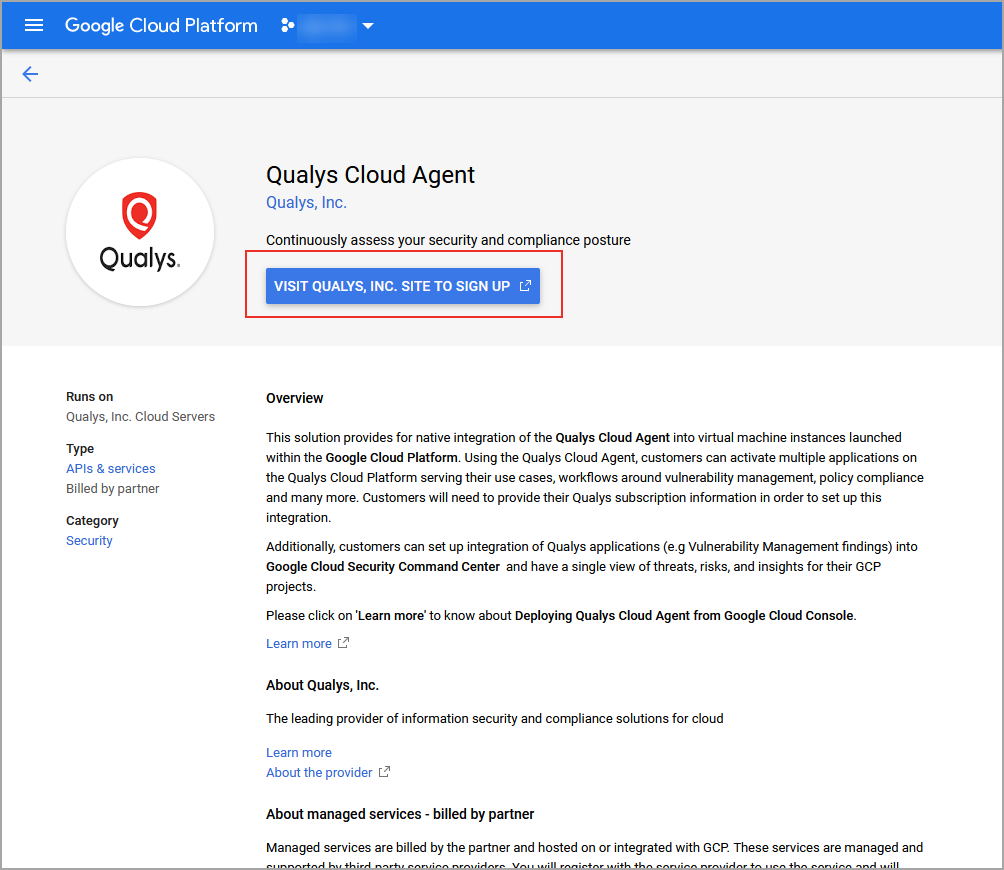
-
You are redirected to the main configuration page if you have enabled Cloud OS Config API.
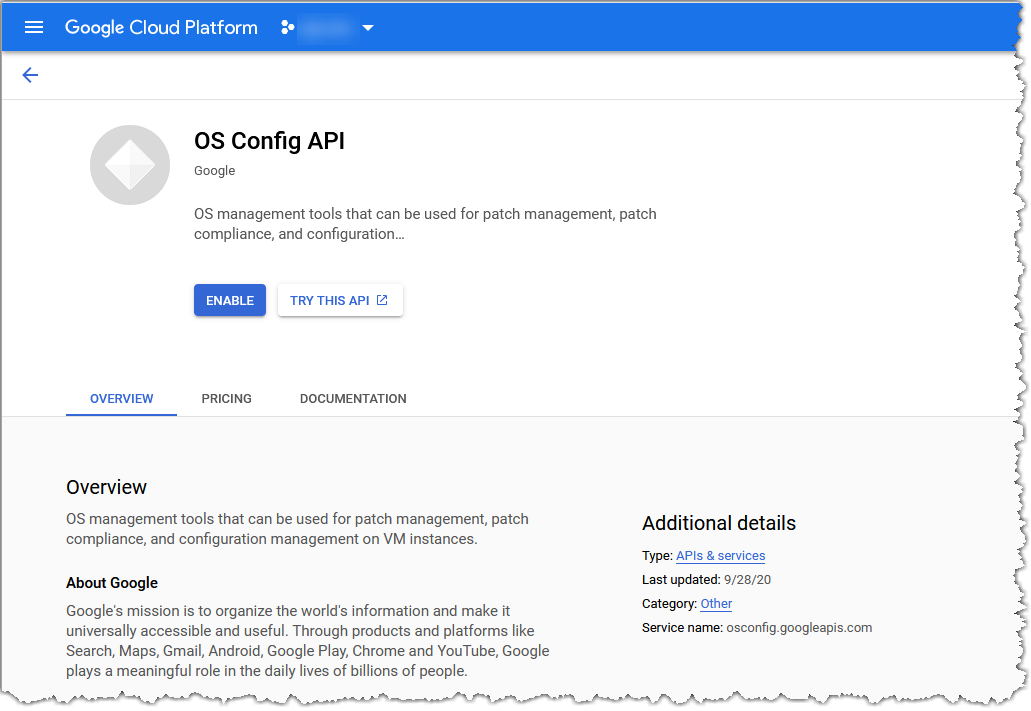
-
If you have not enabled the OS Config API, you are redirected to the GCP console's Cloud OS Config API library page. To enable the OS Config API, click 'ENABLE.' Also, make sure, you install the OS Configuration Agent as mentioned in the prerequisites.
You are redirected to the main Qualys Cloud Agent configuration page.
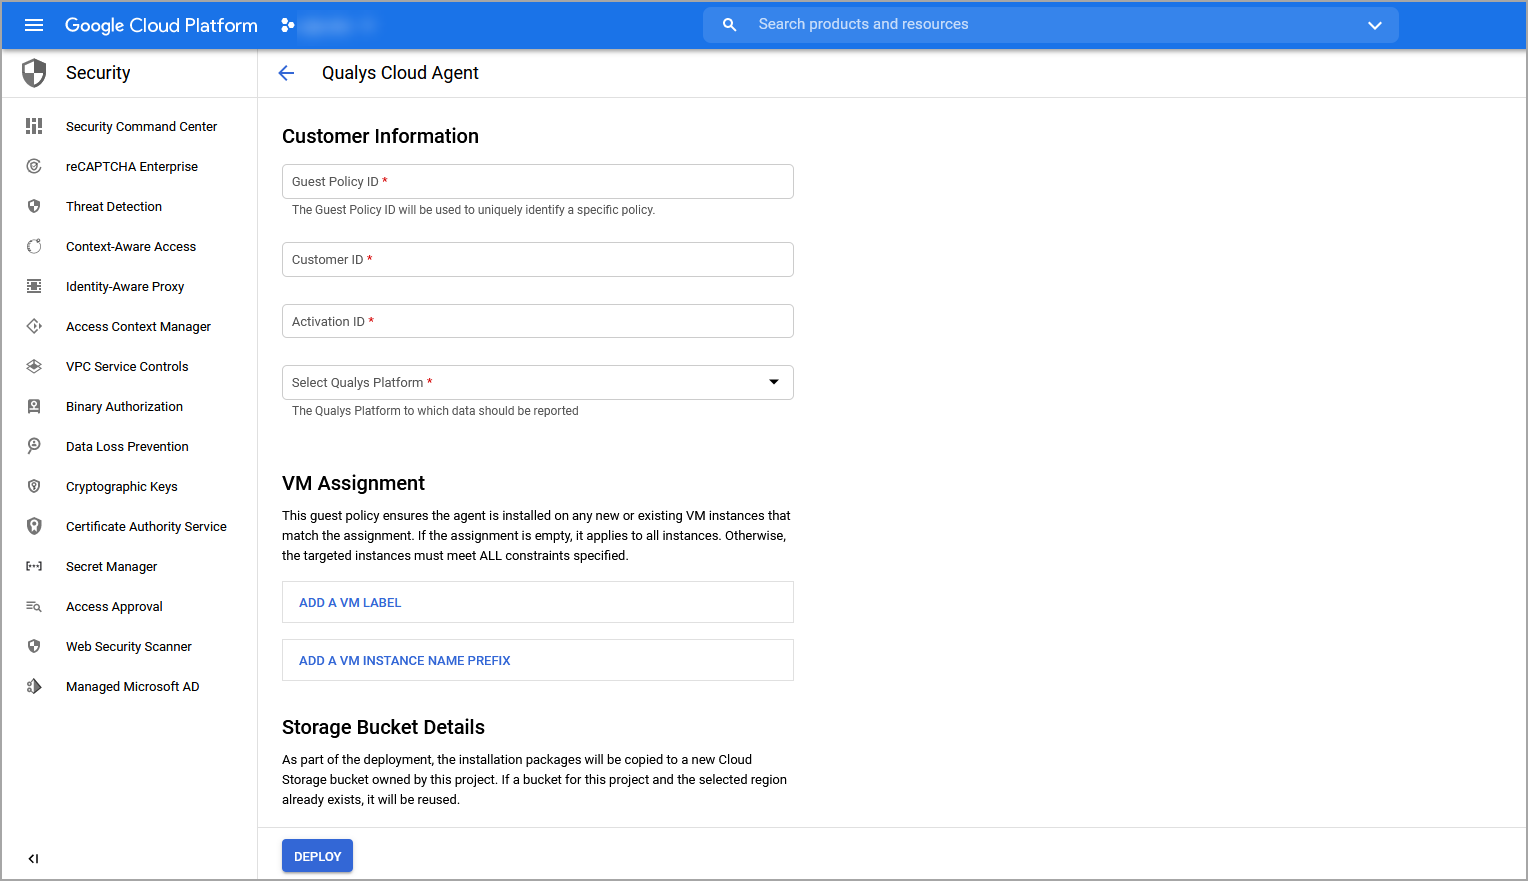
-
Specify an appropriate name as Guest Policy ID. For example, qualys-demo. Guest policy ID is used to uniquely identify a specific policy.
Guest Policy ID must contain only lowercase letters, numbers and dashes.
Guest policies are created automatically.
-
Enter the Customer ID and the Activation ID retrieved from the Qualys portal.
-
From the Select Qualys Enterprise TruRisk™ Platform list, select the desired platform to which the data must be reported. Click What's your Qualys Platform? to verify your Qualys platform.
-
Select VM Assignment. By selecting this, the guest policy updates and ensures that the agent is installed on any new or existing VM instances that match the assignment. If no assignments are added, it applies to all instances. You can add a label for VM instances or a VM Instance name prefix here. To add a VM label, click ADD A VM LABEL and to add a VM Instance name prefix, click ADD A VM INSTANCE NAME PREFIX. After the assignment is configured, the guest policy ensures that Qualys cloud agent is installed on all those VM instances with specified labels or name prefix.
-
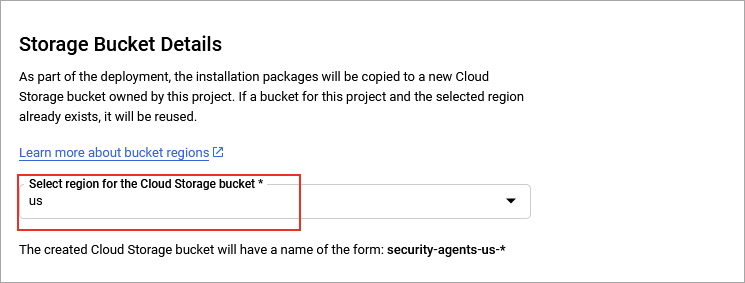
Select the Cloud storage bucket region in the Storage Bucket Details section and click DEPLOY. This deploys the Qualys cloud agent on the VM instances that match the VM assignment. A cloud storage bucket is automatically created in your project. This bucket is created to reduce the load on the original source of installers. The storage buckets created as a part of this configuration are synced with the original installer source. The installers are copied automatically into this storage bucket from the original source to be available to all the VM instances within the project. Only one storage bucket is created in the specified region (the regional parameter is a legal requirement to satisfy regulations on data localization) and can be reused to launch subsequent deployments.
This completes the Qualys Cloud Agent deployment and configuration procedure.