Configure Application
For Single User Instance
If you want to use Qualys VM for QRadar 7.5.0 GA+ as single user instance, you need to configure the steps mentioned in Qualys API Configurations.
Multi-tenant Environment
If you want to use Qualys VM for QRadar7.5.0 GA + in multi-tenant environment, you need to configure the steps mentioned in Multi-tenant Environment section and then the steps mentioned in Qualys API Configurations.
Qualys API Configurations
Perform the following steps once you configure the app.
- Log in to QRadar and go to the Admin tab.
- Scroll to the Apps section and click Qualys VM App Settings.
-
A pop-up window opens. Go to Advanced Configuration.
Credentials
QRadar Authorization token is used while interacting securely with QRadar. You can obtain this token from Admin > User Management > Authorized Service.
For a multi-tenant environment, make sure that you create an authentication token with user role permission specific to the security profile's user and select the security profile the same as that of the instance that is created and configured. For more information, refer to Adding an Authorized Service.
For example, here we have created an instance for Security Profile A, and users using this instance have a user role as User Role A. Hence, while creating an authentication token for the created instance, perform the following steps:
- Go to Authorized Services in the Admin tab
- Click Add Authorized Service.
- Enter the desired Service Name.
- Select User Role as Admin.
- Select Security Profile as Admin.
- Set the expiry date as required.
- Click Create Service and then click Deploy changes.
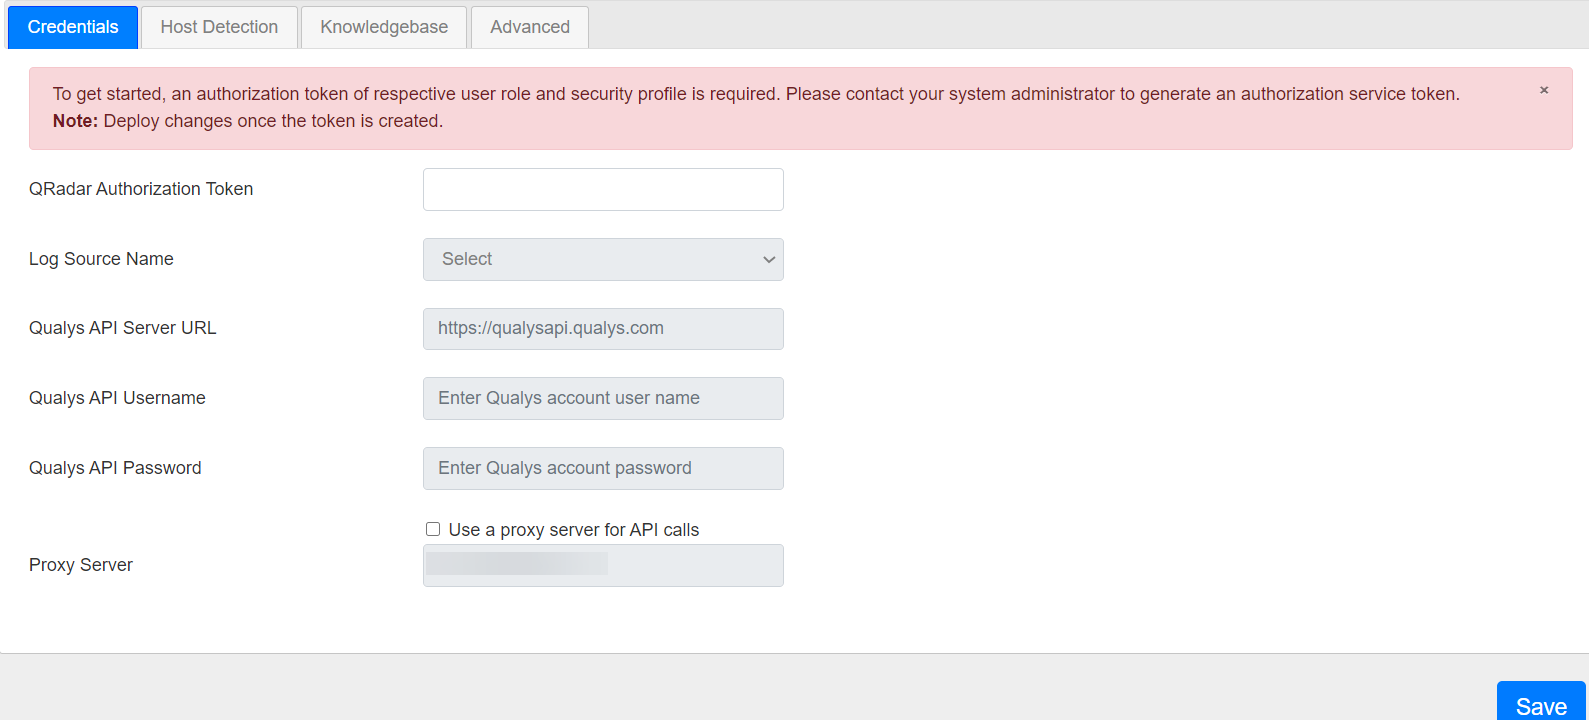
Use the Credentials tab to configure your Qualys credentials. Enter your Qualys API server, username, and password in the appropriate fields.

Proxy Configuration
Configure proxy details if you want the Qualys app to use a proxy while calling the API.
- Select the check box to enable proxy.
- Add your proxy server and proxy port in <proxy server>:<proxy port> format.
If your proxy needs authentication, add the proxy user and proxy password along with the server and port in <proxy user>:<proxy password>@<proxy server>:<proxy port> format.
Host Detection
Use the Host Detection tab to configure and enable Host Detection input.

Perform the following steps to configure Host Detection Input:
- You must enable this input to use this extension. To enable this input, select the checkbox in front of Enable Host Detection to fetch.
In the Host Detection Cron Schedule field, write a valid cron entry (time part only).
Your input runs according to this schedule. This is a mandatory field. It is advised that you keep the cron schedule coordinated with your scanning schedule.
For example, if you run scans once a day, schedule this input to run once a day. To learn more about cron expressions, refer to the Cron Wikipedia page. - In the Start Date-Time field, enter the date from which you wish to fetch the VM detection data. The date/time is specified in YYYY-MM-DD[THH:MM:SSZ] format (UTC/GMT), like 2007-01-25T23:12:00Z. This field is optional and may be left blank. When left blank, it defaults to 1999-01-01T00:00:00Z. (Optional)
- If you want to provide any extra parameters for the Host Detection API, set them in the Extra API Parameters field in valid JSON format. Refer to the Qualys API (VM, PC) User Guide for a list of API input parameters. This field is optional and may be left blank. (Optional)
- If you want to get Tags in VM detection data, select the Add Tags to Events option. (Optional)
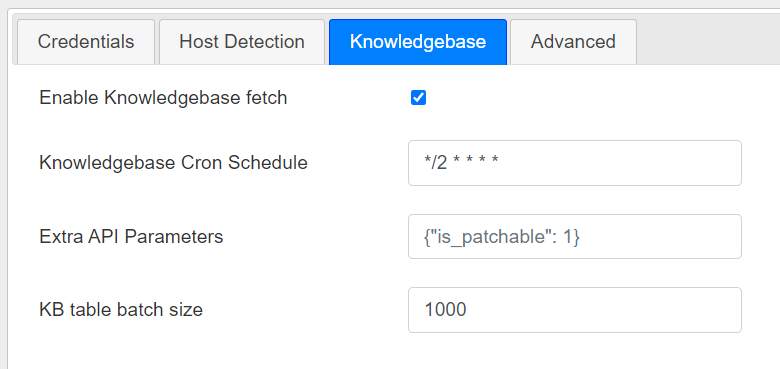
Knowledgebase
Use the Knowledgebase tab to configure and enable Knowledgebase input.
A copy of Qualys knowledgebase is bundled with this extension. To keep it up to date, enable this input. You need to update your knowledgebase copy at least once a week.
To enable this input, select the checkbox in front of Enable Knowledgebase fetch.
- In the Knowledgebase Cron Schedule field, write a valid cron entry (time part only). Your input runs according to this schedule. This is a mandatory field. You might not want to run this every day. Once a week is also OK. To learn more about cron expressions, refer to the Cron Wikipedia page.
- (Optional) If you want to provide any extra parameters for the Knowledgebase API, set them in the Extra API Parameters field, in valid JSON format. Refer to the Qualys API (VM, PC) User Guide for a list of API input parameters. This field is optional and may be left blank.
- You can specify KB table batch size to define the number of records to be pulled for faster loading.
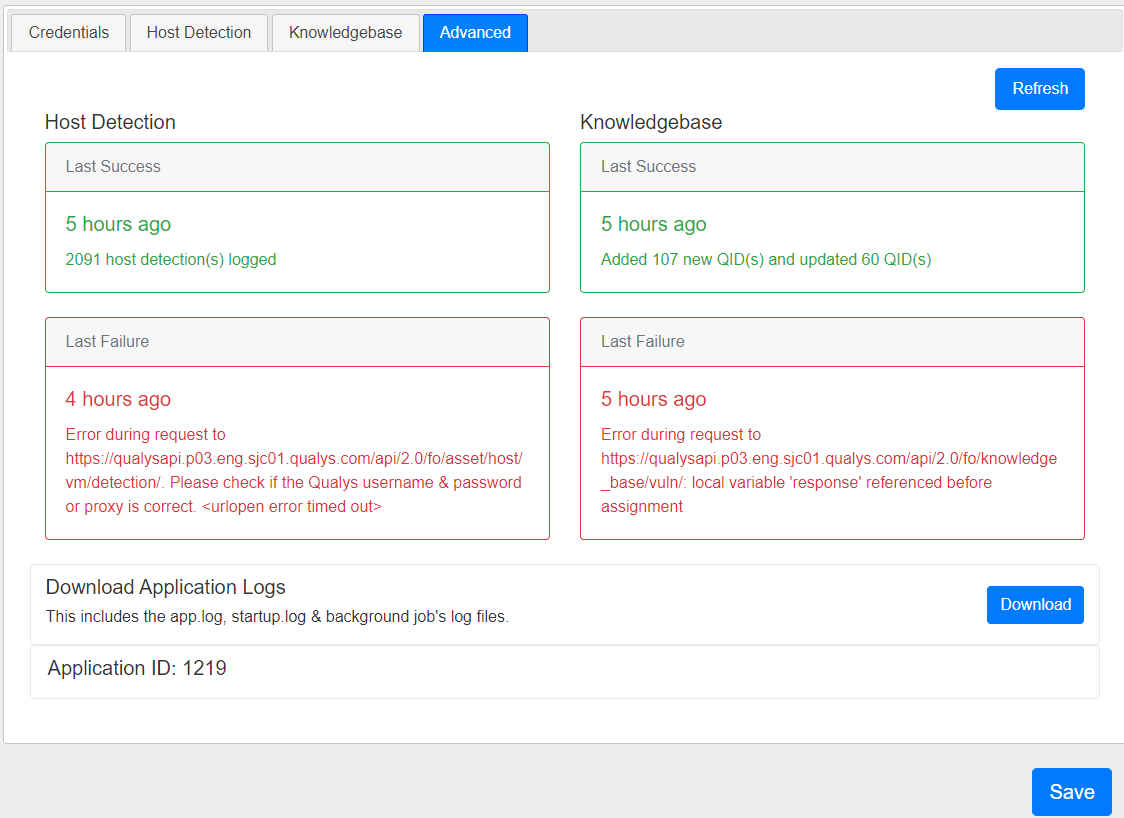
Advanced
Use the Advanced tab to see the last success and last failure for host detection and knowledgebase. You can also see the last success and failure for FIM Events, FIM Ignored Events and FIM Incidents.