Schedule Import
You can define schedules to import each type of data at a specified frequency, automating the data import process.
You have a default import schedule associated with every import configuration.
Perform the following steps to schedule the import:
- Go to Data Import > Scheduled Imports to view the schedules defined by default.
The following image displays the default schedules for each import configuration defined for FIM and VMDR.
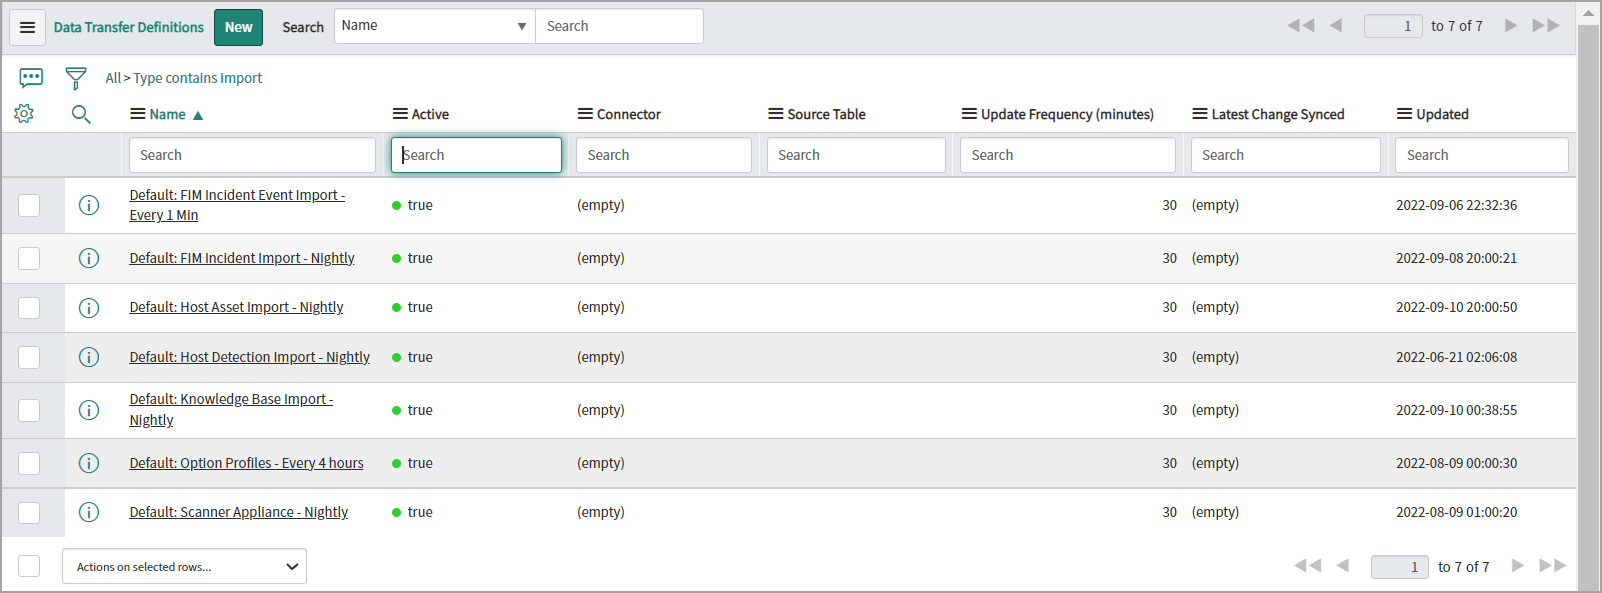
We recommend importing each data type at least once daily. However, you can configure imports to occur multiple times per day, depending on your infrastructure capacity and scanning frequency requirements.
-
In the default import schedules, review the following sections:
If you want to copy the default import schedule, modify it, and then create a new schedule. Open the default import schedule, click Make changes to the same, right-click the toolbar, and click Insert and Stay.
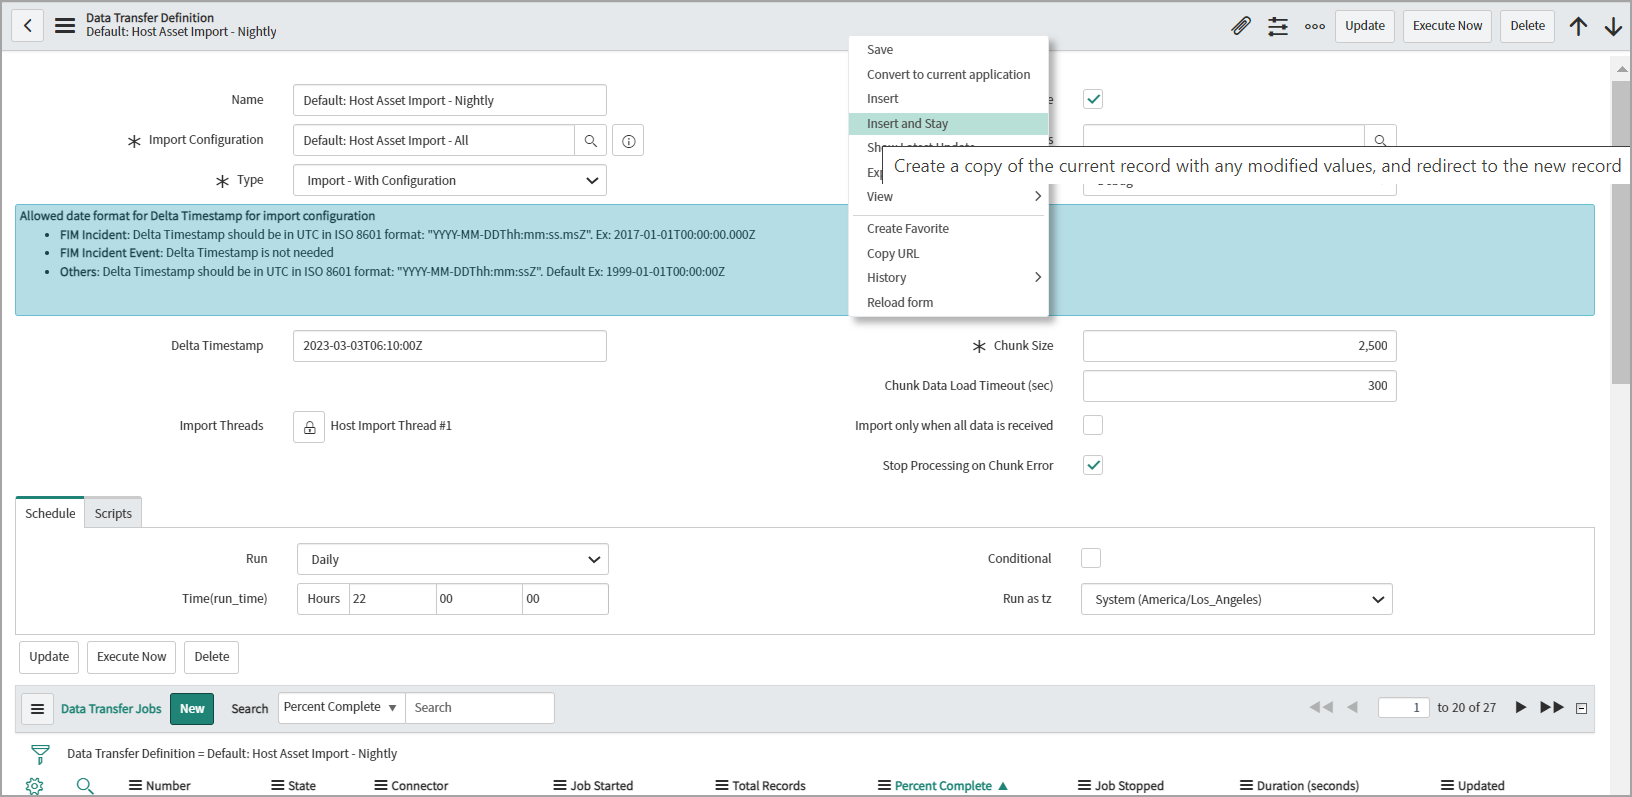
Review the following fields:
- Delta Timestamp - Indicates the date and time when this scheduled import was last run.
If the Delta Timestamp field is populated, the data import is executed as a delta update. For the first import execution, clear the value in the Delta Timestamp field to perform the full import.
- Chunk Size - Indicates the number of records to be imported in a chunk.
-
Chunk Data Load Timeout (sec) - Provide the time limit in seconds between the time when the chunk import record is created and the time when loading of data is completed. If it exceeds the defined time, the chunk is marked with an error.
For the chunk size and chunk data load timeout fields, the default values for each type of import schedules are as follows:
Type of import schedule
Default Chunk Size value
Default Chunk Data Load Timeout value
host asset
2500
300
host detection
50
300
KnowledgeBase
1000
300
By default, the Qualys VMDR subscription includes the Standard API service level. For the default Qualys API rate limits, refer to Qualys API Limits.
- Stop processing on Chunk Error - Select this check box if you want the scheduled import operation to stop when a chunk is marked as an error.
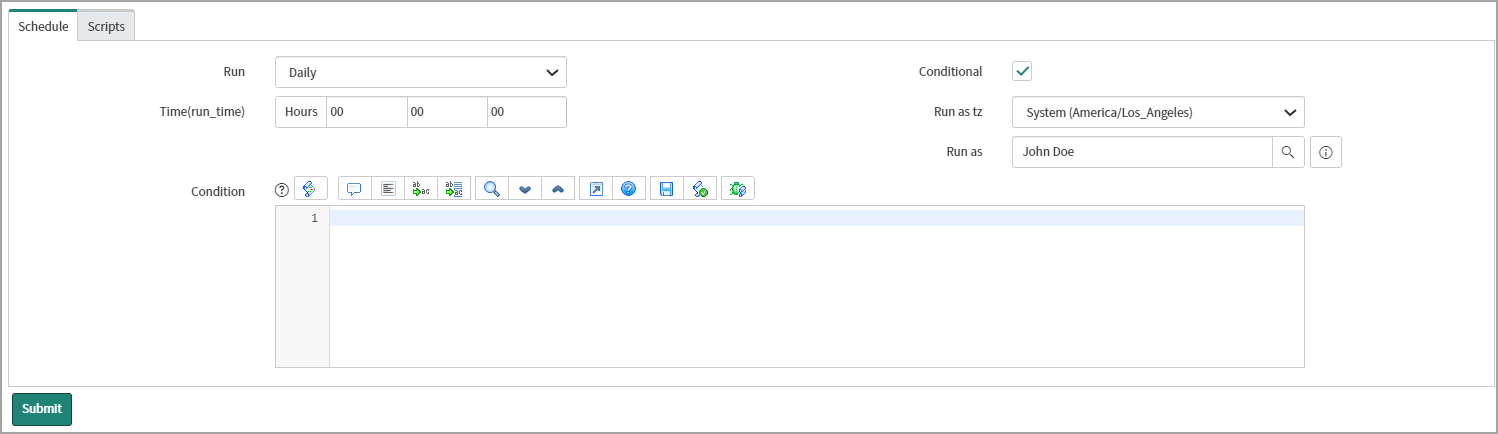
- Schedule
-
Run - Select the frequency of import from the list. The related fields change based on the value you select in the Run field.
-
Run as tz - Select the time zone to be followed for this import schedule.
-
Run as - Select the user or user group.
-
Conditional - Select this check box to add more conditions on the import schedule.
-
-
Script - You can enter a script to customize the import schedule
A default import schedule is associated with every import configuration. We recommend retaining the default values for all fields except the Delta Timestamp and Schedule fields.
- Delta Timestamp - Indicates the date and time when this scheduled import was last run.
Edit Import Configuration
Qualys provides all the necessary configurations for data import. However, you can modify these configurations if needed.
Import Configuration for Host Asset Data
To edit the import configuration for Host asset Data, perform the following steps :
- Navigate to the Qualys Core app and go to Schedule Import.
- In the Data Transfer Definition table, click Host Asset Import - All.

The Import Configuration: Host Detection Default: Host Detection Import - All detail page is displayed.
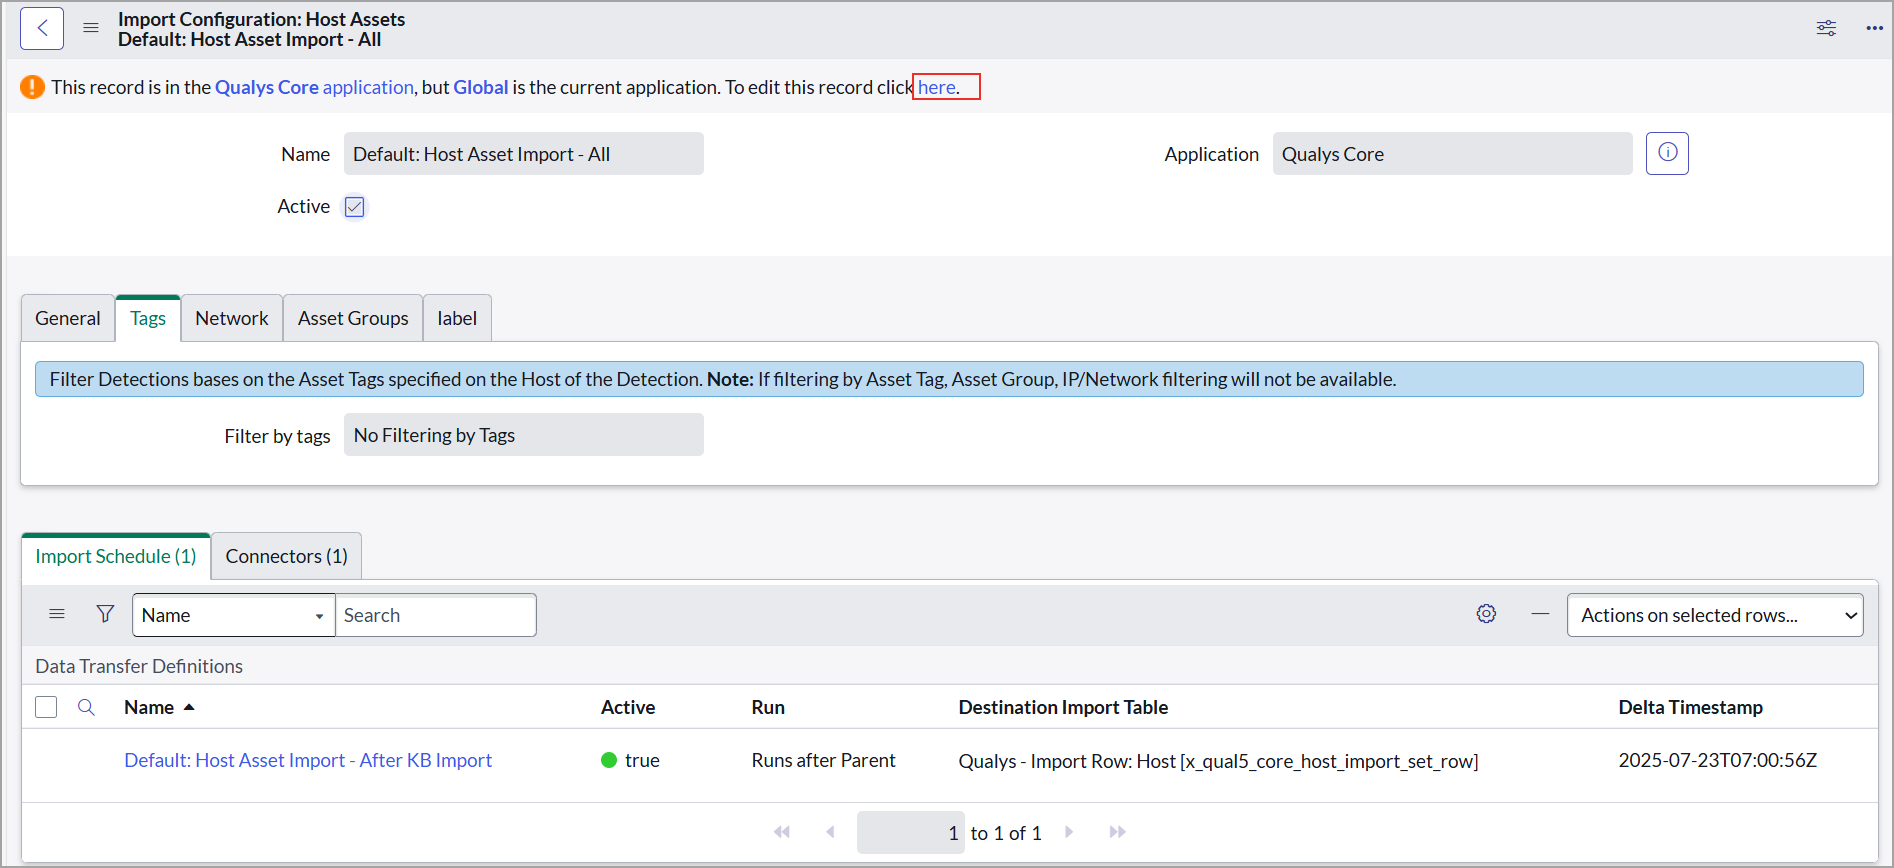
- To edit the configuration, on the banner, click here.
- To edit tags, navigate to Tags.
- Under the Tags tab, from the Filter by tags dropdown, choose the tag type.

After selecting an option from the Filter by tags dropdown, the "Tags Include Type" and "Tag Exclude Type" dropdowns become visible. - From the Tags Include Type dropdown, choose one of the following options:
- If you want to include the host that matches at least one of the selected tags, choose Any.
- If you want to include hosts that match all selected tags, choose All.

- From the Tags Exclude Type dropdown, choose one of the following options:
- If you want to exclude the host that matches at least one of the selected tags, choose Any.
- If you want to exclude hosts that match all selected tags, choose All.
- To pull asset data associated with the specified tags, enter the tags you want to include in the Tags to Include field. This is a mandatory field.
- Click Update to save the changes.
You are set to fetch asset data only associated with the tags you mentioned.