User Groups
A User Group in Qualys mROC defines the customers that team members can access. Configure customer access once for the group. Then assign the group to each team member who needs the same access.
A user group grants access to customers in one of two ways:
- Grant Access to All Customers: Team members in the group access all customers available in the subscription.
- Select Using Tags: Team members in the group access only the customers associated with the selected tags.
Benefits of User Groups
User groups keep customer access consistent and simplify administration. For example, a team manages customers in a specific region. Rather than assigning the same customers to each team member:
- Create a user group.
- Configure customer access for the group.
- Assign the user group to the team members.
All team members in the group receive the same customer access. A change to the group's customer access applies to every team member in the group.
How Roles and User Groups Work Together
A role and a user group control different parts of team member access in mROC:
| Component | Controls |
|---|---|
| Role | What a team member can view, modify, and manage in mROC. |
| User Group | Which customers a team member can access. |
The role and the user group together determine the effective access of a team member:
Role (what the team member can do) + User Group (which customers the team member can access) = Effective access
For example, two team members with the same role can belong to different user groups. Both perform the same tasks, but each works on a different set of customers. For more information about roles, see the Roles topic.
How Customer Access Works
A team member receives customer access from two sources:
- Assigned user group: All customers included in the user group.
- Direct assignment: Customers added individually to the team member.
The team member's accessible customer list combines both sources. A customer included through both sources appears only once in the list.
Each team member must belong to one user group. A team member can belong to only one user group at a time.
View User Groups
Go to Administration > User Groups. The User Groups tab lists all user groups, including system-defined user groups.
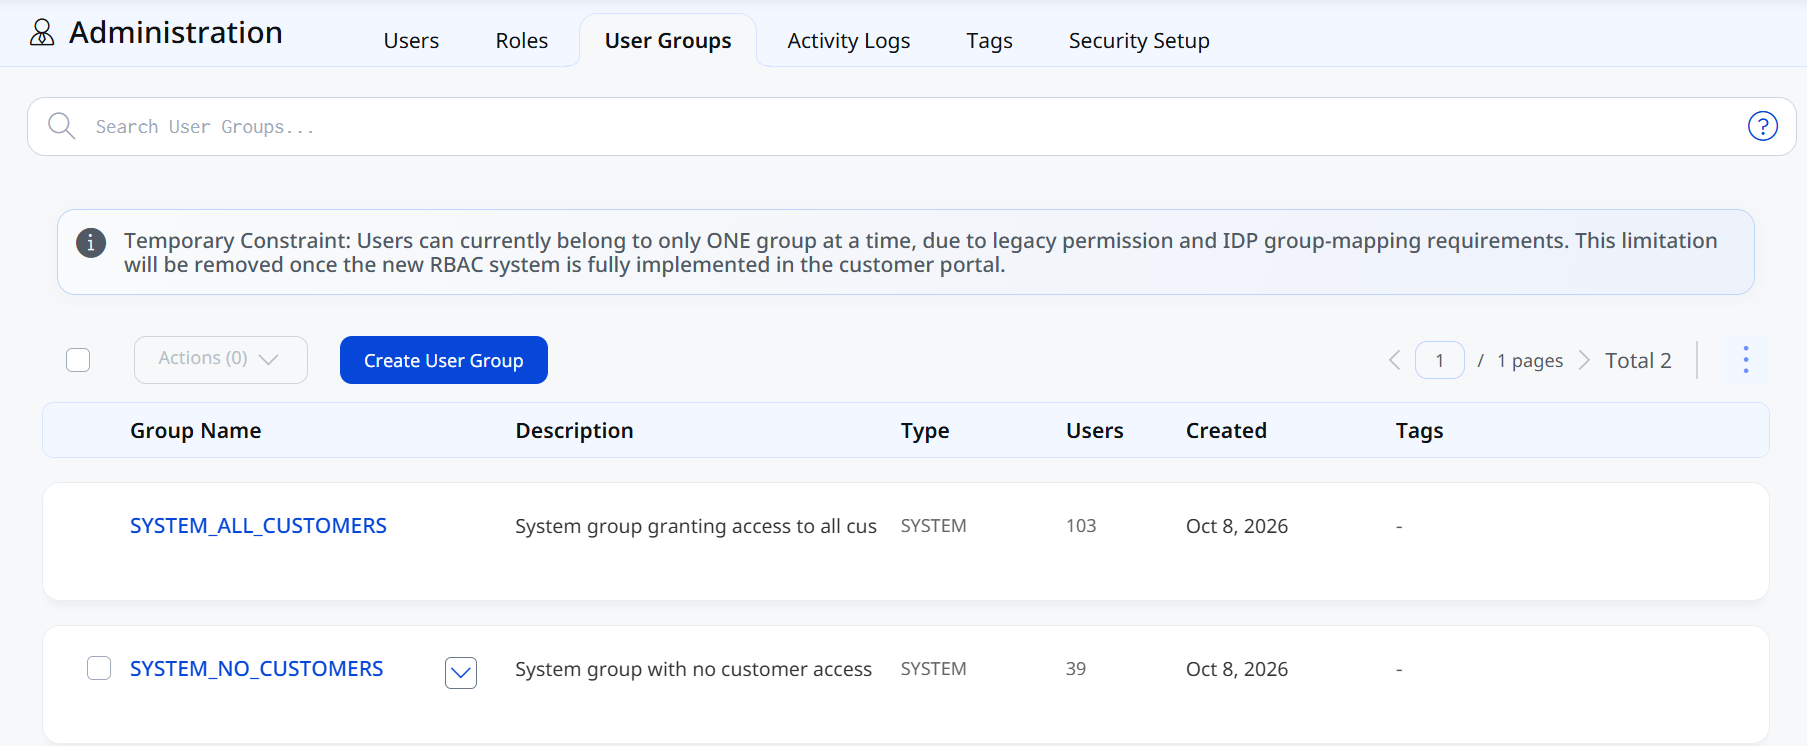
The user group list includes these columns:
- Group Name: Displays the name of the user group.
- Description: Displays a short description of the group's purpose.
- Type: Displays the user group type: System or Custom.
- Users: Displays the number of team members assigned to the user group.
- Created: Displays the date the user group was created.
- Tags: Displays the tags associated with the user group. A hyphen (-) indicates no associated tags.
System-Defined User Groups
The User Groups list includes both custom user groups and system-defined user groups. The following system-defined user groups are available by default:
| Group Name | Type | Description |
|---|---|---|
|
SYSTEM_ALL_CUSTOMERS |
SYSTEM |
Grants access to all customers available in the subscription. |
|
SYSTEM_NO_CUSTOMERS |
SYSTEM |
Does not grant access to any customers. |
These system-defined user groups cannot be edited or deleted.
How to Create a Custom User Group
Create a user group to manage customer access for multiple team members from one place.
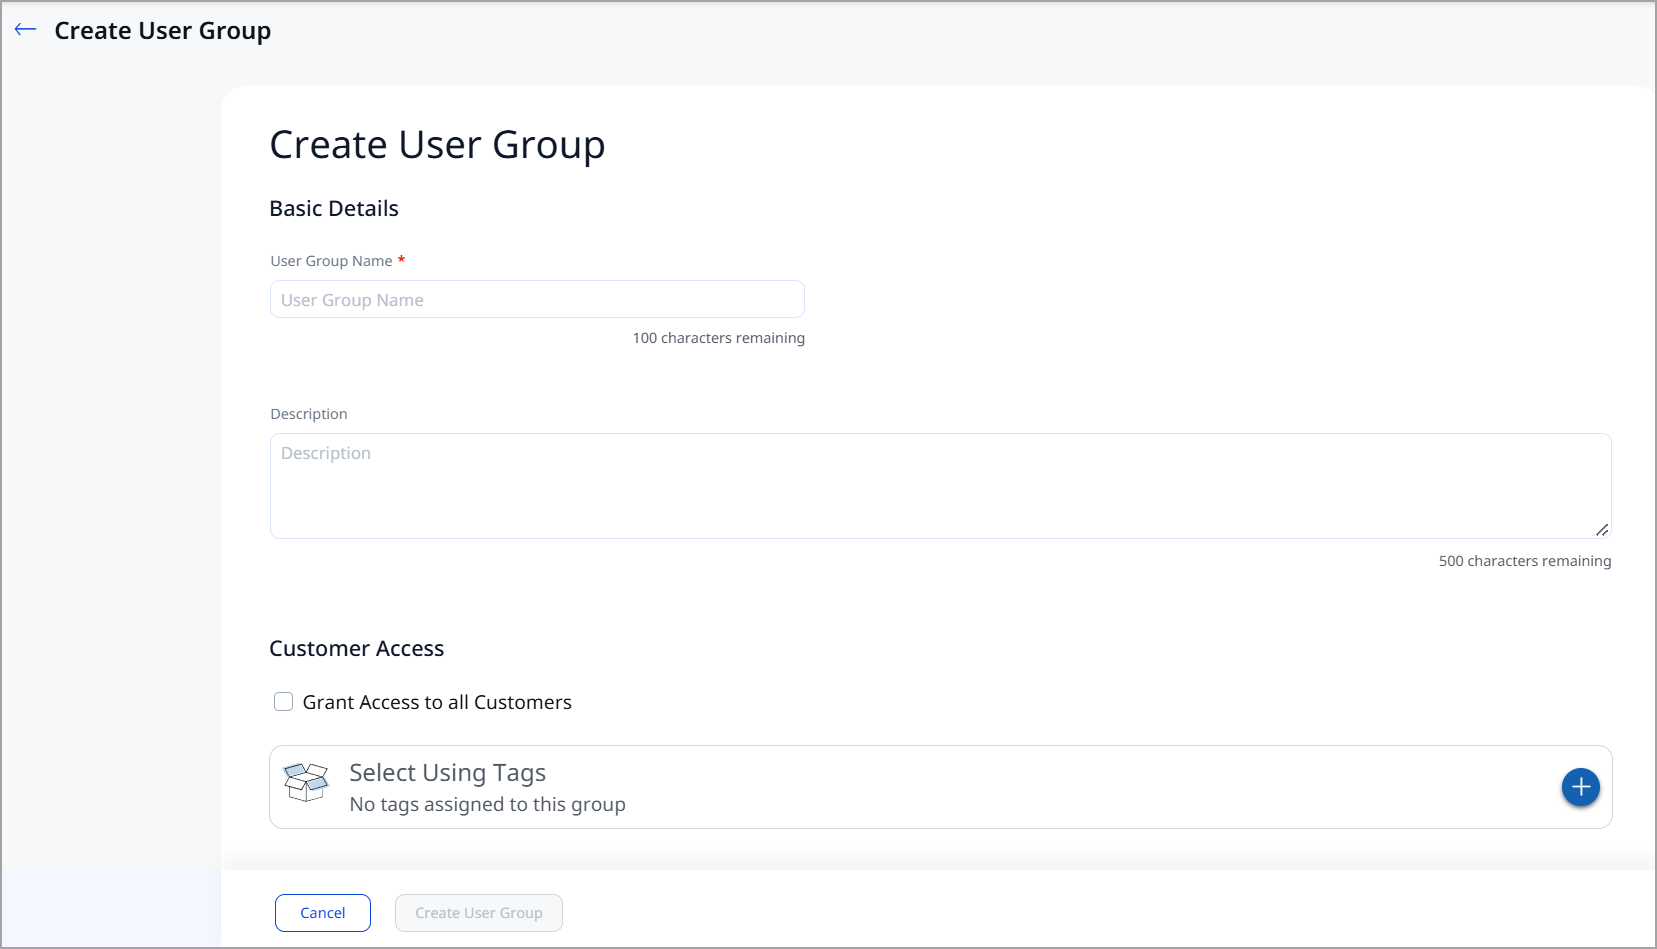
- Go to Administration > User Groups.
- Select Create User Group.
- Enter a name for the user group.
- Enter a description of the group's purpose.
- Configure customer access. Select one of these options:
- Grant Access to All Customers: Team members in the group access all customers available in the subscription.
- Select Using Tags: Team members in the group access only the customers associated with the selected tags. Select the required tags.
- Review the configuration.
- Select Save.
The user group appears in the User Groups list and is available for assignment to team members.
Assign a User Group to a Team Member
Assign a user group when creating or editing a team member. Assign the role first, then the user group.
- Go to Administration > Users.
- Create a team member or edit an existing team member.
- Assign a role.
- Select a user group. Next stays unavailable until a user group is selected.
- Optional: Select individual customers to add to the team member's access.
- Review the details and save the changes.
The team member receives access to the customers defined by the assigned user group and any customers added directly to the team member.