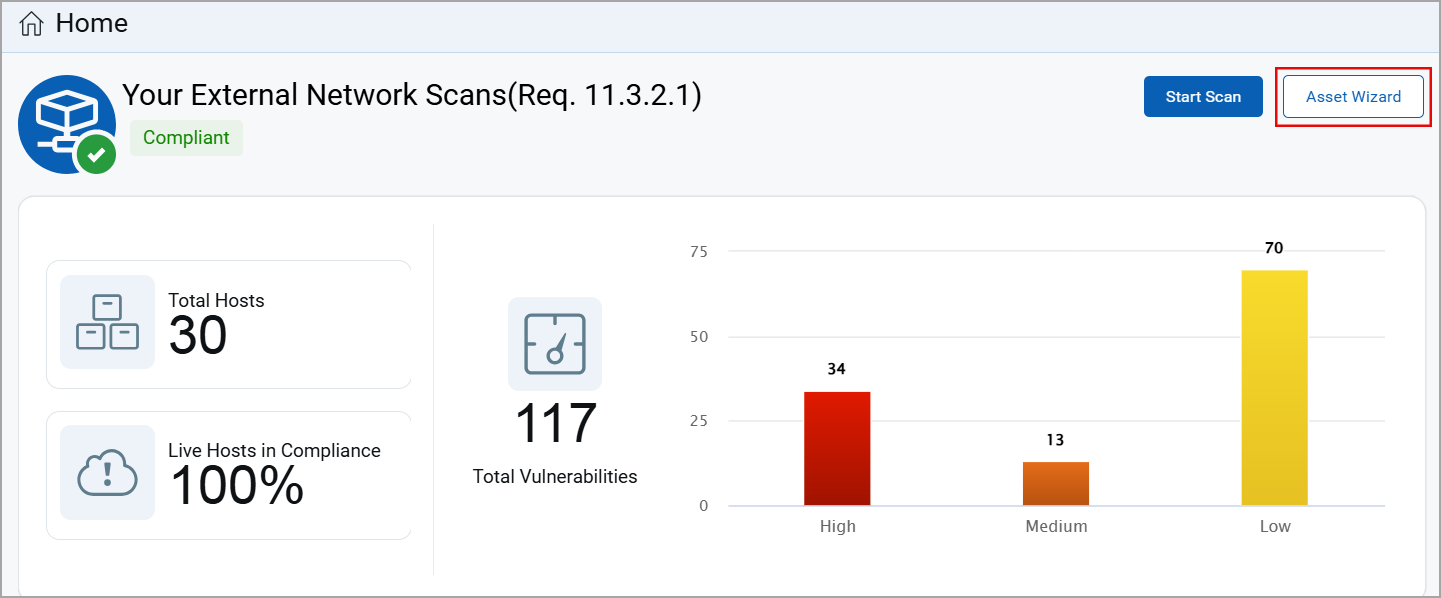
Network Scanning
Per PCI DSS v3.0 requirement 11.2.2, merchants are required to perform quarterly external vulnerability scans via an Approved Scanning Vendor (ASV). Every part of cardholder data system components needs to be scanned. Using the PCI module you can meet the external network scans requirement.
You are responsible for adding IP assets to your PCI account for all in-scope infrastructure for the PCI DSS external network scan requirement. To see the IP assets in your account go to Account > IP Assets. You can add IP addresses up to the total IPs purchased.
Check Scanner IP Addresses Before Scanning
Only IPs that are accessible from the Internet are scanned by the Qualys PCI service. The service automatically provides multiple scanners for external (perimeter) scanning, located at the Security Operations Center (SOC) that is hosting the PCI compliance service. Depending on your network, it may be necessary to add the scanner IPs to your list of trusted IPs, so the service can send probes to your in-scope system components.
The scanner IPs are: 64.39.96.0/20 (64.39.96.1-64.39.111.254), 139.87.112.0/23 (139.87.112.1-139.87.113.254)
Define Your In-Scope Infrastructure
Click the Asset Wizard button on your Home page (or go to Account > IP Assets and select the wizard). The wizard helps you define the in-scope infrastructure for the external network scan. You must add to your account all Internet-facing IP addresses and/or ranges. If you have domains that host in-scope PCI infrastructure you need to add these domains to your account.
The wizard prompts you to confirm scans can be performed without interference. The service provides multiple scanners for external (perimeter) scanning and lists the scanner IP addresses. Depending on your network, it may be necessary to add the scanner IPs to your list of trusted IPs.
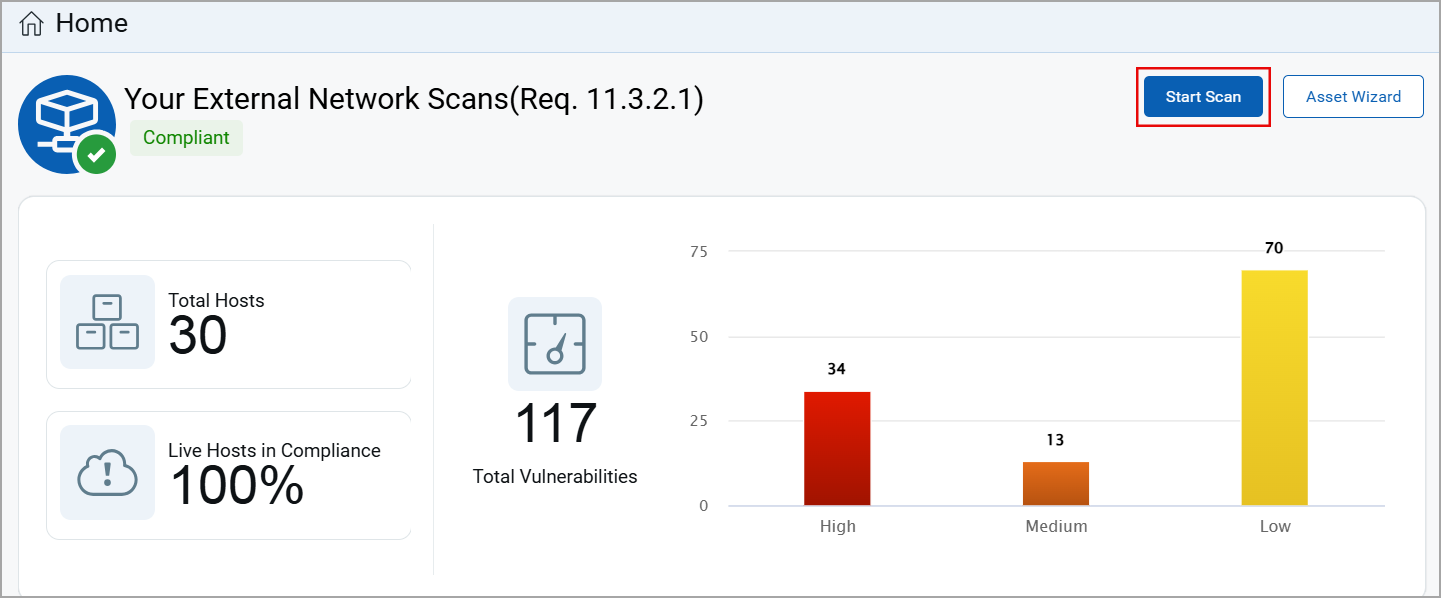
Start an External Network Scan
- Click the Start Scan button on your Home page (or go to Network > New Scan).
You may have already run an external PCI network scan using Qualys VM and then shared this scan with the PCI module. In this case you’re ready to run reports and complete certification steps. Jump ahead to the section “Create Network Reports for Certification” later in this document.
Next you’ll see the New Scan page. Select your scan settings and click OK.
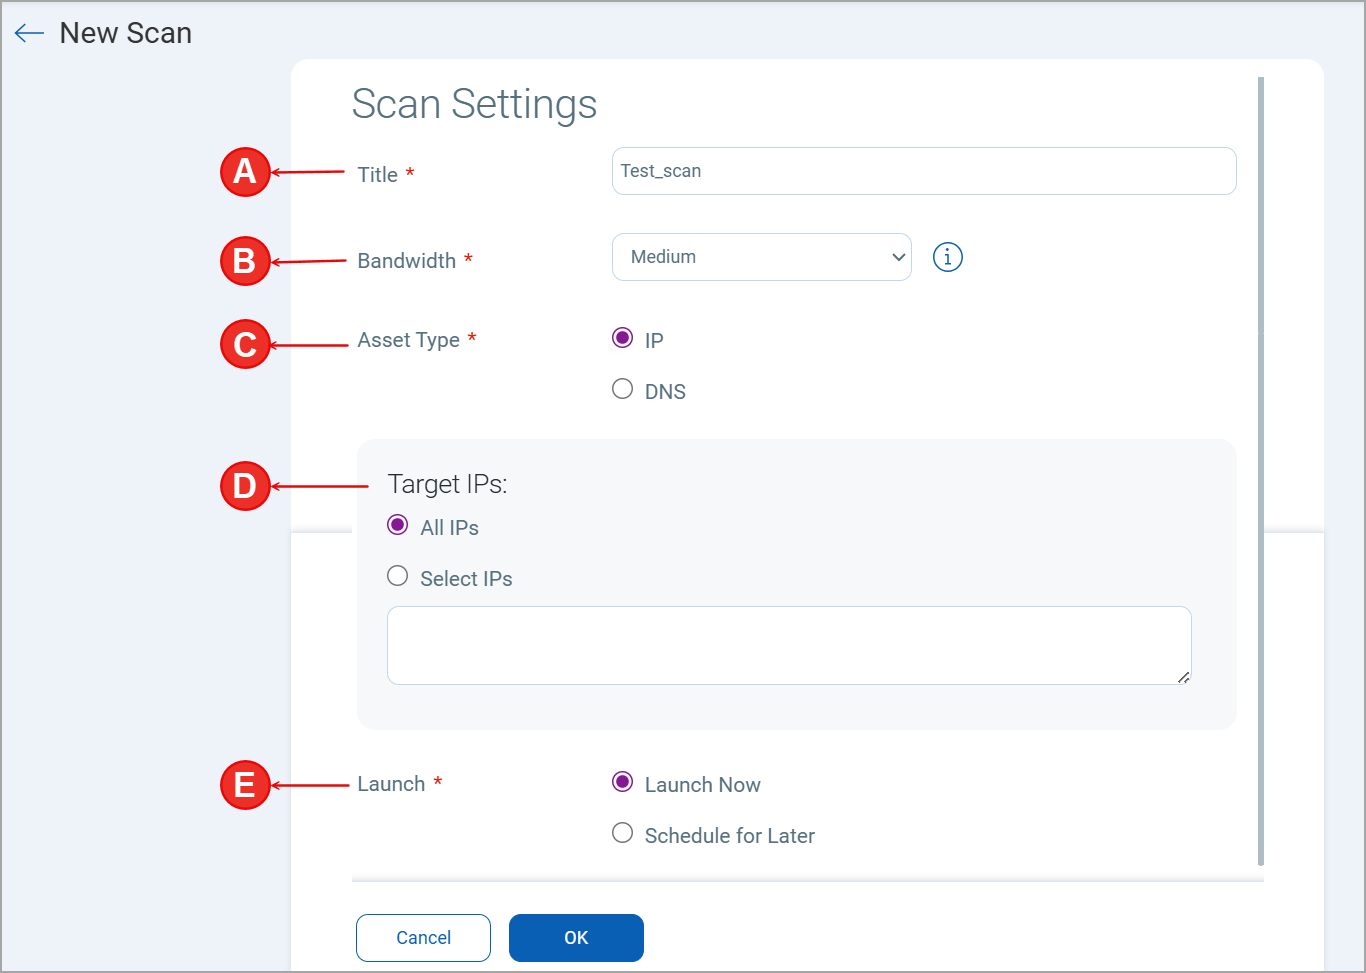
-
The bandwidth represents a set of scan performance settings. We recommend Medium to get started. Click the Info link to understand the settings.
-
Choose to scan All IPs in your account or just certain IPs. Tip – To meet PCI compliance all the IPs in your account must be scanned and there can be no detected PCI vulnerabilities on any IPs. If you have a large number of IPs that must be compliant, you may want to scan a few IPs at a time to help you with the remediation process.
-
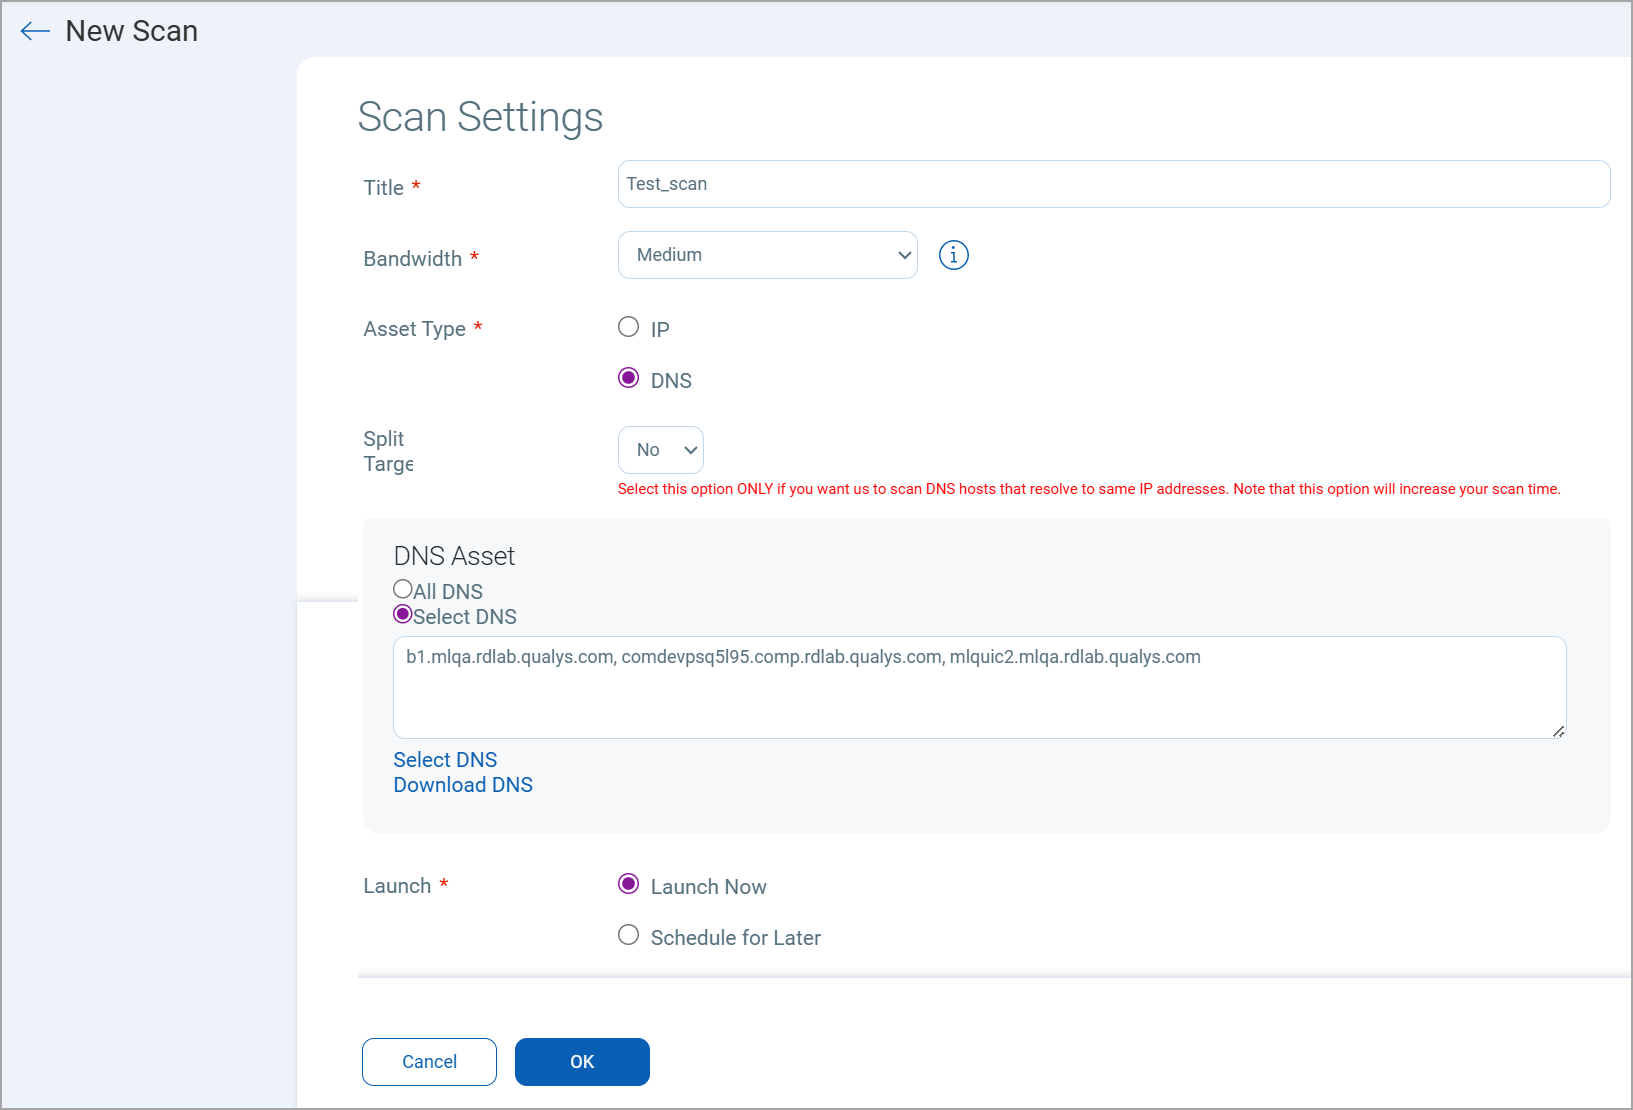
When enabled by admin, you can choose to scan by All DNS hosts or just certain DNS hosts. Scan by DNS supports scanning DNS hosts that resolve to unique IP addresses. If you want to scan DNS hosts that resolve to same IP address, use Split Targets option. You can add a maximum of 500 DNS hosts if you want to scan DNS hosts using Split Targets option. Note that your scan time will increase if you select this option.
-
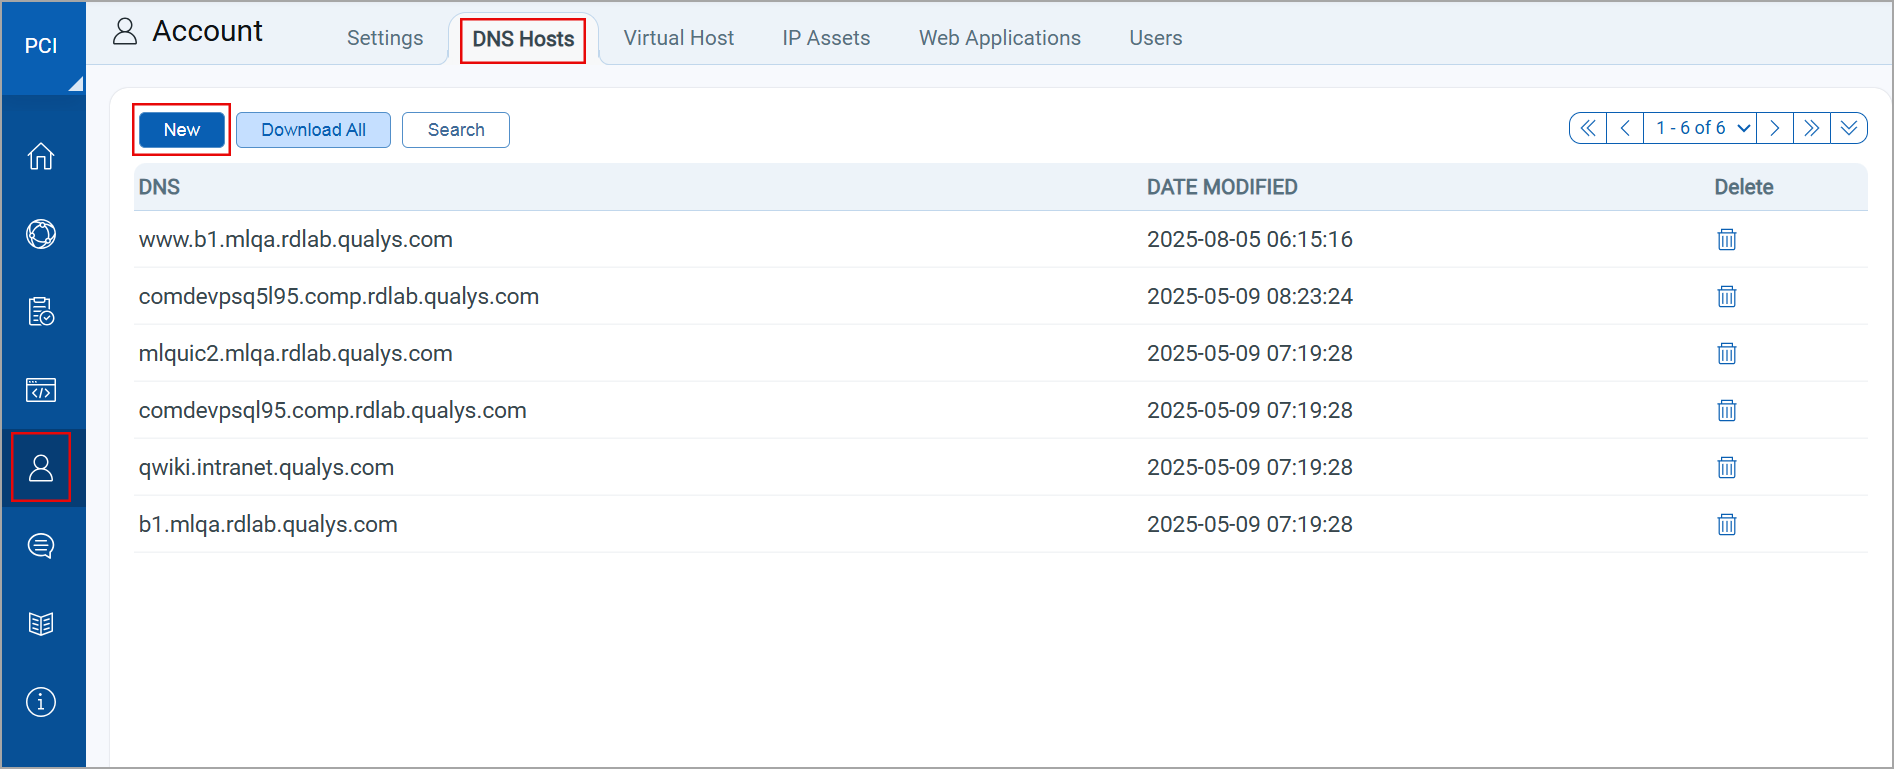
To add DNS hosts to your account, go to Account > DNS Hosts and click New. See Configuring Virtual Hosts if you wish to scan the domains associated with an IP address, possibly increasing the number of vulnerabilities detected.
-
You can schedule the scan to run later or on a regular basis – daily, weekly or monthly. We recommend you set up a schedule so you’ll receive vulnerability scan results on an ongoing basis.
-
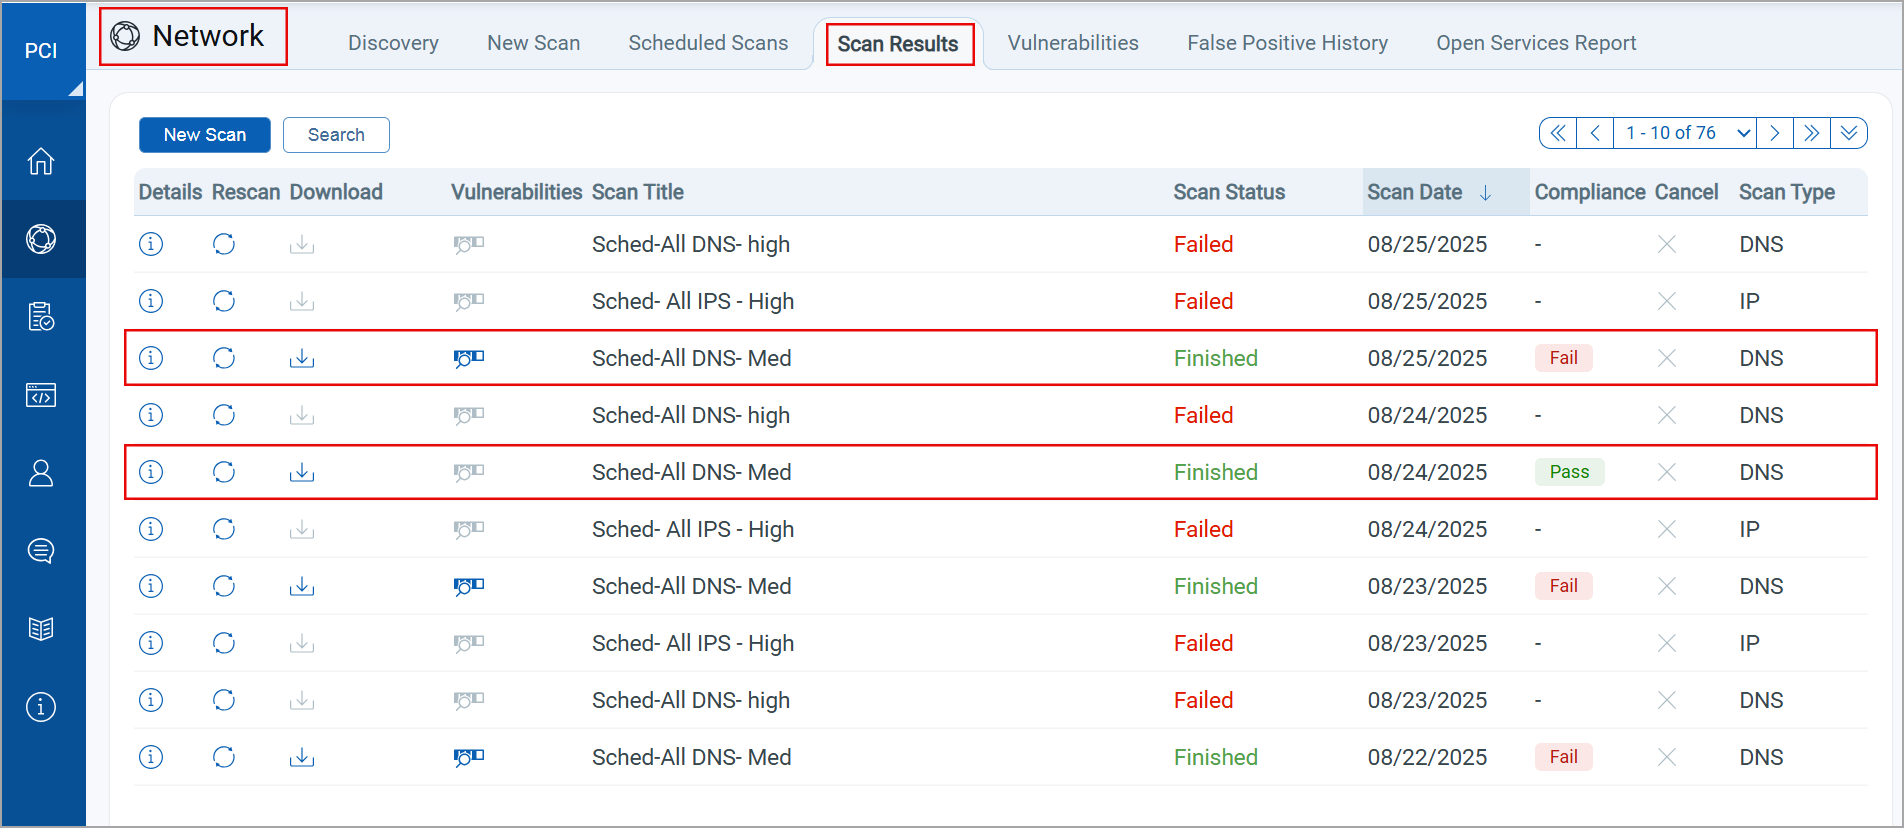
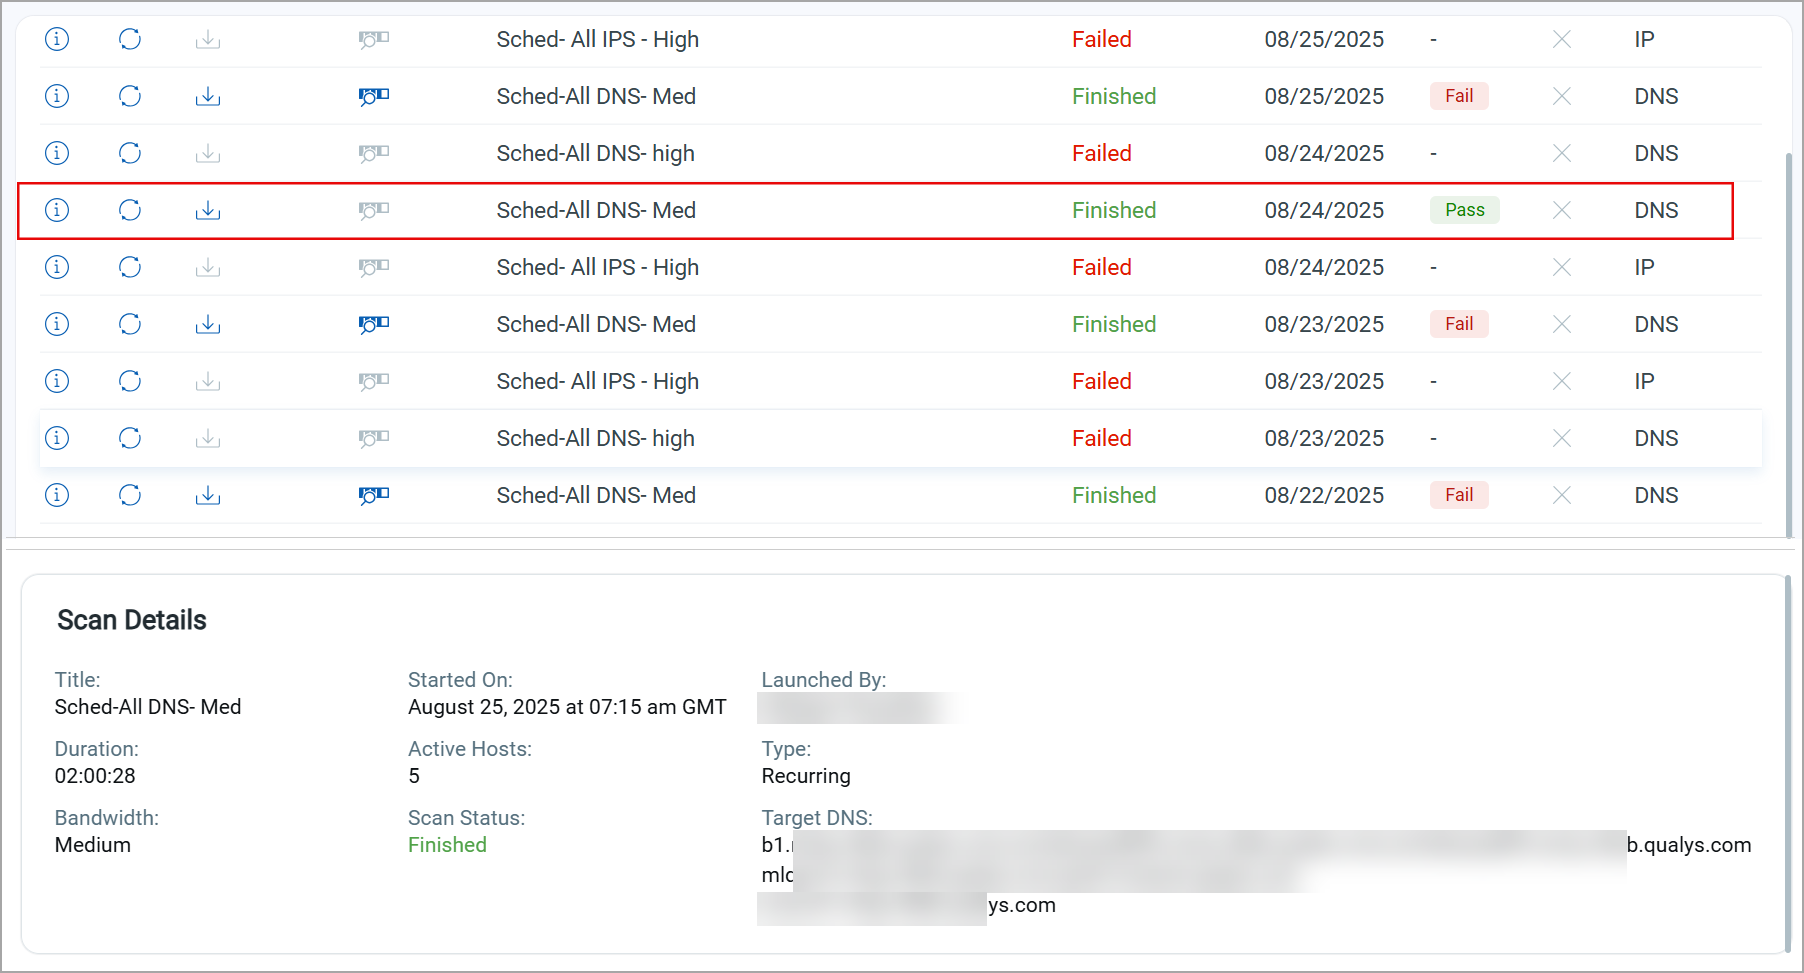
Once the scan is launched you can monitor the scan progress by going to Scan Results.
-
The scan status will be Running while the service is performing vulnerability testing. Once the status is Finished you’ll see the overall PCI compliance of the scan as
 or
or  , and you can view detected vulnerabilities in your scan results. Just click
  (Download) to download your results in PDF format.
-
What does the scan status Importing mean? Importing means a user requested to share an external PCI network scan using the VM module and the service is importing this scan. Once complete, the status will change to Finished and any of the scanned IPs not already in your PCI account will be added.