Installing Cloud Agents for Isolation
Agent installations are managed in Cloud Agent (CA).
Qualys Cloud Agent Platform
Our revolutionary platform gives you continuous security updates through the cloud using lightweight cloud agents. Go to Cloud Agent (CA) app to install agents and activate them for Isolation. It is possible to activate existing agents for ISL with other capabilities that are available in VM and PA/PC modules.
3: Activate Agent for Mitigation
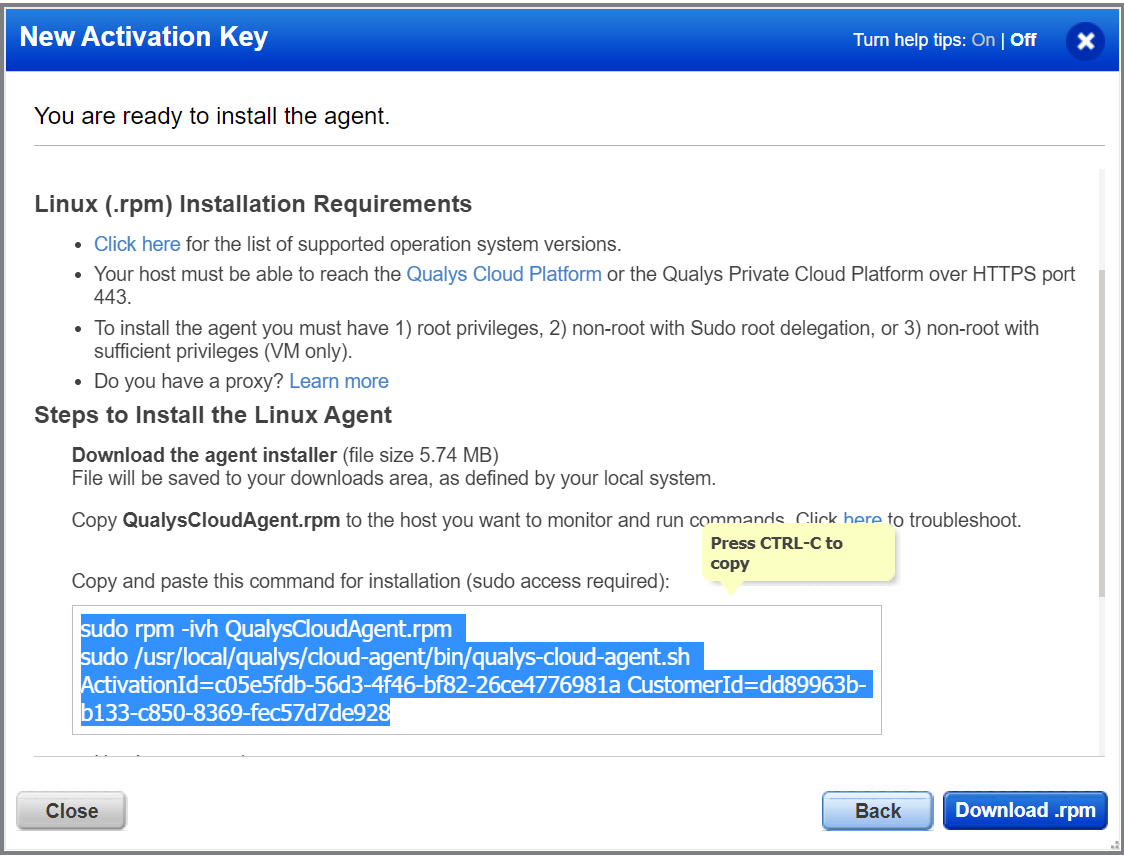
1. Create Activation Key
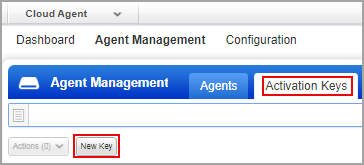
- Go to the Cloud Agent (CA) application from the app picker.
- To create an activation key, go to Activation Keys, and click New Key.
- On the New Activation Key window, perform the following:
- Enter the title of the key. If required, select the required tag.
- Under the Provision for these applications section, select Isolation.
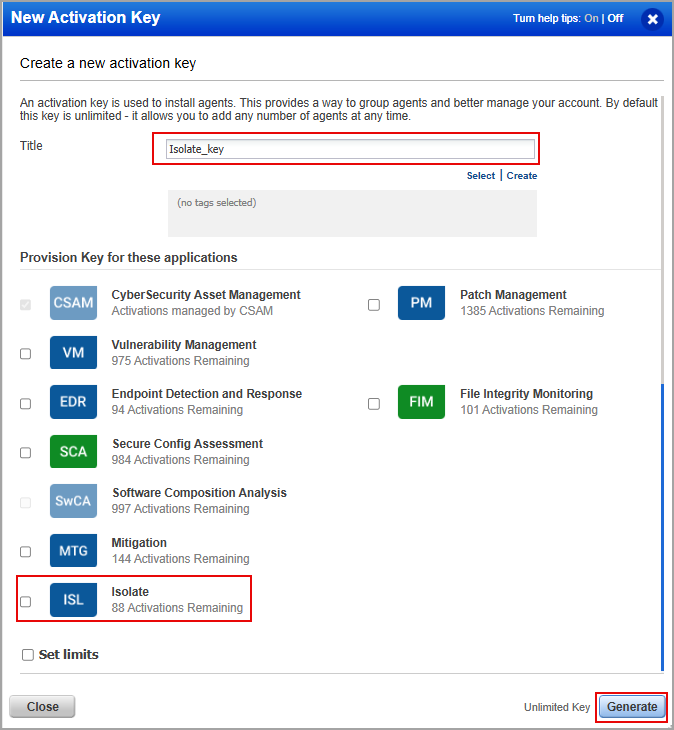
- (Optional) To define the limits for the activation keys, select the Set limits checkbox and enter the maximum number of agents to be installed using the key in the Maximum number field and the end date of agent installation in the Date field.
3. Click Generate.
You can provision the same key for any of the other applications in your account. To understand the license numbers, see Viewing Isolation Licenses.
2. Download Installer
1. Based on your preference, click Install instructions next to Windows (.exe) and Linux (.rpm).
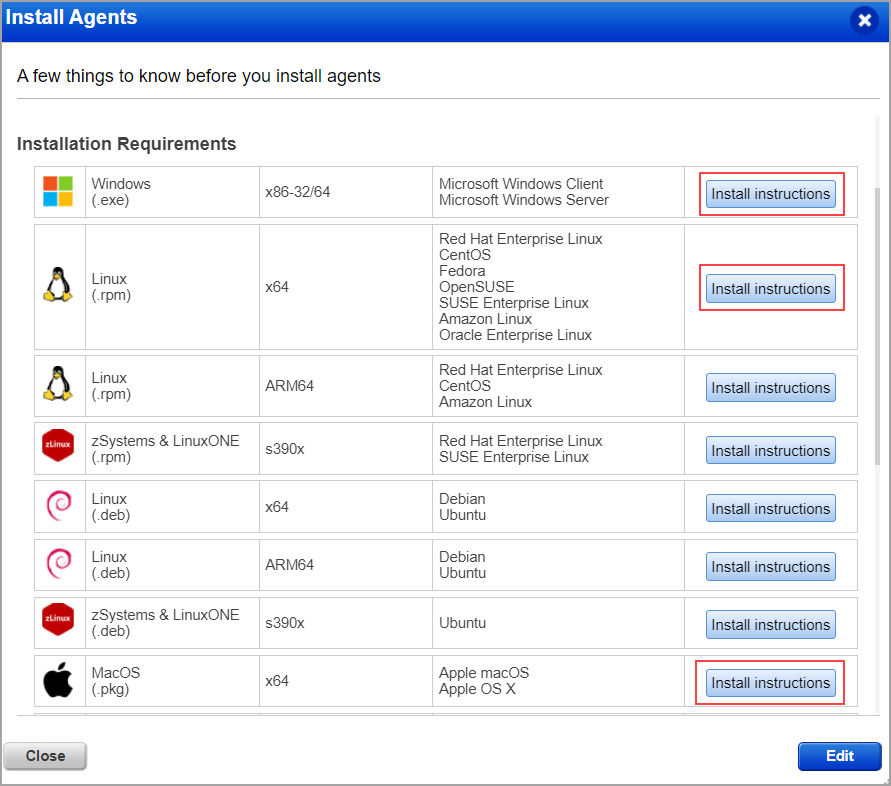
2. Review the installation requirements and click Download.
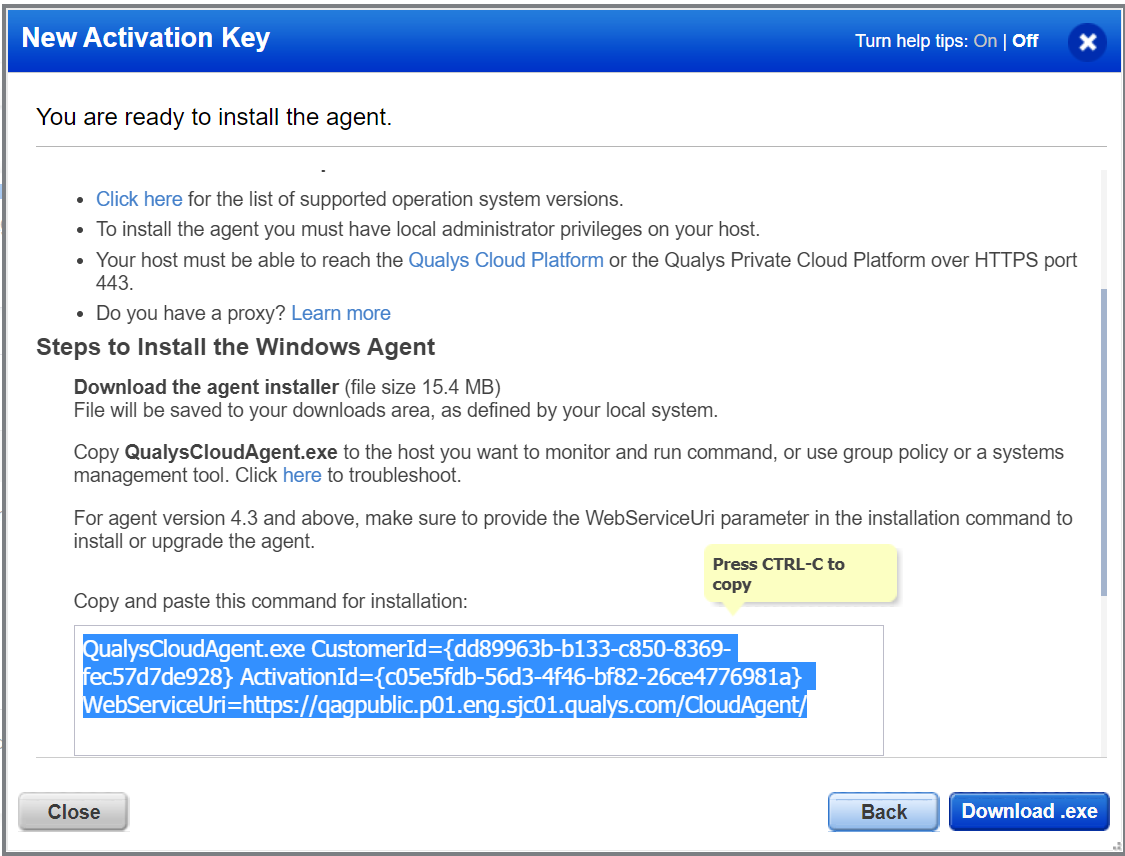
You'll run the installer on each system from an elevated command prompt, or use a systems management tool or Windows group policy.
Your agents should start connecting to our cloud platform.
For Windows agent:
For Linux agent, to enable patch installation on Linux assets, ensure the following:
- The Agent must be running with the root user or as a sudo user. You can configure users by using the Agent configuration tool.
- If the proxy is configured for a machine, then add the same proxy: /etc/apt/apt.conf.d/proxy.conf
Example:
Acquire::http::Proxy "http://<<proxy_ip_address>>:<<port>>"
Acquire::https::Proxy "https://<<proxy_ip_address>>:<<port>>"
To know the supported Linux operating systems and the supported agent versions for them, refer to the Cloud Agent Platform Availability Matrix (PAM).
Your host must be able to reach your Qualys Enterprise TruRisk™ Platform (or the Qualys Private Cloud Platform) over HTTPS port 443. On the Qualys Enterprise TruRisk™ Platform, go to Help > About to see the URL your host needs to access. For more information about connectivity requirements/proxy settings refer to the platform-specific Cloud Agent Installation Guides available on https://www.qualys.com/documentation/.
3. Activate Agent for Isolation
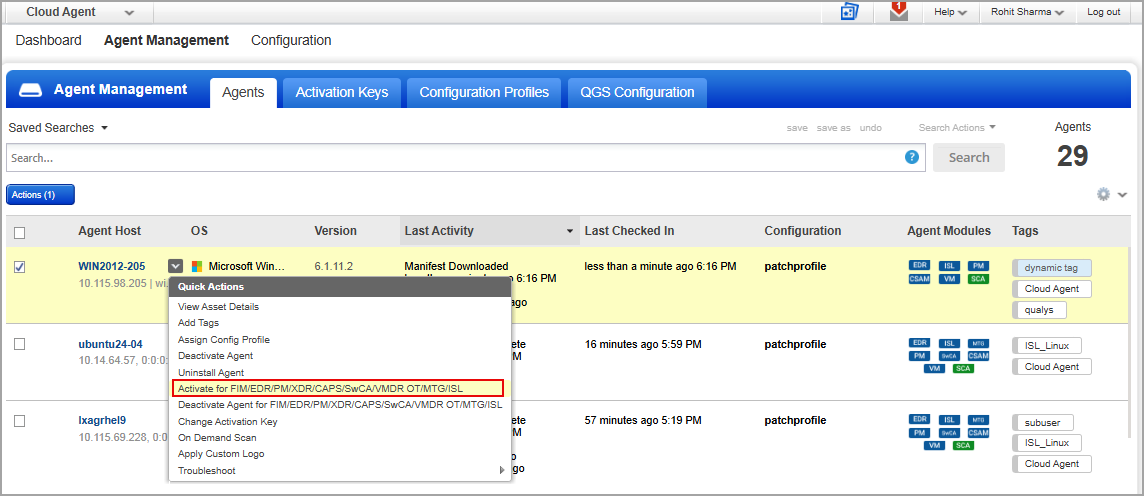
- On the Cloud Agents module, navigate to the Agent Management > Agents tab.
- Select the agent and from the Quick Actions menu, click Activate for FIM/EDR/XDR/CAPS/SwCA/VMDR OT/MTG/ISL.
Note: Bulk activation is supported from the Quick Actions menu.
- On the Activate Agent window, turn ON the toggle for Isolate and click Activate.
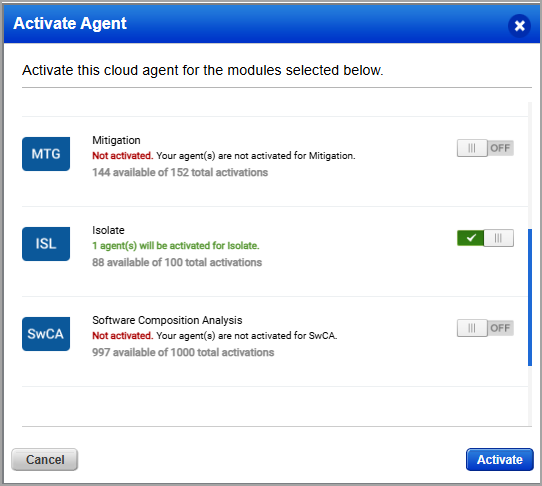
A success message appears stating that the agent is successfully activated.
The activated asset displays the ISL agent module for your asset, as shown in the following screen capture.

Once the asset is activated, the ISL license will automatically be assigned to it. For more information, see Viewing Isolation Licenses.
You're ready
You can now select ISL from the app picker and create a Isolation job.